
Forum Replies Created
-
AuthorPosts
-
3 April 2025 at 19:55 in reply to: VAM1250 for BeoSound 9000 MK3: who knows a reliable source to buy > SOLVED #64923
 BRONZE Member
Hi Igor,
Can you share a picture of the sticker you refer to?
Location: The Netherlands
Favourite Product: BeoSound 9000
My B&O Icons:
 3 April 2025 at 13:40 in reply to: VAM1250 for BeoSound 9000 MK3: who knows a reliable source to buy > SOLVED #64914
Fortunately, I was able to find a VAM 1250 through one of our respected members in the BeoWorld community: Keith Saunders (many thanks to him).
Also I got the laser unit with original packaging. And I think I remember that packaging from a Chinese manufacturers webshop page.
When I have time I will go check that again, because I guess there will be more people in need of this type of laser unit.Best regards,
Location: The Netherlands
Favourite Product: BeoSound 9000
My B&O Icons:
13 March 2025 at 15:21 in reply to: BeoLab 8000: Broken plastic leg supporting PCB > which glue ? #64486Where can I find it Frog?
Location: The Netherlands
Favourite Product: BeoSound 9000
My B&O Icons:
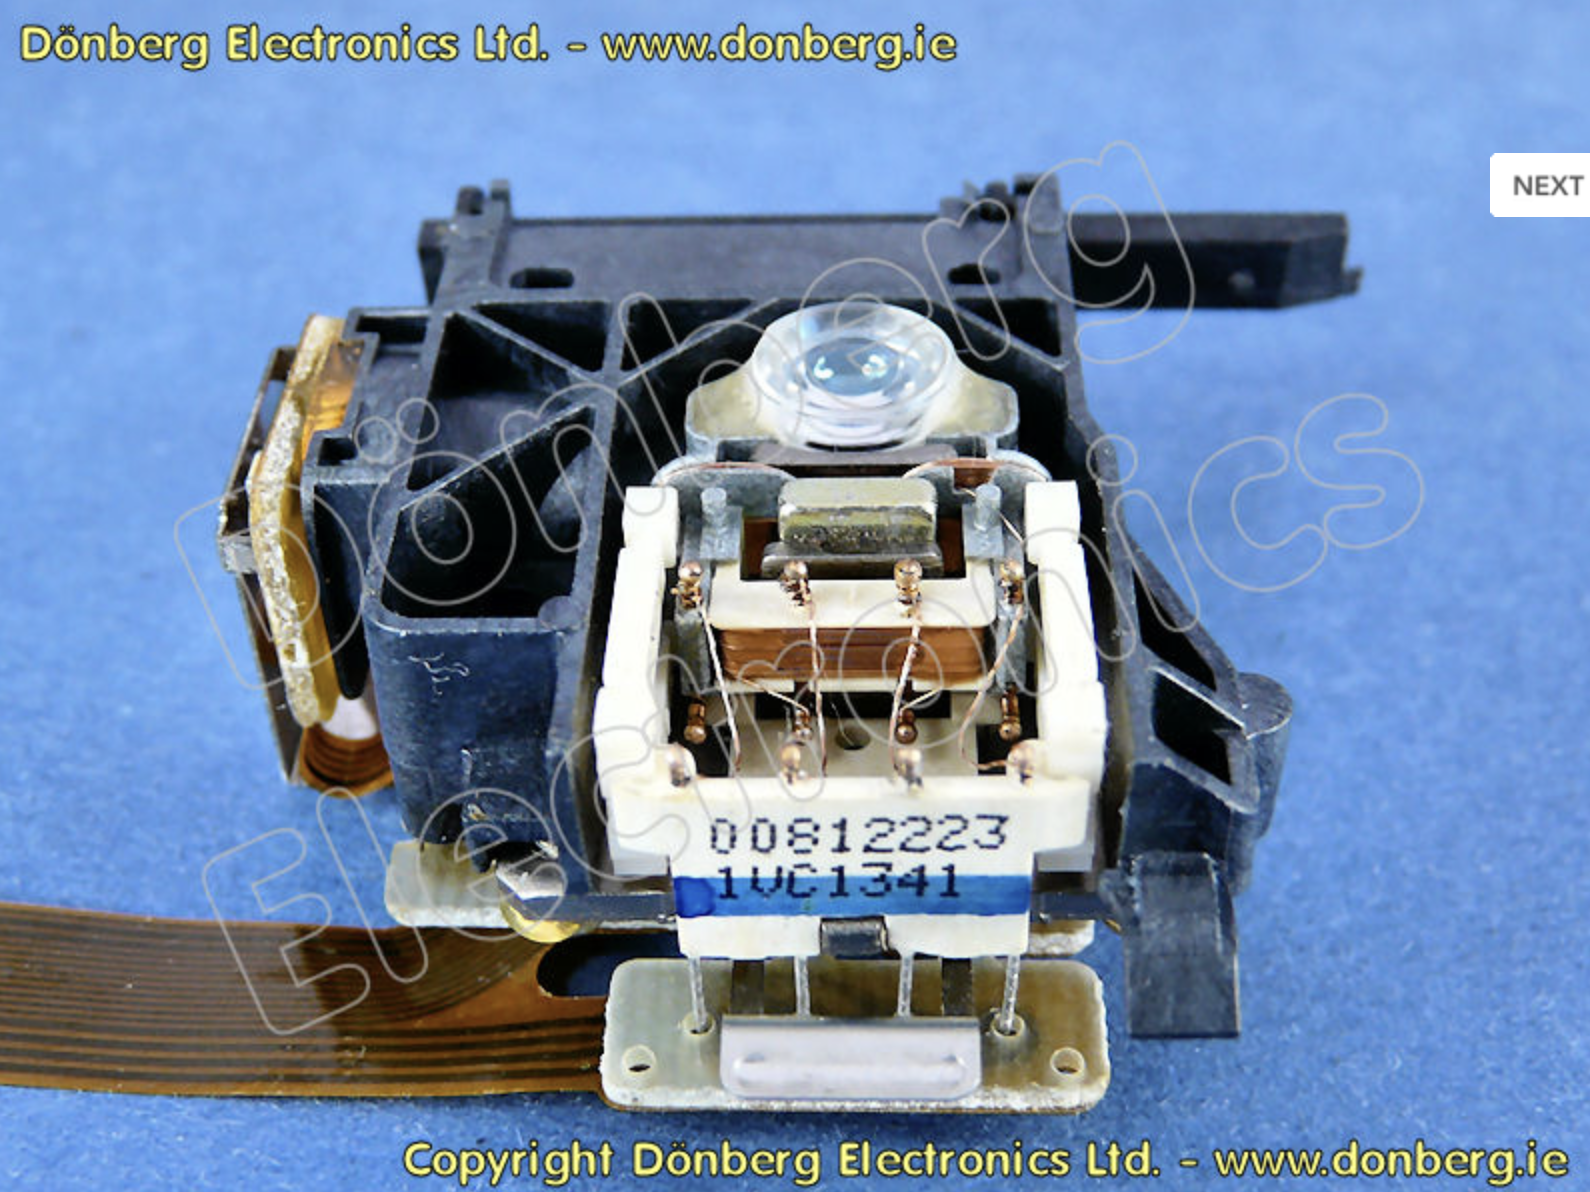
11 March 2025 at 08:16 in reply to: VAM1250 for BeoSound 9000 MK3: who knows a reliable source to buy > SOLVED #64435In the meantime I did find a VAM1250 at Dõnberg Electronics in Ireland:
https://www.donberg.co.uk/catalogue/vam_1250.html
But it doesn’t have the addition ‘/21’. So, I am not sure if this is the right one (Dönberg also doesn’t know if it will work.
Question
- Does anyone know if this VAM1250 will work in the BeoSound 9000 MK3?
- Are there any other laser units that are compatible with the VAM1250/21?
The VAM1250 at Dönberg Electronics:

Location: The Netherlands
Favourite Product: BeoSound 9000
My B&O Icons:
Found one at DKSoundParts.
Location: The Netherlands
Favourite Product: BeoSound 9000
My B&O Icons:
4 March 2025 at 15:29 in reply to: BeoSound 9000: Torx screw in glass-door hinge stuck ? > SOLVED #64309Thanks @B&O Orlando
I did find out in the meantime that the replacement for the BS9000 MKIII, is a VAM1255.
But also I found out that there are not that many available. Some form the US (too far/long shipping time cost) and some in Europe. In the end I ordered at http://www.DKSoundParts.com. They had the right one and reasonable pricing and shipping cost.Curiosity / question
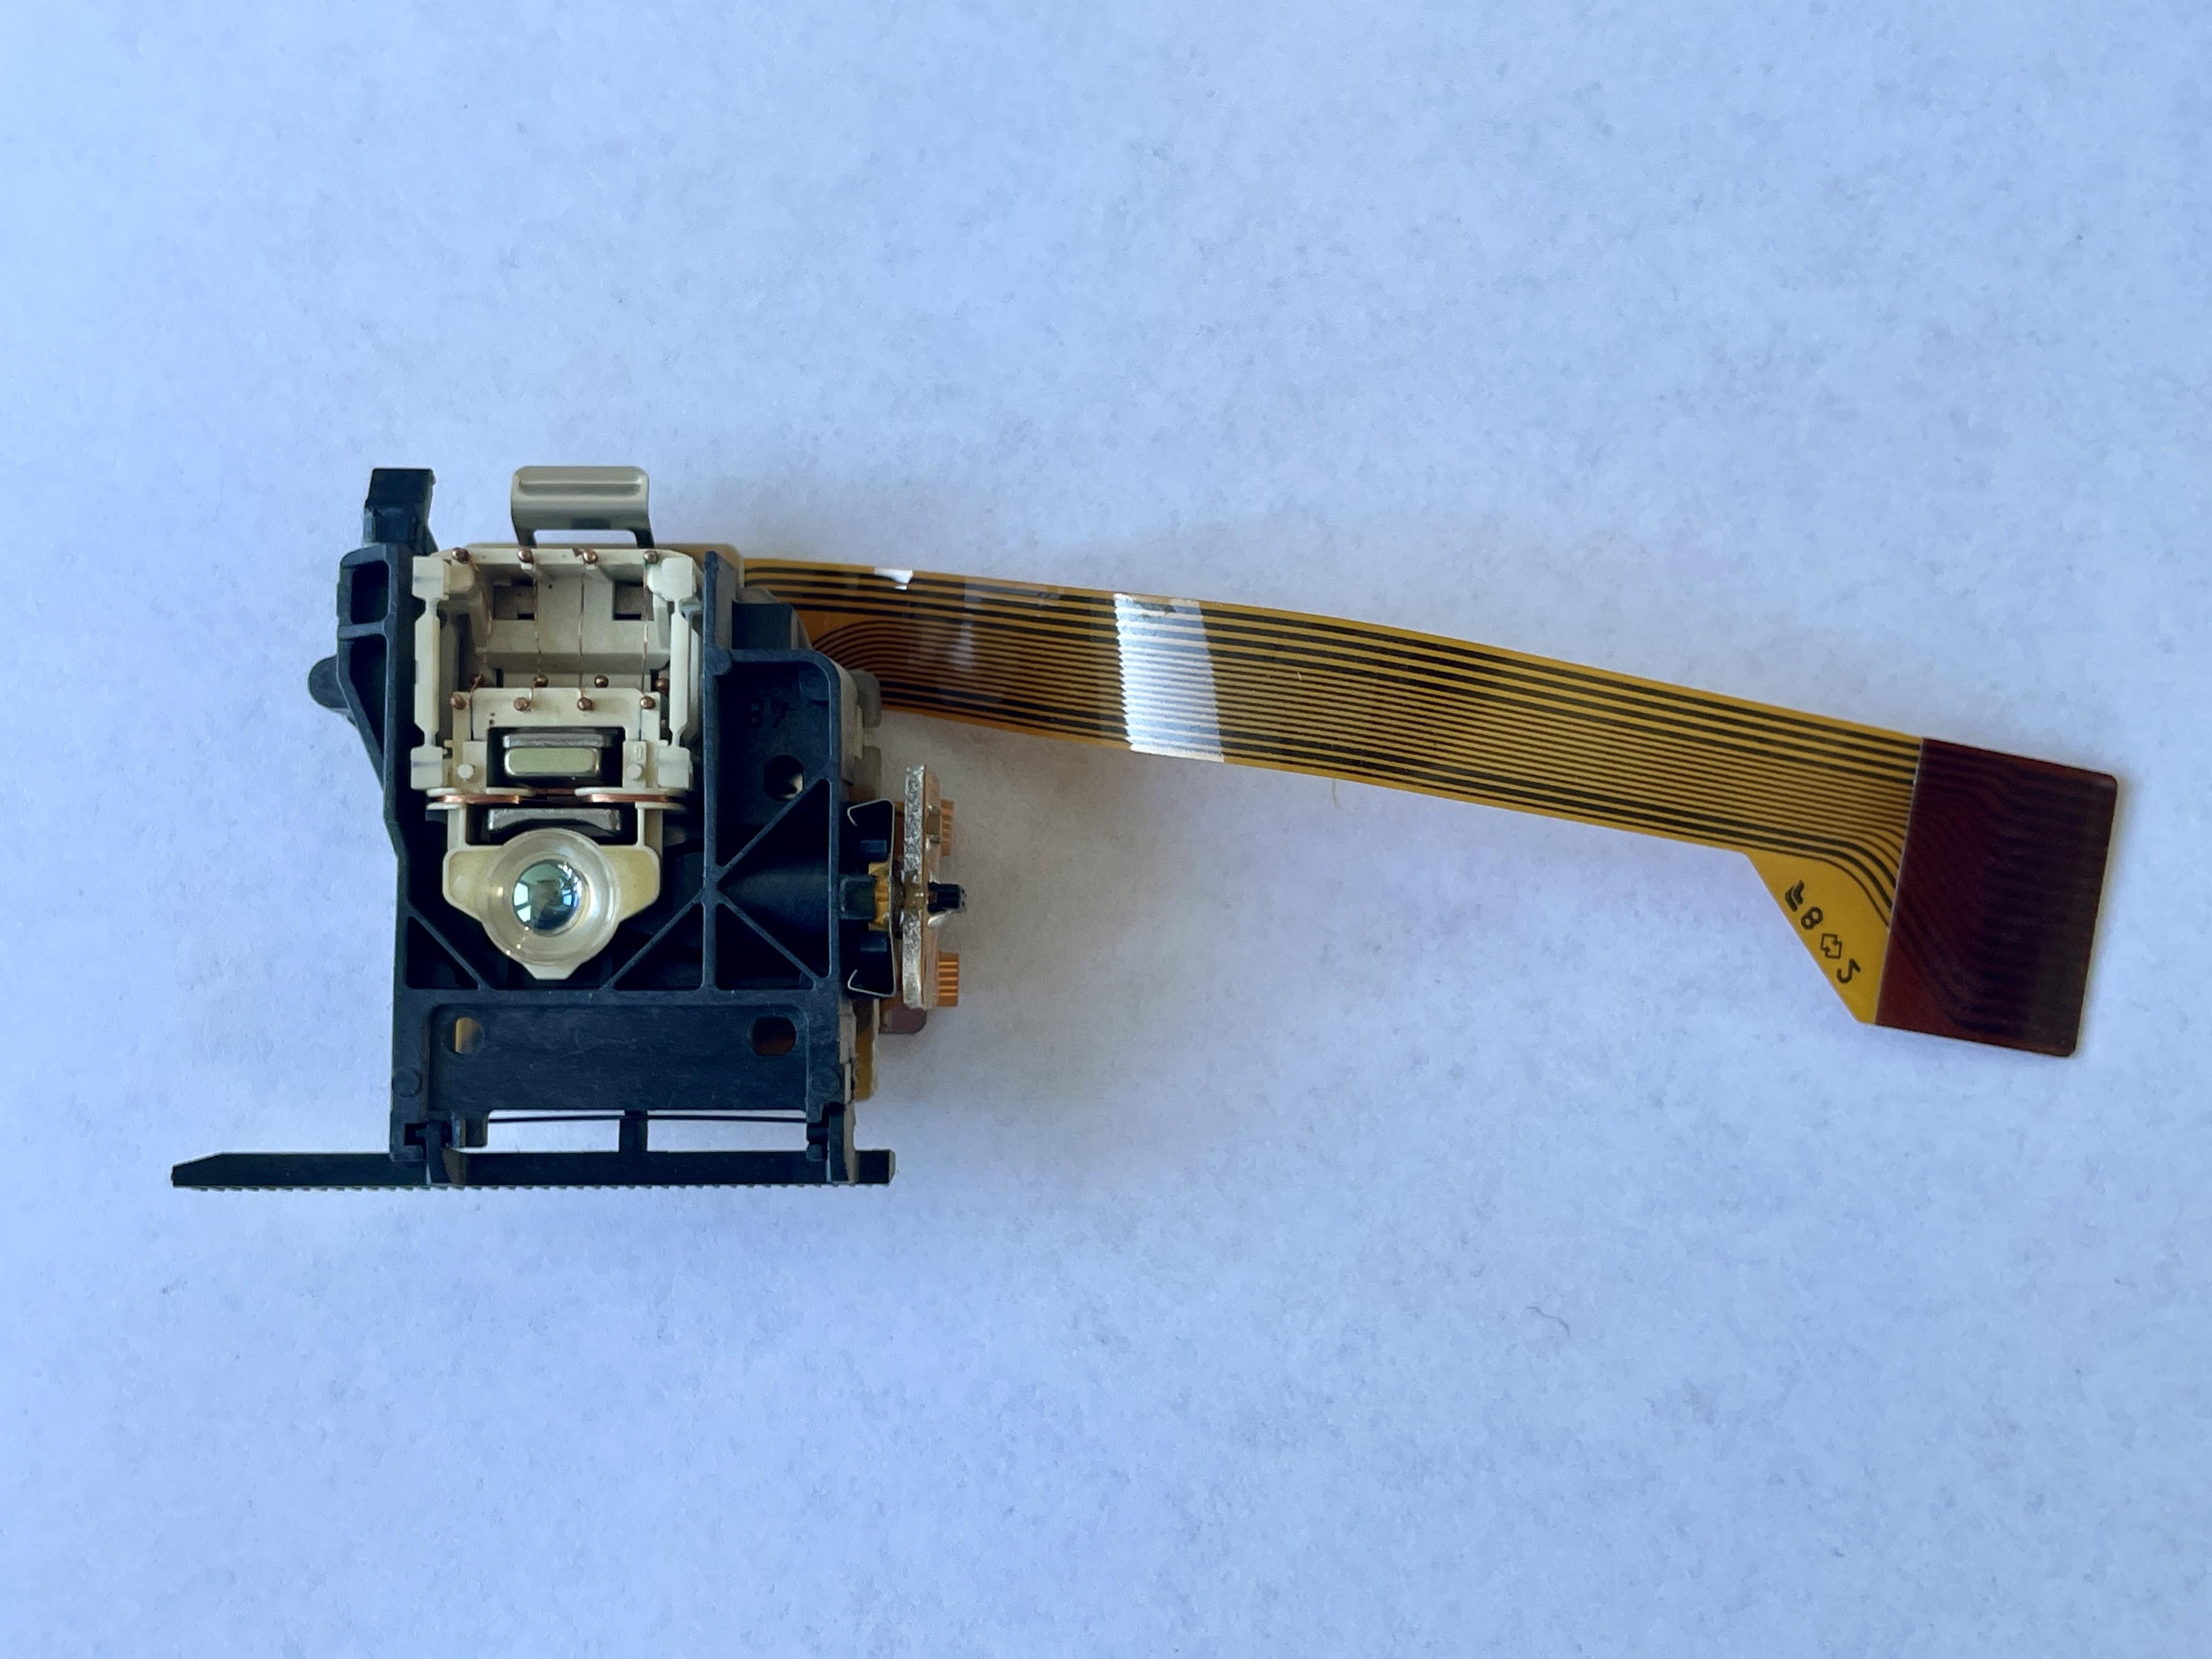
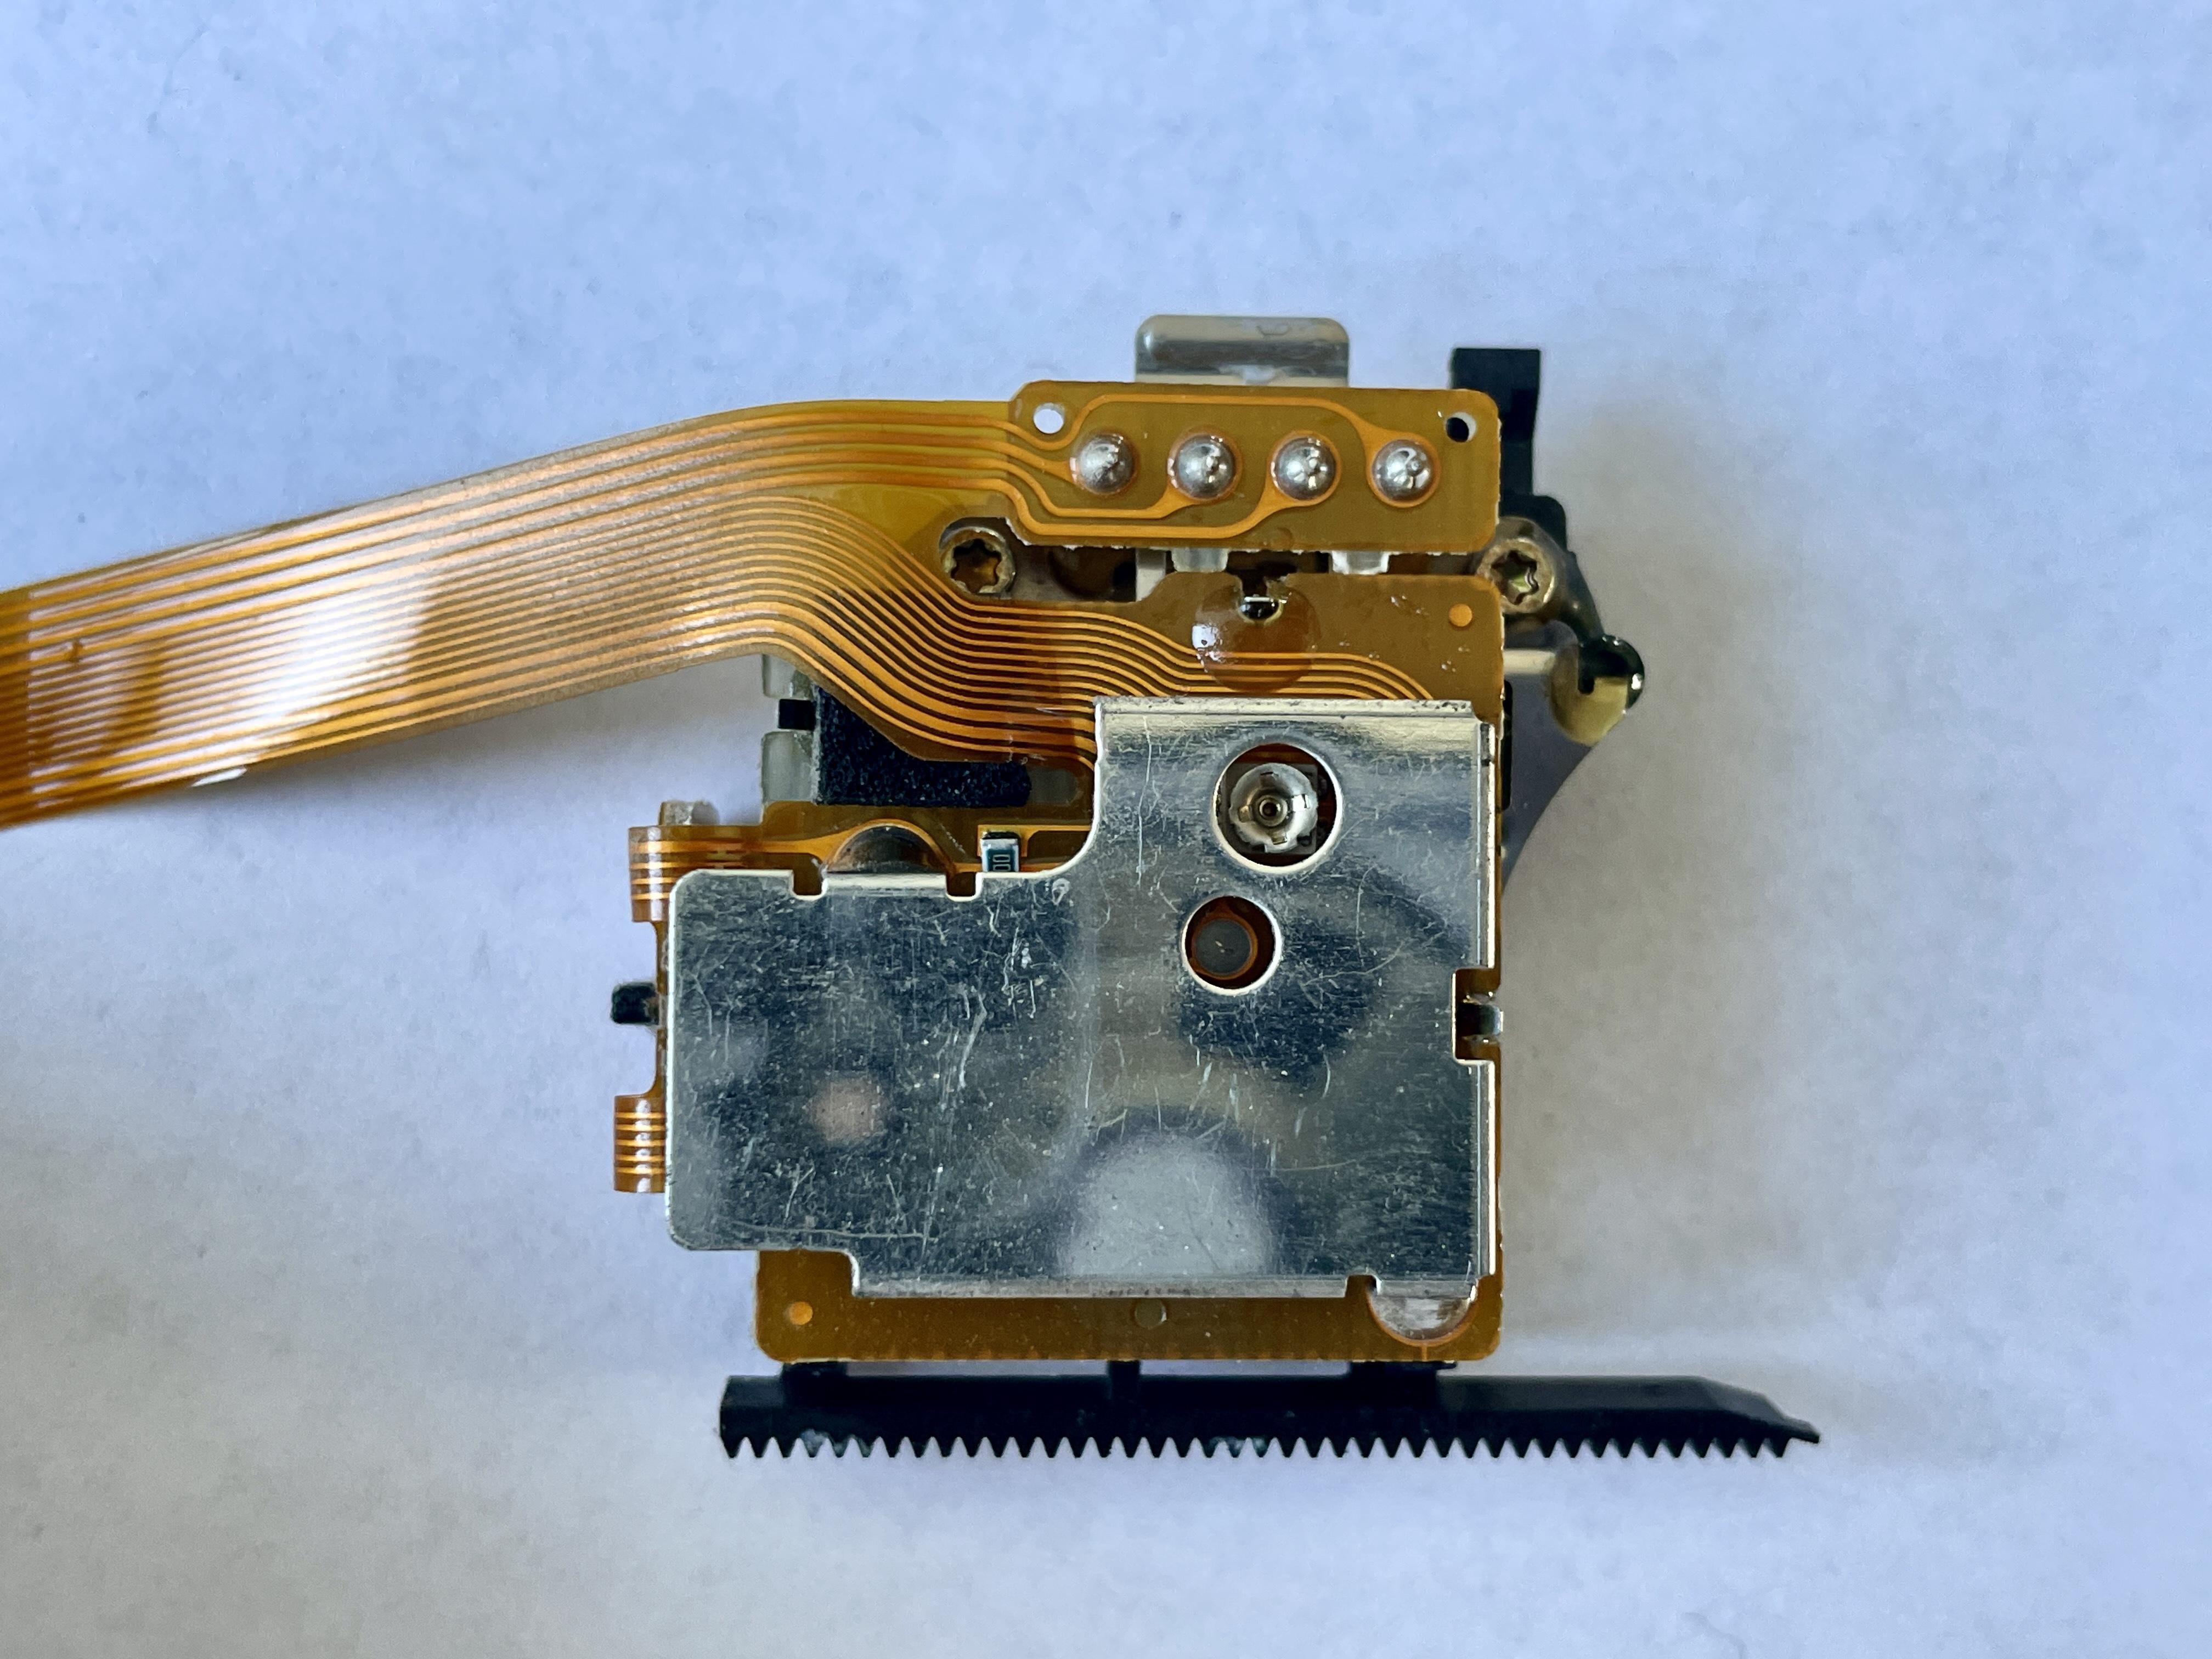
For getting to the sticker on the CD module. Can you give me some direction what should be disassembled?
Can you point put with these pictures?

Location: The Netherlands
Favourite Product: BeoSound 9000
My B&O Icons:
3 March 2025 at 08:01 in reply to: BeoSound 9000: Torx screw in glass-door hinge stuck ? > SOLVED #64281Makes 2 of us.
I should have know too.😉
Location: The Netherlands
Favourite Product: BeoSound 9000
My B&O Icons:
2 March 2025 at 16:45 in reply to: BeoSound 9000: Torx screw in glass-door hinge stuck ? > SOLVED #64274Dear M.
Thanks so much for your extensive reply; very helpful suggestions!
The good news is that I solved getting the hinge screw loosened!
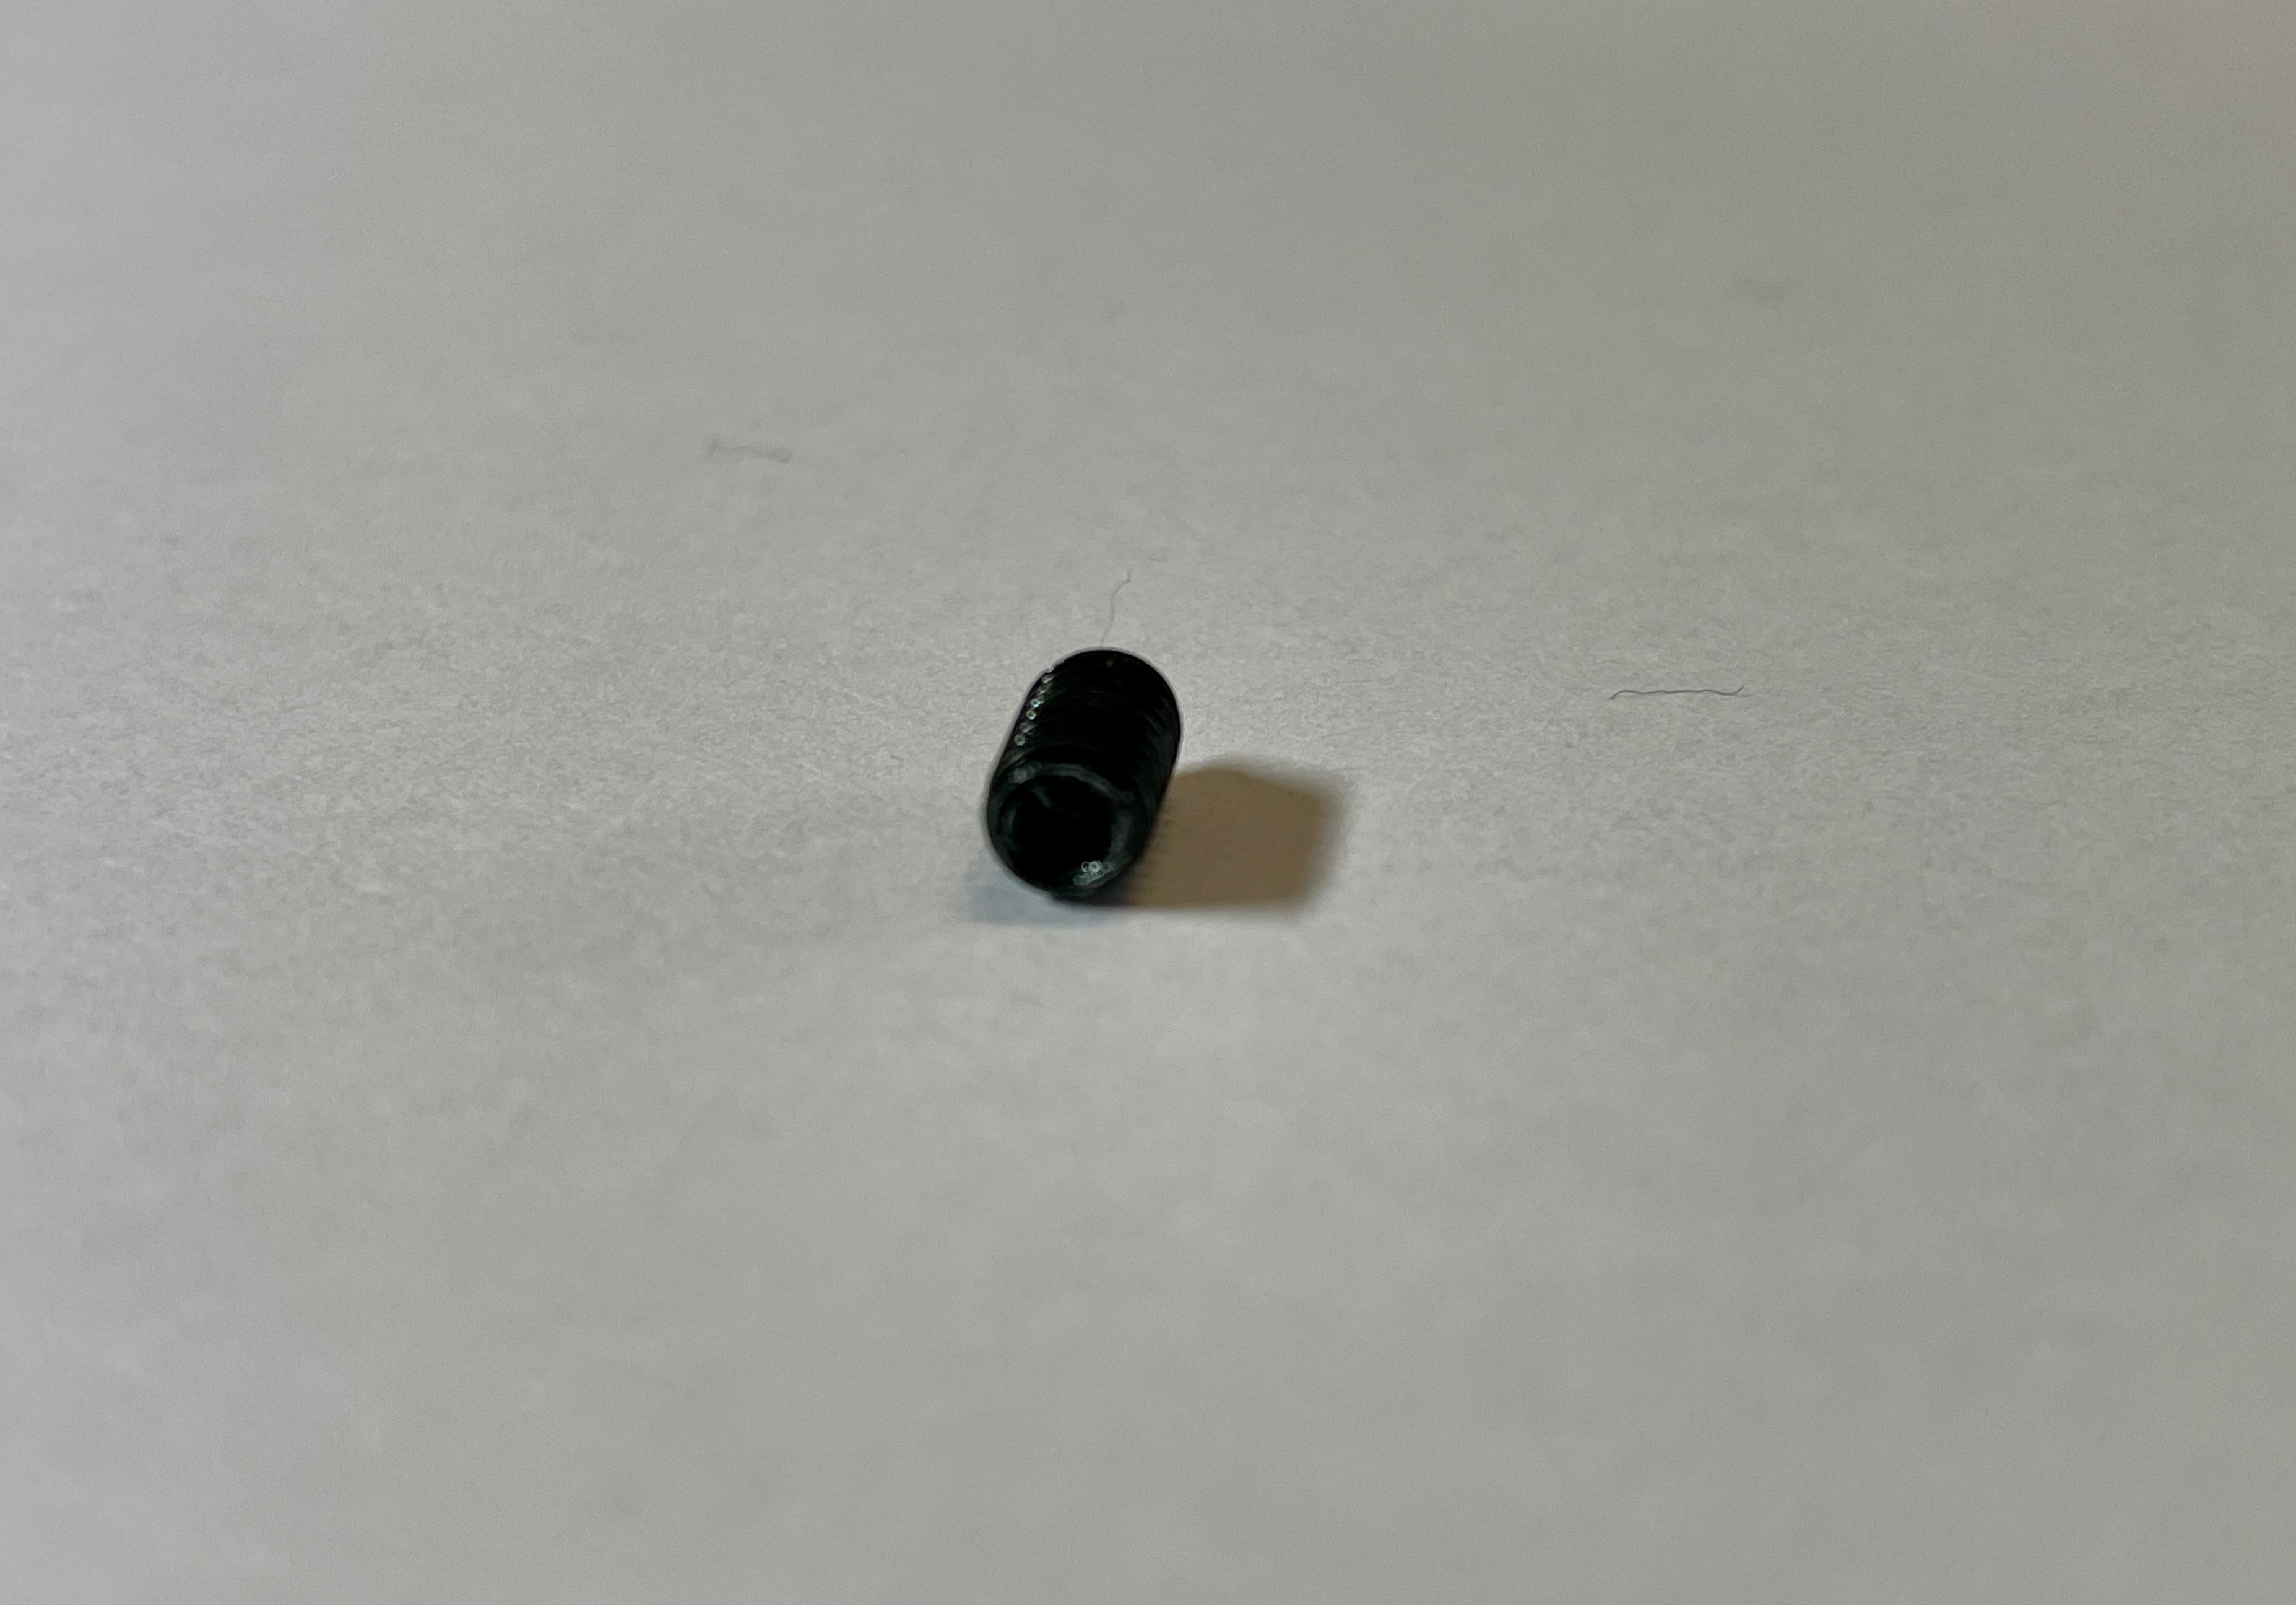
When taking another and closer look with a magnifier, I got the impression that it wasn’t a Torx screw. So, I just tried an allen key wrench on it, and immediately felt it made a perfect fit with good grip. So, I concluded it wasn’t a Torx screw but an allen key screw.
It was still very much stuck, but I was able to loosen it that much to get the glass panel out!
So this part is solved, thanks for all the help and suggestions: @Matador & @B&O Orlando
By the way, I checked with the owner. He bought the BS9000 brand new, and gad no service or repair on it. So it remains a mystery to have two different screws in the hinges.
Laser unit for BS9000
Thanks for the advice. I will first get the existing laser unit out and check which type it is. And then look at your tips for sourcing possibilities .
Location: The Netherlands
Favourite Product: BeoSound 9000
My B&O Icons:
1 March 2025 at 11:24 in reply to: BeoSound 9000: Torx screw in glass-door hinge stuck ? > SOLVED #64237Good point M,
I have been very careful with using the soldering iron, and therefore I am sure nothing has melted.
My main focus has been on trying to get the ‘WD-40 anti corrosion lock lubricant’ to pull in. But with no result so far.Question
Again, if this doesn’t work, I might have to drill the Torx-screw out, but then also replace the hinge (part) in which it sits.
But:- Is this a possibility?
- Is the hinge part available?
- About the CD Laser Pickup: the Service Manual mentions ‘CD VAM 1250 from serial no. 15143261’. So this means I need a VAM 1250 for this BeoSound 9000 MK3?
Location: The Netherlands
Favourite Product: BeoSound 9000
My B&O Icons:
1 March 2025 at 11:04 in reply to: BeoSound 9000: Torx screw in glass-door hinge stuck ? > SOLVED #64234Thanks @B&O Orlando
I think you are right about the color. I took another look and compared the Torx screws from both hinges. The right/upper one (the losse one) is certainly black, and the left/lower one looks grey. So like you said, probably not original.


I have let the ‘WD-40 anti corrosion lock lubricant’ do its work overnight, but unfortunately still no movement.
Hopefully I can get a Torx-8 screw driver with a T-handgrip, to get a bit more force. But like you said, it is tricky.
QuestionIf this doesn’t work, I might have to drill the Torx-screw out, but then also replace the hinge (part) in which it sits.
But:- Is this a possibility?
- Is the hinge part available?
- About the CD Laser Pickup: the Service Manual mentions ‘CD VAM 1250 from serial no. 15143261’. So this means I need a VAM 1250 for this BeoSound 9000 MK3?
Location: The Netherlands
Favourite Product: BeoSound 9000
My B&O Icons:
22 February 2025 at 13:56 in reply to: Line-In on ML devices – using ML Gateway and NL/ML Converter #63925But that is possibly because the ML connector on the BeoLab 3500 has to be activated by the Beo remote, to pick up the audio signal.
Location: The Netherlands
Favourite Product: BeoSound 9000
My B&O Icons:
22 February 2025 at 12:39 in reply to: Line-In on ML devices – using ML Gateway and NL/ML Converter #63923Hi Frog,
I am not sure if I understand your question correctly. But if you want to stream with a Chromecast through a BeoLab 3500, it is possible.
If this is what you want … I do this via the DIN-connector and a Mini-Jack-to-DIN cable. In this case you need a cable that connects the right way to the pins in the DIN-connector.
Then you have to use the Beo remote to activate the ML on the BeoLab 3500, and streaming works.
Let me know, if this is what you meant.
Location: The Netherlands
Favourite Product: BeoSound 9000
My B&O Icons:
Thanks again!
Location: The Netherlands
Favourite Product: BeoSound 9000
My B&O Icons:
SOLVED
I must admit, I had real doubts about this issue, whether they would be caused by dirty glass door sensors or glass. Especially since the CD-sledge showed a hick-up when trying to move from position q1 to any other CD position. Therefor I was thinking about some mechanical disruption in the movement area of the CD-sledge.
Nevertheless, I decided to once more do a thorough cleaning of the 2 prisms, the whole aluminum surface area, and the glass door (inside & outside). After that I ran TM71 in the Service Mode …. And yes, the ‘Cleaning Required’ notification has gone, and all movements of the CD-sledge are back to normal. Also no more hick ups when the CD-sledge starts moving from position 1 to any other CD position.
So my lesson here, cleaning has to be thorough cleaning!
@Severed_hand_of_skywalker: thanks for your advice. It did do the trick.Location: The Netherlands
Favourite Product: BeoSound 9000
My B&O Icons:
17 February 2025 at 17:20 in reply to: BeoLab 8000: Broken plastic leg supporting PCB > which glue ? #63854Thanks @Jaspers1996
I have a 3D printer, so having a 3D model would be my preference.
Location: The Netherlands
Favourite Product: BeoSound 9000
My B&O Icons:
Thanks for your reply and advice. I have done so. In fact, I have even done some more cleaning by carefully using compressed air. Also near the CD-sledge.
Unfortunately , there was no effect. I still see the ‘Cleaning Required’ notification in the display.
Reading the Service Manual and the possible test modes, I decided to do TM71: Mechanical test of ‘Finger Protection’, sledge and led. I have CD’s loaded in positions 6, 5, 4, 3, 2 but no CD in position 1. Here’s what happens (looking at each step of this test):
- Glass door opens = Correct.
- Glass door closes = Correct.
- Sledge moves slowly to CD6 = Not Correct.
- Display shows: Cleaning Required > CD1 > Load CD.
In this step, the sledge moves about 2mm down from position 1 (like in normal use), but then doesn’t do anything.
So here the test ends/does not continue for all other steps. (All others are listed underneath)Question:
- What is wrong, and what next step should I make?
Remaining steps of TM71, not executed:
- Sledge moves Quickly to CD1 =
- Sledge moves Quickly to CD6 =
- Glass door opens =
- Sledge moves Slowly to CD1 =
- Sledge moves Slowly to CD5 =
- Sledge moves Slowly to CD1 =
- Sledge moves Slowly to CD4 =
- Sledge moves Slowly to CD1 =
- Sledge moves Slowly to CD3 =
- Sledge moves Slowly to CD1 =
- Sledge moves Slowly to CD2 =
- Sledge moves Slowly to CD1 =
- Test finalizes in position 1, with the glass door still open.
Location: The Netherlands
Favourite Product: BeoSound 9000
My B&O Icons:
I just looked back in my logs. I found:
- 1477 xxx with the old foam
- 1486 xxx with the new foam
So probably it changed somewhere between them.
Location: The Netherlands
Favourite Product: BeoSound 9000
My B&O Icons:
Congratulations, great this solves your issue!
BeoLab MK II does not have the ‘foam rot’ issue. BeoLab MK II is serial number 1699 2475 and up.
BeoLab MK I ‘younger’ serial numbers also have the newer (white) foam. I am not sure from which serial number onwards B&O started using the newer foam. But I think they started somewhere 16xx xxxx.
Location: The Netherlands
Favourite Product: BeoSound 9000
My B&O Icons:
You are welcome Nicolaas!
We kunnen dit ook in het Nederlands voortzetten, but for the B&O community we’ll continue in English.Isopropyl: yes, if you have the 96% alcohol from the pharmacy, it will do. For some parts of the cleaning I dip earths in the alcohol to rub the foam dirt away. For the surface of PCB’s (printplaten) ~I dip a small (soft) toothbrush in the alcohol and gently brush the PCB.
Yes, this type of damage on the copper traces can already cause the malfunction.
If you experience bad contact of the RCA connector, I would check this:
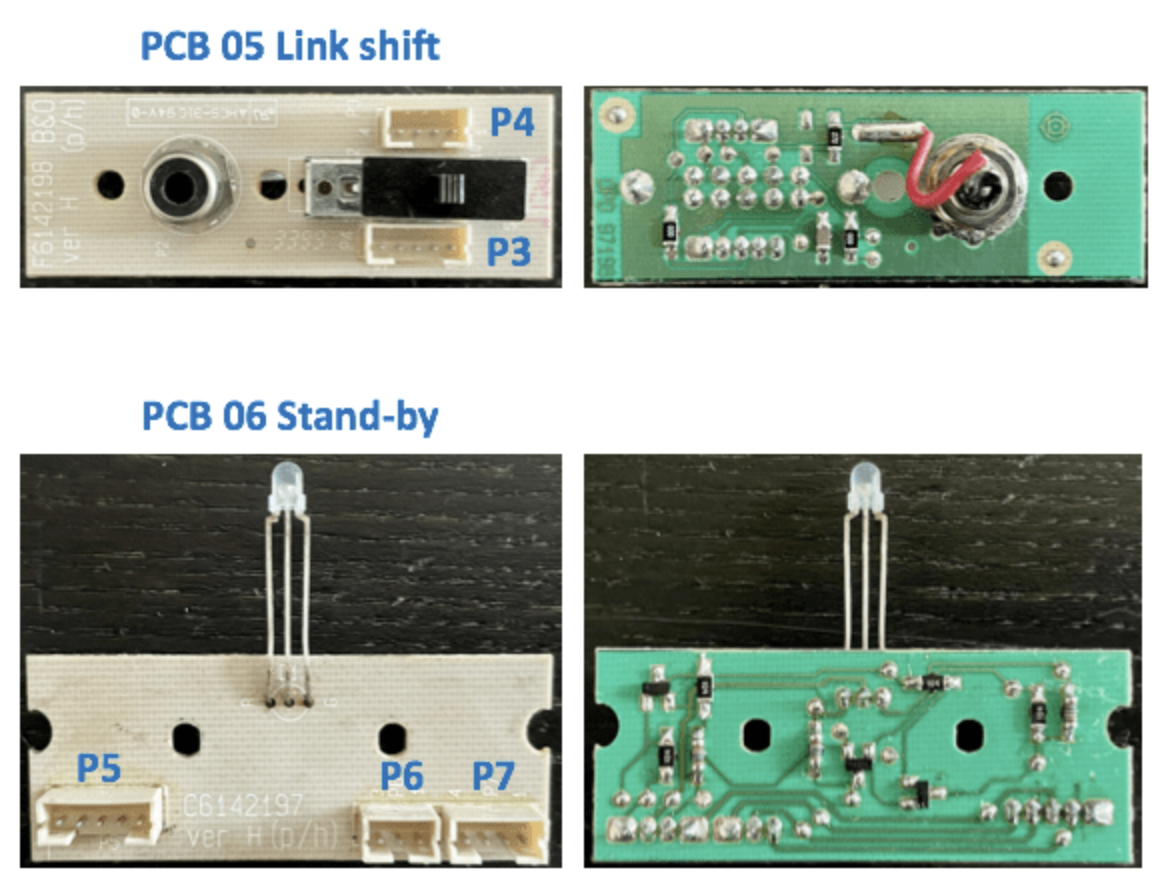
- The RCA connector has a flat nut on the bottom side of PCB05 (see picture). You will have to remove the cone cover on the top/point of the foot to get access. If you get there, check if the nut is still tight.
- What I have also seen, is that the foam dirt was sitting on PCB06 (see picture). This PCB connects PCB05 and all electronics inside the alu casing. It therefore also influences the auto stand-by function. So check if this one is dirty too and clean it if necessary.

BeoLab Penta; yes they are great!
Location: The Netherlands
Favourite Product: BeoSound 9000
My B&O Icons:
Hi Nicolaas,
Good that you post here and share what you have already seen.
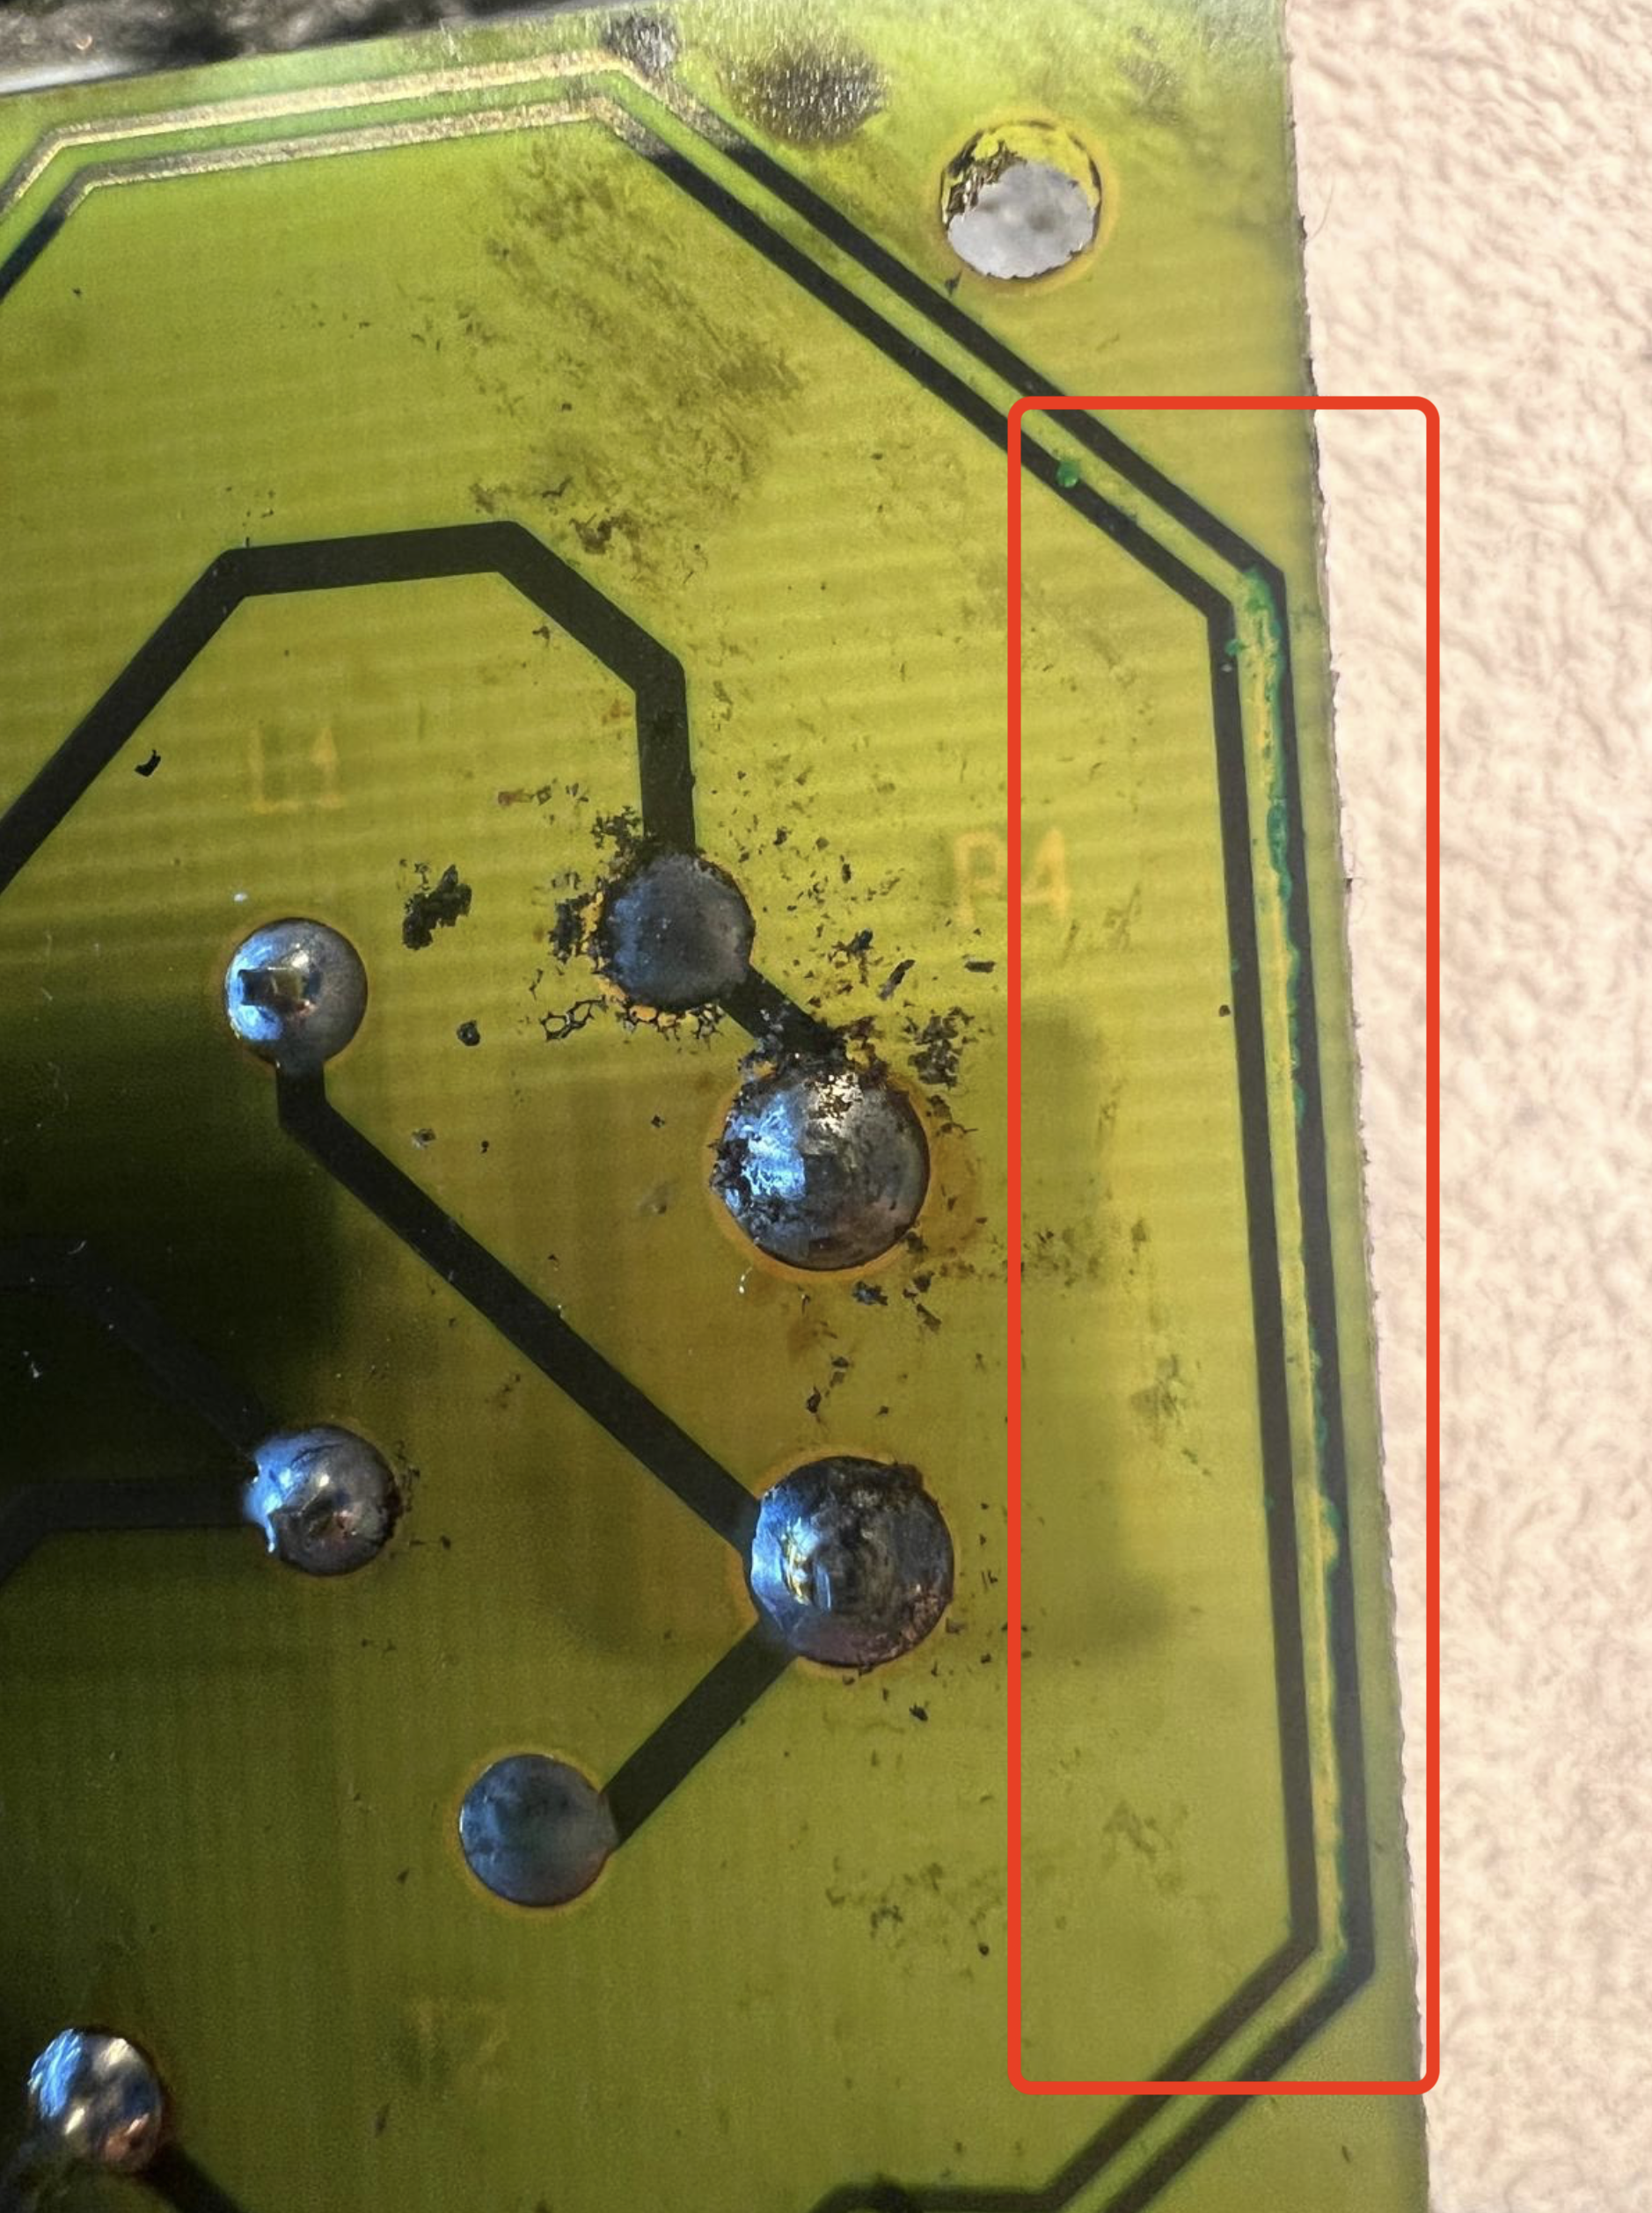
As I can see from your picture, the deteriorated foam has definitely done ‘its work’. Especially on the right side of your picture, one can see that the two copper tracks have been damaged. The foam ‘eats’ the tracks away (like bite marks in the traces), and this in many cases causes the Auto stand-by to not be activated or to switch back and forth continuously.

Here’s my suggestion
I t could be there are also other problems, but I would start with this.
- Remove the Amplifier & Power Supply panel from the alu casing. Do the same with the speaker panel. Be careful. The speaker panel has one cable and connector connected to the amplifier side. And the Amplifier/Power Supply has three cable connectors that connect to the botttom of the alu casing.
- Remove all the foam particles from all places where you see them. This can be a time consuming work, because it can be everywhere. Make sure you clean it away from PCB’s, connectors, components, … You can use isopropyl alcohol to get the sticky parts away.
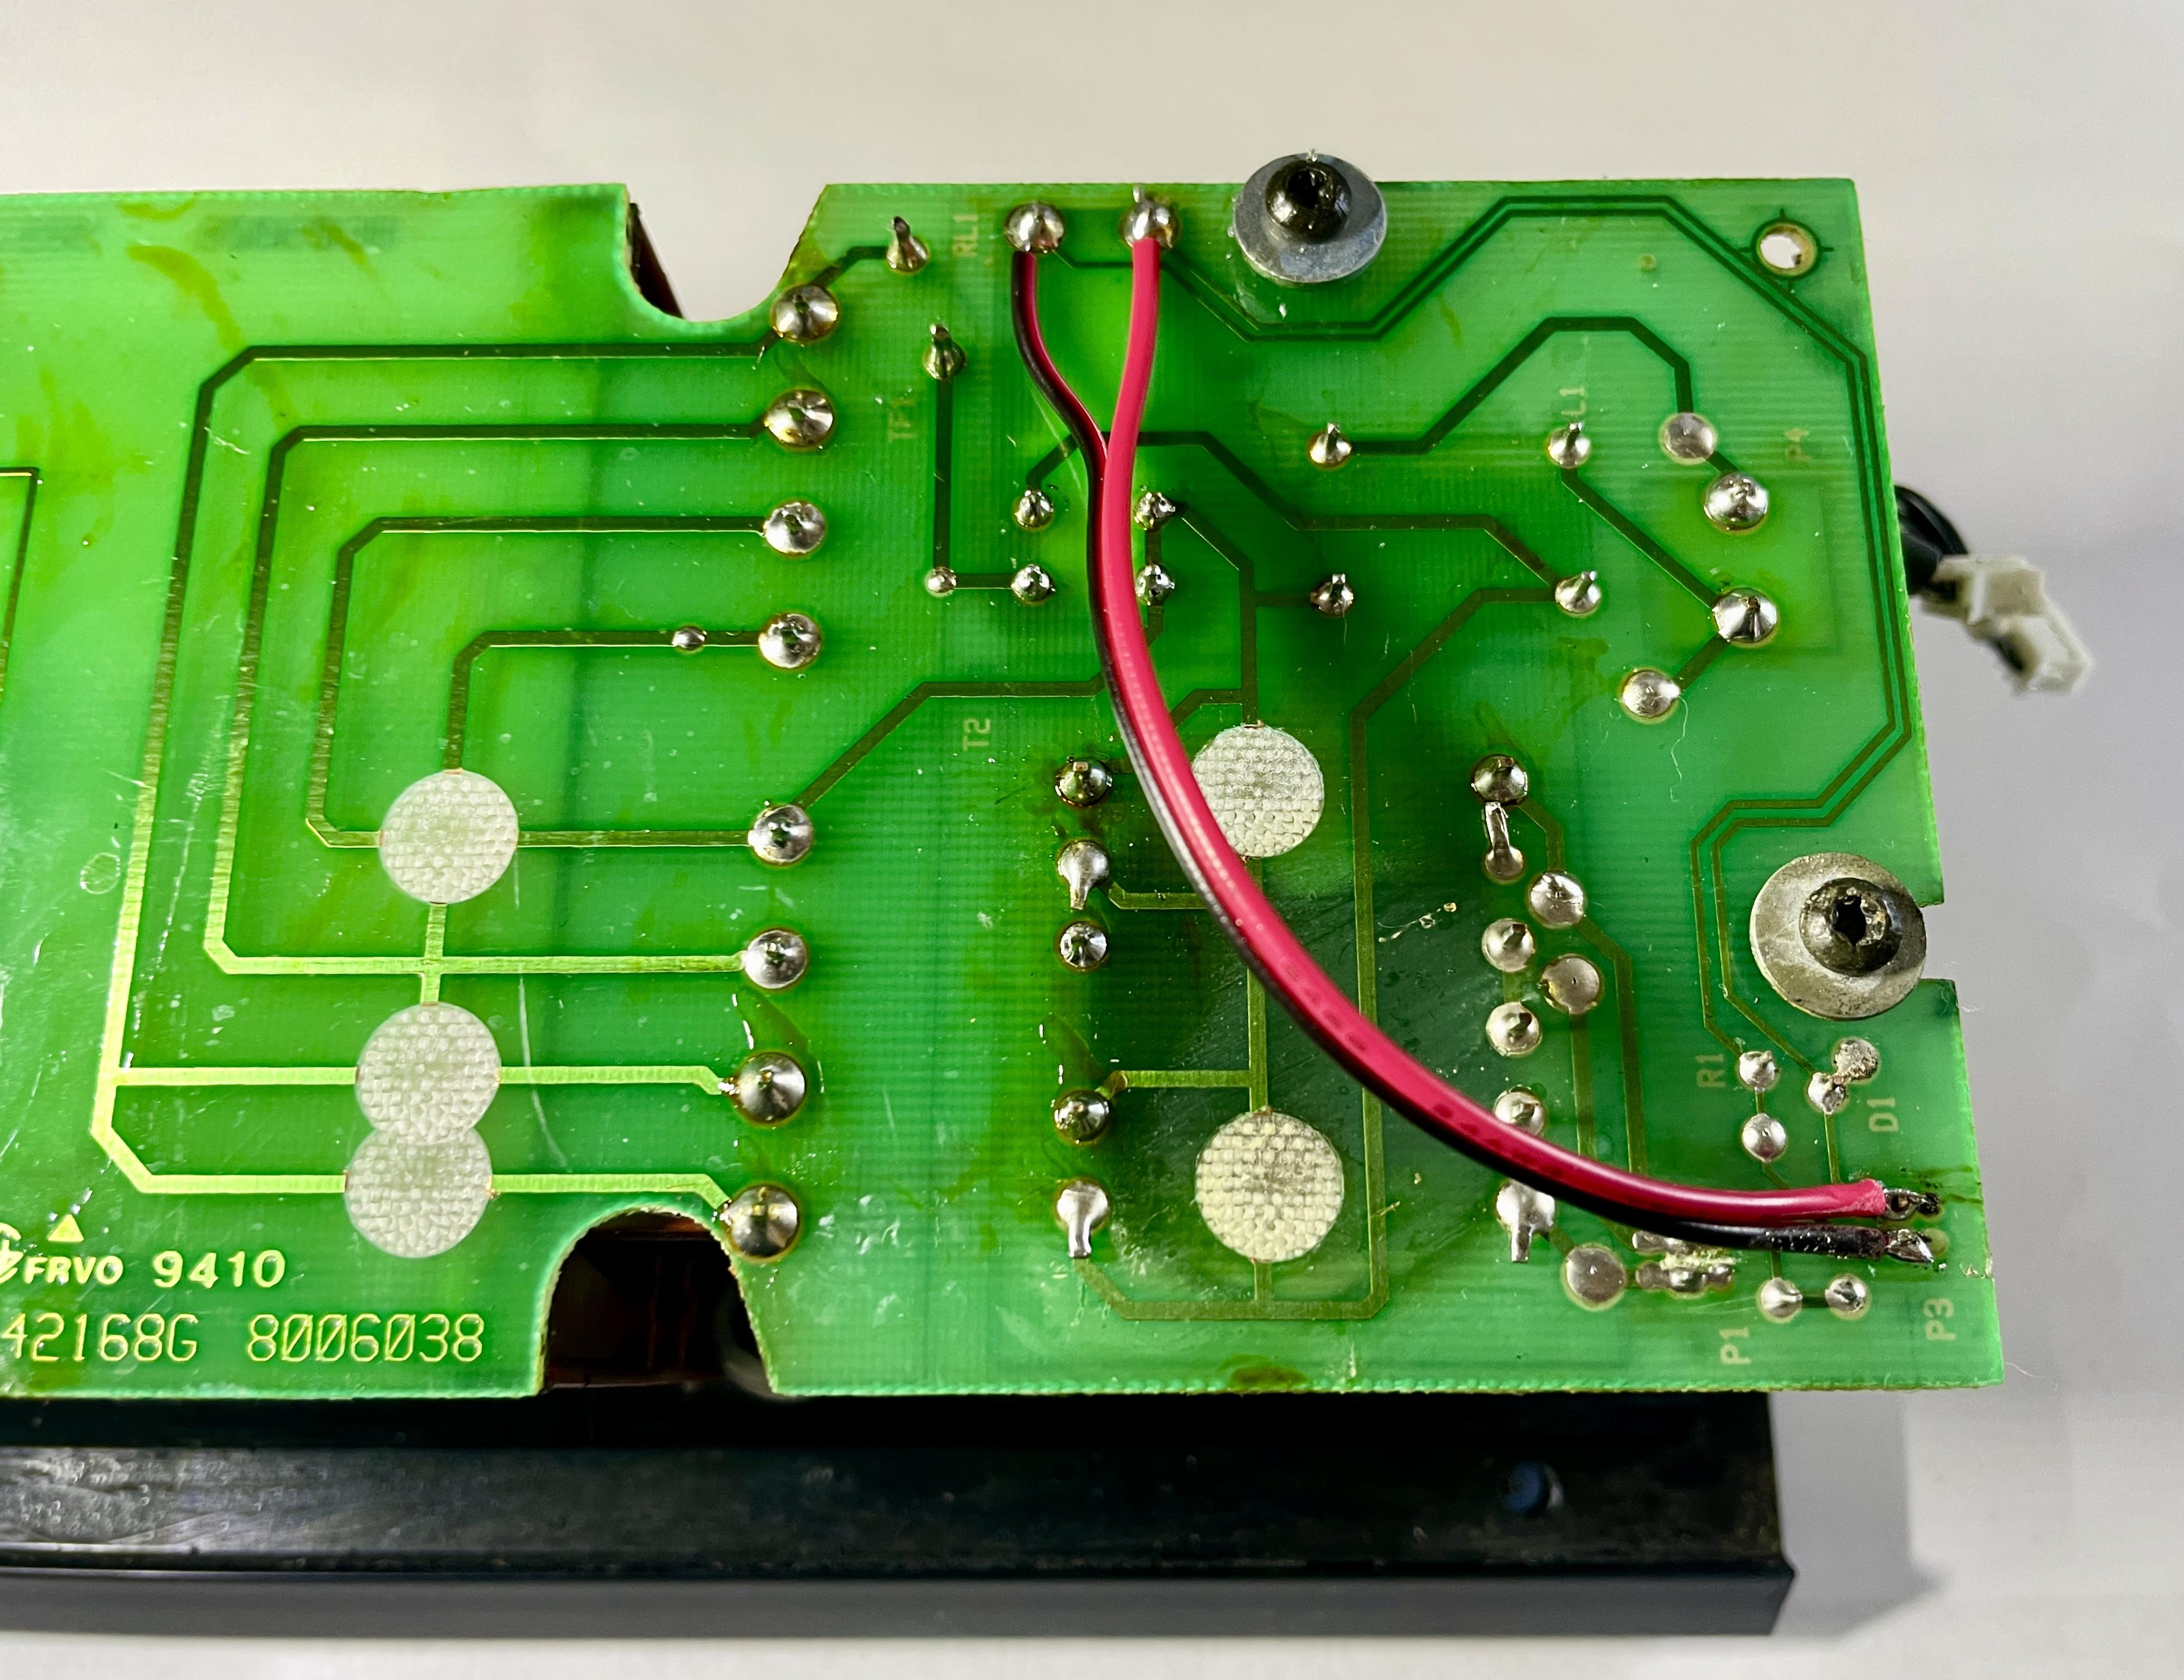
- When done, create a bypass as shown in the picture underneath.

When this is all done, put all parts back in the alu casing and reconnect. Power up the BeoLab, put an audio signal to the PL or RCA input and check if the auto stand-by turns on.
Let us know the outcome.
By the way, are you Dutch?Location: The Netherlands
Favourite Product: BeoSound 9000
My B&O Icons:
-
AuthorPosts