Forum Replies Created
-
AuthorPosts
-
Glitch
BRONZE MemberCheck the metal braces on the underside of the upper cover. The plastic “rivets” that connect the brace to the cover can fail. This lets the cover interfere with the drawer. Also check the screw for mounting the drawer motor. This can rub if the drawer rollers have settled.
Glitch
Glitch
BRONZE MemberA very timeless and complete set in my eyes.
Thank you for the kind words.
I think that the styling of the 5500-7000 series has aged quite well. One of my goals is to get B&O equipment into the “public rooms” at my son’s house. My daughter-in-law can be pretty selective about the decor. So far, she has only agreed to a Stage, but I think she is warming up to other options.
It must be hard to go back to a lightweight plastic remote after getting used to a Audio/Video/AV terminal.
Glitch
Glitch
BRONZE MemberI am considering doing something similar, my colleagues are highly recommending I just go all-in and remove the dust cap and do it properly.
I always consider the likelihood that I could remove the dustcap and residual glue without damaging the cone. Finding a suitable replacement dustcap is sometimes a problem. I like to install a slightly larger dustcap than what I removed to help hide any evidence that the driver was worked on. This is usually pretty straightforward with woofers, but I’m not so confident with something like a Penta midrange.
Another thing to consider with dustcap removal and shimming is that uneven tension of the surround/spider will undo any shim alignment as soon as the shims are removed. Obviously, drivers with tighter tolerances will be more sensitive to things like this.
One idea that I’ve had is to use a combination of techniques. Combine the segmented clamp/gluing concept with using an inspection scope (stereo microscope) to visually check the coil alignment. I haven’t tried this yet, but will when I have the need to service something that requires high precision.
Glitch
Glitch
BRONZE MemberEvan,
I use something similar to clamp the surround. Depending on the particular driver, I’ll run some tests with just the clamp. Once I’m happy with the performance, the surround gets some glue. Sometimes, a segmented clamp is needed so that the surround can be glued a section at a time with a thin needle applicator syringe.
I’m not too surprised to hear that much of this is being done by hand. I’m guessing that the difference between the higher and lesser quality parts has to do with the “end of line” testing and sorting.
Glitch
Glitch
BRONZE MemberWhat these tests do not offer are acoustic responses. To test the spectral capability we would need to measure on a baffle with microphones etc. To really understand uniformity, we would need to both Klippel and mic several samples to understand the consistency.
My (possibly bad) assumption is that if two drivers are similar mechanically (displacement response, driver shape, etc.) and electrically (impedance vs frequency, etc.) that they will be similar acoustically.
I think that many people underestimate how easy it is to do a “suboptimal” surround replacement. I’ve found some drivers, especially ones with tight tolerances, can be very finicky to get right. I’ve been able to pick up differences in alignment techniques (centering, foam tension, etc.) with the relatively crude measuring equipment that I have.
Some people make it seem like refoaming is always trivial. Maybe they are right (and I am just not very good at it), but I think it is more likely that they aren’t testing their work. It reminds me of something that happened at work. We had a group of developers that kept reporting that they “hadn’t found any bugs in their software”. I eventually figured out that statement was their way of saying that “they never tried testing their software”. 😉
I’m looking forward to seeing any test results that you are willing to share…
Glitch
Glitch
BRONZE MemberCool. I appreciate seeing data even if I don’t understand exactly what it is saying. 😉
Is the testing a driver easy enough where it is possible to test multiple drivers?
I’d be curious about the driver uniformity, especially the refoamed mid-ranges. With some measure of “sameness” you could either pick the best of the batch for your project or sort for best matched pairs.
Glitch
Glitch
BRONZE MemberI absolutely loved it and would really appreciate any help in identifying said components / machine.
Here is a nice website that has pictures and dates for B&O equipment. This page may be the best one to start on: https://beocentral.com/receivers
Once you have identified the product, https://www.beoworld.org/products.asp can be used to find more detailed information about it.
Glitch
Glitch
BRONZE Memberand no – you currently can’t have two Theatres playing in sync in a multichannel (i.e. one-room) system.
That’s disappointing. I was looking forward to the “Beosound Theatre Innovative Configurations” thread (i.e. the Theatre version of the “BeoLink Converter 1611 Innovative Configurations” thread) 😉
Glitch
Glitch
BRONZE MemberRalph,
Looks good and like it was meant to be there.
BTW, I saw in another thread the suggestion to use a small bolt and nut to create an attachment point. This would be an easier way to do the same thing.
Is there enough adjustment to be able to set the “needle down” position correctly?
Does your sliding chassis park without any chatter?
Glitch
Glitch
BRONZE MemberActually, my question was more like towing one car behind another ;-).
Something like this but with Theatres 😉
The towing situation is possible for some car combinations, but not for others.
Glitch
Glitch
BRONZE MemberHow about a “pair” of Theatres?
I know that this isn’t practical, but I’m curious if the software could handle this. (Hopefully this question isn’t too off-topic)
Glitch
Glitch
BRONZE MemberMy best guess is that it that the post is glued on, breaks off easily, and gets lost. I wonder if B&O originally designed something that fit into the hole but changed their minds?
Please post pictures of whatever you make to fix the problem.
Glitch
Glitch
BRONZE MemberRalph,
Yes, it definitely looks like you are missing the post where the spring and string connect to the sliding chassis. It initially looks like the post is molded as part of the sliding chassis frame, but on a closer look I’m not so sure. Here is a picture from the bottom of the sliding chassis.
There appears to be a seam there. This is a strange design choice.
I suspect that you will have a hard time finding just the post. You may have to buy the whole sliding chassis frame. Alternatively, you could make a new custom post that fits into the existing hole. Maybe something like a piece of threaded rod that screws into the hole with part of the rod shaped to form a new post?
I still have not fixed the chattering issue. I moved on to other projects hoping that someone already knew the solution and was willing to share.
Glitch
Glitch
BRONZE MemberI got my BL4000’s running. They had multiple issues including a bad standby transformer, fried relay, and foam rot corrosion. The corrosion not only dissolved some of the traces but also broke some of the connections between the SMD lead and the SMD component body. It was a challenging debug for all of the wrong reasons. 😉
I have a solution for the standby transformer that uses readily available parts. However, there are some (possibly safety related) caveats associated with it. Send me a PM if you are interested in the details.
Glitch
Glitch
BRONZE MemberThe latest (and last for now) Franken-MMC (FMMC) experiment. The donor cantilever is aluminum with a conical, bonded diamond stylus.
My cursory evaluation of the cartridge performance on a 1 to 20 scale, where 1 through 5 map to B&O’s MMC1 through MMC5, respectively, and 20 is something put together from sewing needles and twigs…
The FMMC with the $2 pink ceramic stylus is about a 17. The grafting is relatively easy to do, but the playback is muddy and suffers from distortion on some recordings.
The FMMC with the conical, bonded diamond stylus is about a 12. The playback distortion exhibited by the pink ceramic FMMCs is gone. In general, the highs and lows are there, but the fine detail is not. It sounds like a tired, inexpensive cartridge. This isn’t surprising since it actually IS a tired, inexpensive cartridge.
My overall conclusion is that this type of DIY grafting isn’t very practical. There is a learning curve where one will certainly destroy some donor cantilevers and/or target cartridges. The overall performance could certainly be improved upon by buying a higher quality donor cantilever/stylus. However, the risk/reward ratio just isn’t there. Botching just one reasonably nice donor cantilever and having to replace it puts the overall price in the ballpark of a new SMMC4 (that has a fresh suspension).
My future plans are to use the grafted cantilevers for evaluation of cartridge suspensions. I have a handful of cartridges with missing cantilevers. I got these with various used turntables and have no idea of their history. If I happen find a suspension that still has life in it, I’ll be remotivated and graft it. Maybe some sort of nude elliptical?
Yep, none of this made sense. Wound I do it again? In a heartbeat!
Glitch
Glitch
BRONZE MemberBurned-out standby transformers seem to be a pretty common problem for B&O speakers of that era. The transformers in my BL4000’s appear to be a bespoke part, only having B&O markings and no markings from the supplier that produced them. Based on the prevalence of identical failures, the part was poorly designed, but well manufactured (at least from a repeatability standpoint).
What is interesting about this particular failure is that a failed transformer still outputs a random voltage. This is why you still see the red light, which is pretty robust to voltage variations. The green light is more sensitive to the actual voltage value, so this may or may not work with a failed transformer.
I’m interested in hearing if anyone else has a already has a solution or knows of a replacement part. My research didn’t find much beyond people ordering a replacement part/board from B&O. I assume that that particular pile of parts is long gone.
I’m currently working on an alternative solution, but it is going slowly. Maybe one of the transformer candidates that come in with the next parts order will be a winner. Please let me know if you make any progress and I’ll do the same.
Glitch
Glitch
BRONZE Membermy beomaster 7000 is humming. What can i do ?
Teach it the words? 😉 (sorry, I couldn’t resist)
Seriously though, it would be helpful if you could provide more information about the specific setup and/or conditions where you are experiencing the hum. Does it sound like 50/60Hz? Is it coming from the speakers or the chassis?
Glitch
Glitch
BRONZE MemberAny ideas?
In addition to what Martin said…
Are you doing your powering-on using a “dim bulb tester” (or equivalent)? If not, you might want to. This would reduce the possibility of doing more damage while you sort things out.
Glitch
Glitch
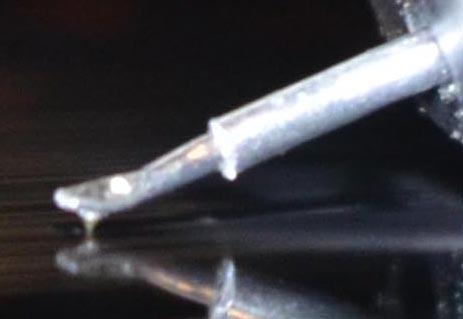
BRONZE MemberThe latest experiment was to make several cantilevers with different tracking angles. The picture above is the one that, by eye, has the best geometry. The bad news is that all of the candidates exhibit a very similar distortion. The good news is that my cantilever bending jig seems to work and I found a record track where the distortion is easy to hear (i.e. the issue is easily repeatable).
Please let me know if you are interested in hearing a recording of the distortion, would like to see any other views of the cartridges, or have any suggestions of what to try next. Thanks.
Glitch
Glitch
BRONZE MemberIs it a bad standby transformer ?
Most likely. The transformer could be shorted internally. I believe the best way to check this is to pull the transformer off the circuit board and check to see if each of the primary coils is independent from the other.
Glitch
-
AuthorPosts


