


Home › Forums › Product Discussion & Questions › BeoSystem › Beosystem 5500 Winter Project
- This topic has 4 replies, 3 voices, and was last updated 2 years, 3 months ago by
 Glitch.
-
AuthorPosts
-
10 April 2024 at 06:40 #54189
 GlitchBRONZE Member
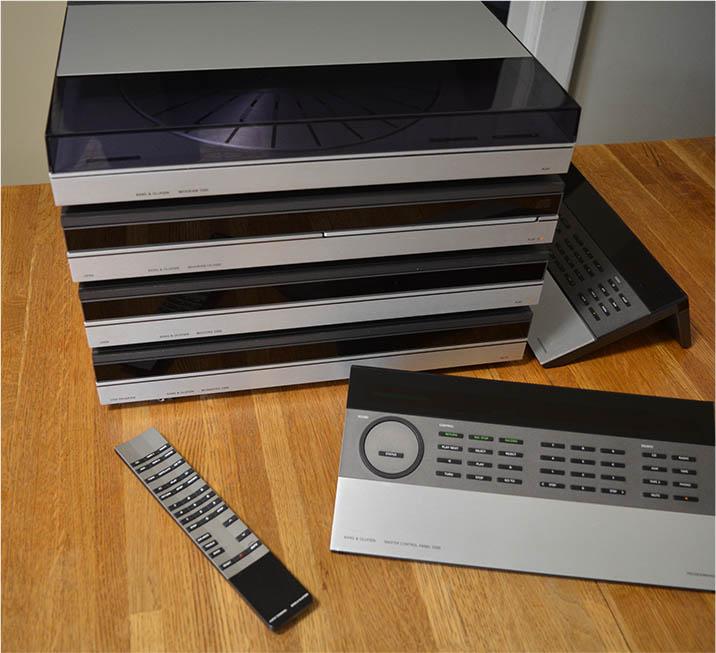
I’m finishing up one of my winter projects, a Beosystem 5500. Everything was either free or cheap due to being broken or partially working. The project started with a free Master Control Panel 5500 and a “for shipping cost” Beomaster 5500 (thanks again Evan) and evolved from there. I had a lot of fun doing this and learned much in the process.

Beomaster 5500
- Reflowed solder joints
- Repaired cracked circuit board
- New capacitors, trim pots, relays, thermal compound
- WIMA caps and updated OPAMPS for preamp
- New trim panel and chassis feet
- Detailed cleaning inside and out
- Adjusted per service manual
Beogram 5500
- Reflowed solder joints
- Full (disassemble) cleaning and lubrication
- New capacitors
- New rubber parts: platter belt, sliding chassis belt
- New trim panel, chassis feet and lid bumpers
- Detailed cleaning inside and out
- Polish dust cover, replace lid damping grease
- Adjusted per service manual
- New SMMC3
Beogram CD 5500
- Reflowed solder joints
- Repaired laser assembly and deep clean
- New capacitors
- New rubber parts: tray belt
- New trim panel and chassis feet
- Detailed cleaning inside and out
- Adjusted per service manual
Beocord 5500
- Reflowed solder joints
- Repaired power supply
- Repaired tape transport
- Tape transport – Full (disassemble) cleaning and lubrication
- New capacitors, trim pots, thermal compound
- New rubber parts: drive belt, pinch rollers, drawer belt, drawer rollers
- New NOS main drive motor, hot oil vacuum infused bearings
- New board mounting clips
- New trim panel and chassis feet
- Detailed cleaning inside and out
- Adjusted per service manual
MCP 5500 #1
- Repair corroded traces on circuit board
- Disassemble and clean switch pads
- New capacitors
MCP 5500 #2
- Replace bad transistors
- Disassemble and clean switch pads
- New capacitors
Audio Terminal
- Repair corrosion in battery compartment
- Clean switches
Random observations
- Rolling OPAMPs in the preamp wasn’t fruitful. I could not hear or measure any meaningful difference between the original and a variety of modern chips.
- Acquiring the test/calibration tapes was harder (and more expensive) than fixing the tape deck
- Repairing/restoring something after a botched repair attempt is harder than fixing something that failed due to natural causes. I already knew this, but the tape deck reaffirmed this.
- Restoration parts can cost more than the acquisition price of a component
- One can still put together a very nice, vintage B&O Beosystem from scratch with patience and perseverance.
TODO
- Find a solution to the cable mess behind the Beosystem stack.
- Fix the Beogram chatter problem (mentioned in another thread).
- Continue verifying that the system meets the original performance specifications.
I assume that a restored Beosystem 5500 is not noteworthy to most forum members. For the couple of other people that might be interested, I’ll happily provide any additional information/pictures.
Glitch
12 April 2024 at 15:40 #54190That is an impressive list and job Glitch. A very timeless and complete set in my eyes.
This set is what my father in law bought new (with BV Pentas) and got me infected with the virus! He still has the speakers, but I just replaced the BM5500 with a BeoPlay Connection Hub + BeoLink Passive. To use the plastic Samsung TV remote (yuk). He clearly got cured.
Location: Netherlands
My B&O Icons:
 13 April 2024 at 15:35 #54191GlitchBRONZE Member
A very timeless and complete set in my eyes.
Thank you for the kind words.
I think that the styling of the 5500-7000 series has aged quite well. One of my goals is to get B&O equipment into the “public rooms” at my son’s house. My daughter-in-law can be pretty selective about the decor. So far, she has only agreed to a Stage, but I think she is warming up to other options.
It must be hard to go back to a lightweight plastic remote after getting used to a Audio/Video/AV terminal.
Glitch
15 April 2024 at 21:01 #54192EvanGOLD MemberHey Glitch – congrats on such an awesome result!
Great project and I’m glad that BeoMaster ended up working out for you. I guess the temp issues ended up getting solved with your overhaul? Last time I used it it was just scorching hot to the touch even when in stand by.
Location: San Francisco
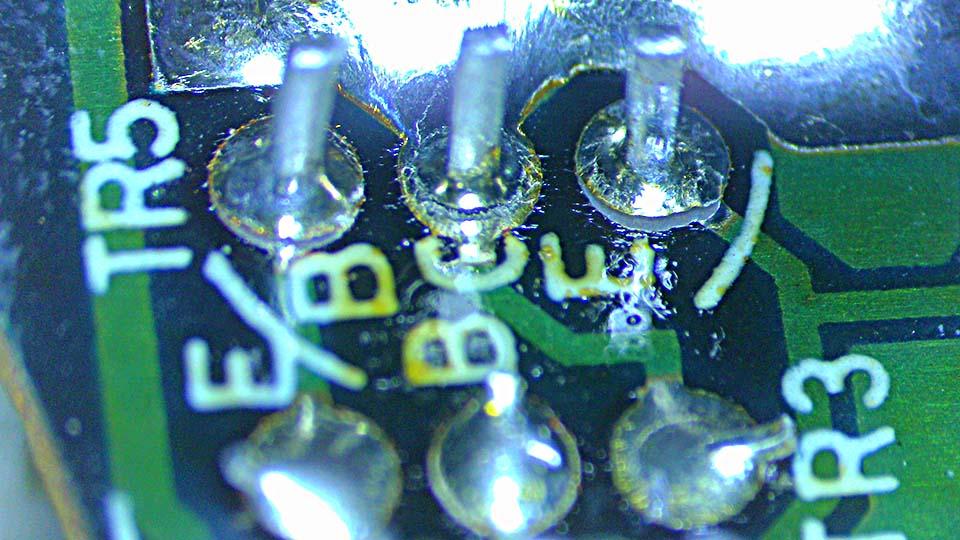
16 April 2024 at 14:48 #54193GlitchBRONZE MemberI didn’t find a specific reason for the overheating. The first step of this Beomaster repair was to remove the circuit boards and inspect them under a stereo microscope. I like to make repairs to any “mechanical issues” (i.e. cold/cracked solder joints, cracked boards, solder bridges, etc.) before applying power for the first time. I recall fixing what appeared to be shipping damage, but my notes are sketchy. Unfortunately, the quantity/quality of my note-taking can be inversely proportional to my excitement about working on something and I was pretty stoked about digging into the project. 😉
I did take a few pictures of the more interesting discoveries.

Power relay contacts
Broken solder pads on fan control board.

The Beomaster is running at “as expected” temperatures. Warm, but not hot enough for the cooling fan to engage.
Glitch
-
AuthorPosts


- You must be logged in to reply to this topic.