


Home › Forums › Product Discussion & Questions › BeoPlay › Beoplay V1 not turning on
Tagged: Beoplay V1
- This topic has 48 replies, 8 voices, and was last updated 2 weeks ago by
 slm@skals.dk.
-
AuthorPosts
-
15 May 2024 at 19:42 #55661
 MadskpGOLD Member
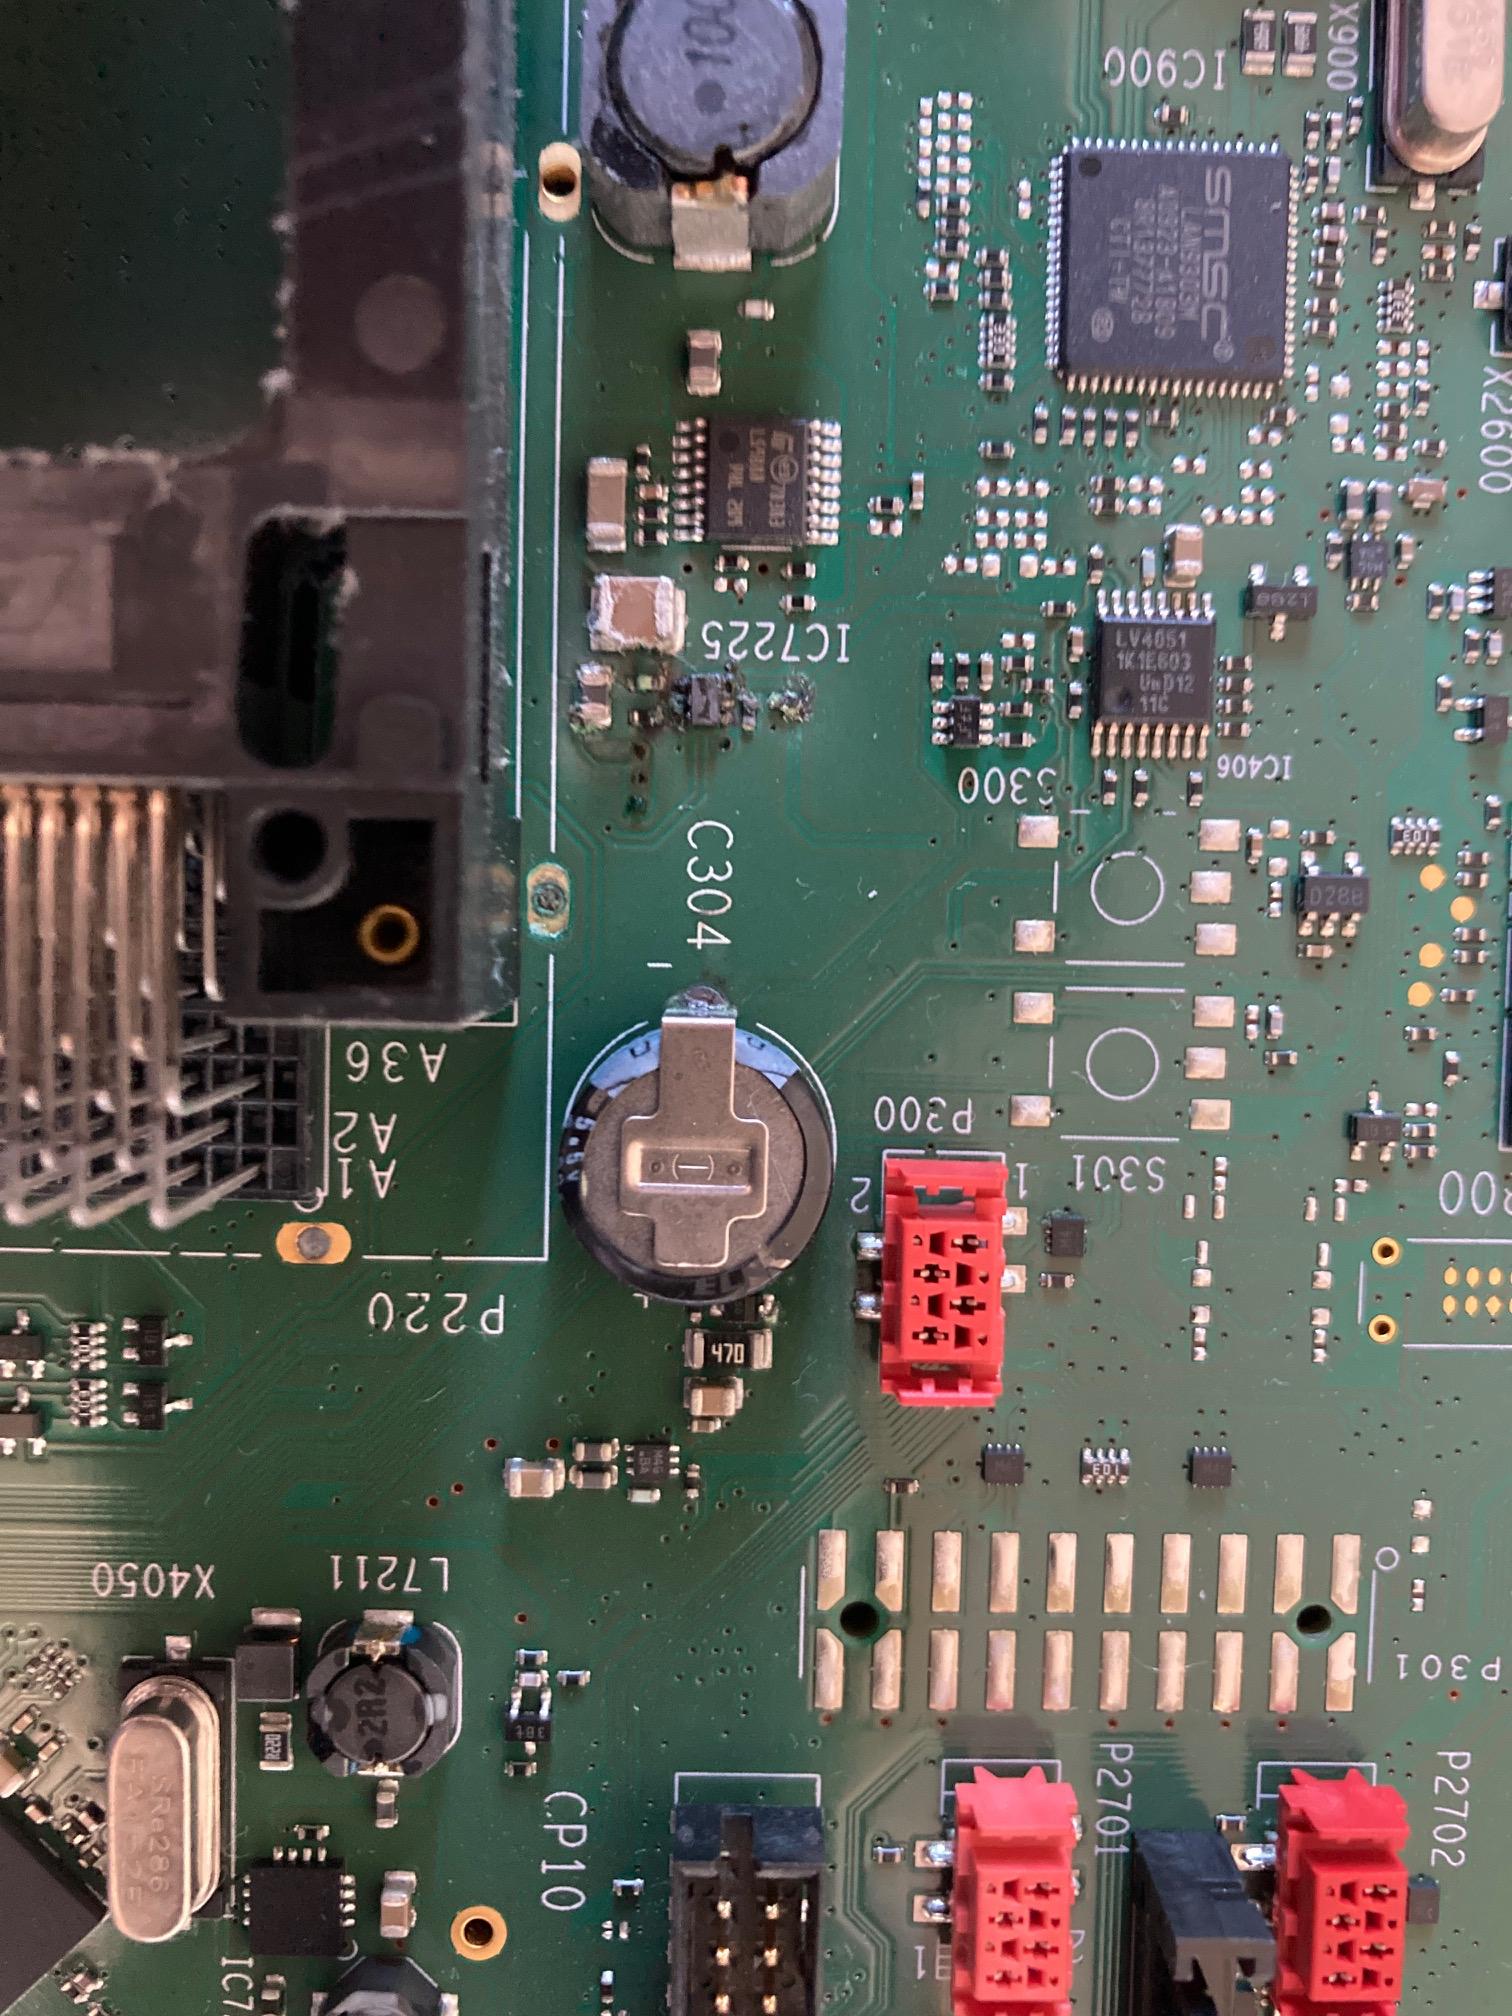
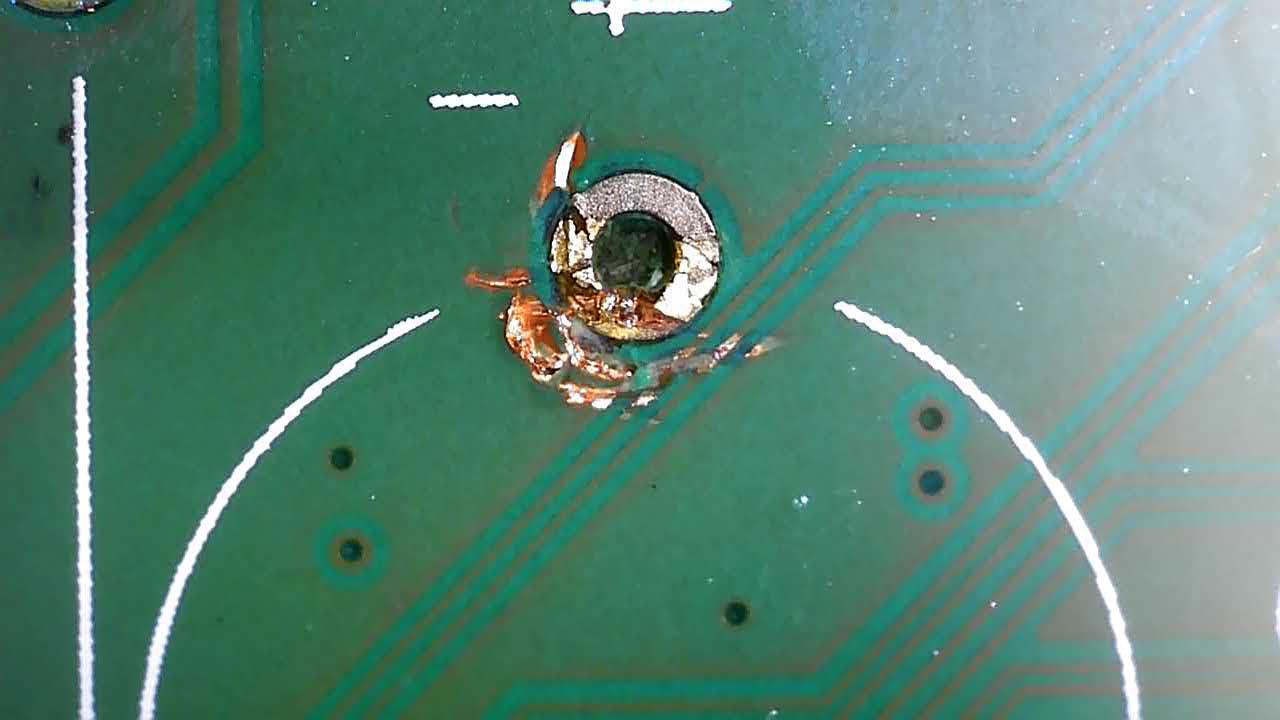
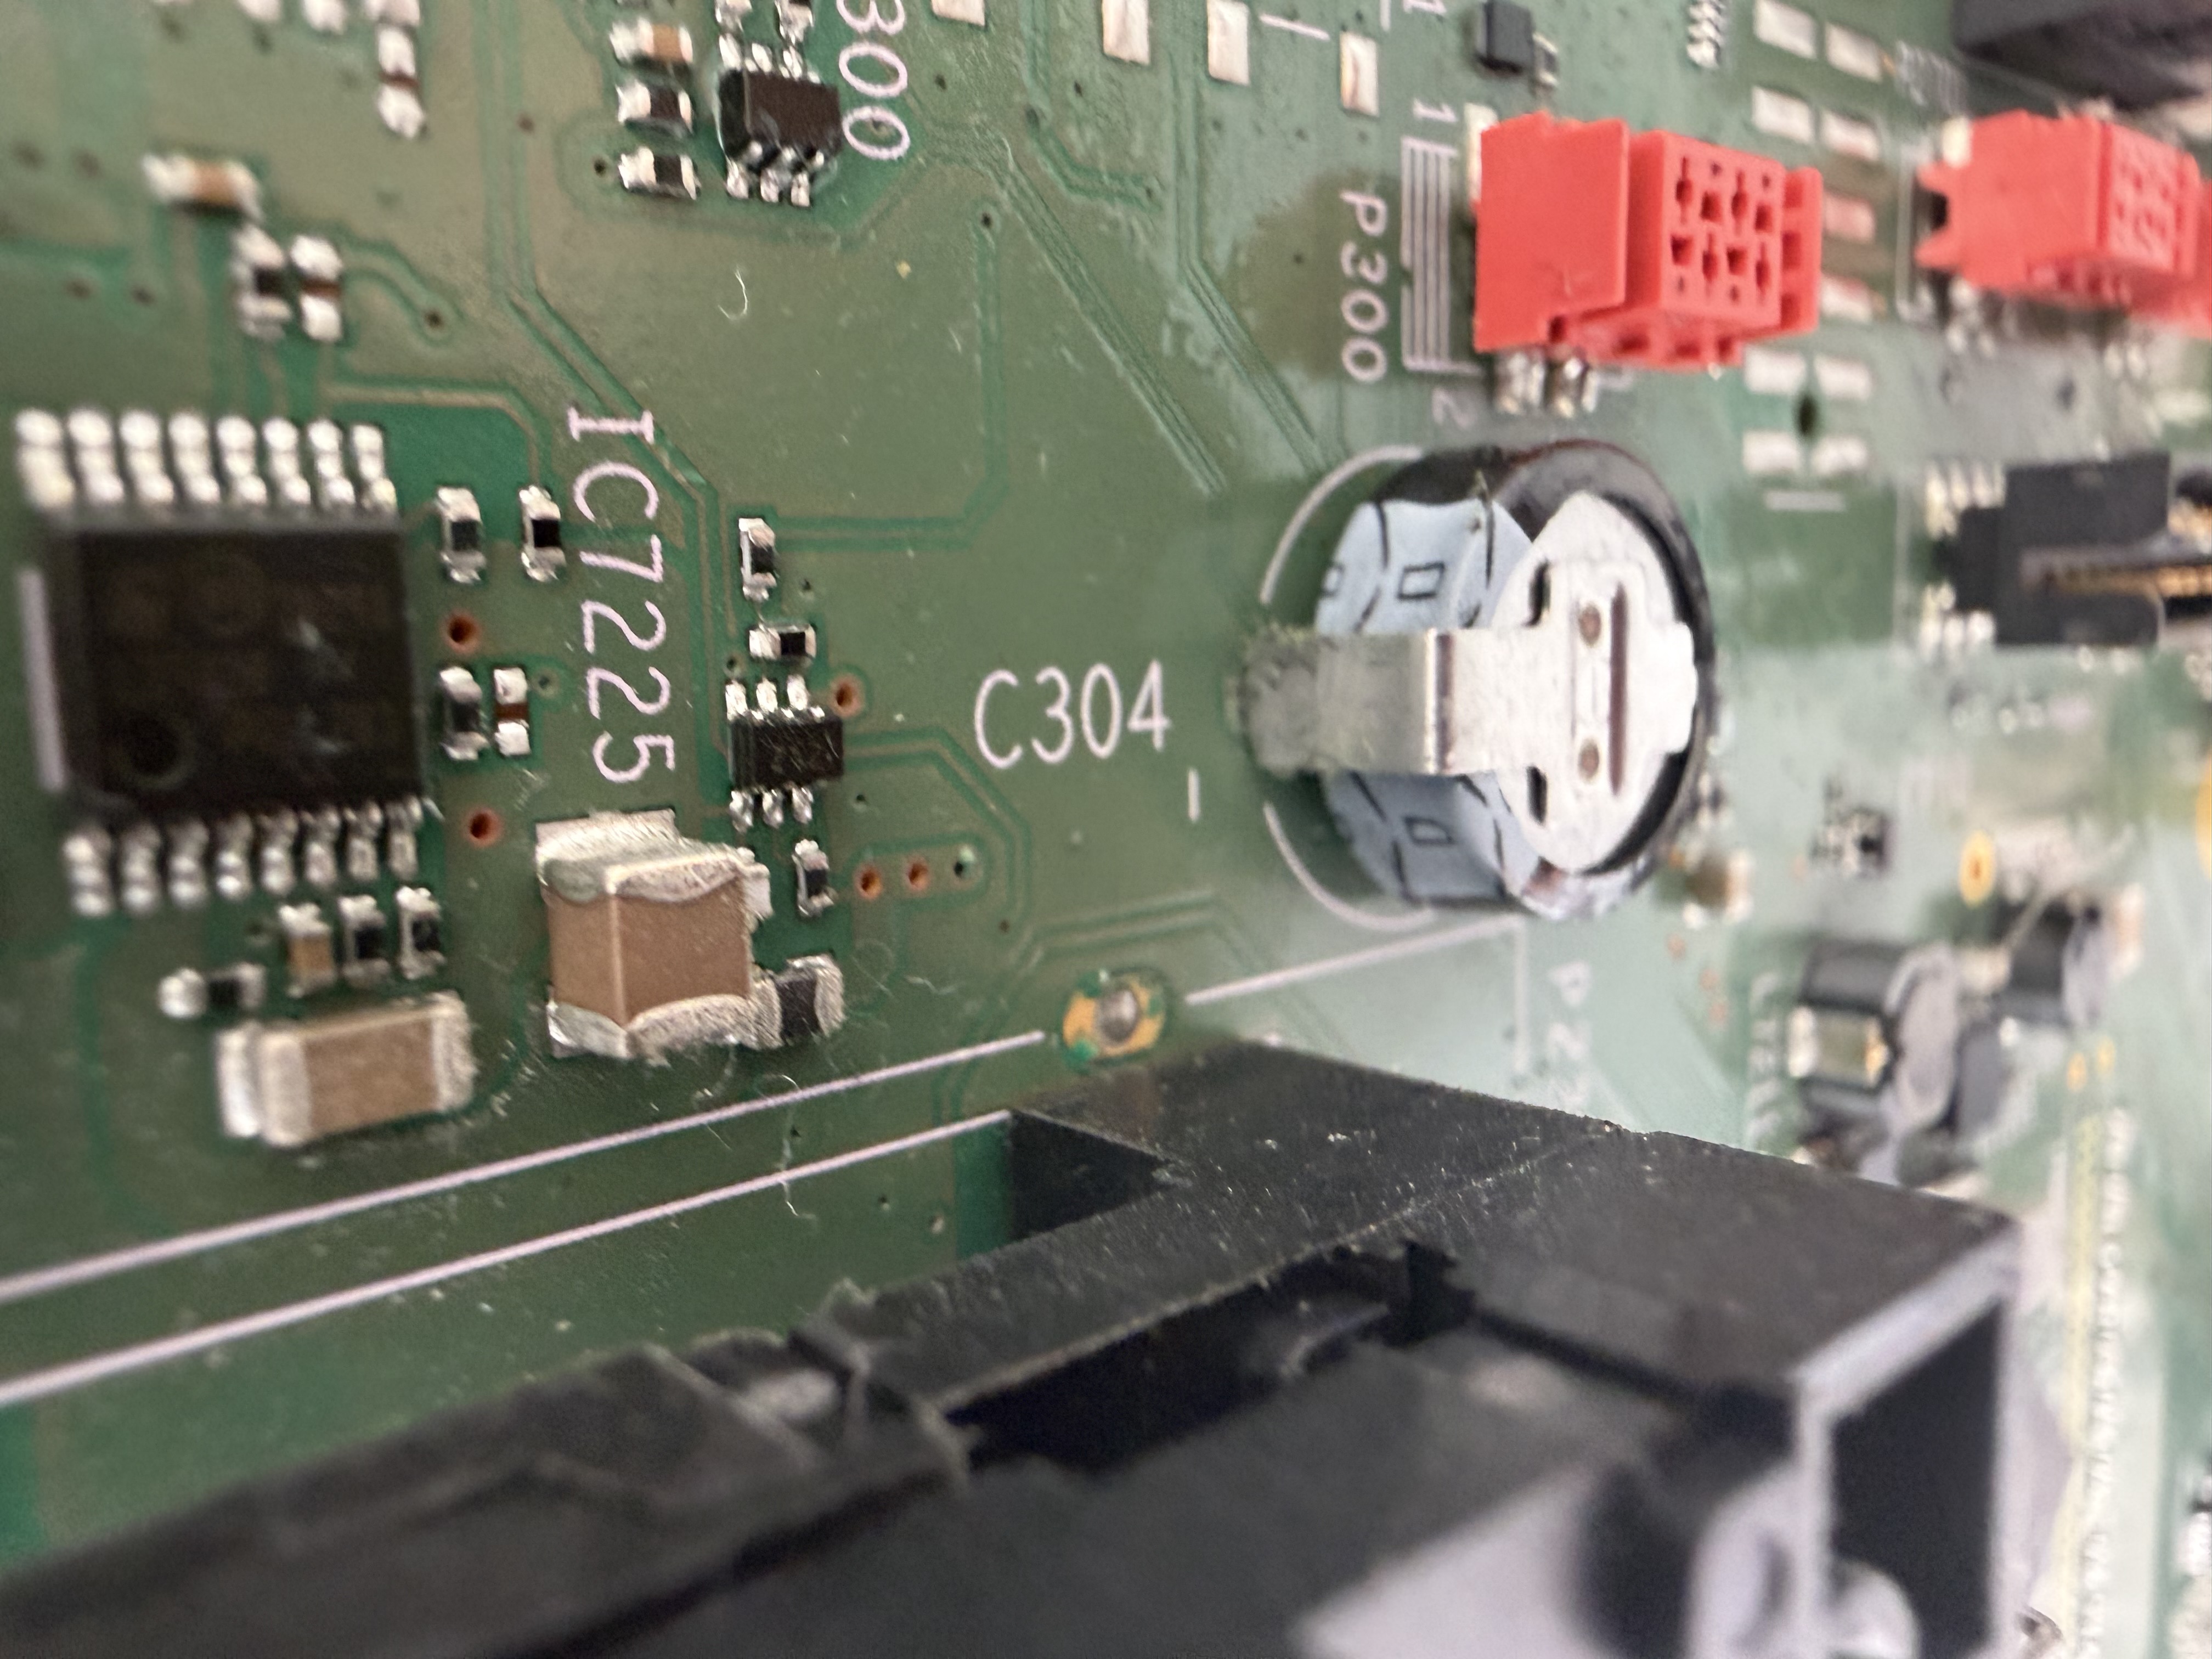
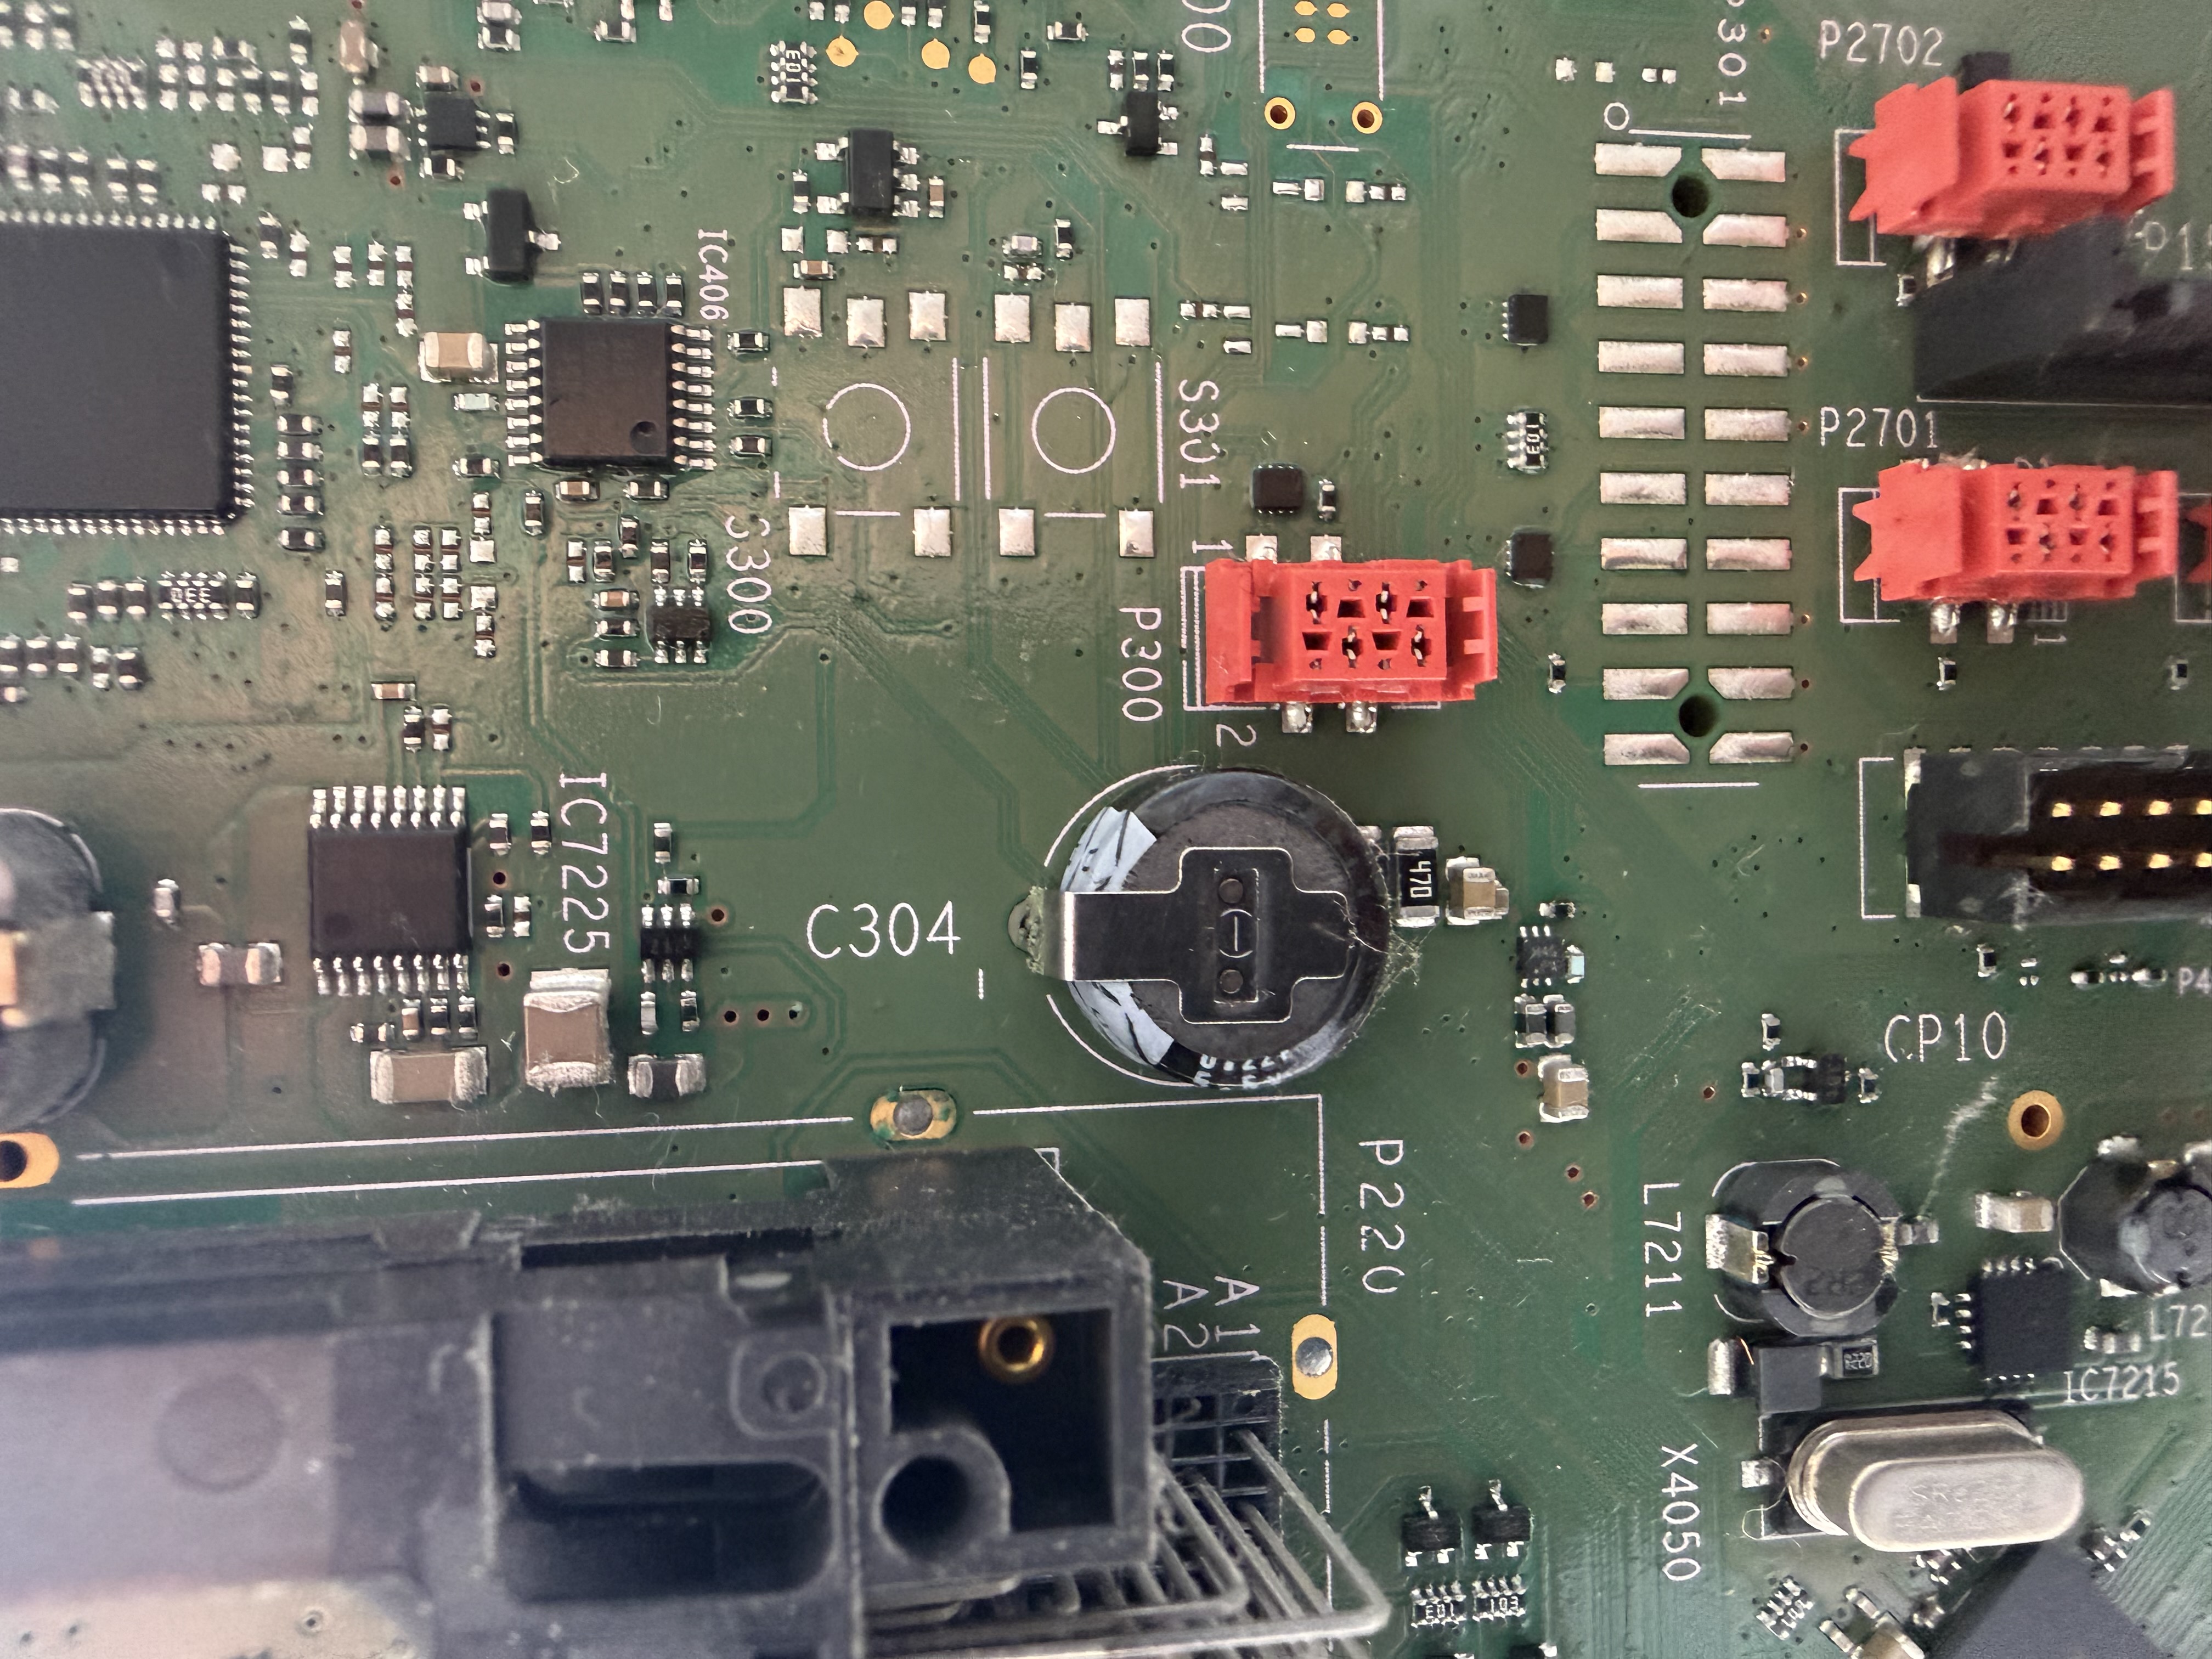
I decided to take it apart to inspect the super capacitor and just as expected behind the plastic foil it was crusty, and had leaked to components below it (over it at the picture) causing corrosion


Location: Denmark
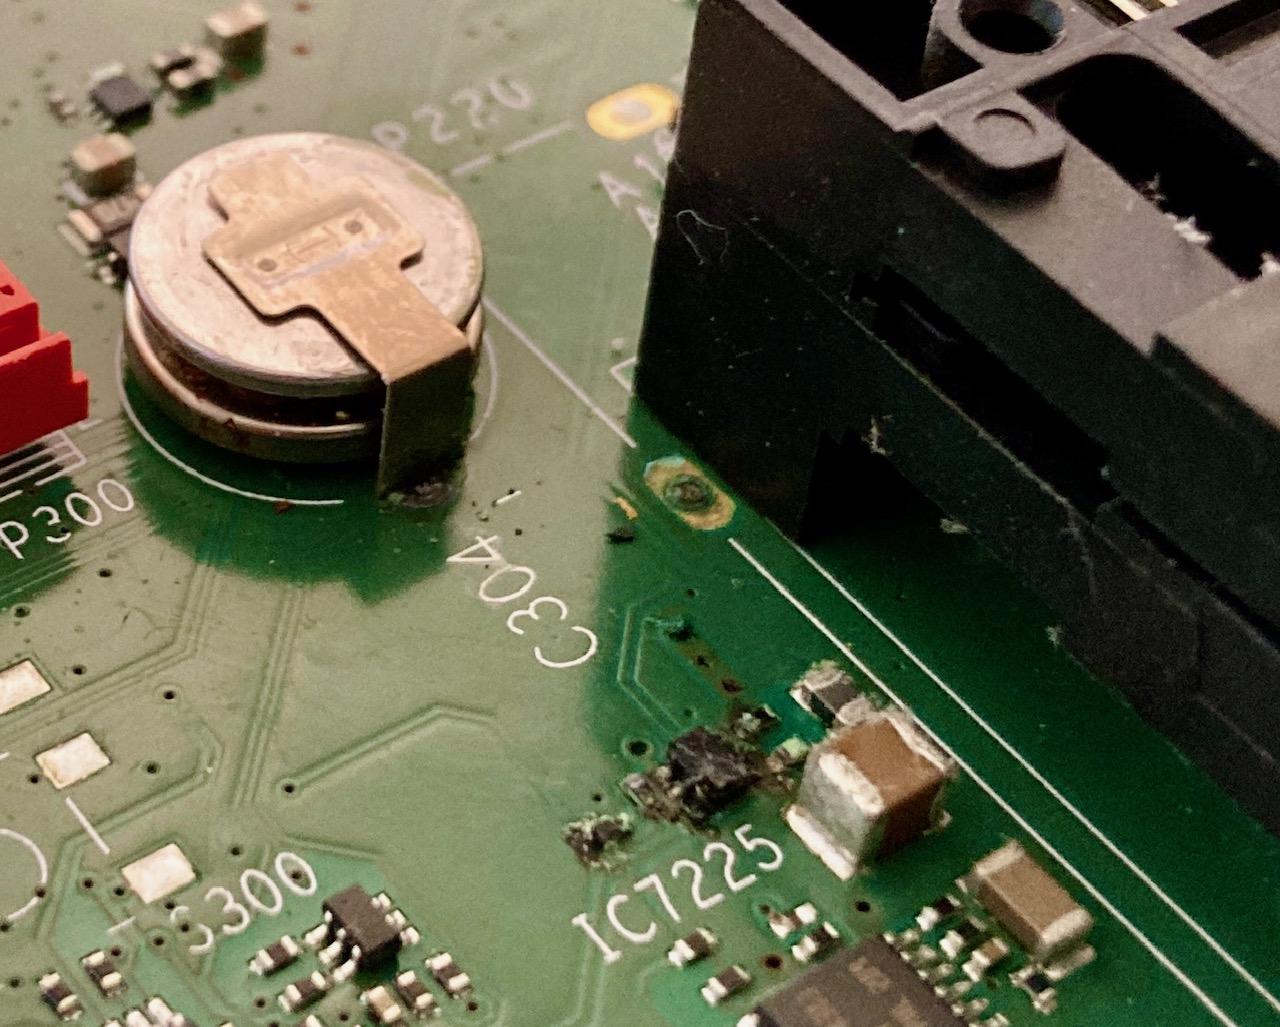
15 May 2024 at 19:46 #55663MadskpGOLD MemberI removed the super capacitor to inspect below it. I thought it might be best to cut it off and just desolder the legs, but unfortnuatly I might have caused damage to some traces beneath the super capacitor while cutting
However the leakage did not seem to have affected this area.
Location: Denmark
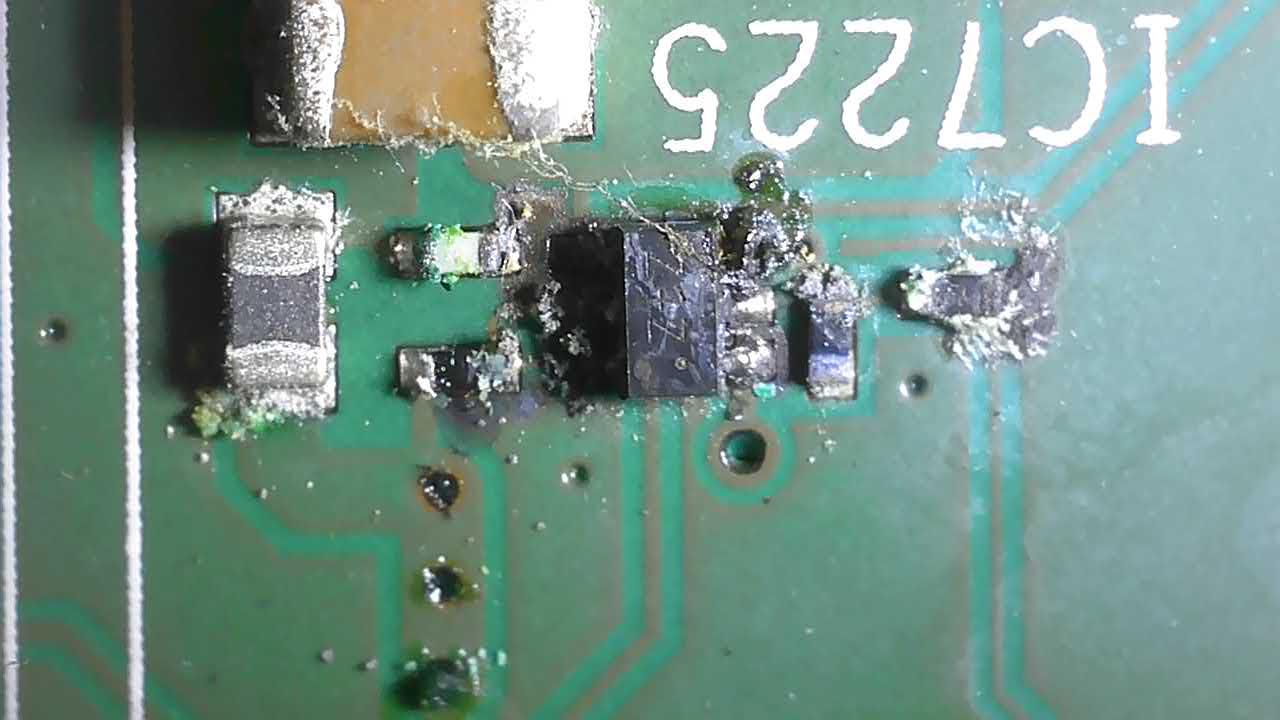
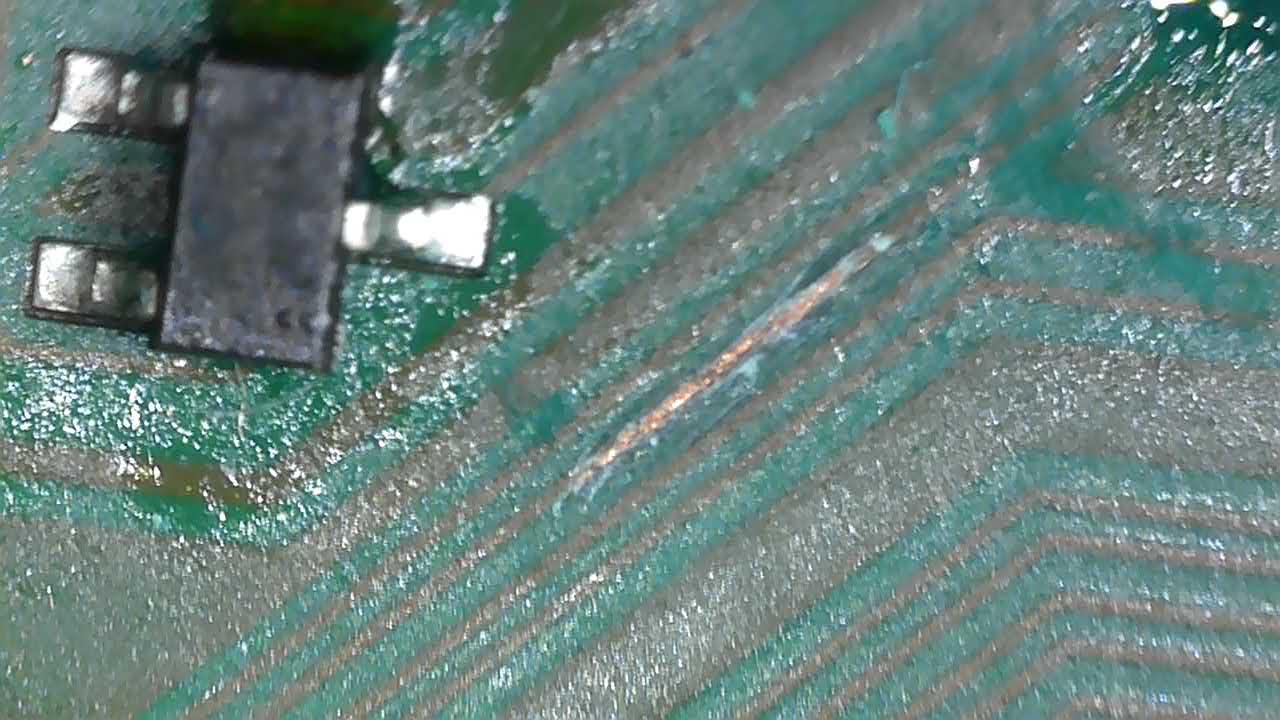
15 May 2024 at 19:49 #55665MadskpGOLD MemberNext step is to check the damaged traces for continuity and clean up the areas with corrosion and check them for damage. Might not have time for that before sometime next week though.
I will also order a new super capacitor, although I wonder if I should go with a 3300uf electrolytic capacitor instead.
Location: Denmark
29 May 2024 at 19:10 #56068MadskpGOLD MemberOK this took more time and patience than expected.
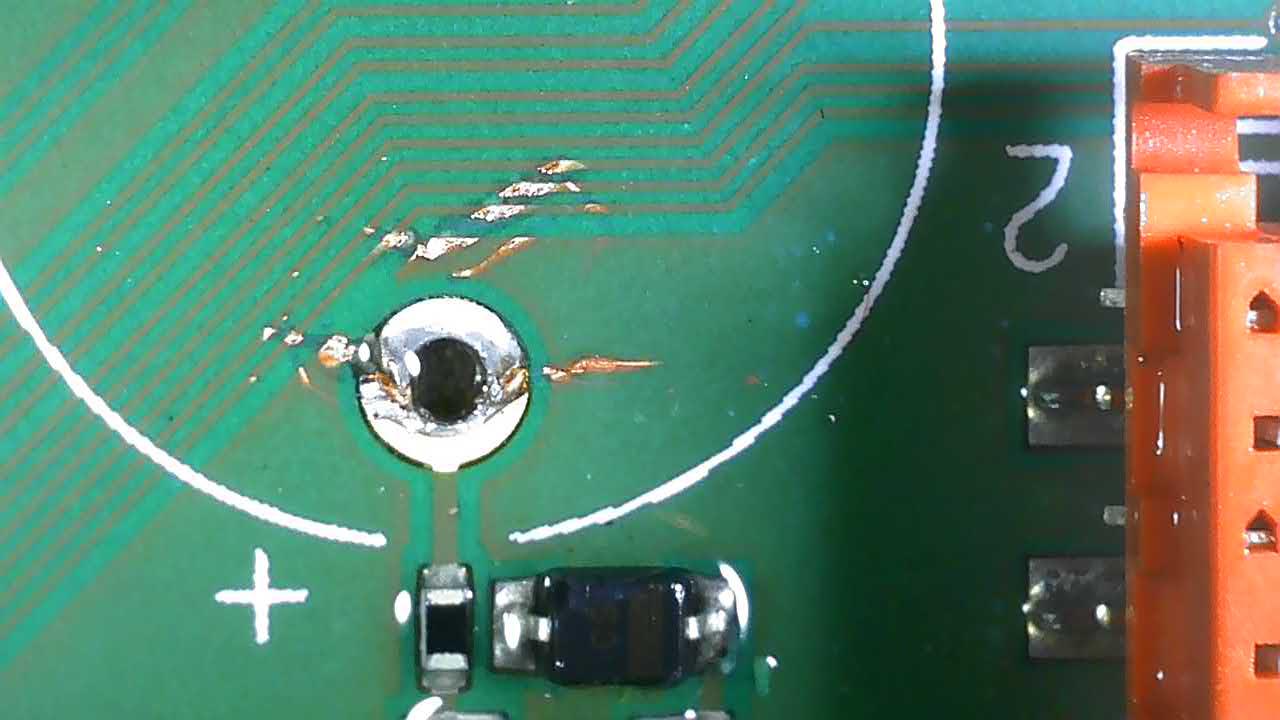
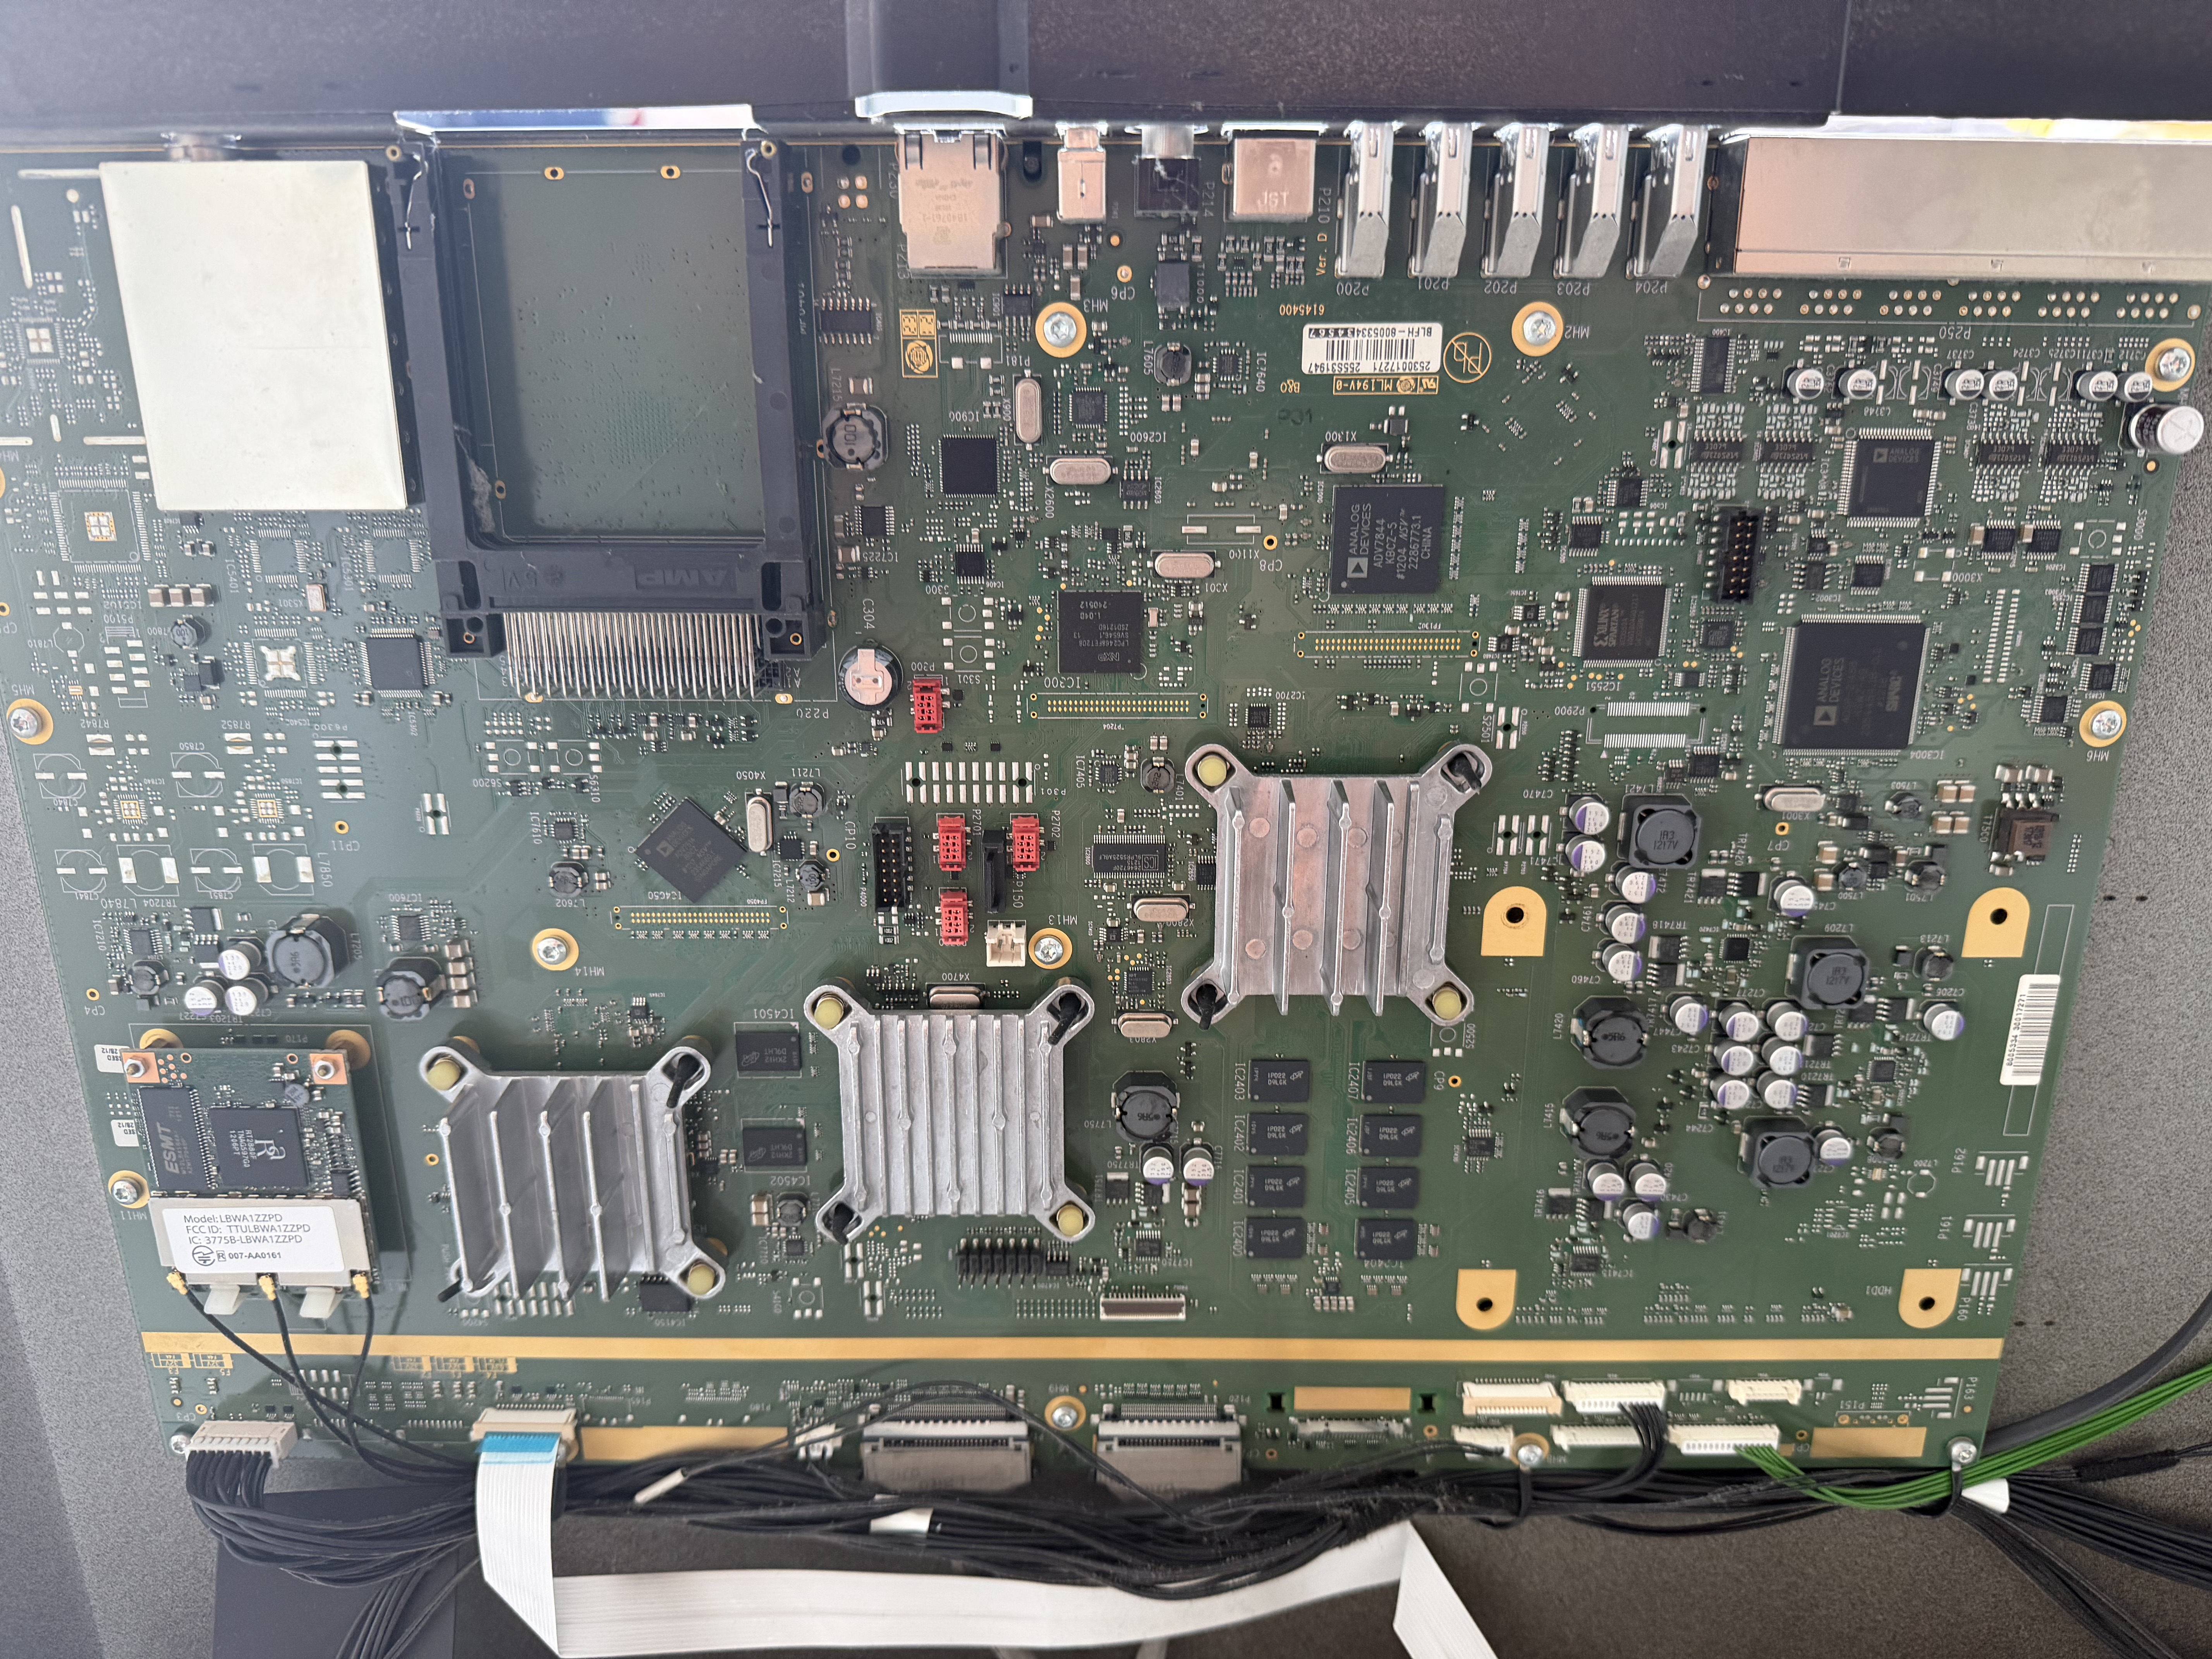
Only 2 of the traces i damaged by removing the battery seemed to have lost connection. My first approch was to just solder a short strain of wire between the two ends of the traces. However that proved to be more difficult than expected as the board seemed to suck the heat from the soldering iron in that area (I suspect a large ground plane in one of the inner layers of the PCB).
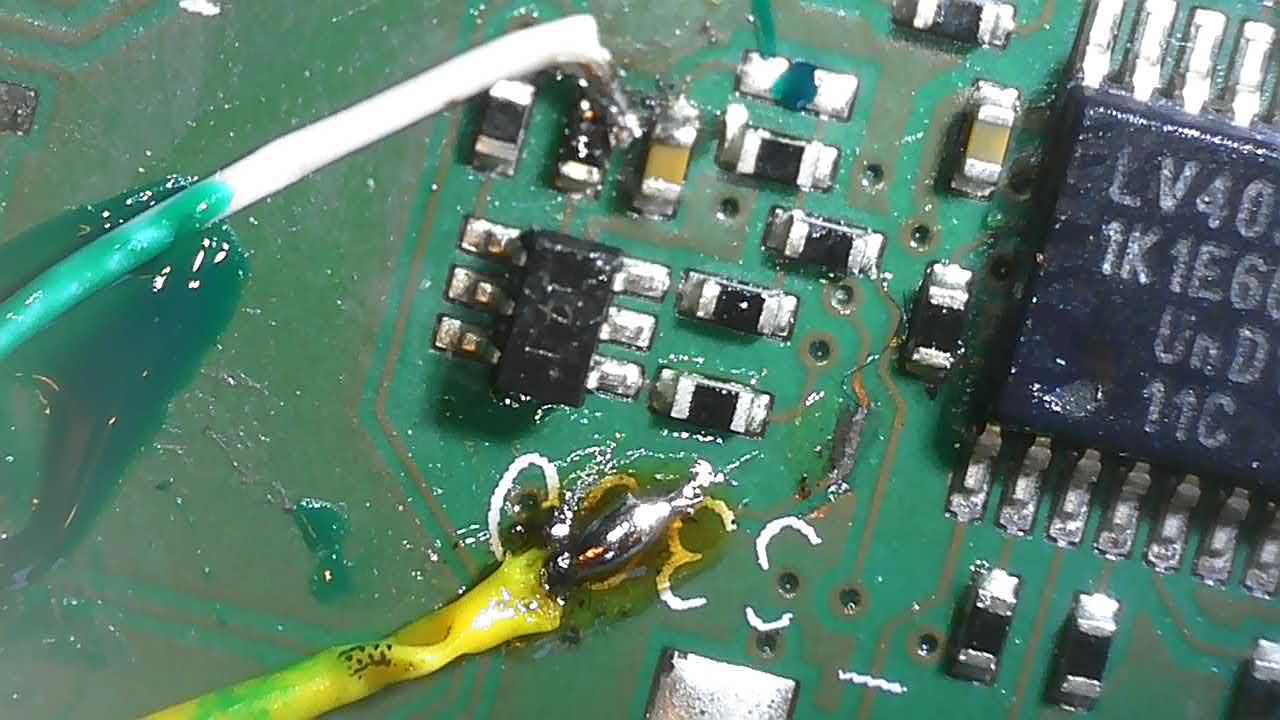
Instead I ended up making connection between two places of traces more far away from each other. Still a pain in the **** to do working under microscope with shaking hands, but better results although it does not look pretty.
To connect to the traces I scraped them down with a scalpel, gave them flux and tinned them the best I could. One of the traces ended in a component in one end, so that was far easier to solder to. The other ends was at via’s which I could not loacte on the other side of the PCB.
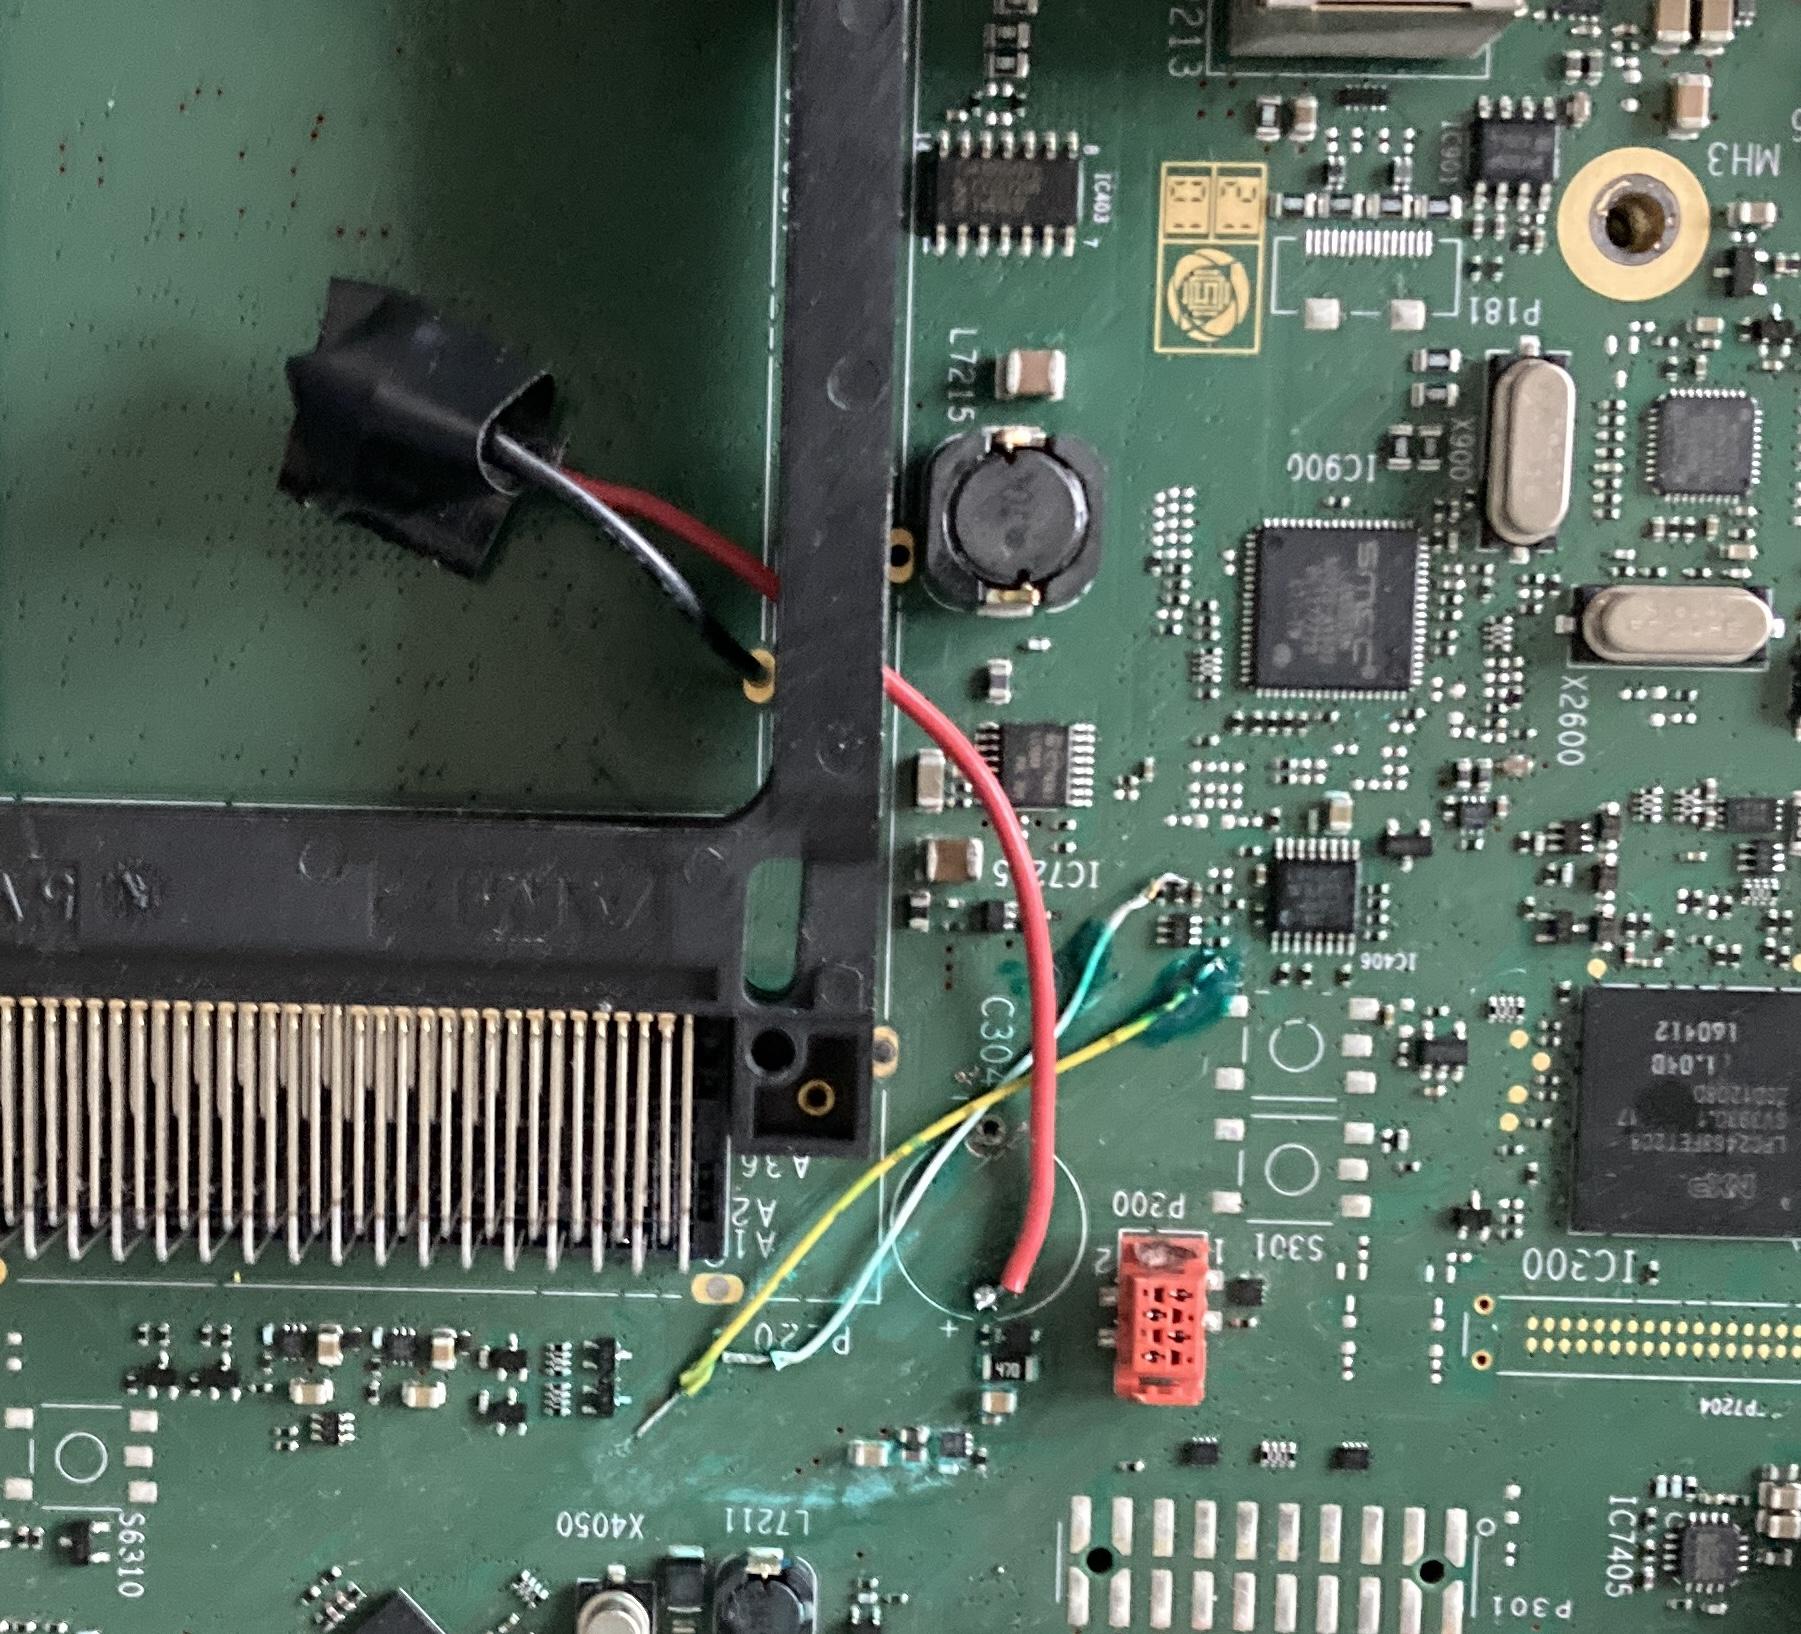
One of the legs from the old super cap I could not remove, I suspect the issue with getting heat enough was the issue again, so I ended up soldering wires to the PCB and place the new super cap in the common interface slot as I don’t have a need for that. This way the next time it leaks the leakage will hopefull ned in the bottom of the cable compartment where it should no make the same damage.

Location: Denmark
29 May 2024 at 19:29 #56069MadskpGOLD MemberAs for the damage done by the battery leakage I just gave it a good scrub in first a little white vinegar, and the 99% Isopropanyl alcohol to clean it up (sorry no after pictures)
When I connected the TV again it would still not respond to the remote. Tried starting it up by the App again, which was still working fine. Then just for the sake of it I tried holding down standby on the remote, and the it would turn off.
Still no turning, on, so I tried to set it to V.OPT 1, and bam it worked wit the remote. So might be something to check up on if doing this repair.
I still need to to some of the reassembly, and also maybe try to attach my repair wires more securely to the PCB.
Was it worth the hassle? Well if I had not broke the traces when I cut the super cap it would have been a walk in the park. However as mentioned Jacek1313 the leakage can also affect traces which again will make the repair more difficult. Under all circumstances I will recommend and inspection of the area around the super cap, and if something looks corroded do the cleaning. The affected area might vary depending on which stand is used for the TV.
I will probably do a preventive inspection on my main V1 to see if anything is on the way, and will report back when I have done that.
Location: Denmark
24 March 2026 at 20:13 #110333benjarysBRONZE MemberHi everyone,
I know this is an old thread but I have a similar problem. Based on this post above, what are your suggestions?
Is cleaning some critical spots enough to revive this TV? I certainly hope so 🙂
My Beoplay V1 (40) turns on with the app over ethernet, but no image (I see a backlighted black screen)
Remote doesn’t work.
Please, I’d love to fix it 🙂
25 March 2026 at 05:50 #111911MadskpGOLD MemberHi everyone,
I know this is an old thread but I have a similar problem. Based on this post above, what are your suggestions?
Is cleaning some critical spots enough to revive this TV? I certainly hope so 🙂
My Beoplay V1 (40) turns on with the app over ethernet, but no image (I see a backlighted black screen)
Remote doesn’t work.
Please, I’d love to fix it 🙂
Hello. Having only fixed one of these I can not for sure say if cleaning is enough.
ButI believe that it is an essential part of the fix. Be aware that the leakage is from the supercapacitor, and as such it’s functionality might be limitied, and therefor a replacement of it might be needed at some point.
But I would suggest starting with the cleaning and see if it makes a difference. The spot that needs cleaning may vary depending on how the TV has been placed.
let us know how you proceed
Location: Denmark
7 July 2026 at 08:26 #124420slm@skals.dkBRONZE MemberI have the same problem. Green light flashing after connecting to power. No visible leaks from the supercapacitor and measures 3 V over it, so it seems to be working. Ai suggested it was the power supply bord 24 secondary area, so I had the row of capacitors changed, but no fix. Before I could turn it on, but now screen is black. Any suggestions are welcome. I am in my summerhouse in Spain so not as easy to fix here as back in Denmark.
7 July 2026 at 08:31 #124424slm@skals.dkBRONZE Member
-
AuthorPosts
- You must be logged in to reply to this topic.