Forum Replies Created
-
AuthorPosts
-
 xschopBRONZE Member
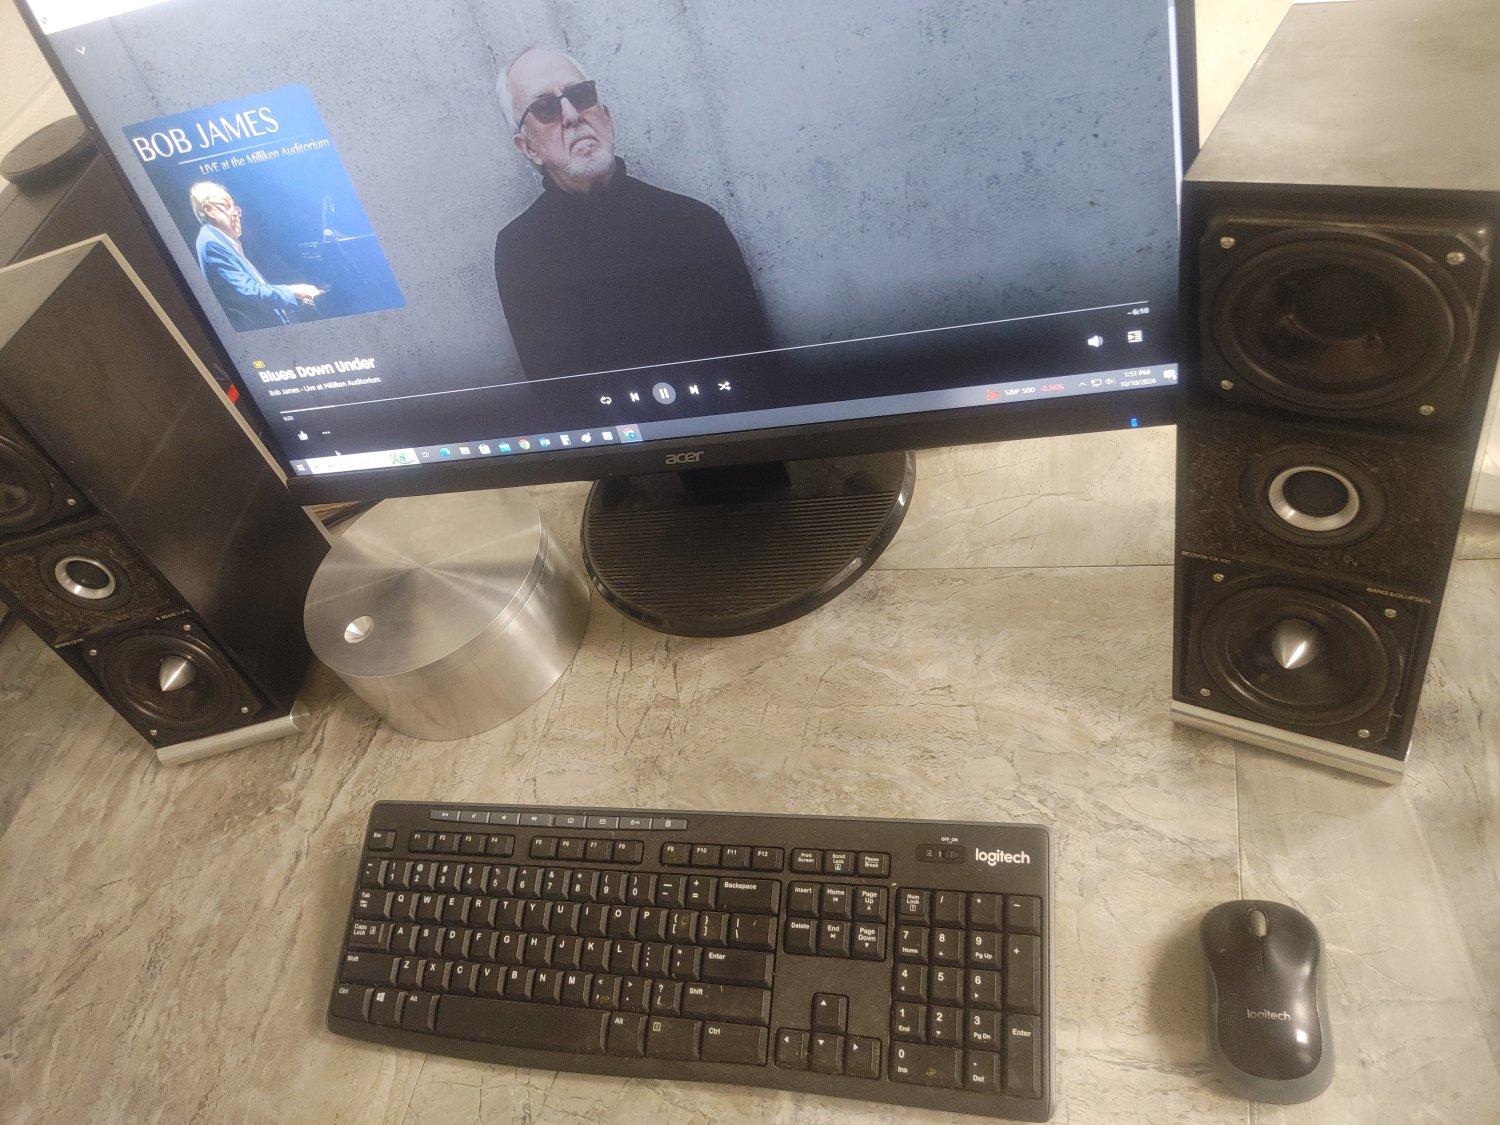
A nice set of B&O CX-100’s with a small sub is heavenly…
 xschopBRONZE Member
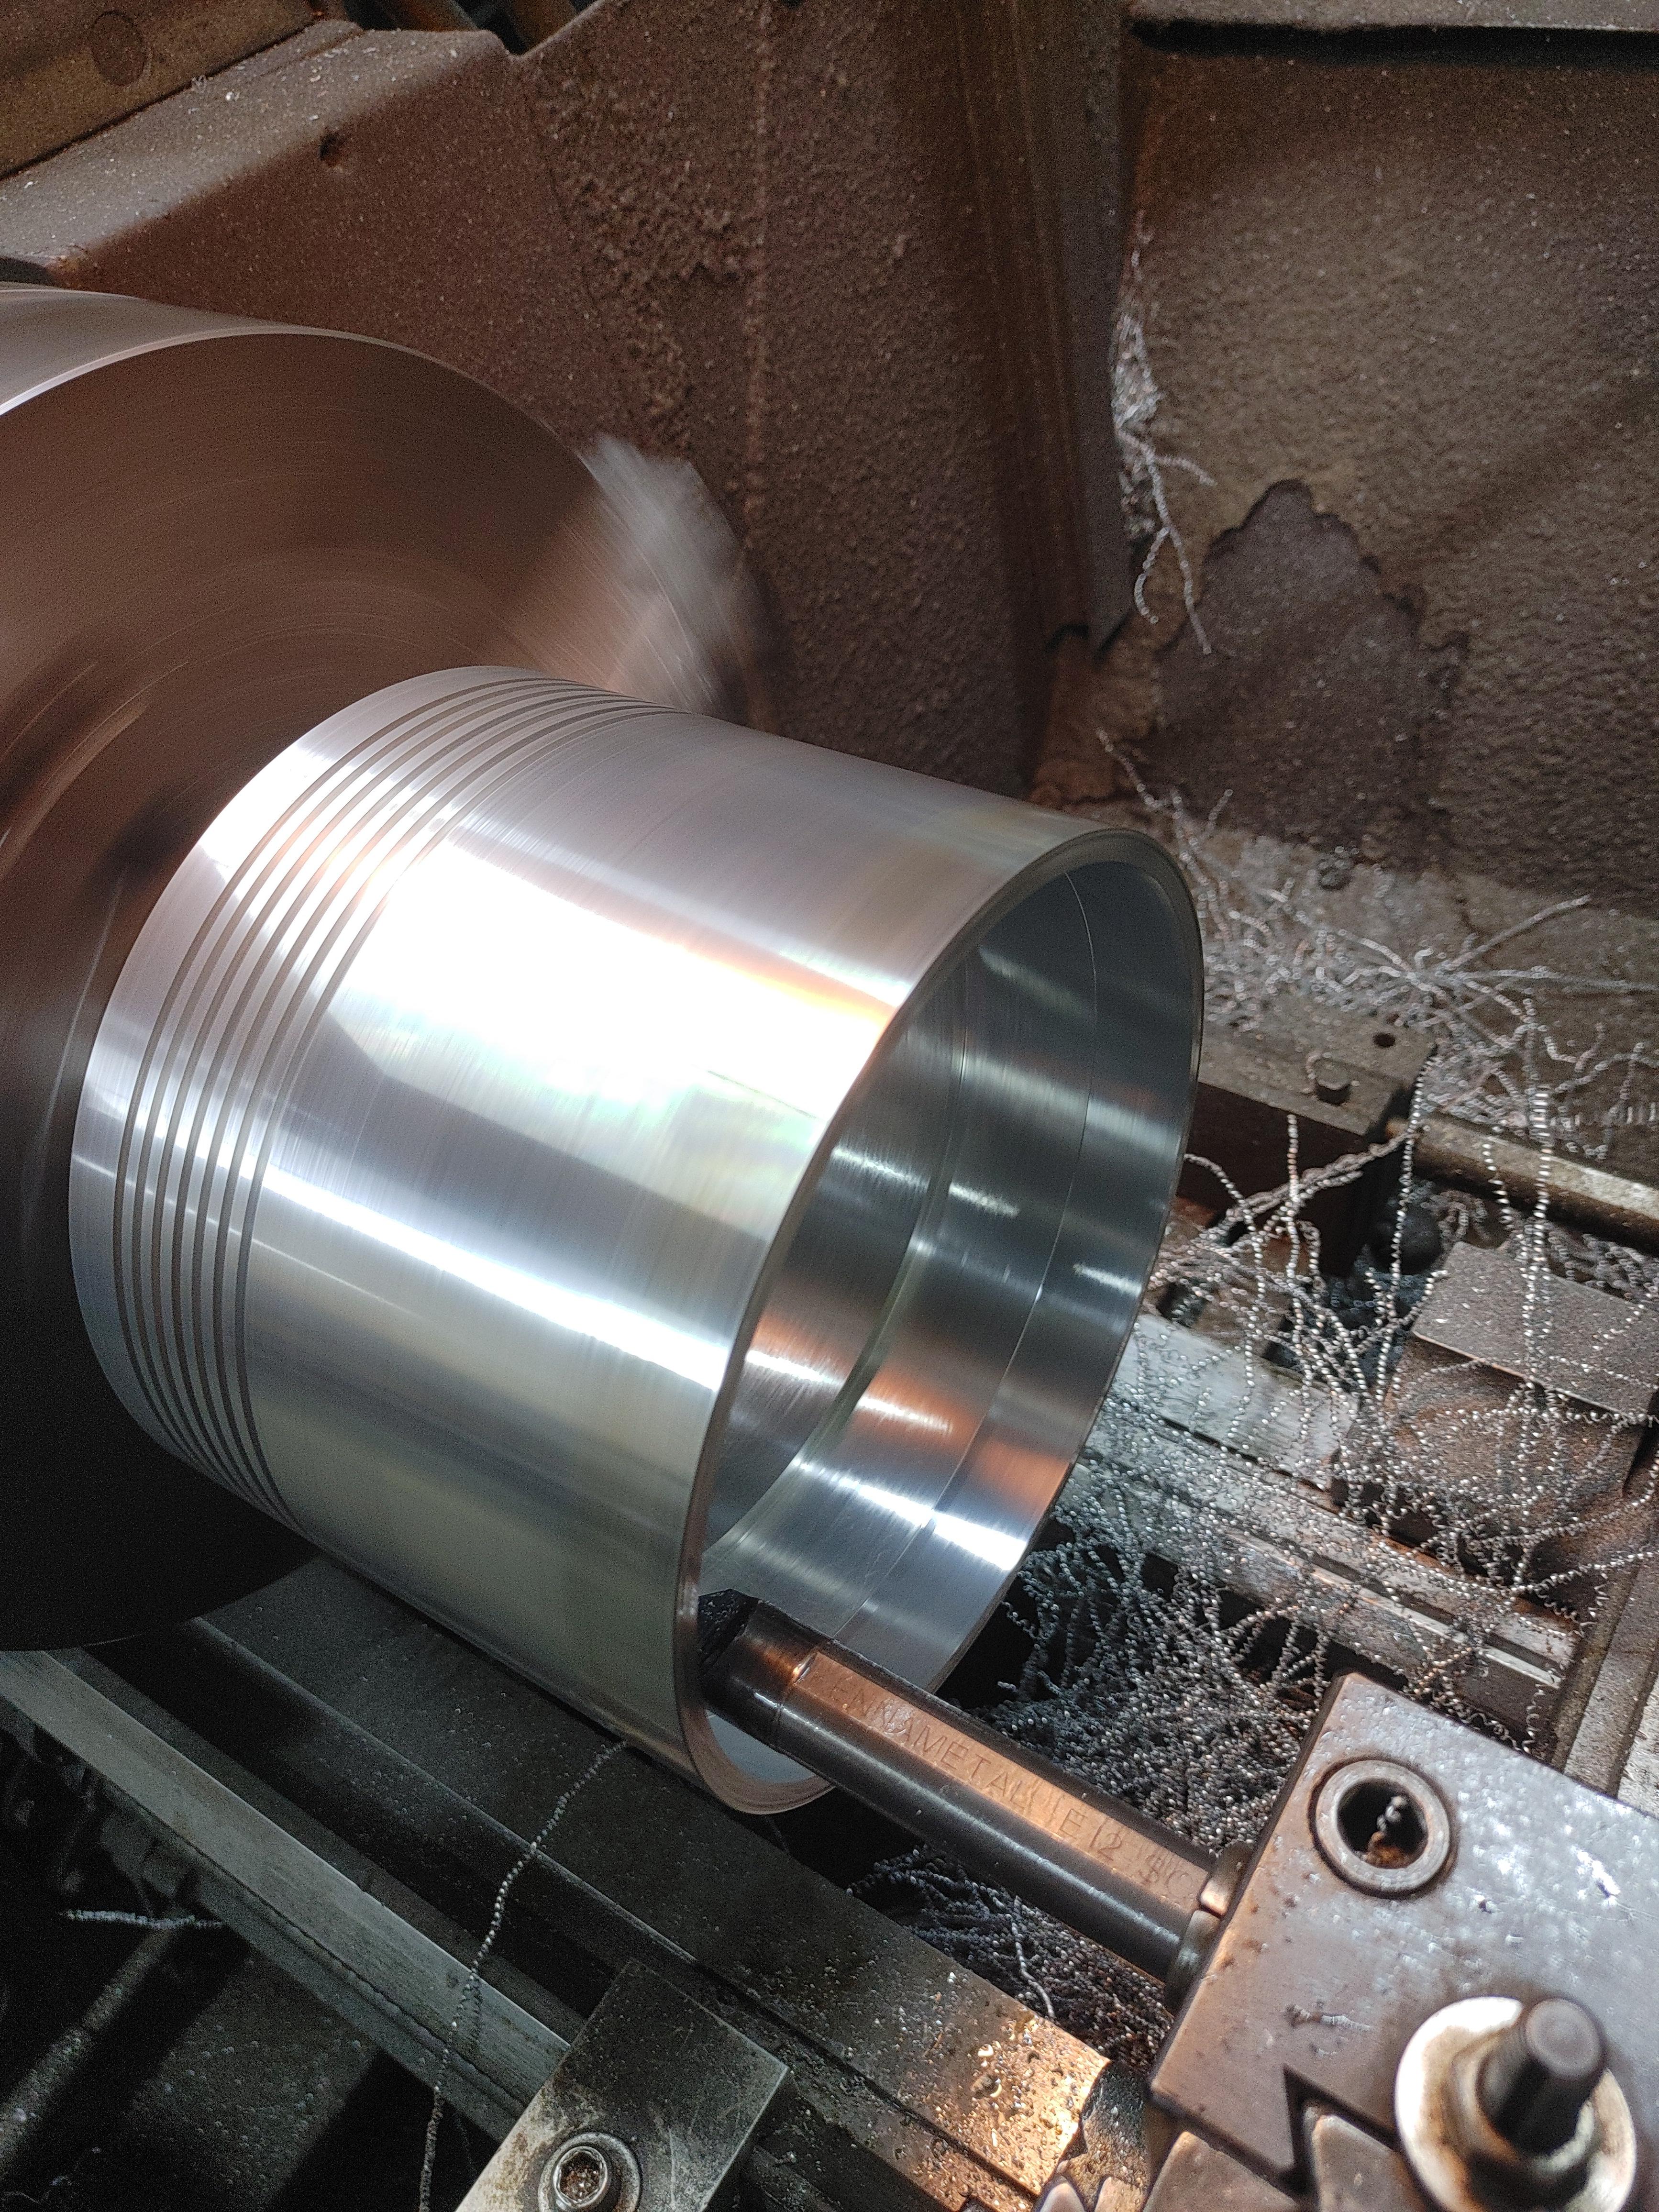
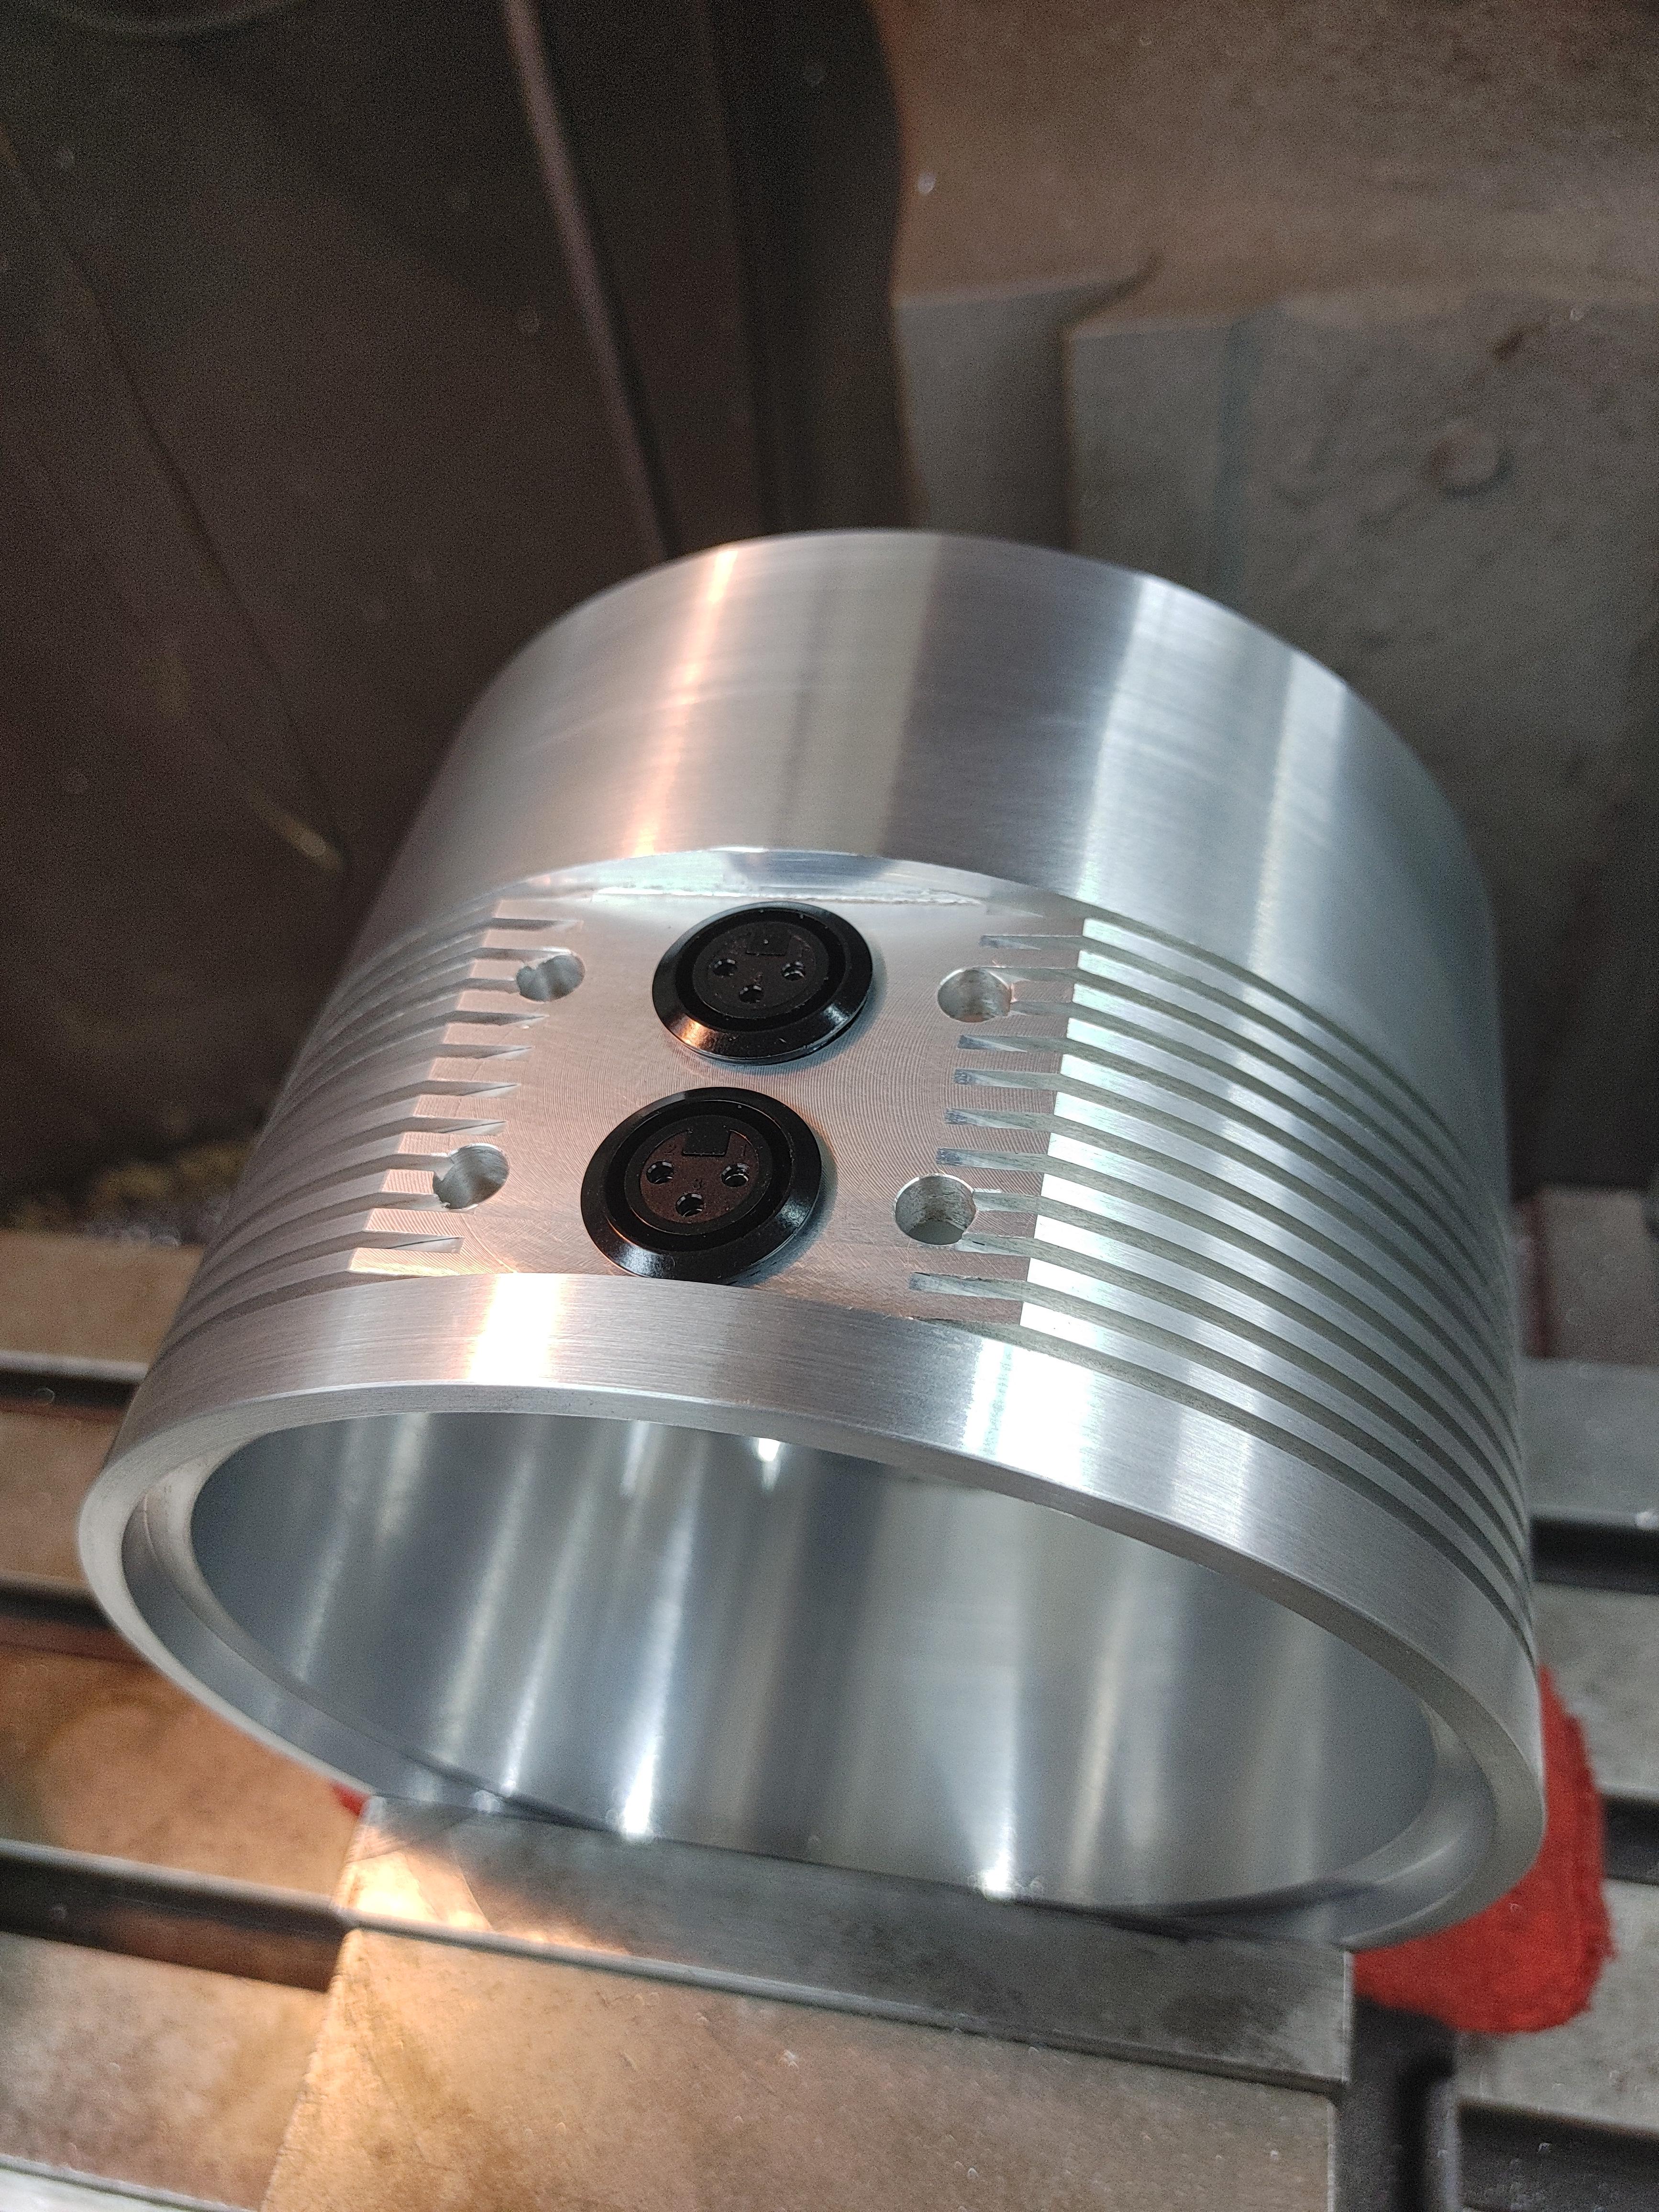
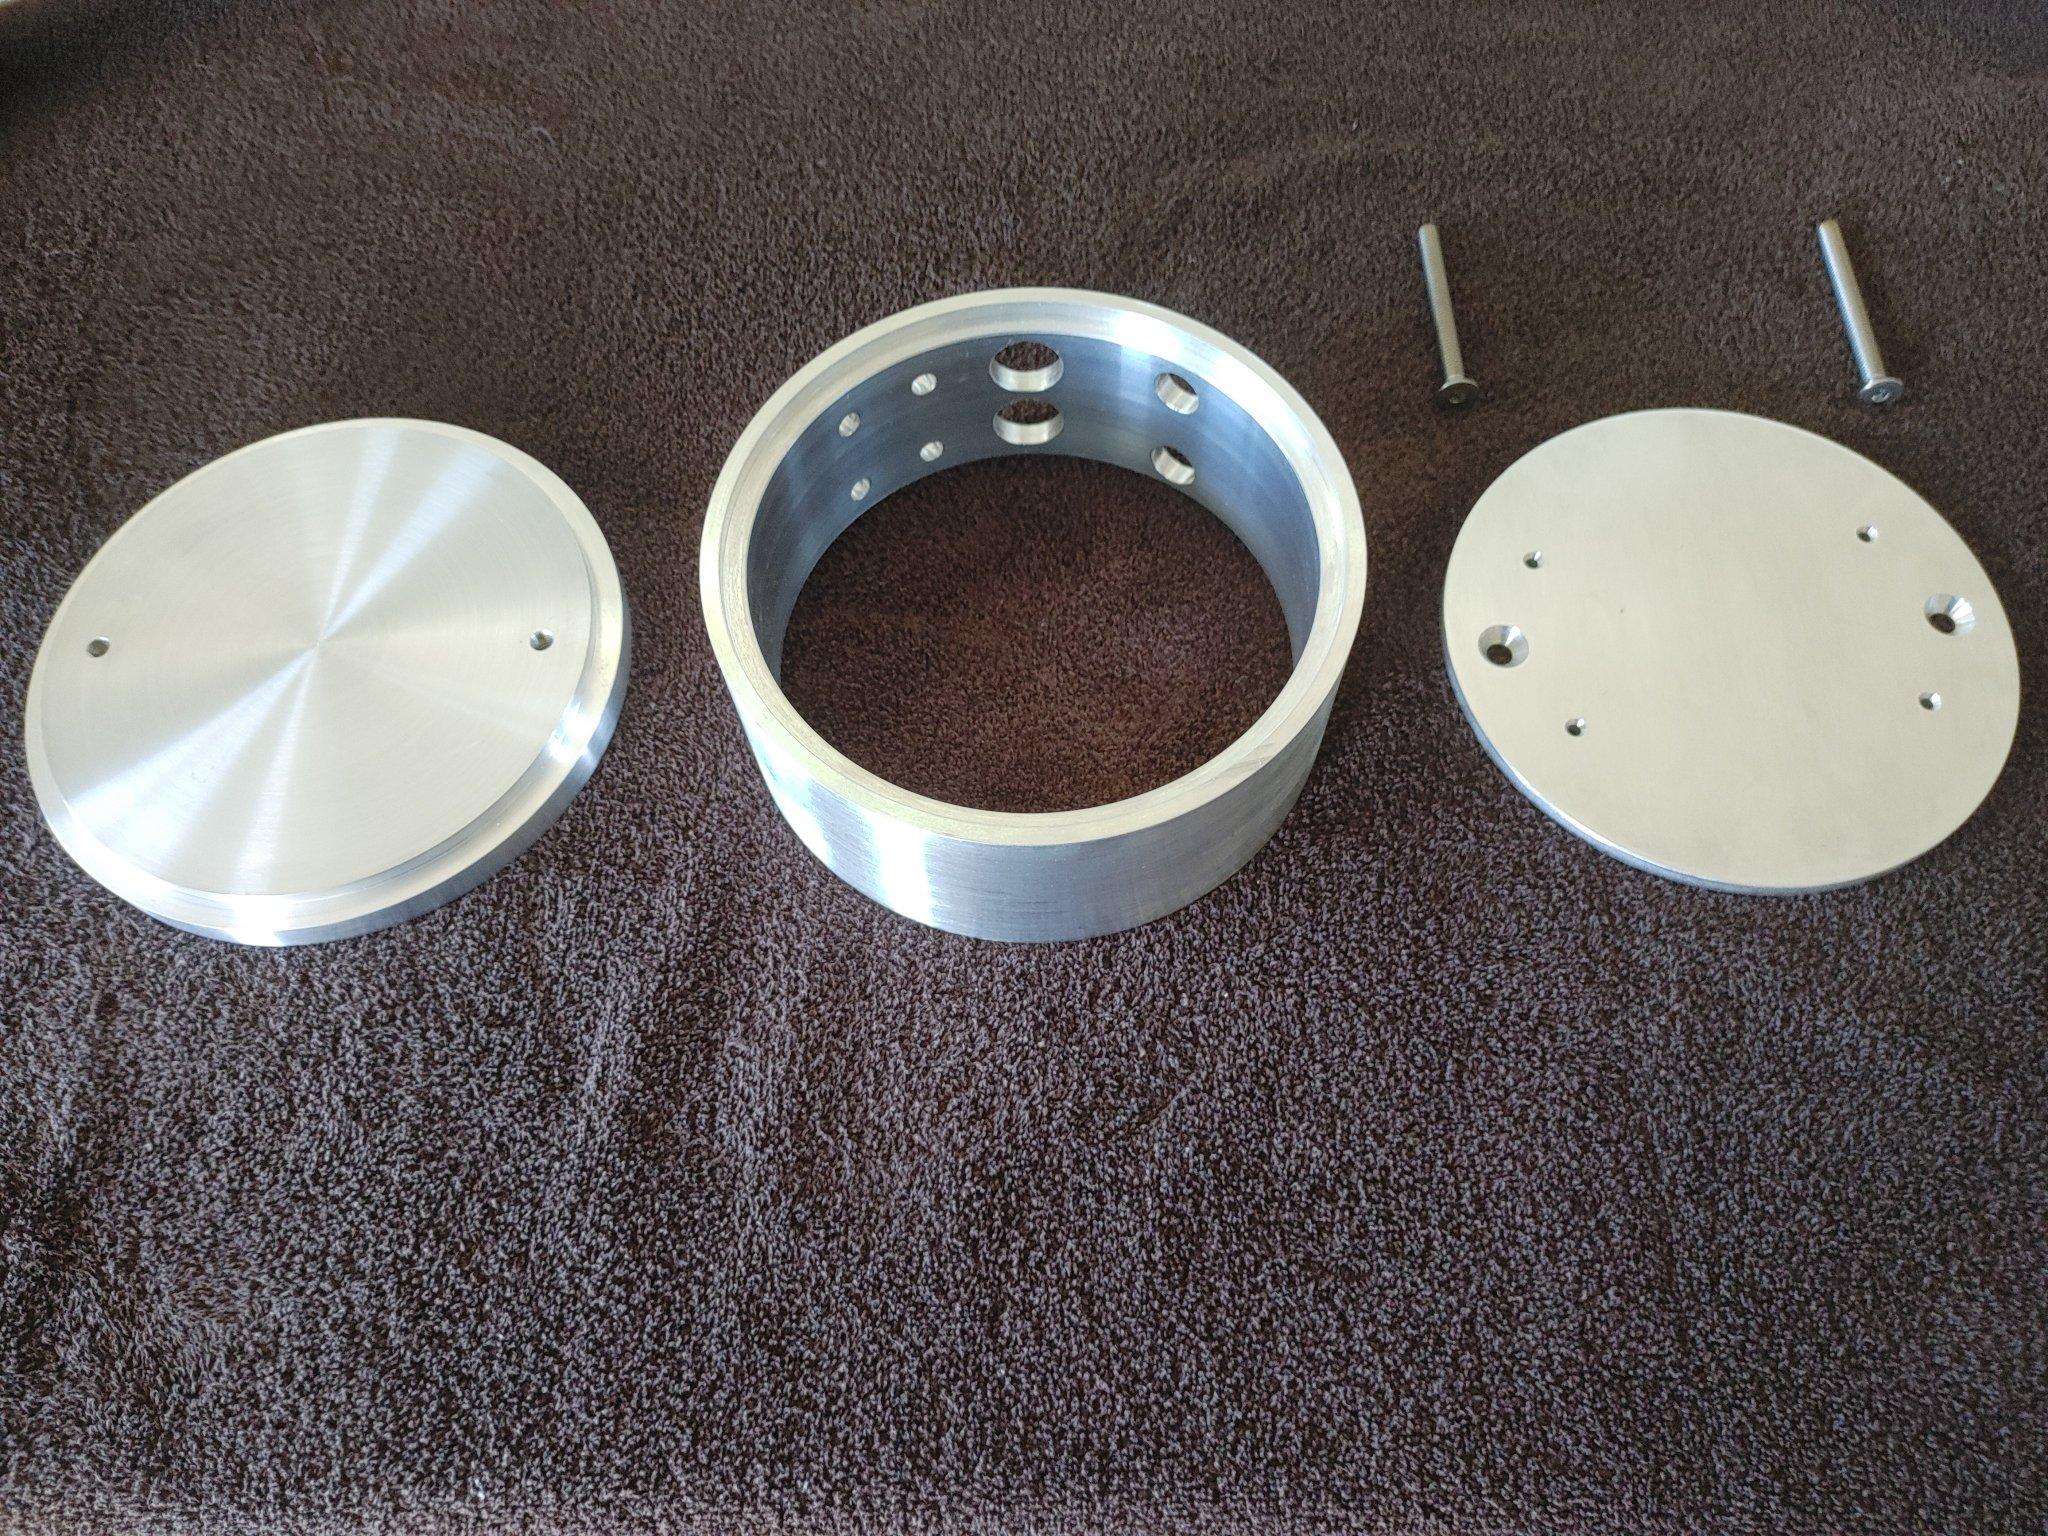
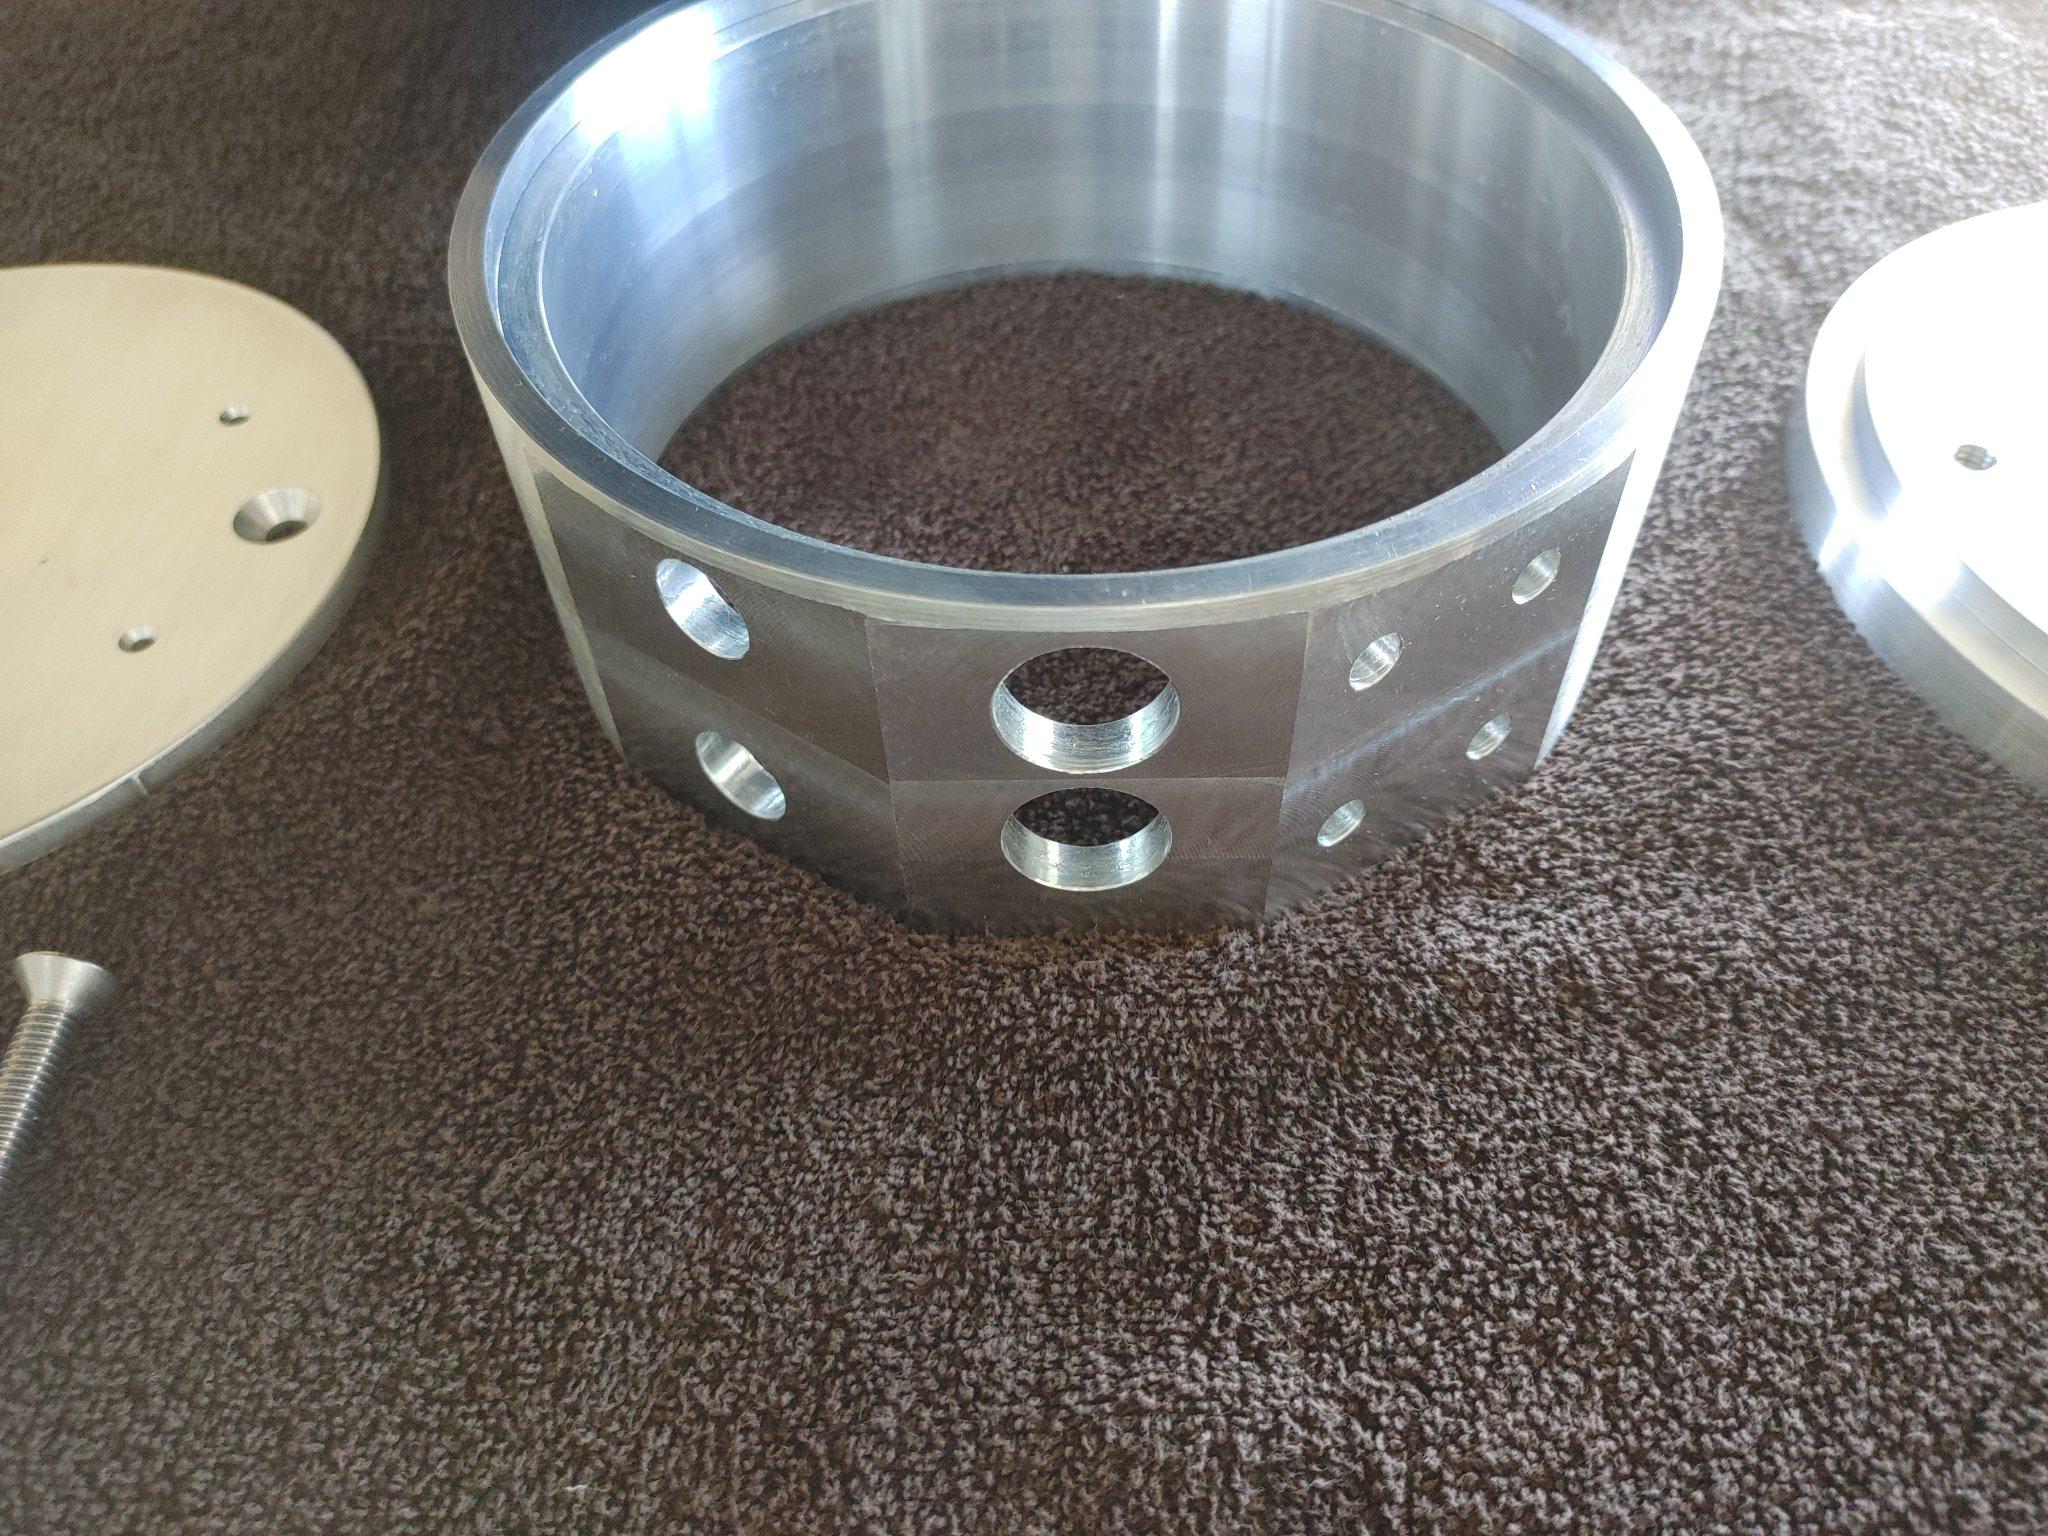
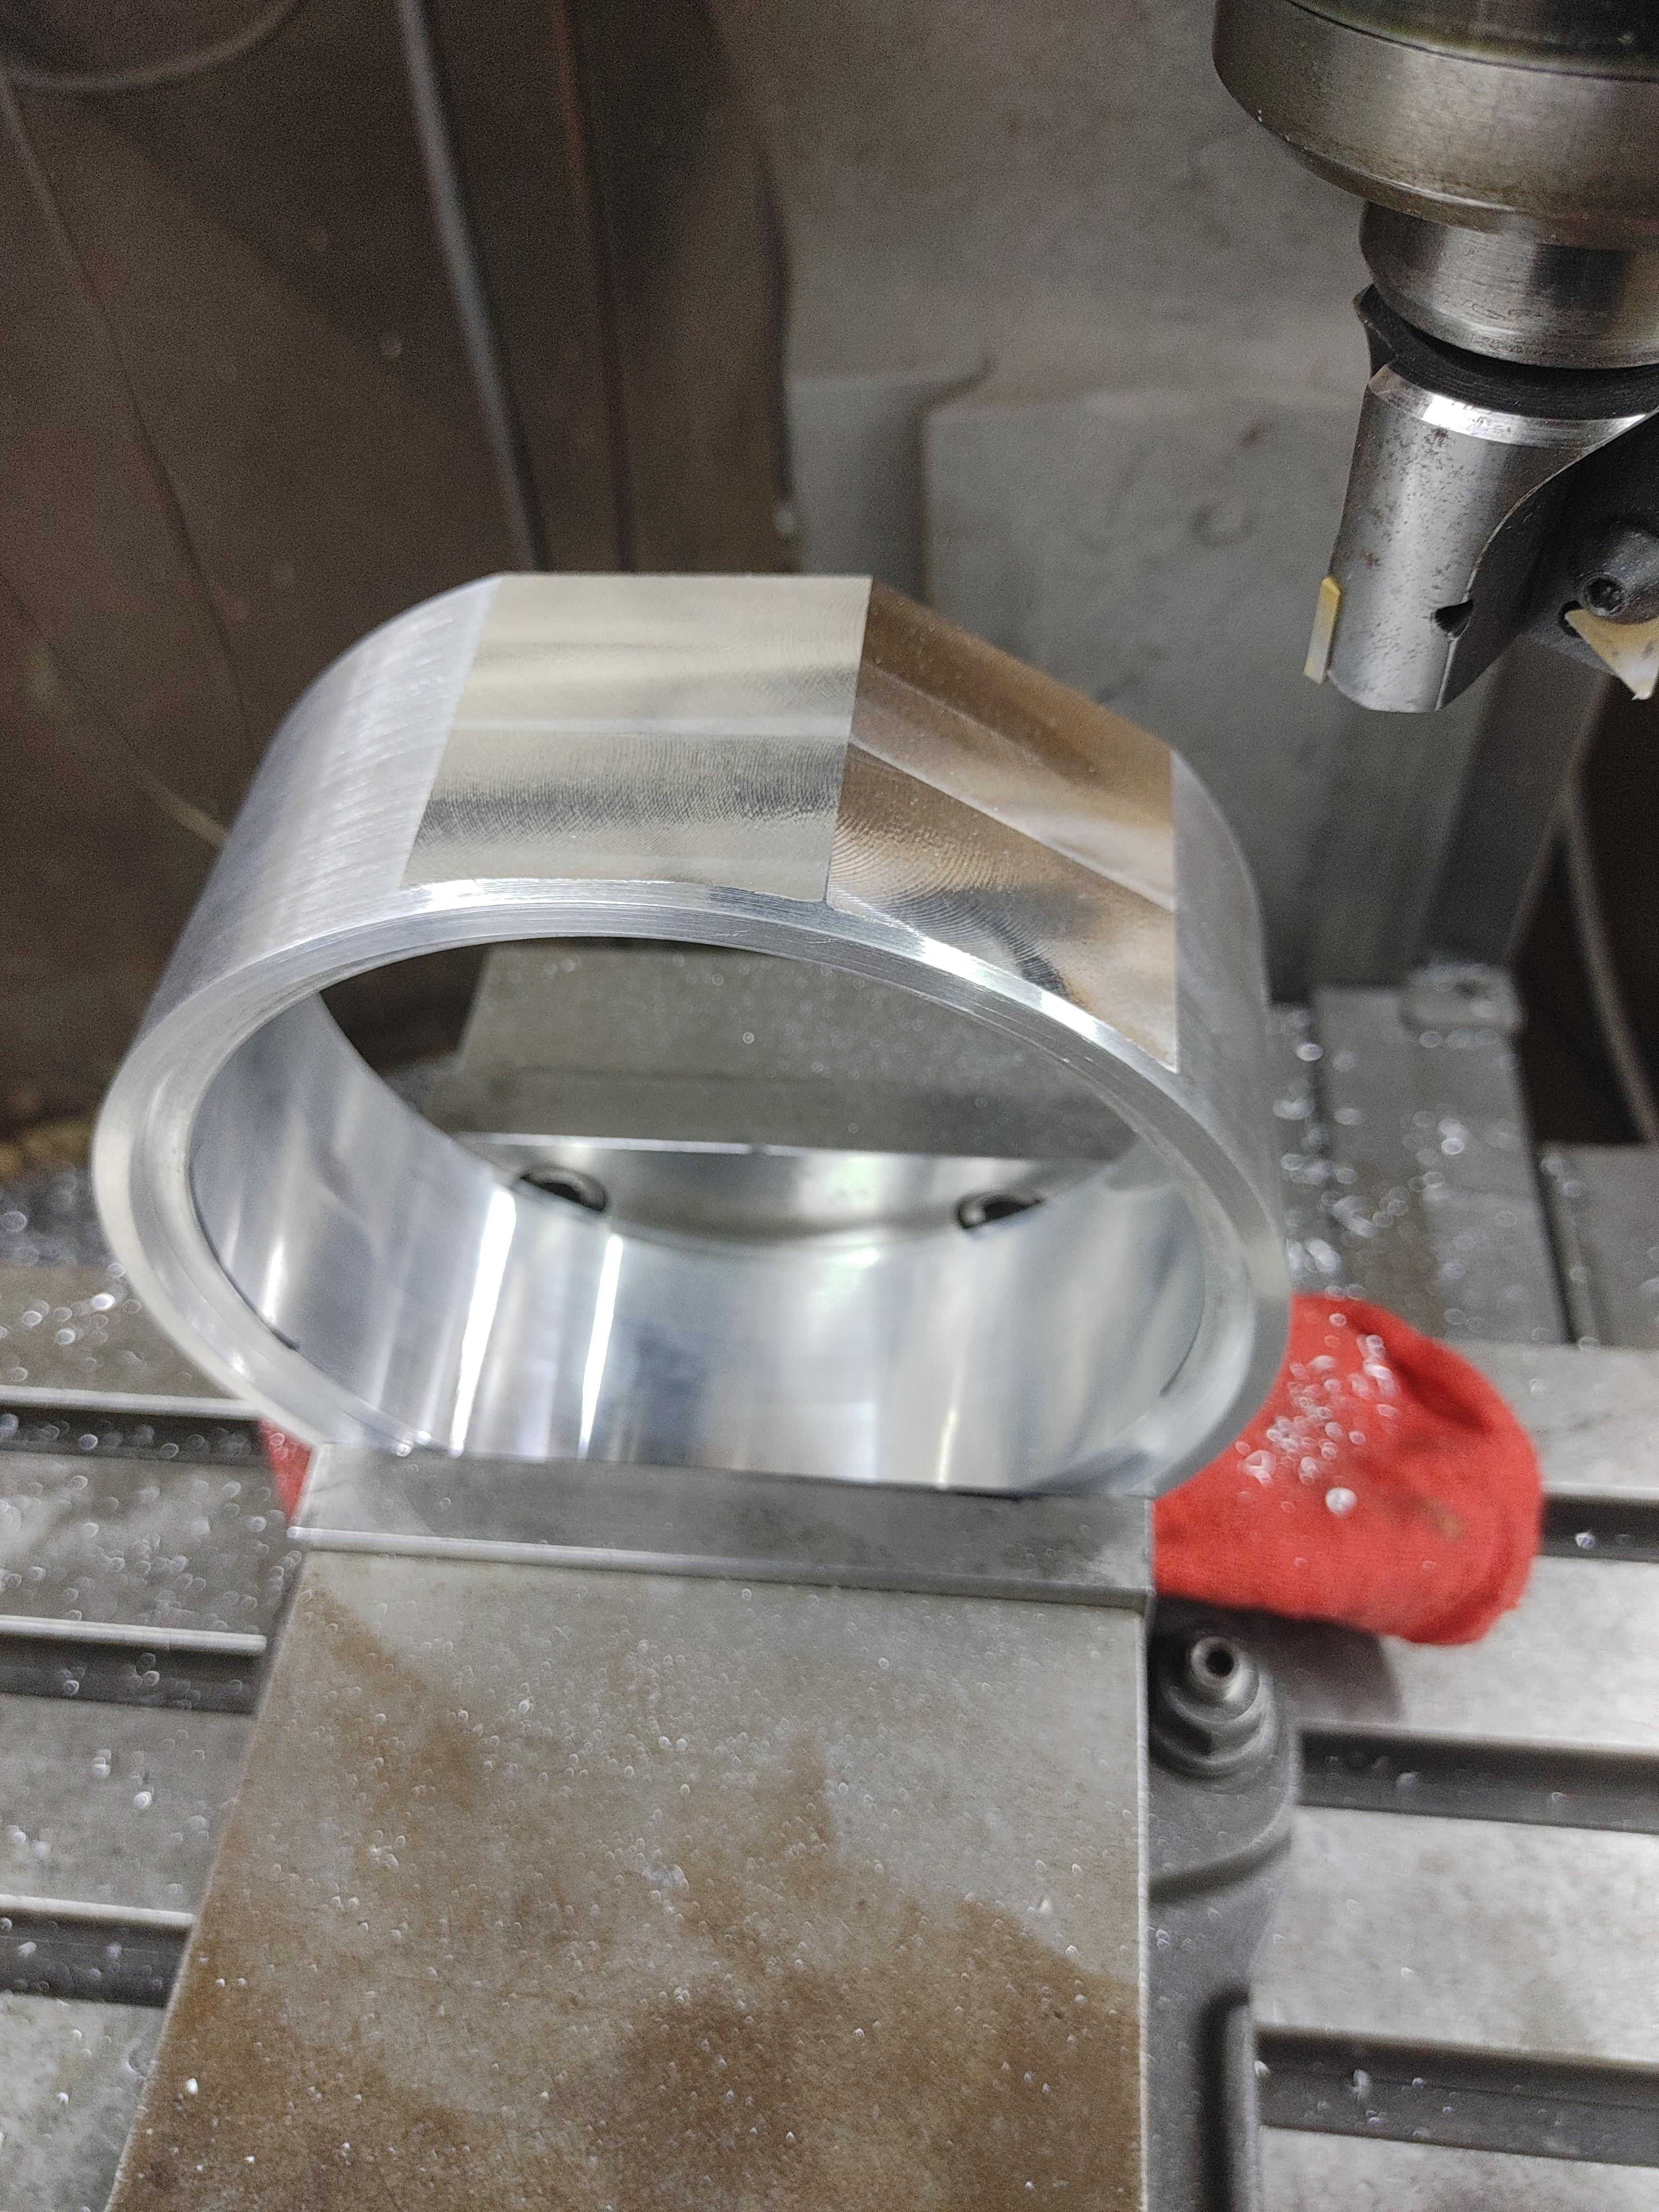
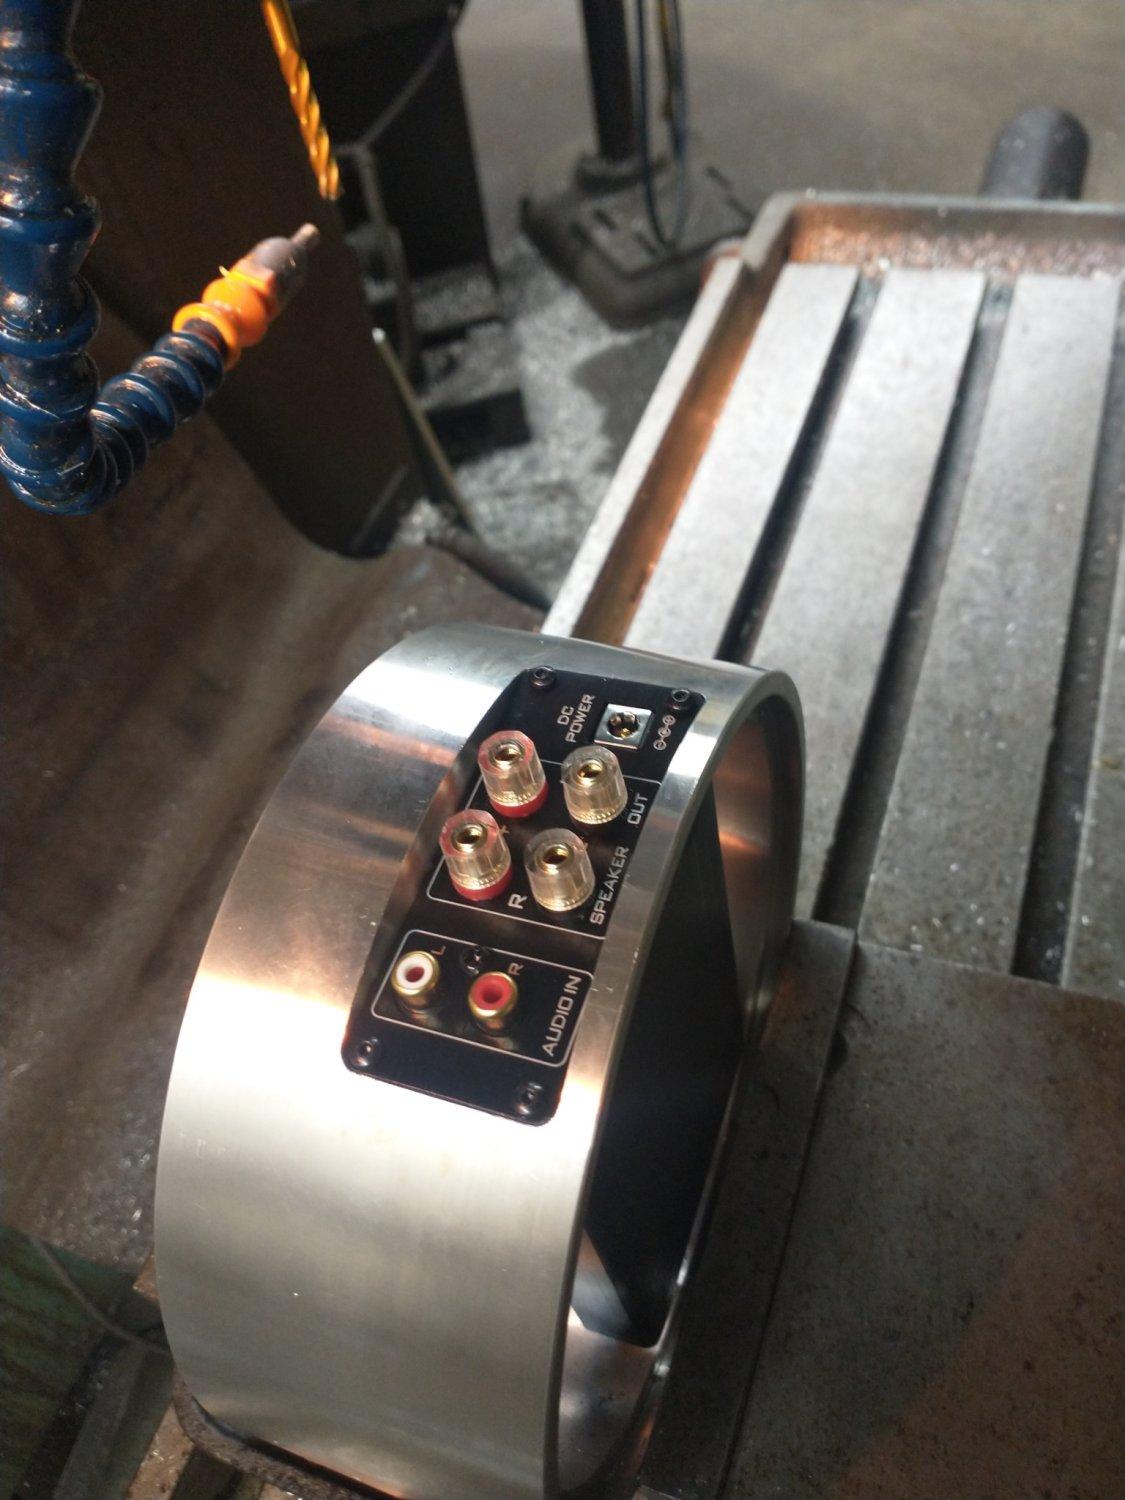
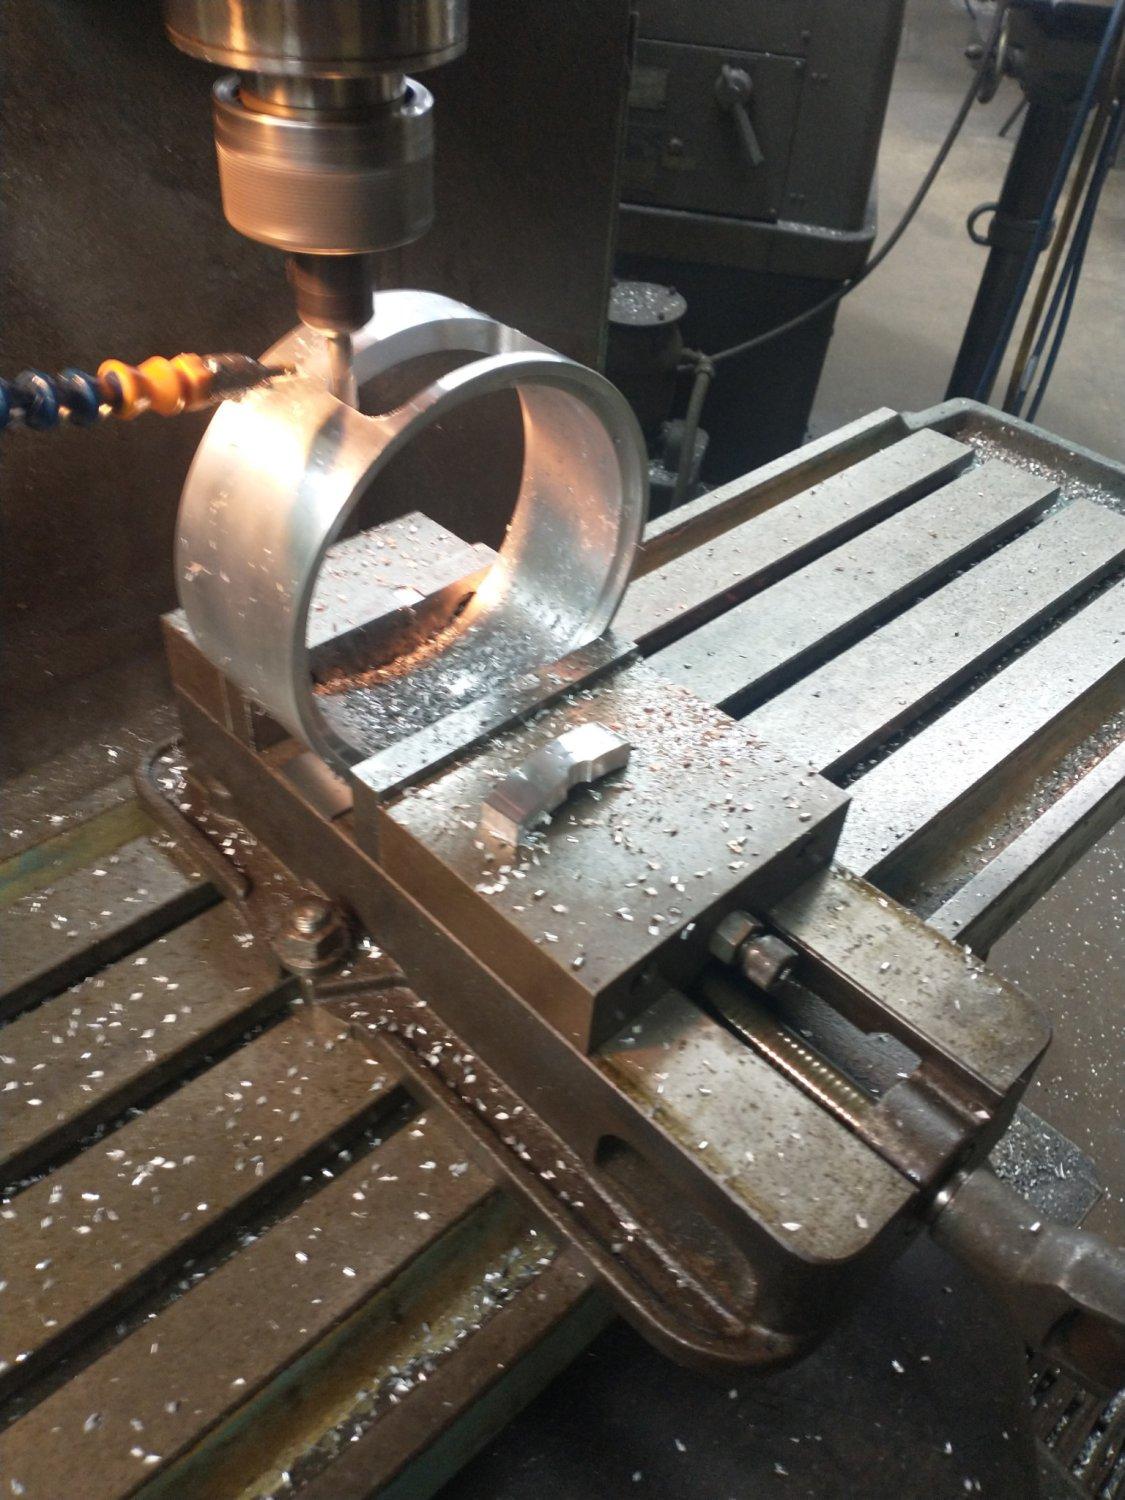
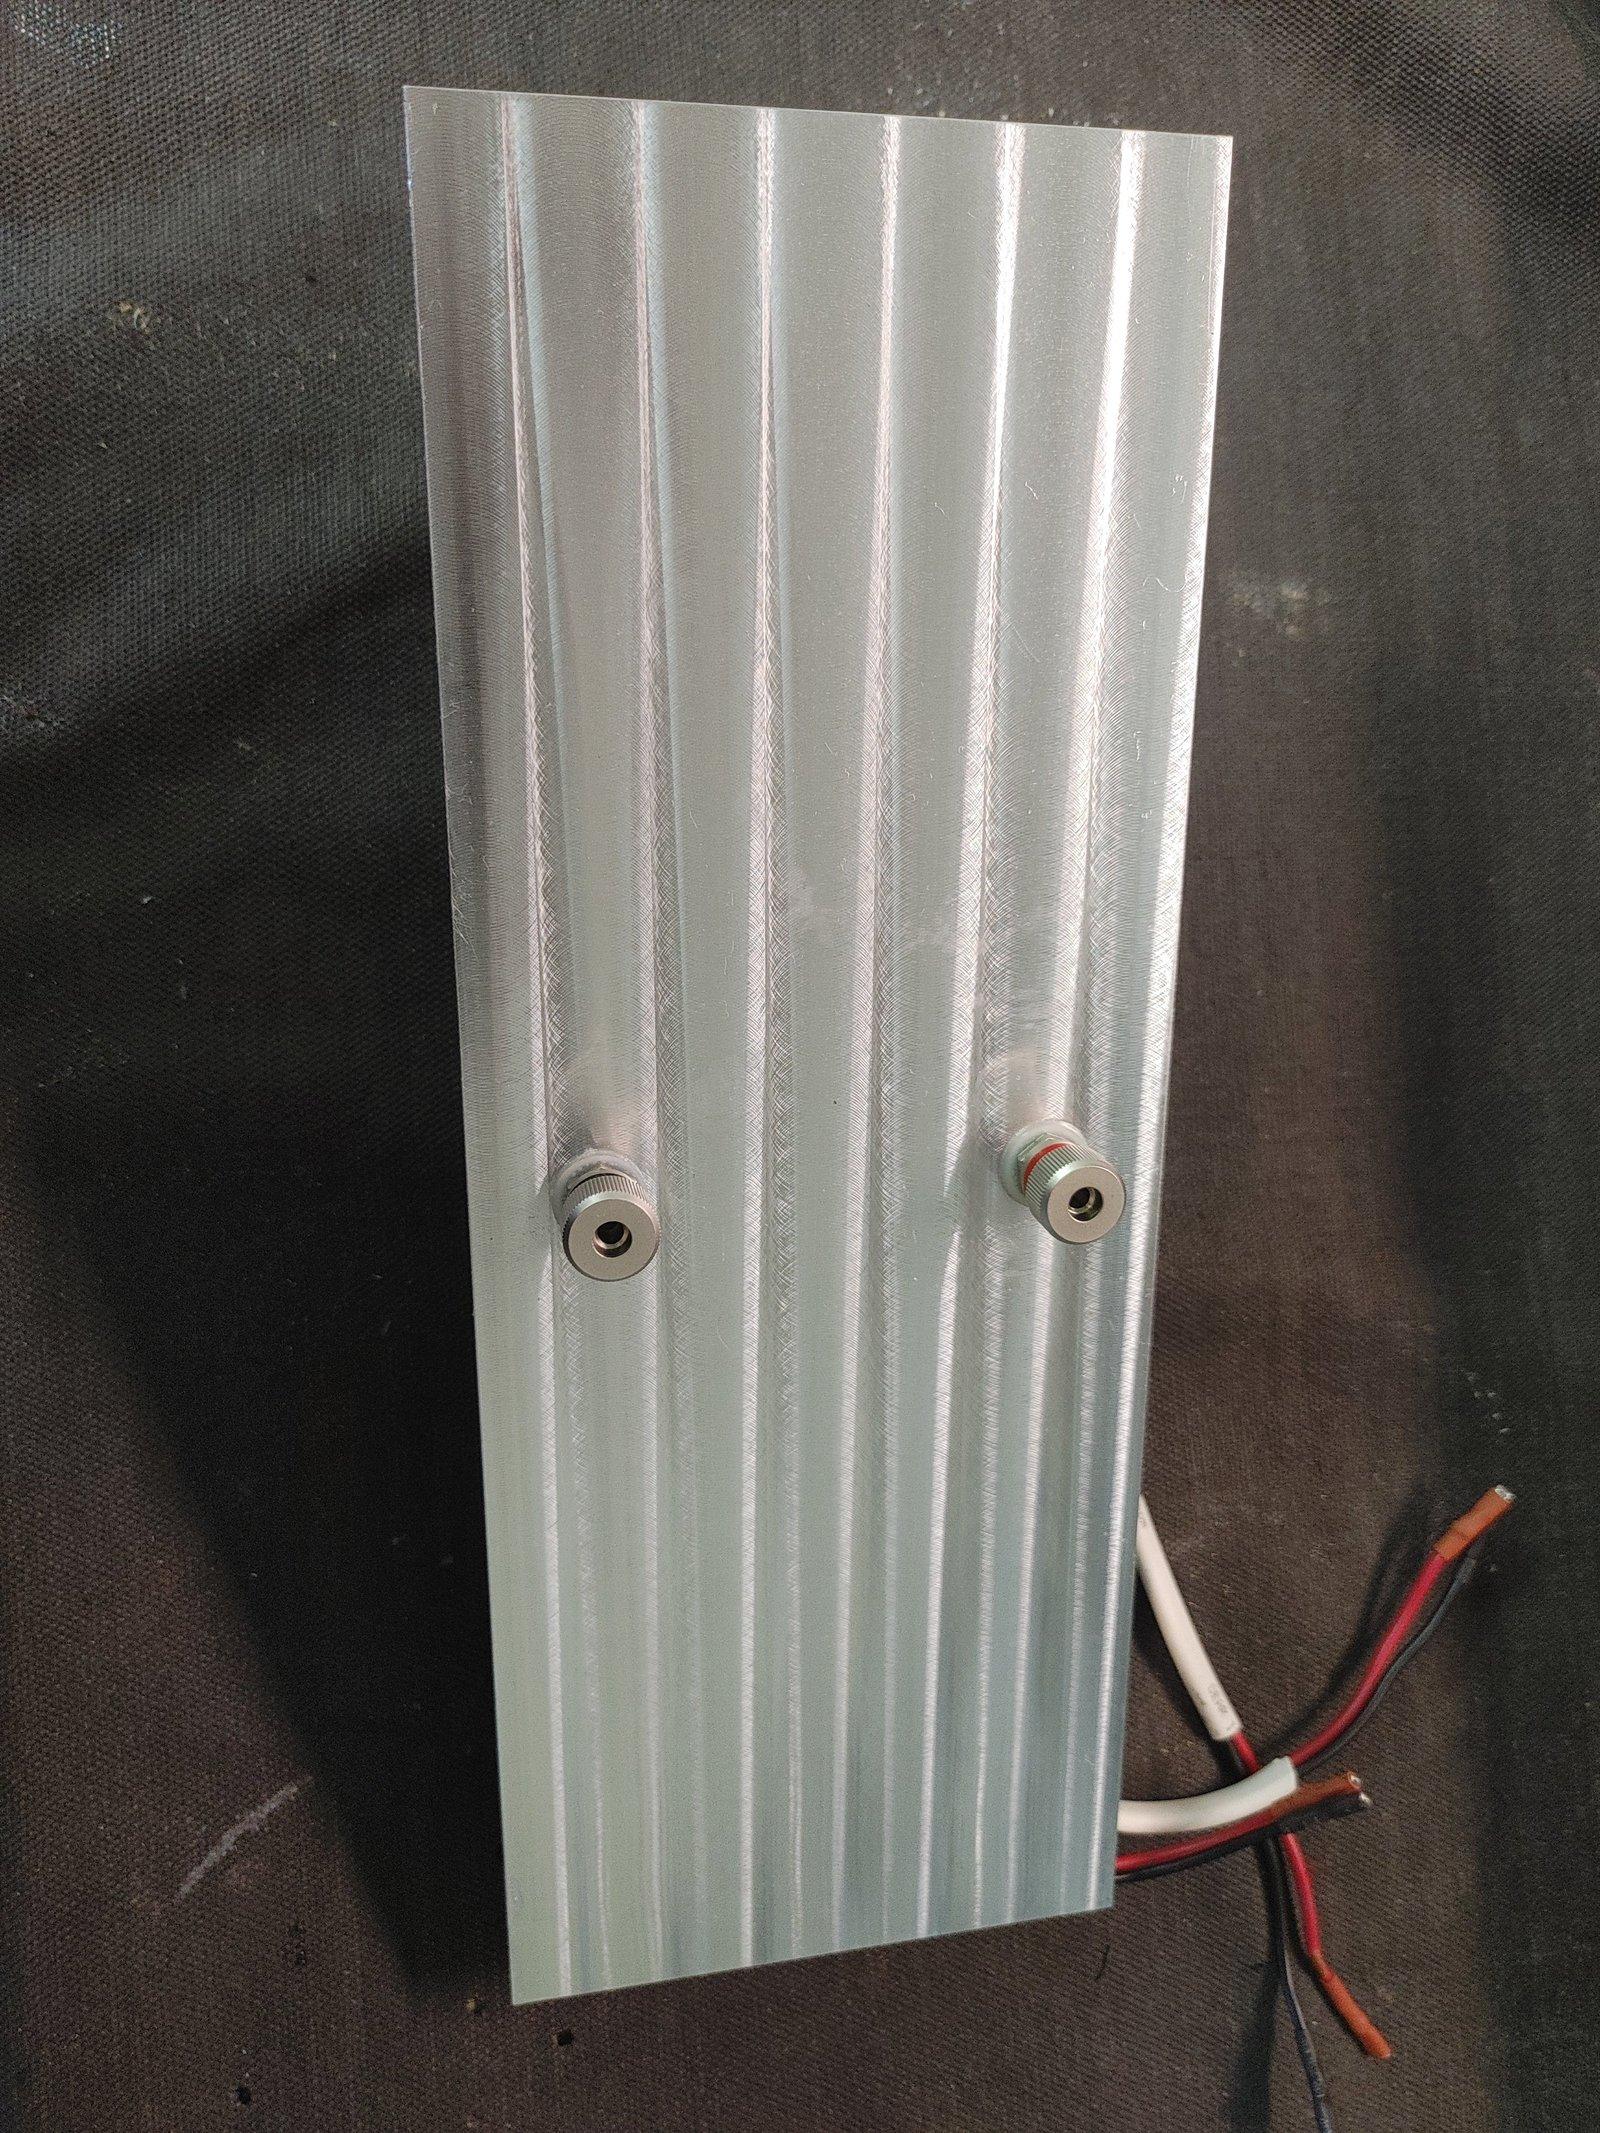
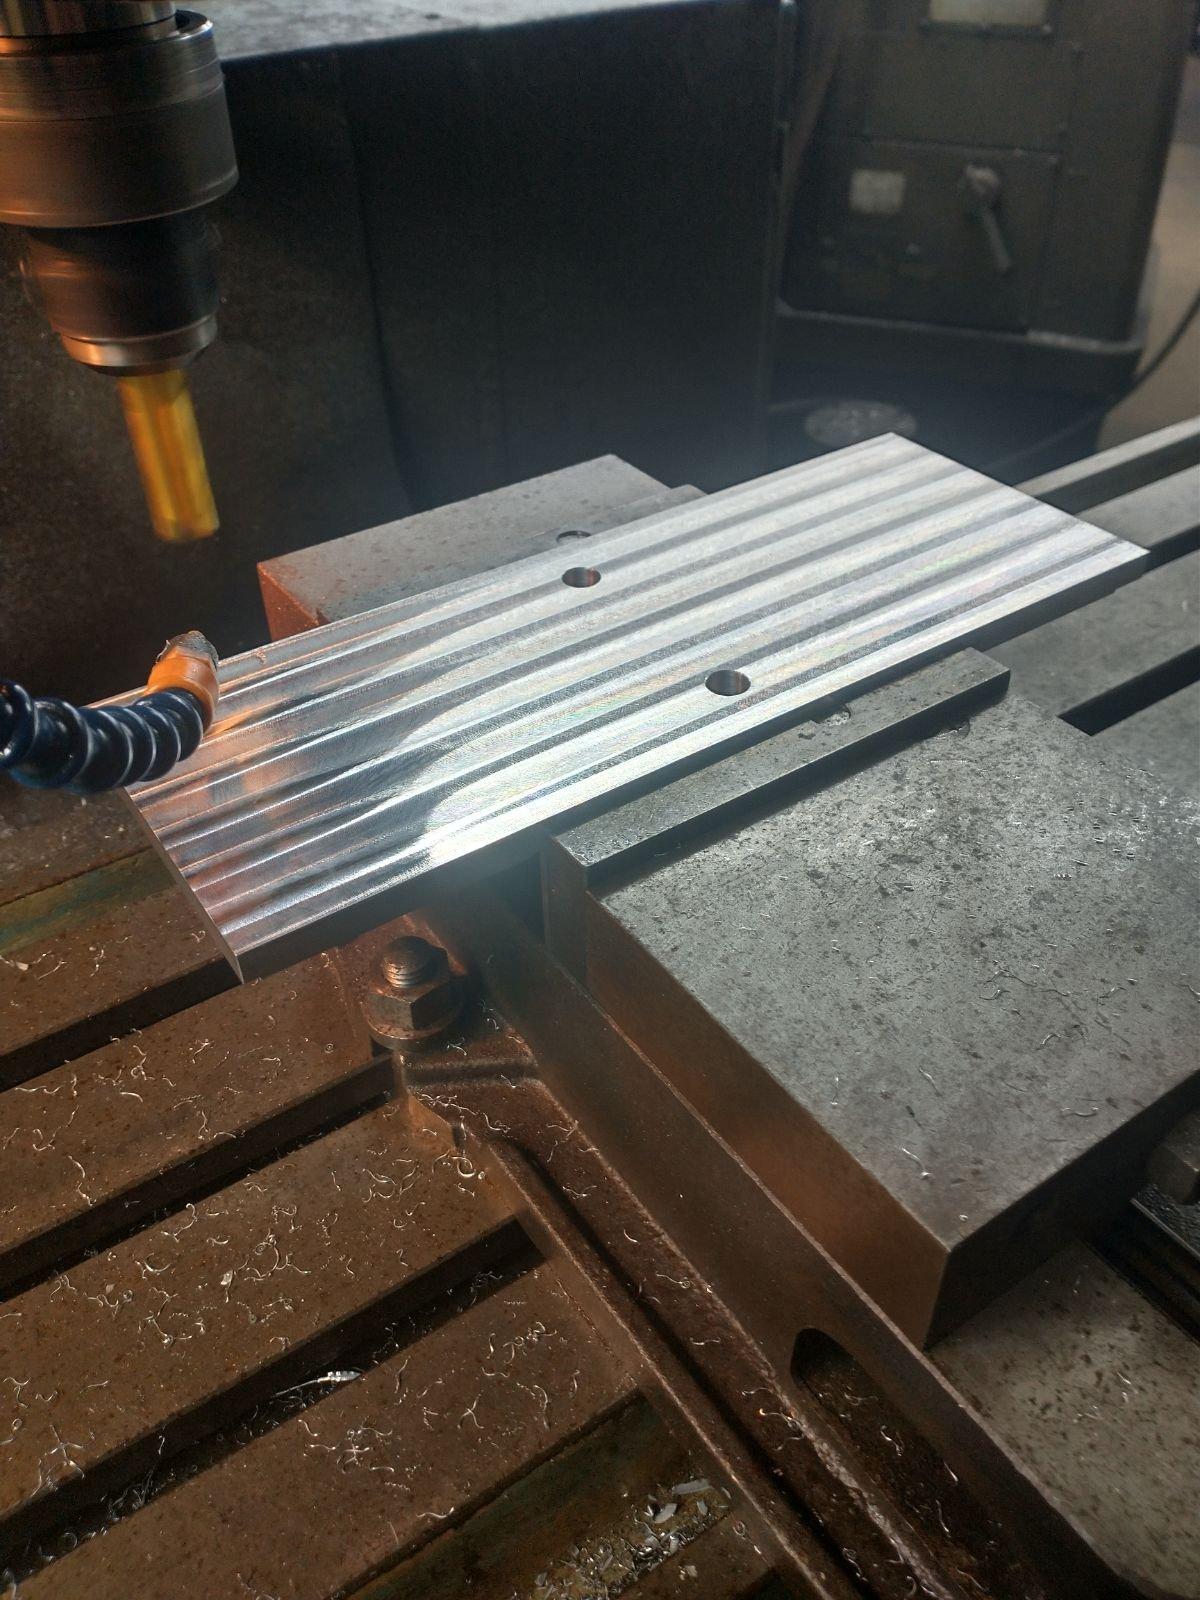
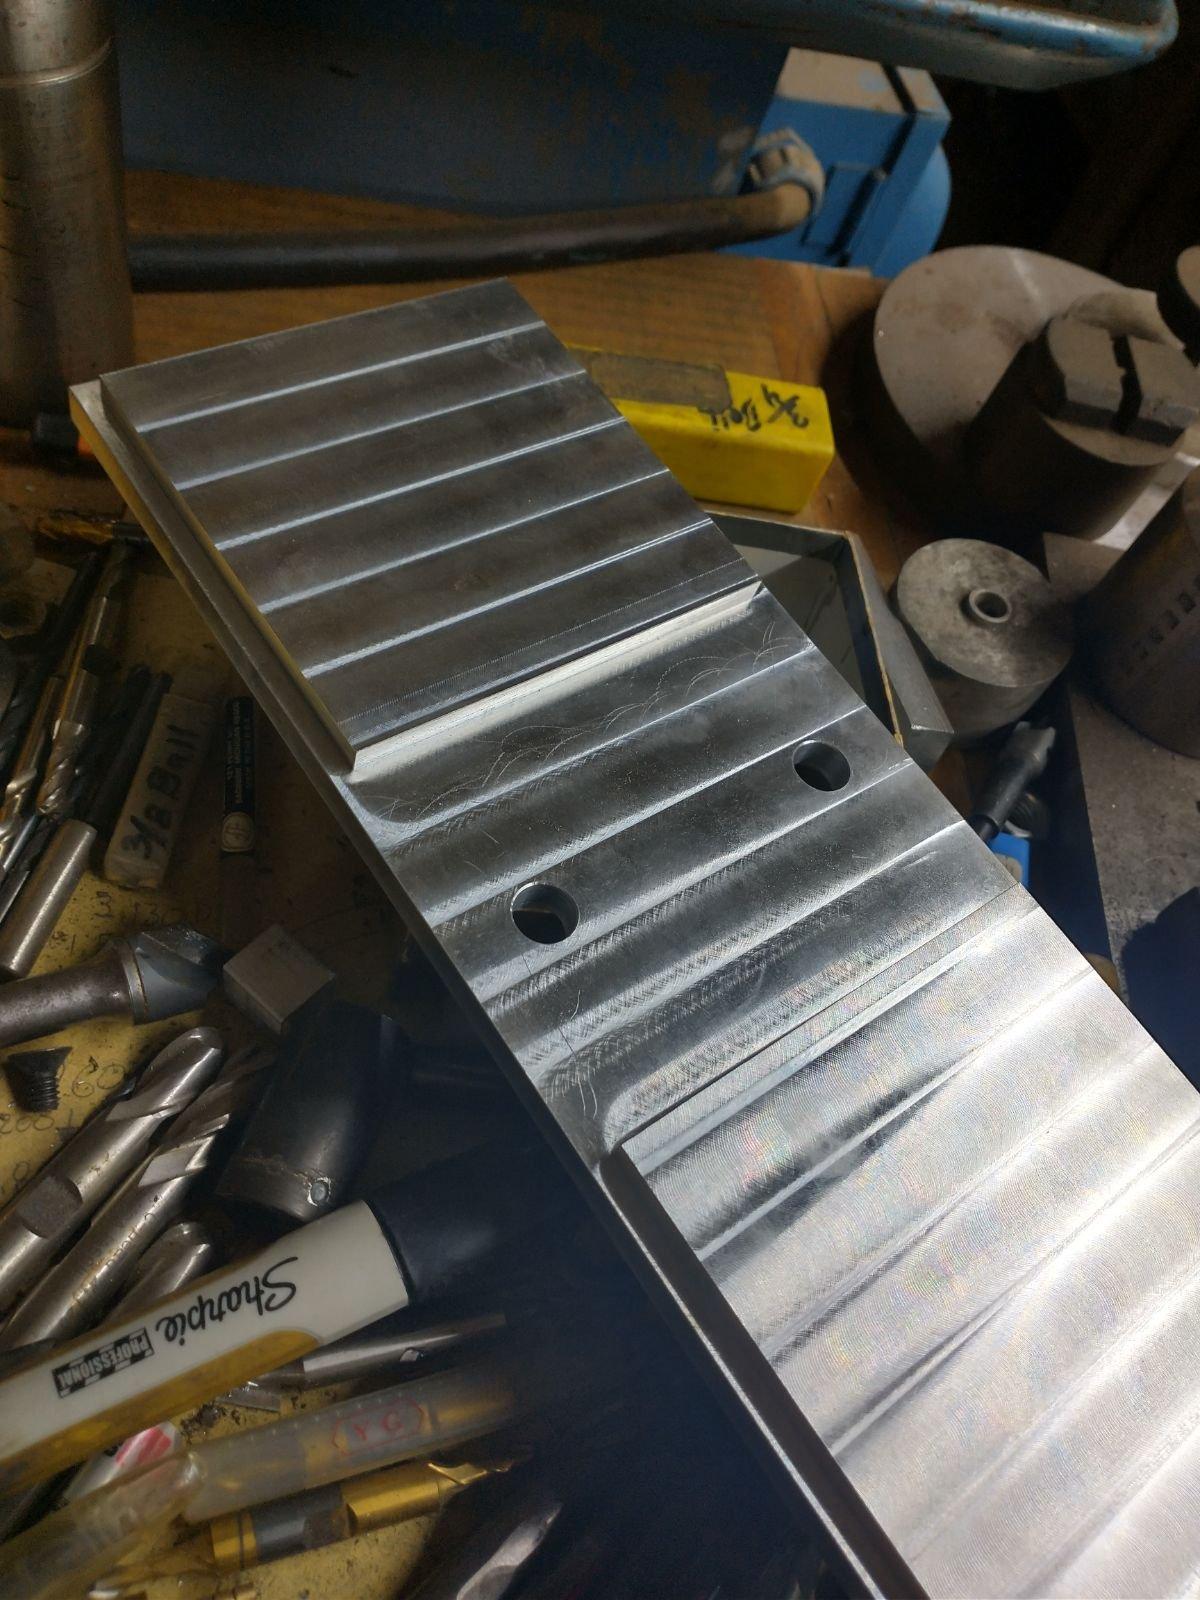
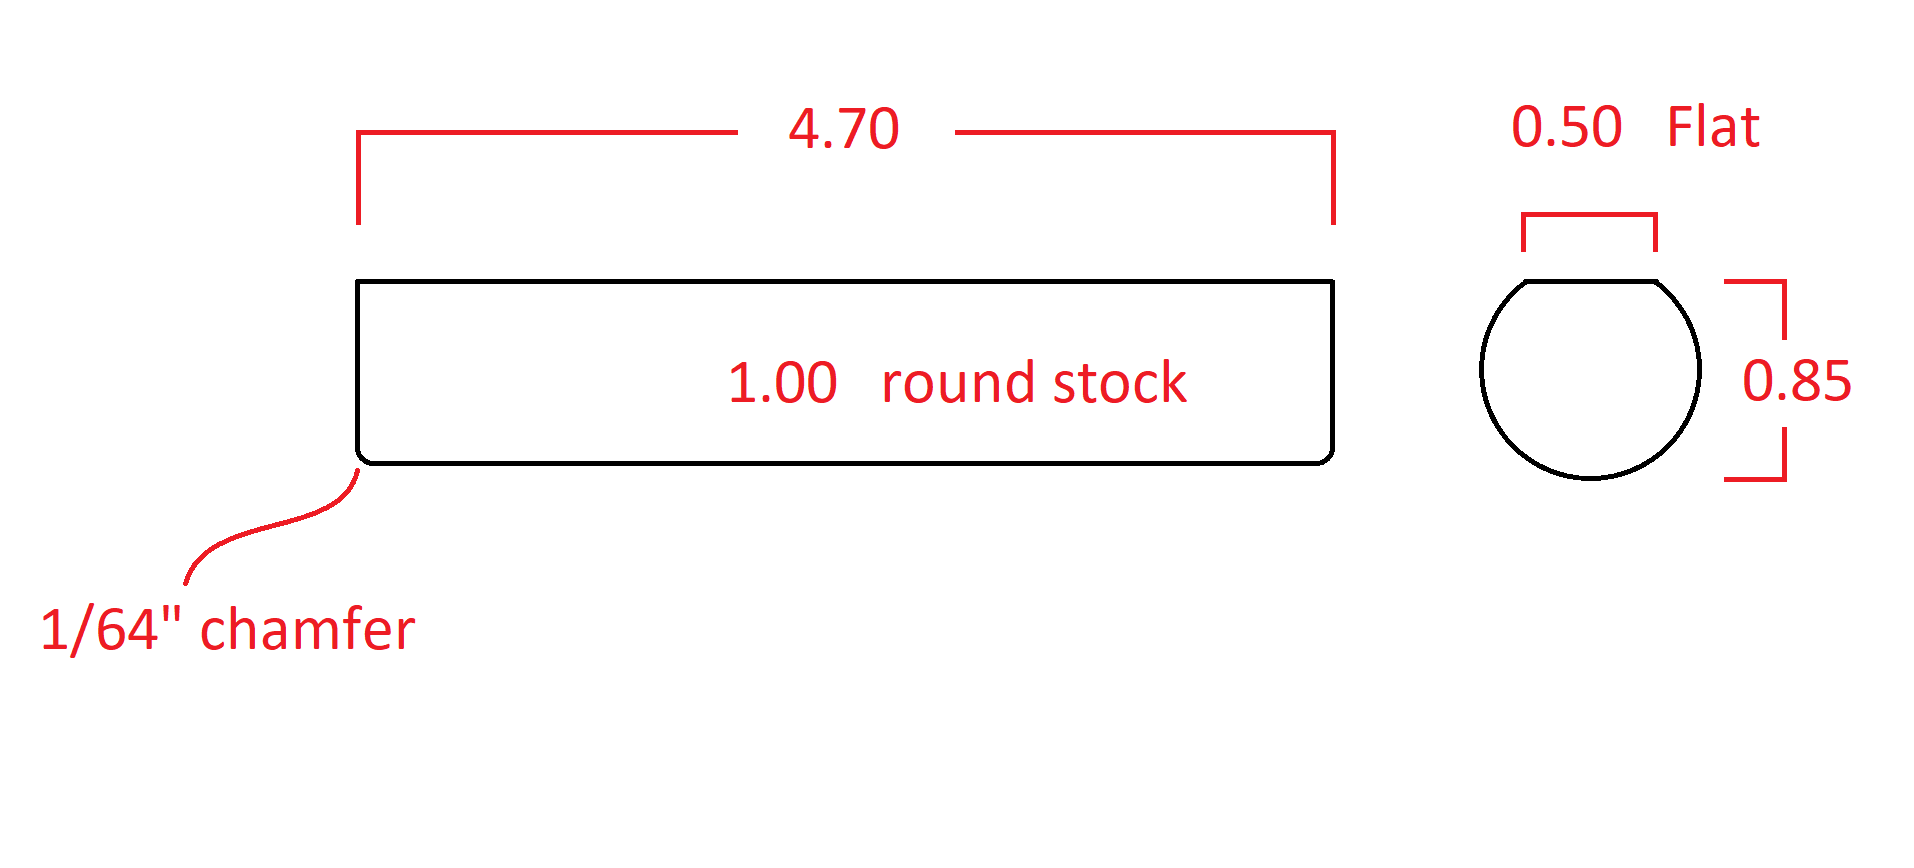
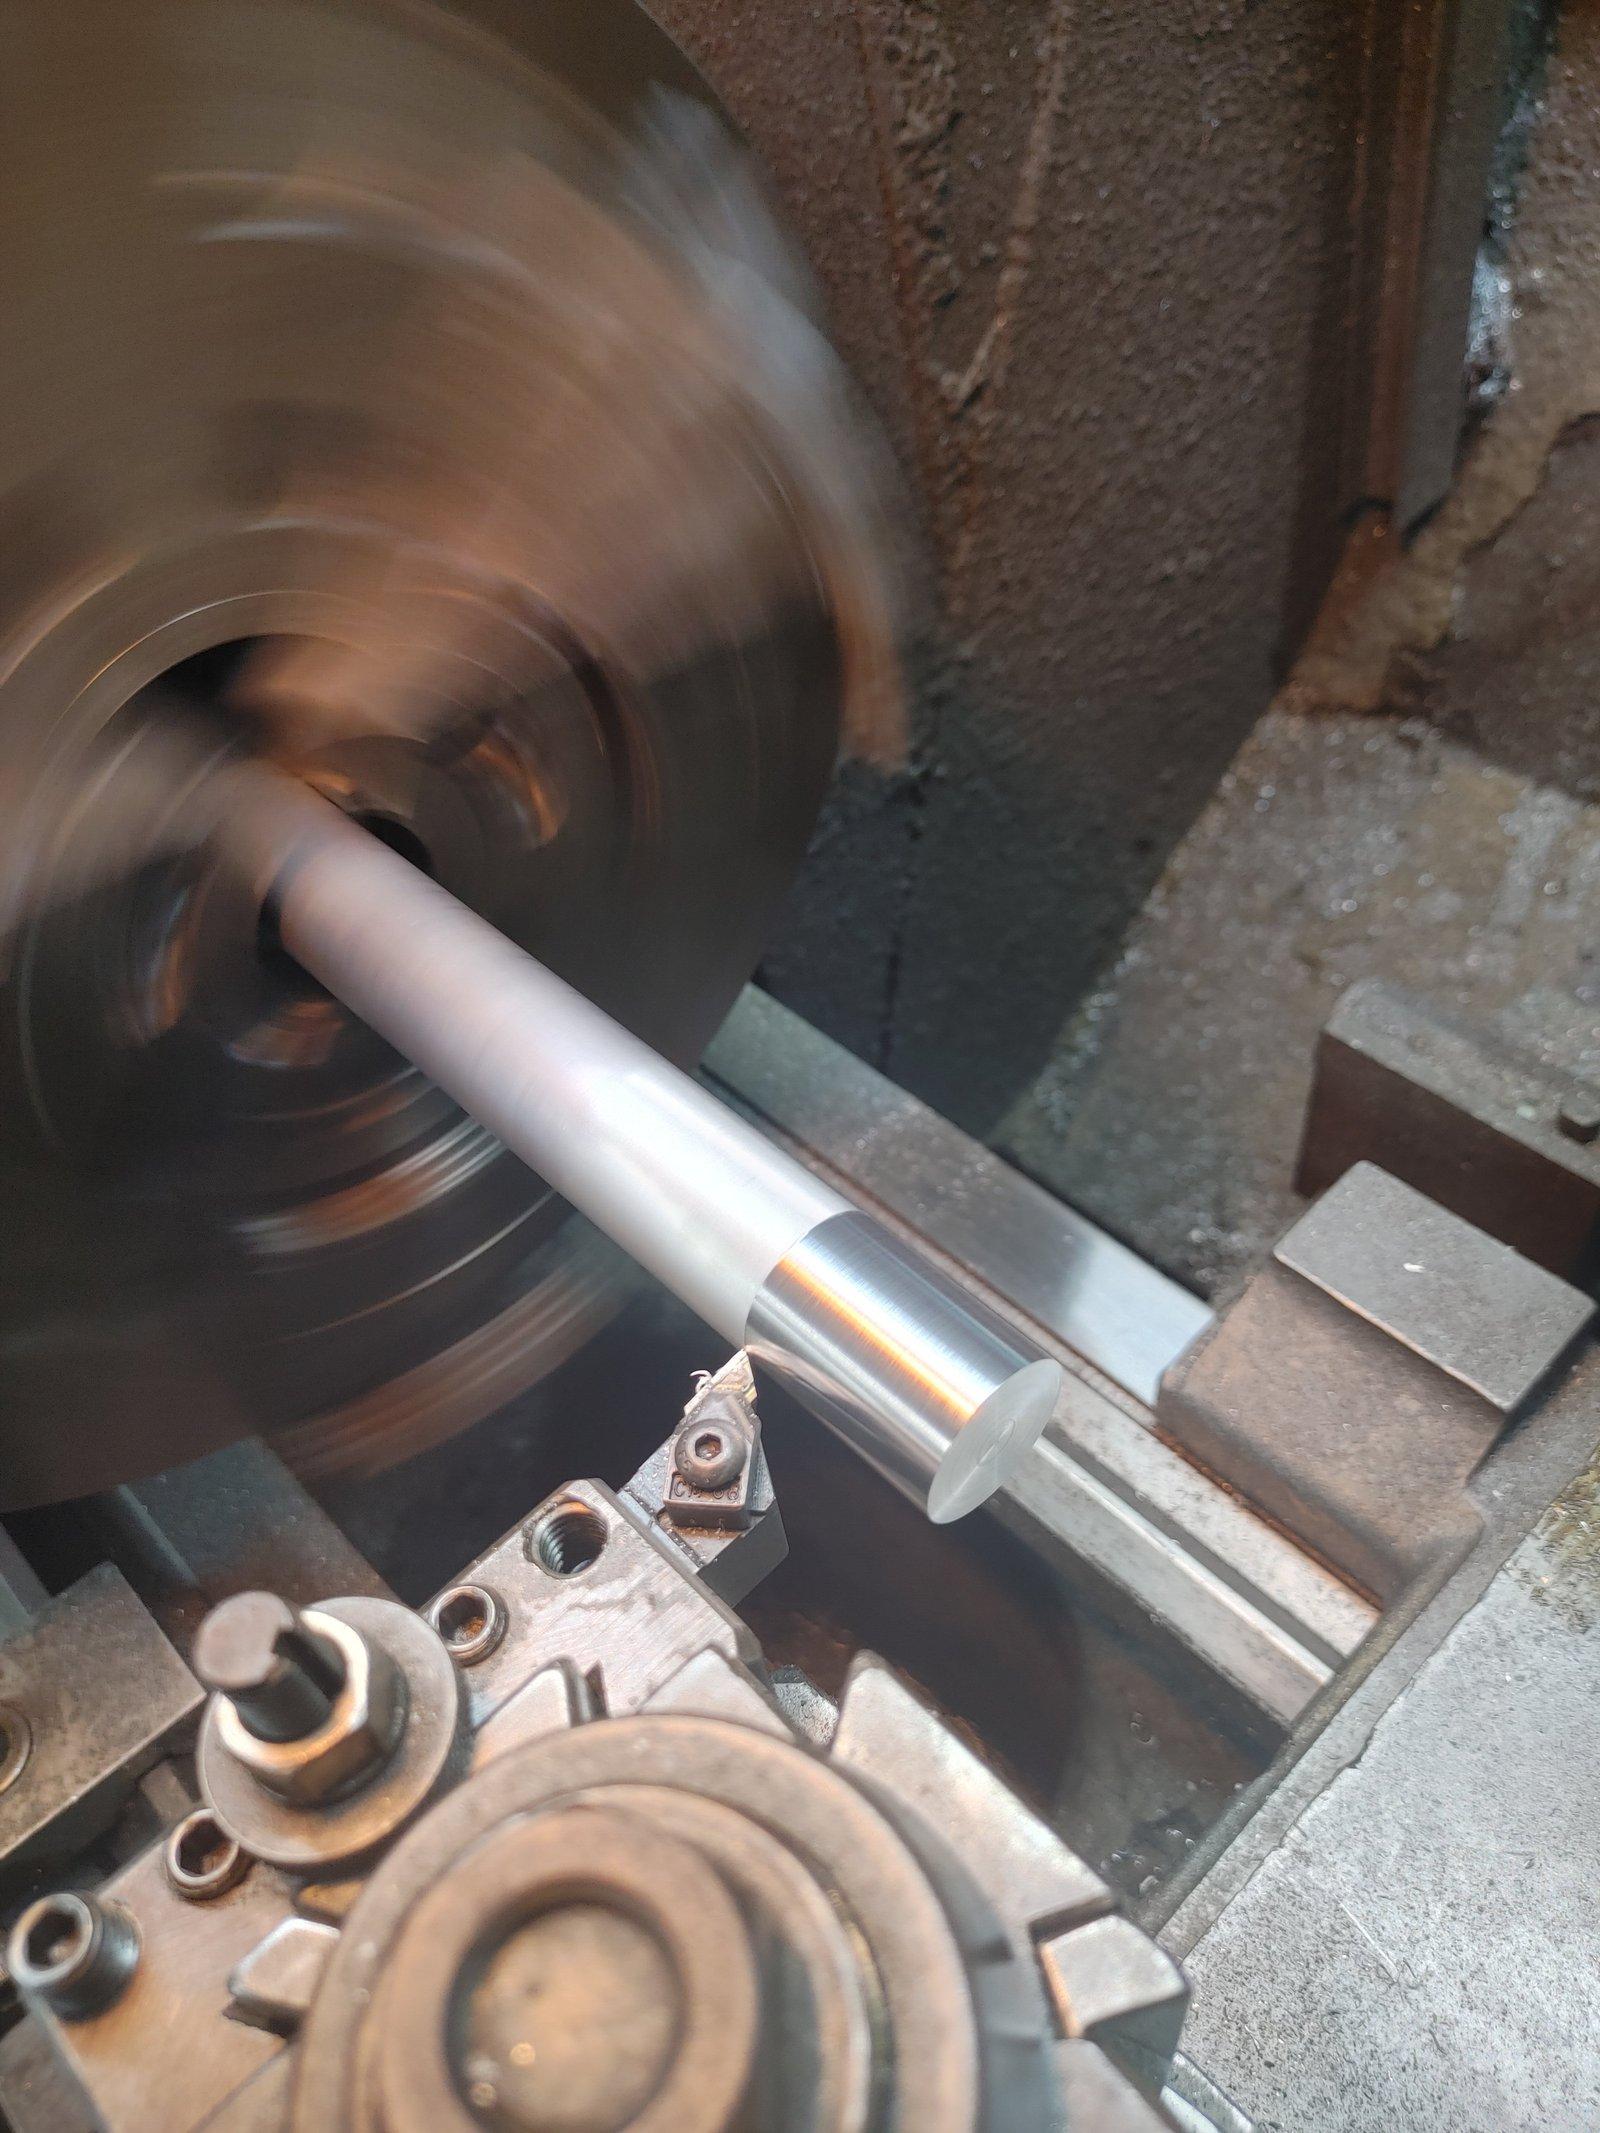
Started building another one. Incorporated heat dissipation ribs around circumference near bottom heat plate.
 xschopBRONZE Member
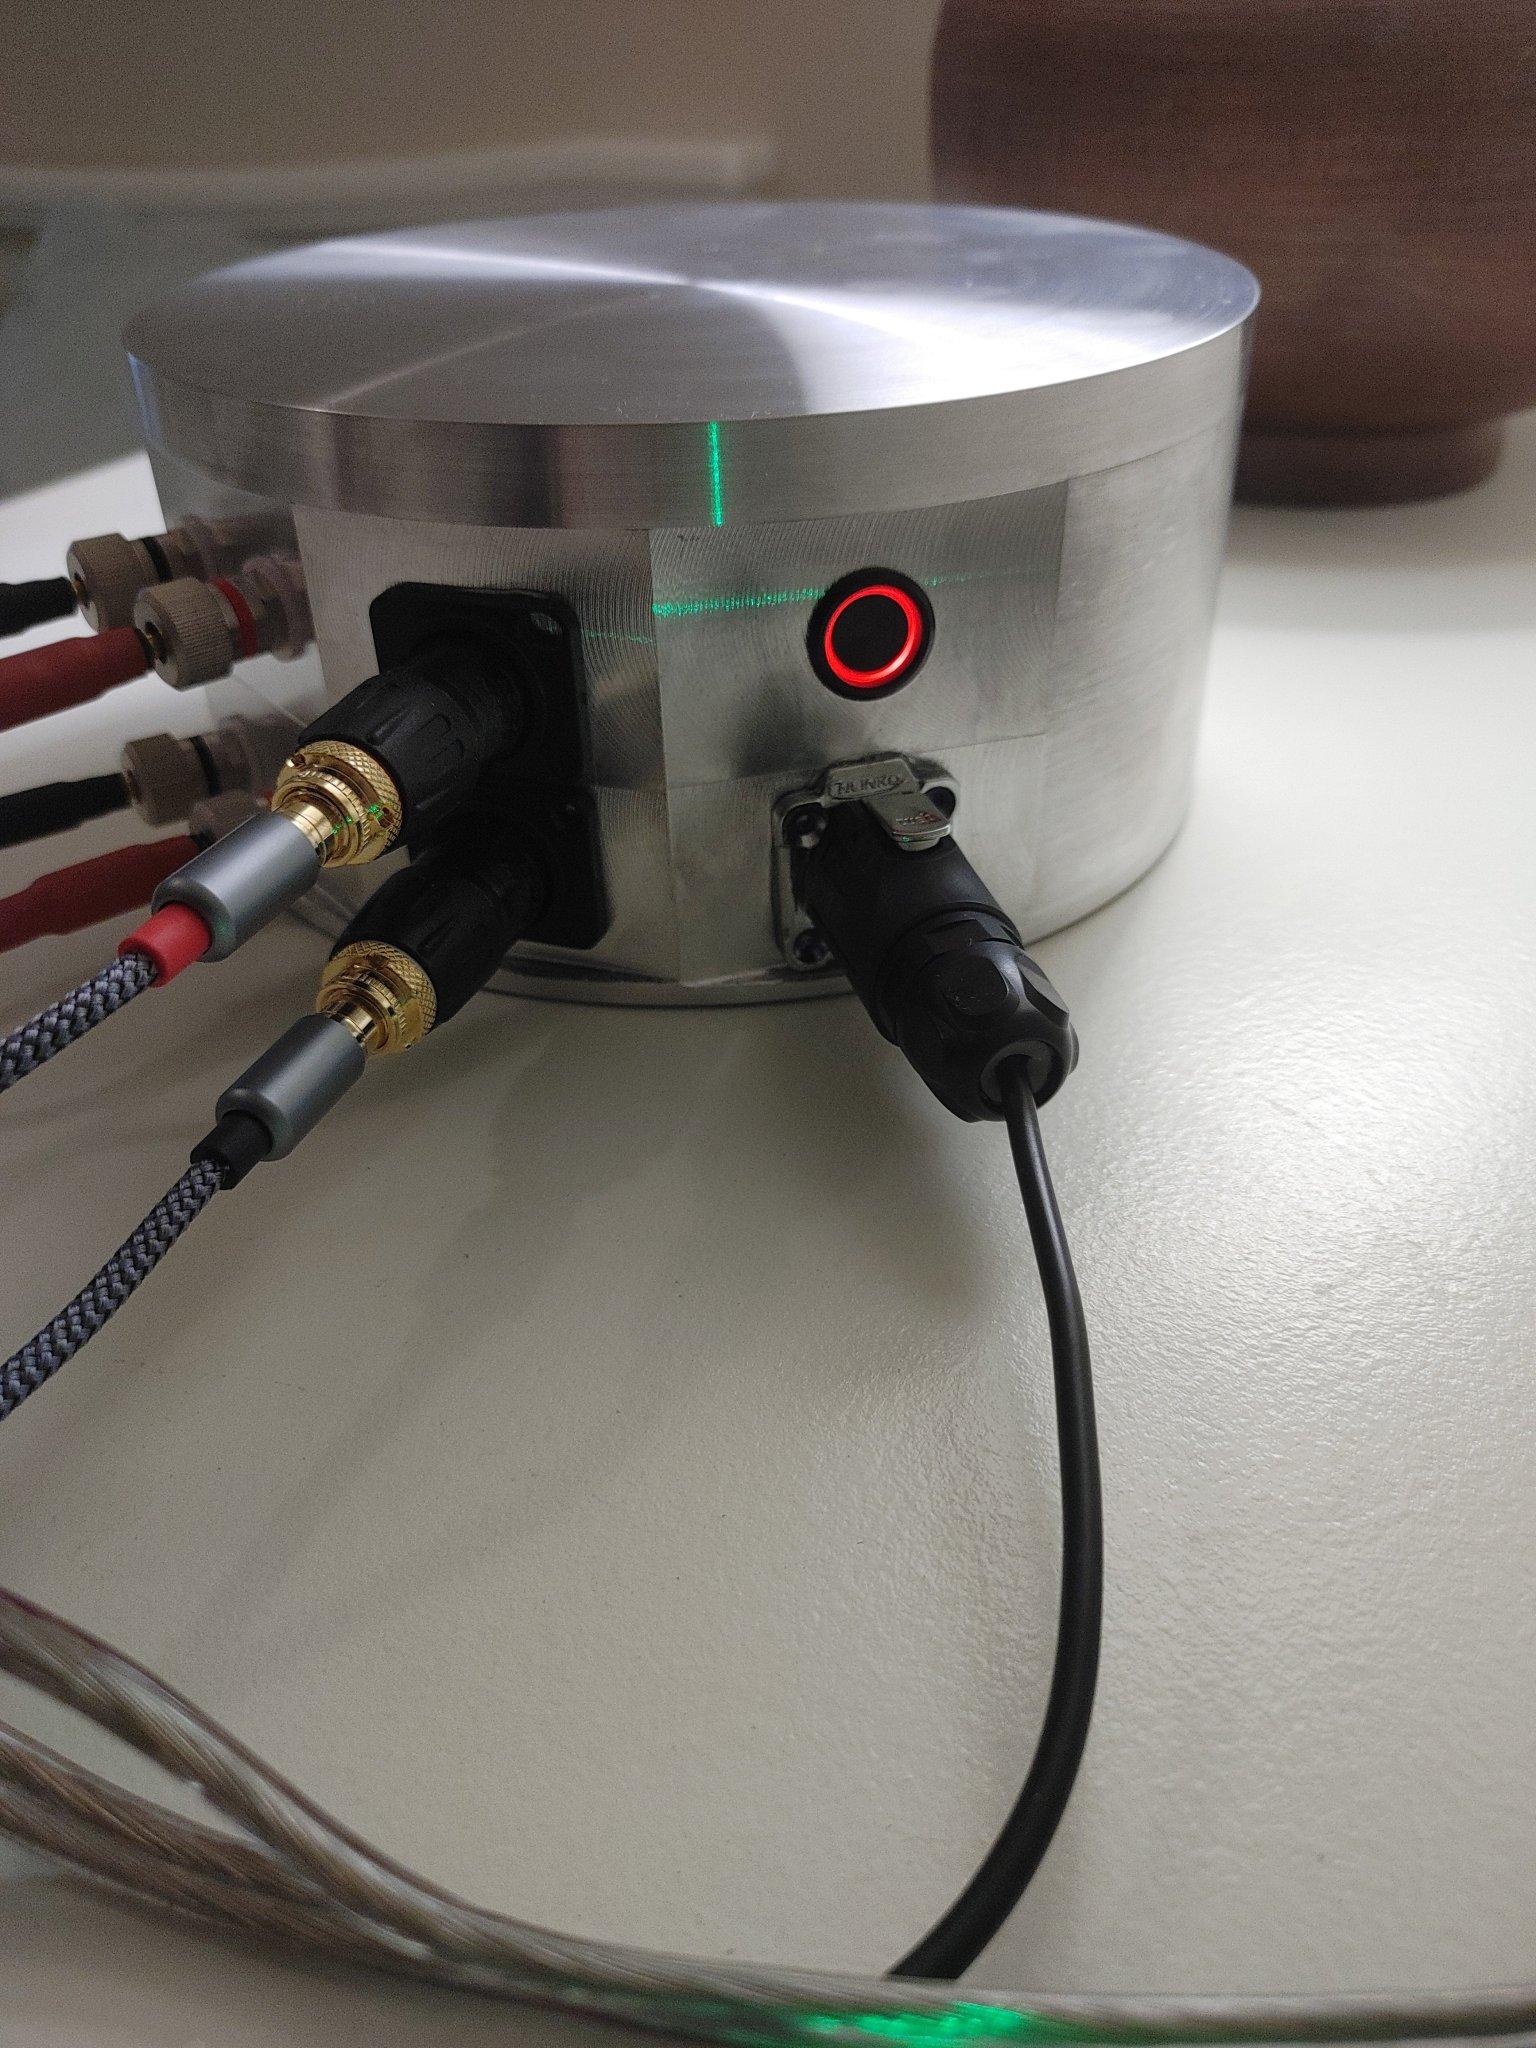
My latest TPA-3255 with PFFB and fully balanced XLR inputs. Will build a 48 Volt power supply for this jewel….

 xschopBRONZE MemberxschopBRONZE Member
Built to last! Beautiful work xschop.
Thank you Tig. I usually don’t build anything unless it is “nukeproof”.
I’m taking the design further and adding balanced inputs with another TPA3255 with PFFB. One of the best sounding amps I’ve heard to date.
xschopBRONZE Member
Thought I’d share my latest B&O inspired amp based on the TPA-3251 chip amp…
 xschopBRONZE Member
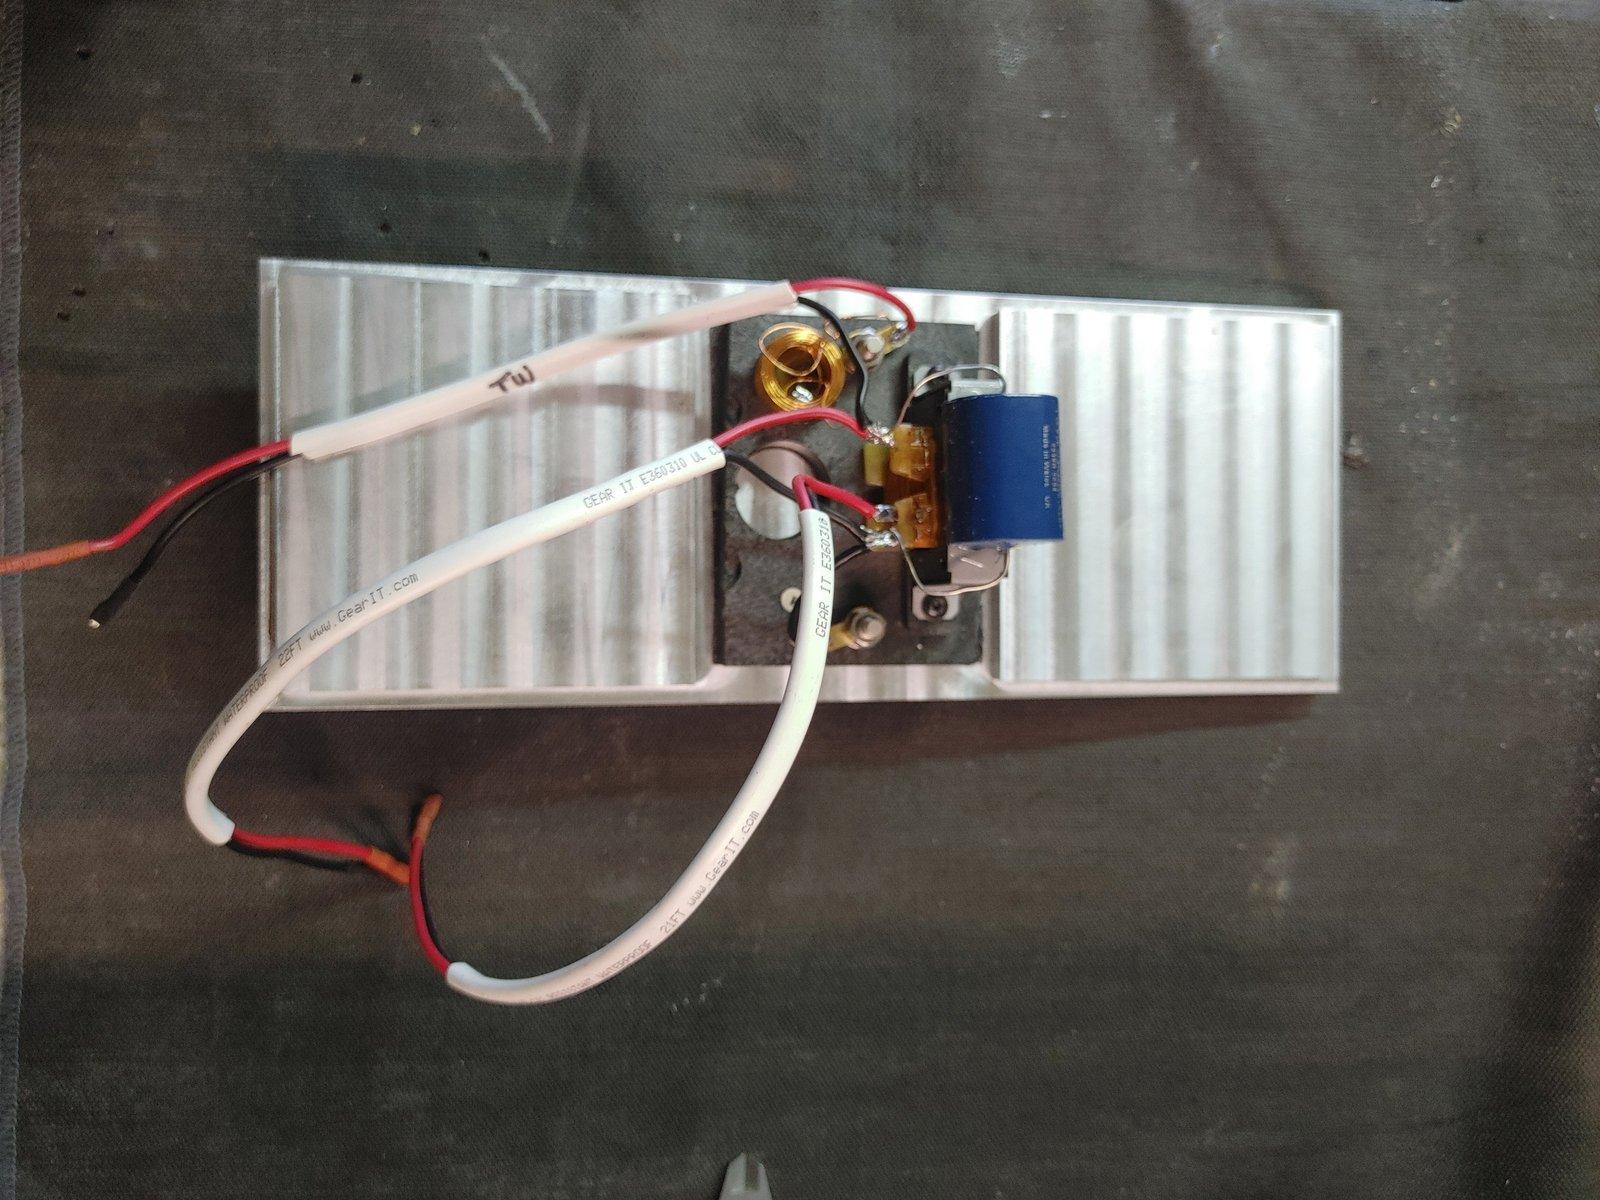
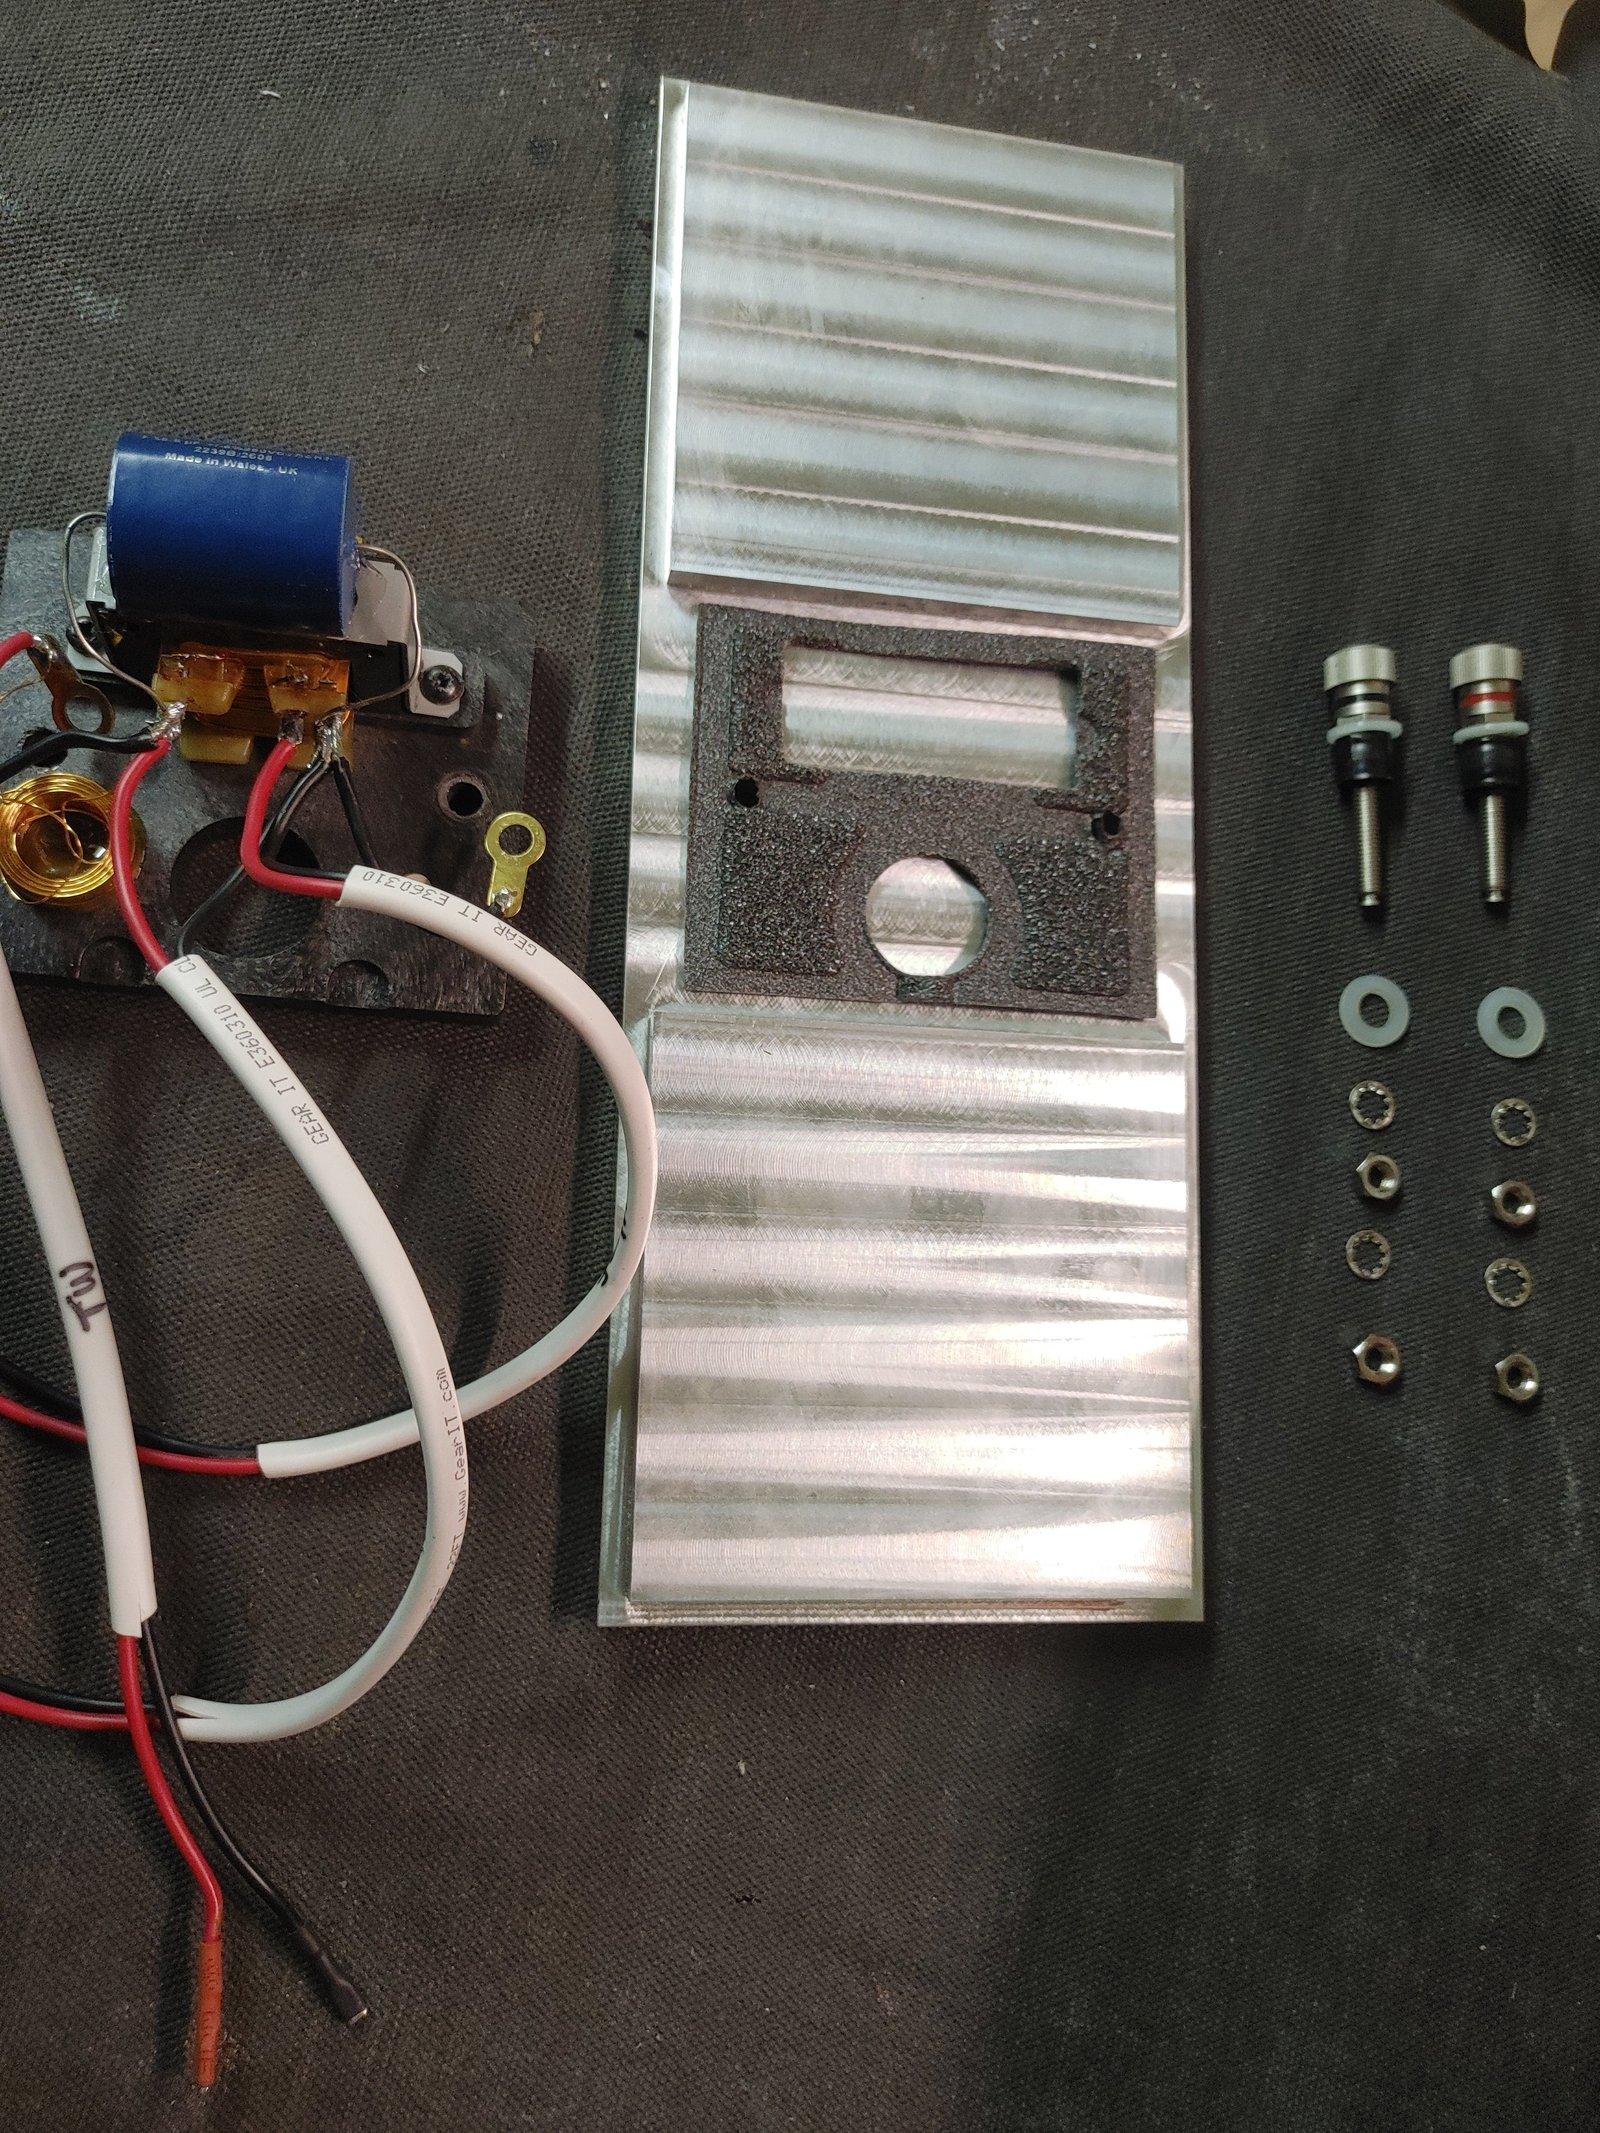
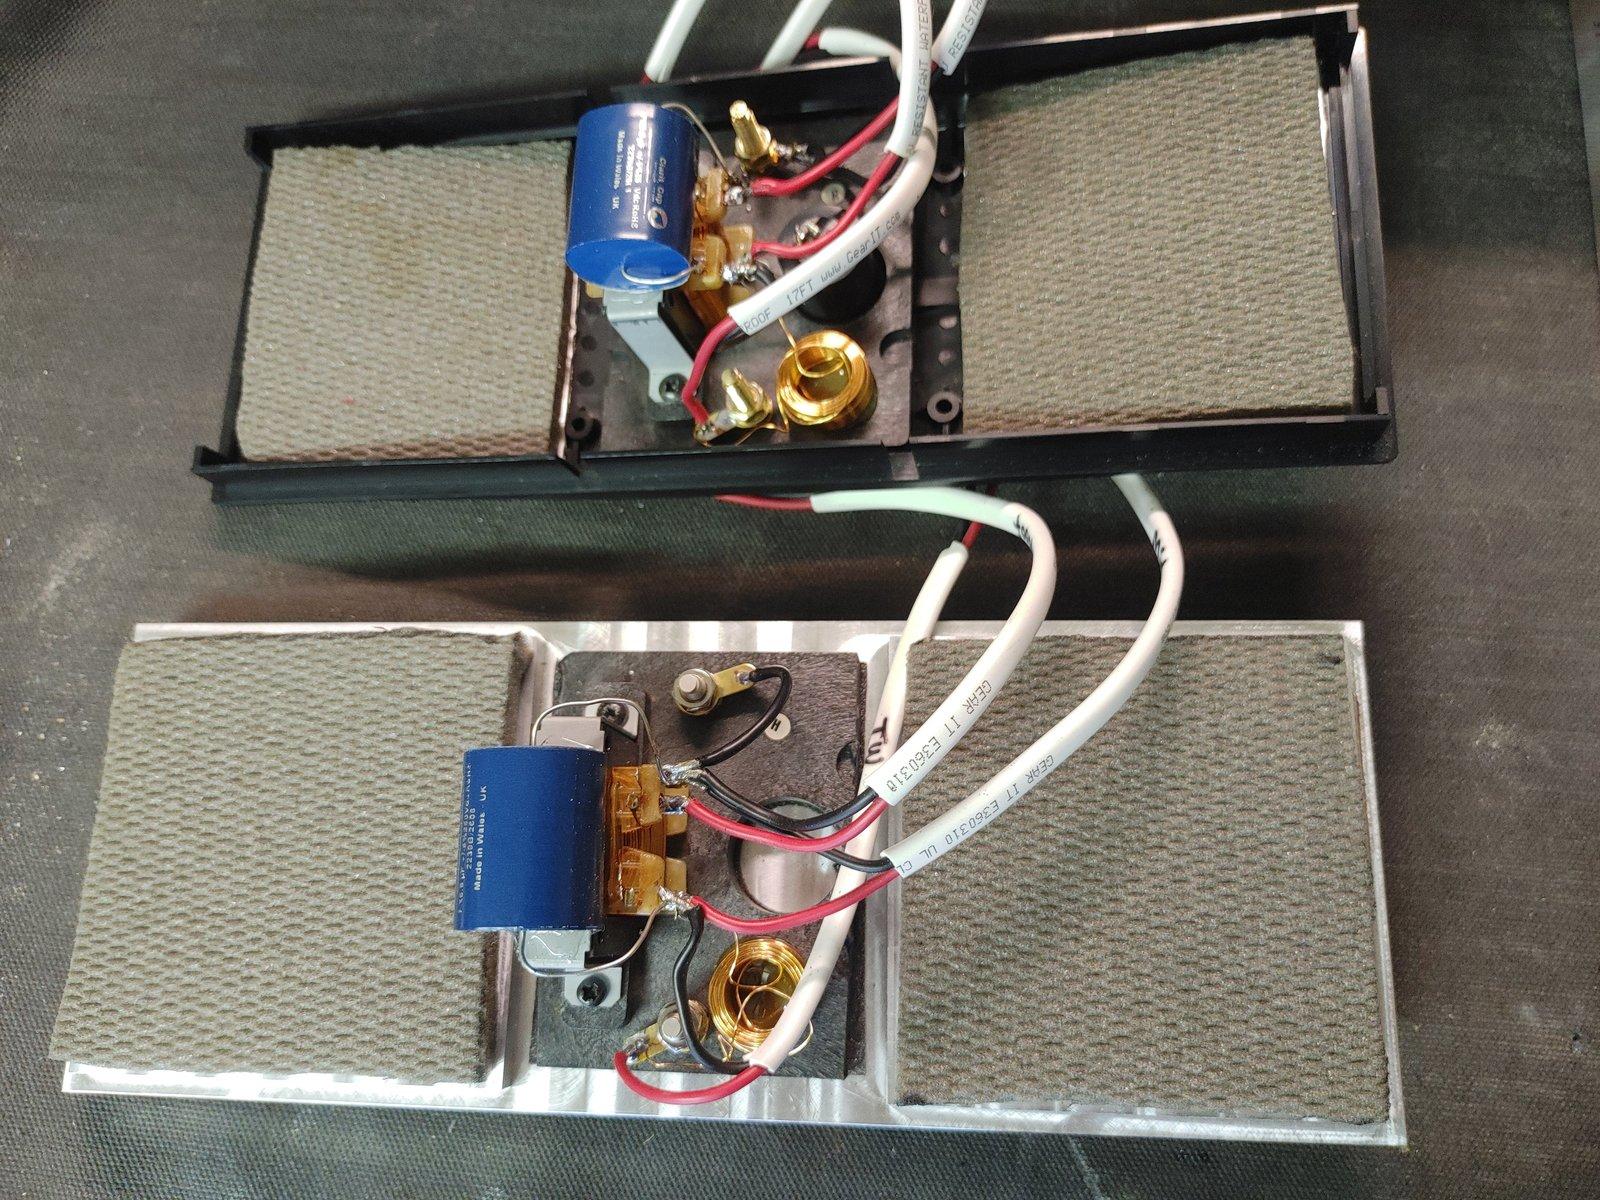
Finally got a weekend day to reassemble the new covers. Had to grind down the factory ABS crossover mounts to clear the alloy crossbraces.
I like the nickel plated binding posts with the patina. Added 4×4×5/8″ open cell foam top and bottom directly behind mids as well. These added a couple lbs. to the build.
 xschopBRONZE Member
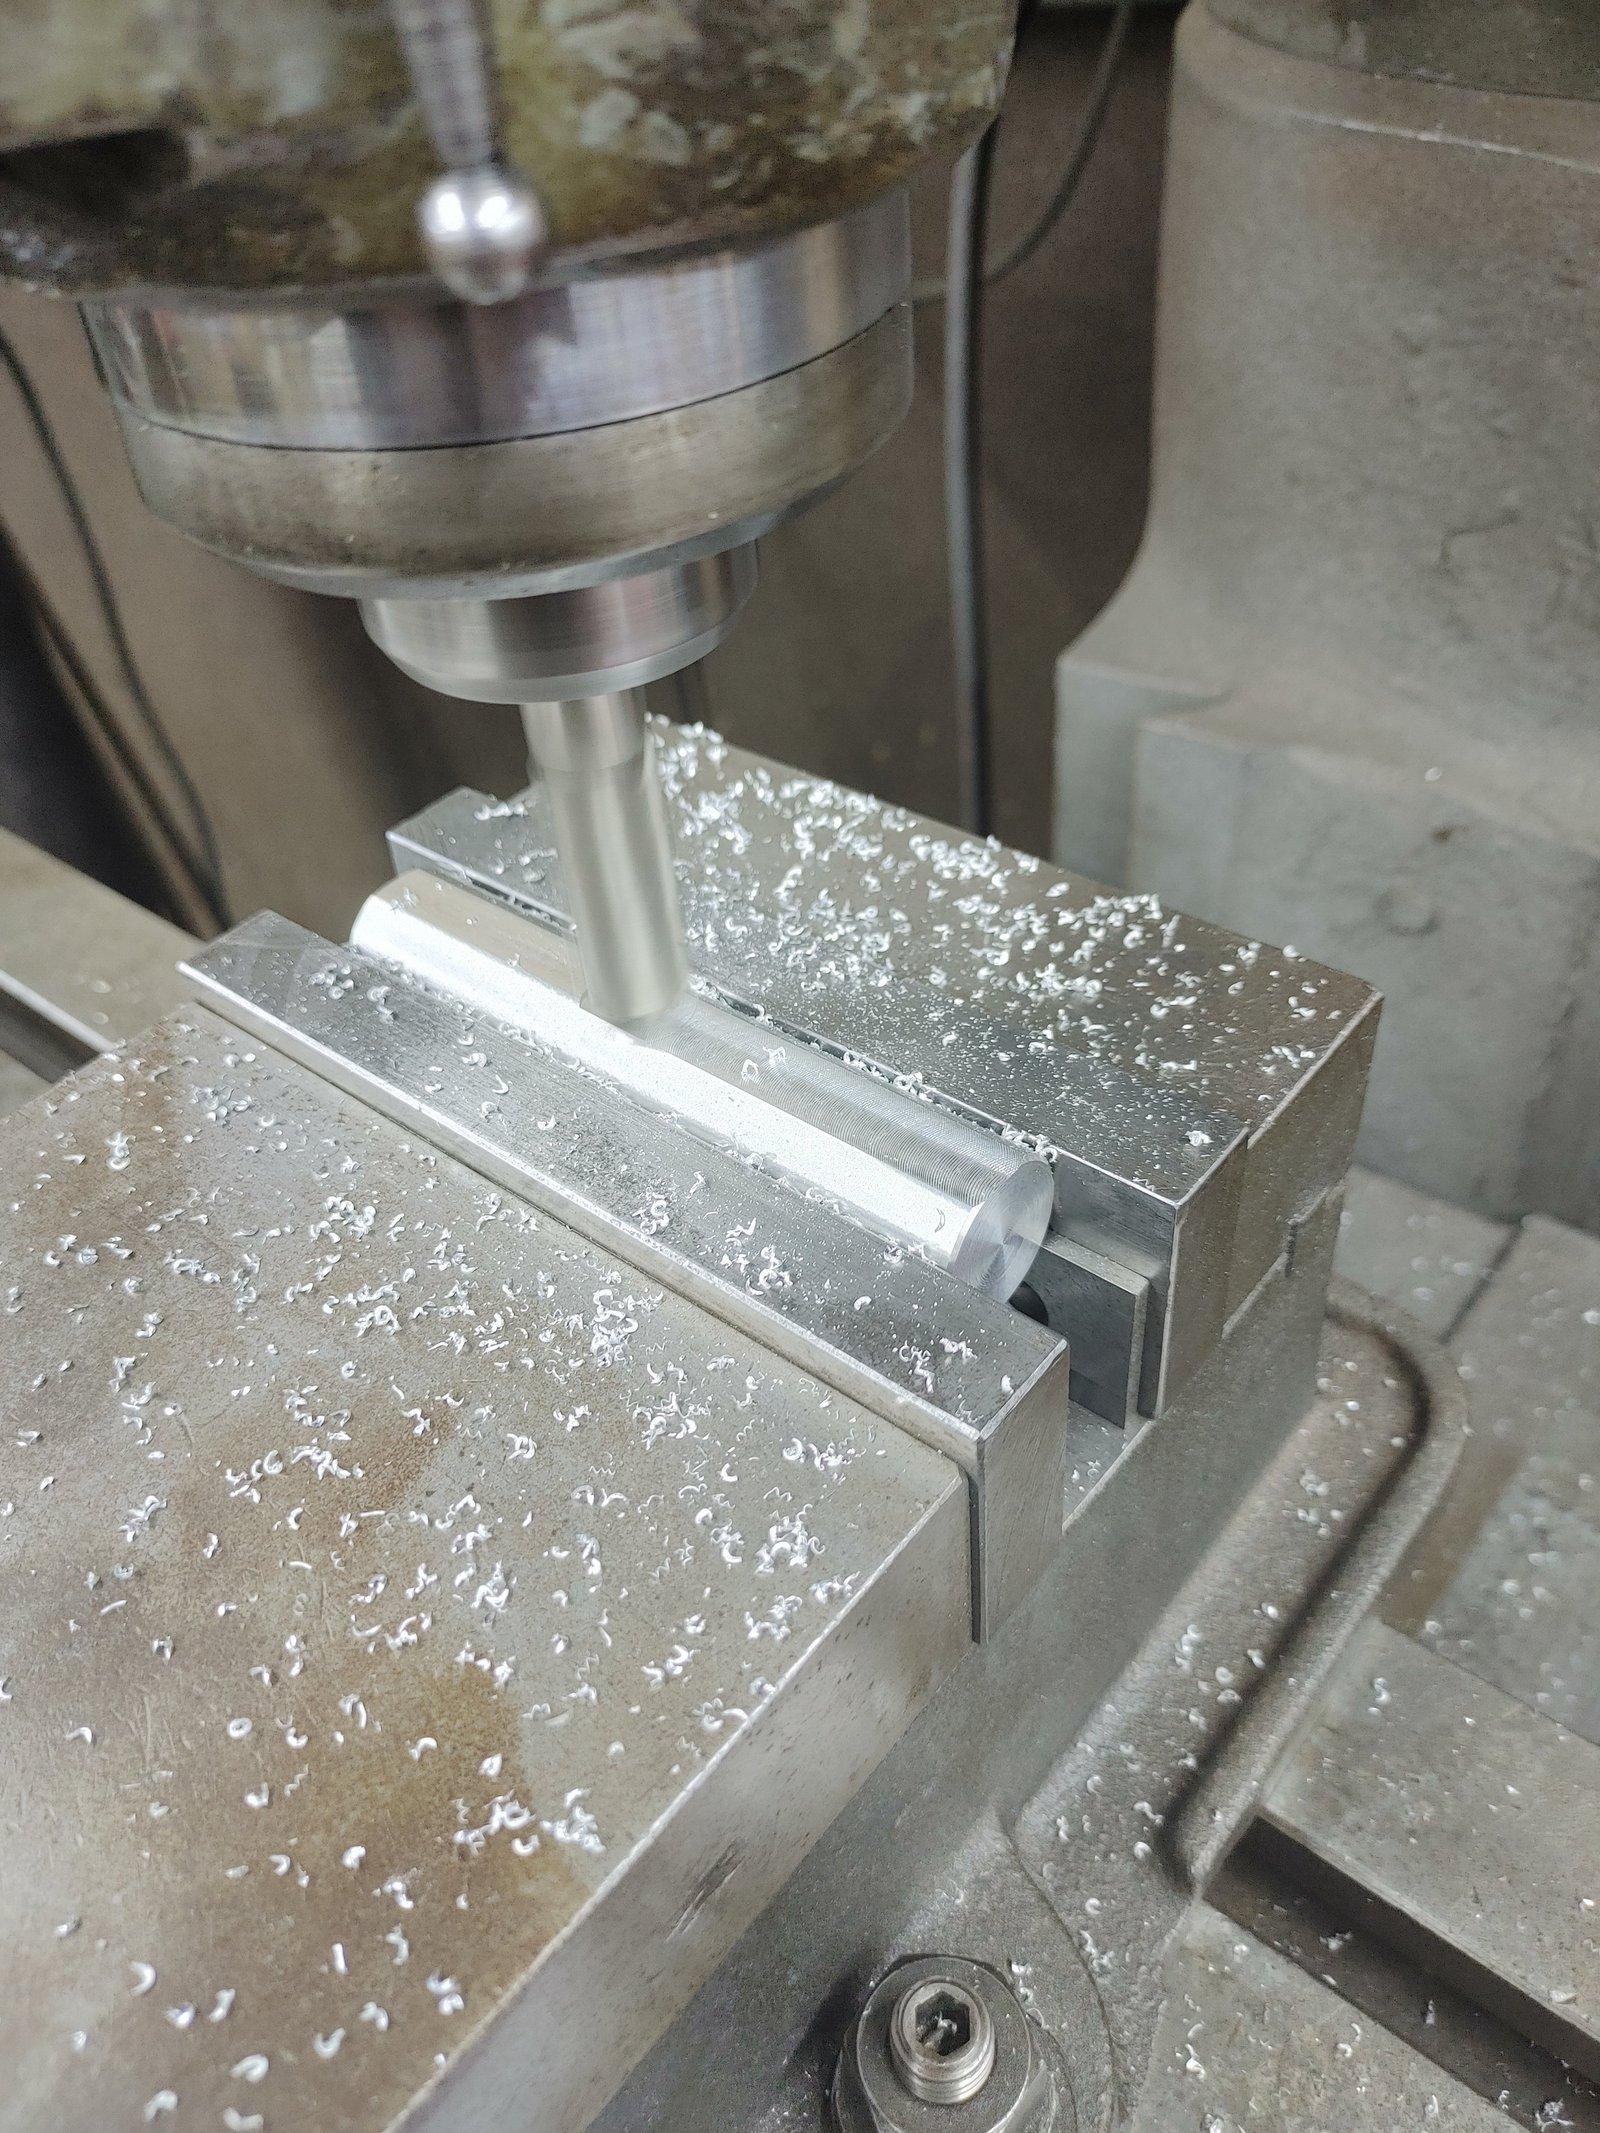
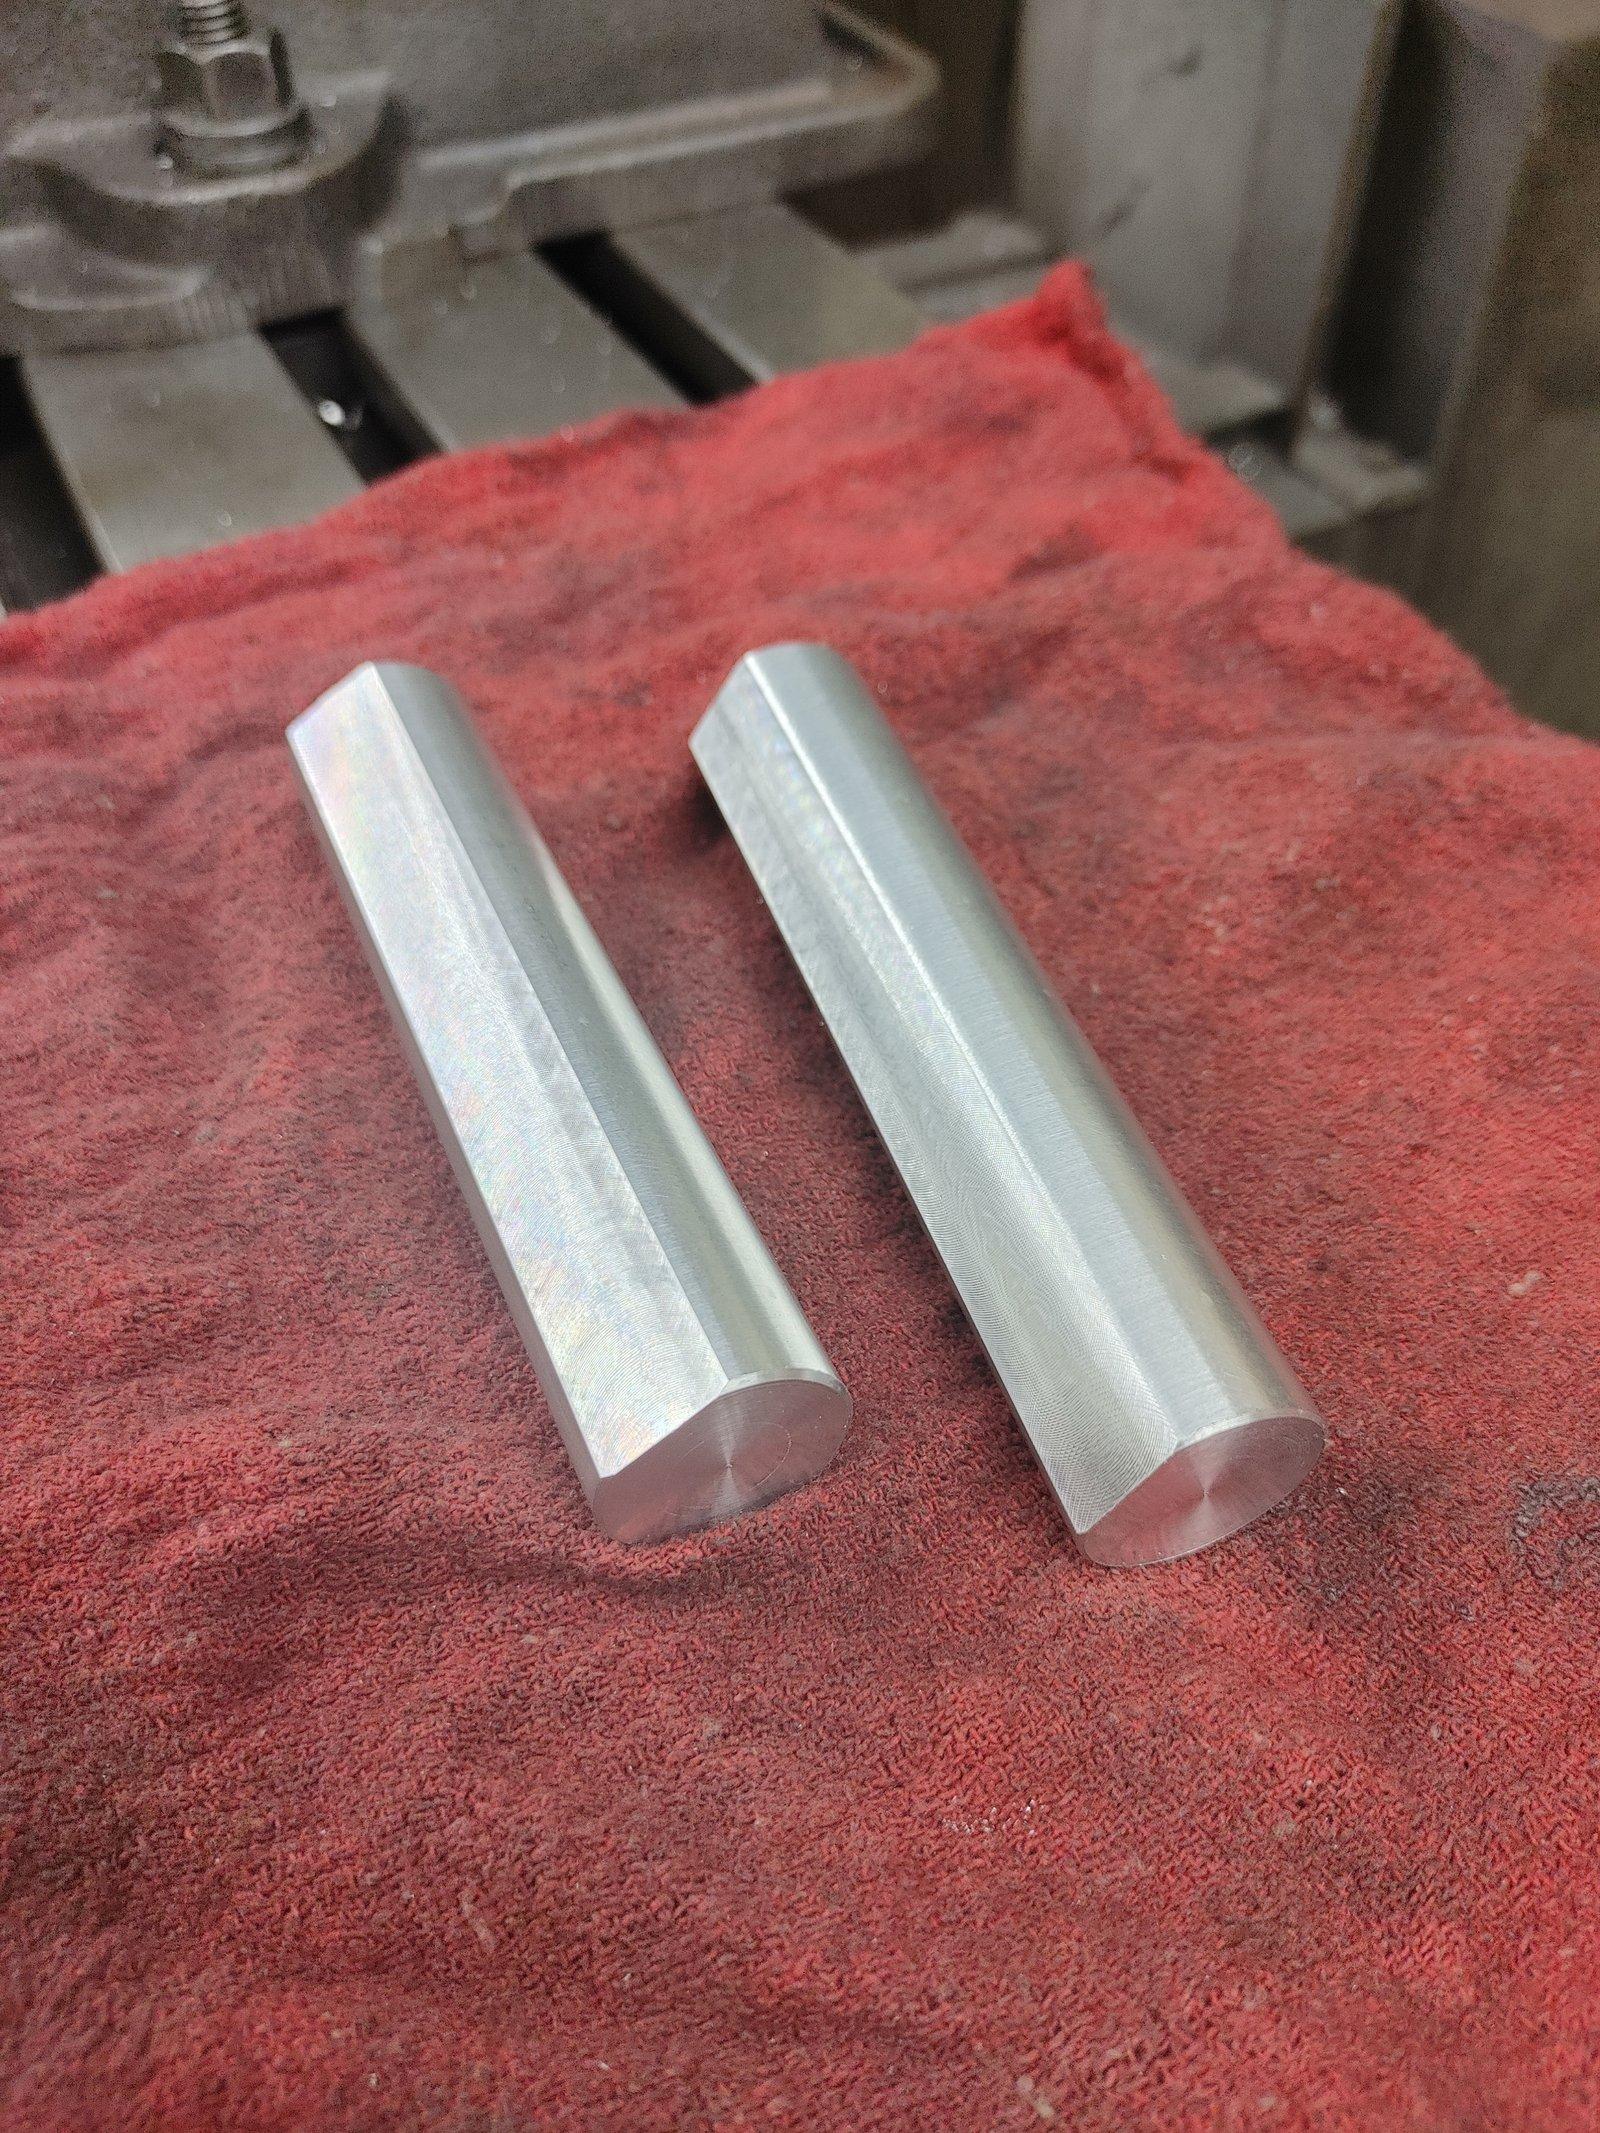
Finalized with fly-cut cross-hatch machining and omitted the thin sheet metal bracket mounts as they’ll be attached and sealed with polyurethane rubber adhesive. This will mitigate any resonance at the highest volumes….
 xschopBRONZE Member
Tired of the foam I had under them to angle up at the desk….
 xschopBRONZE Member
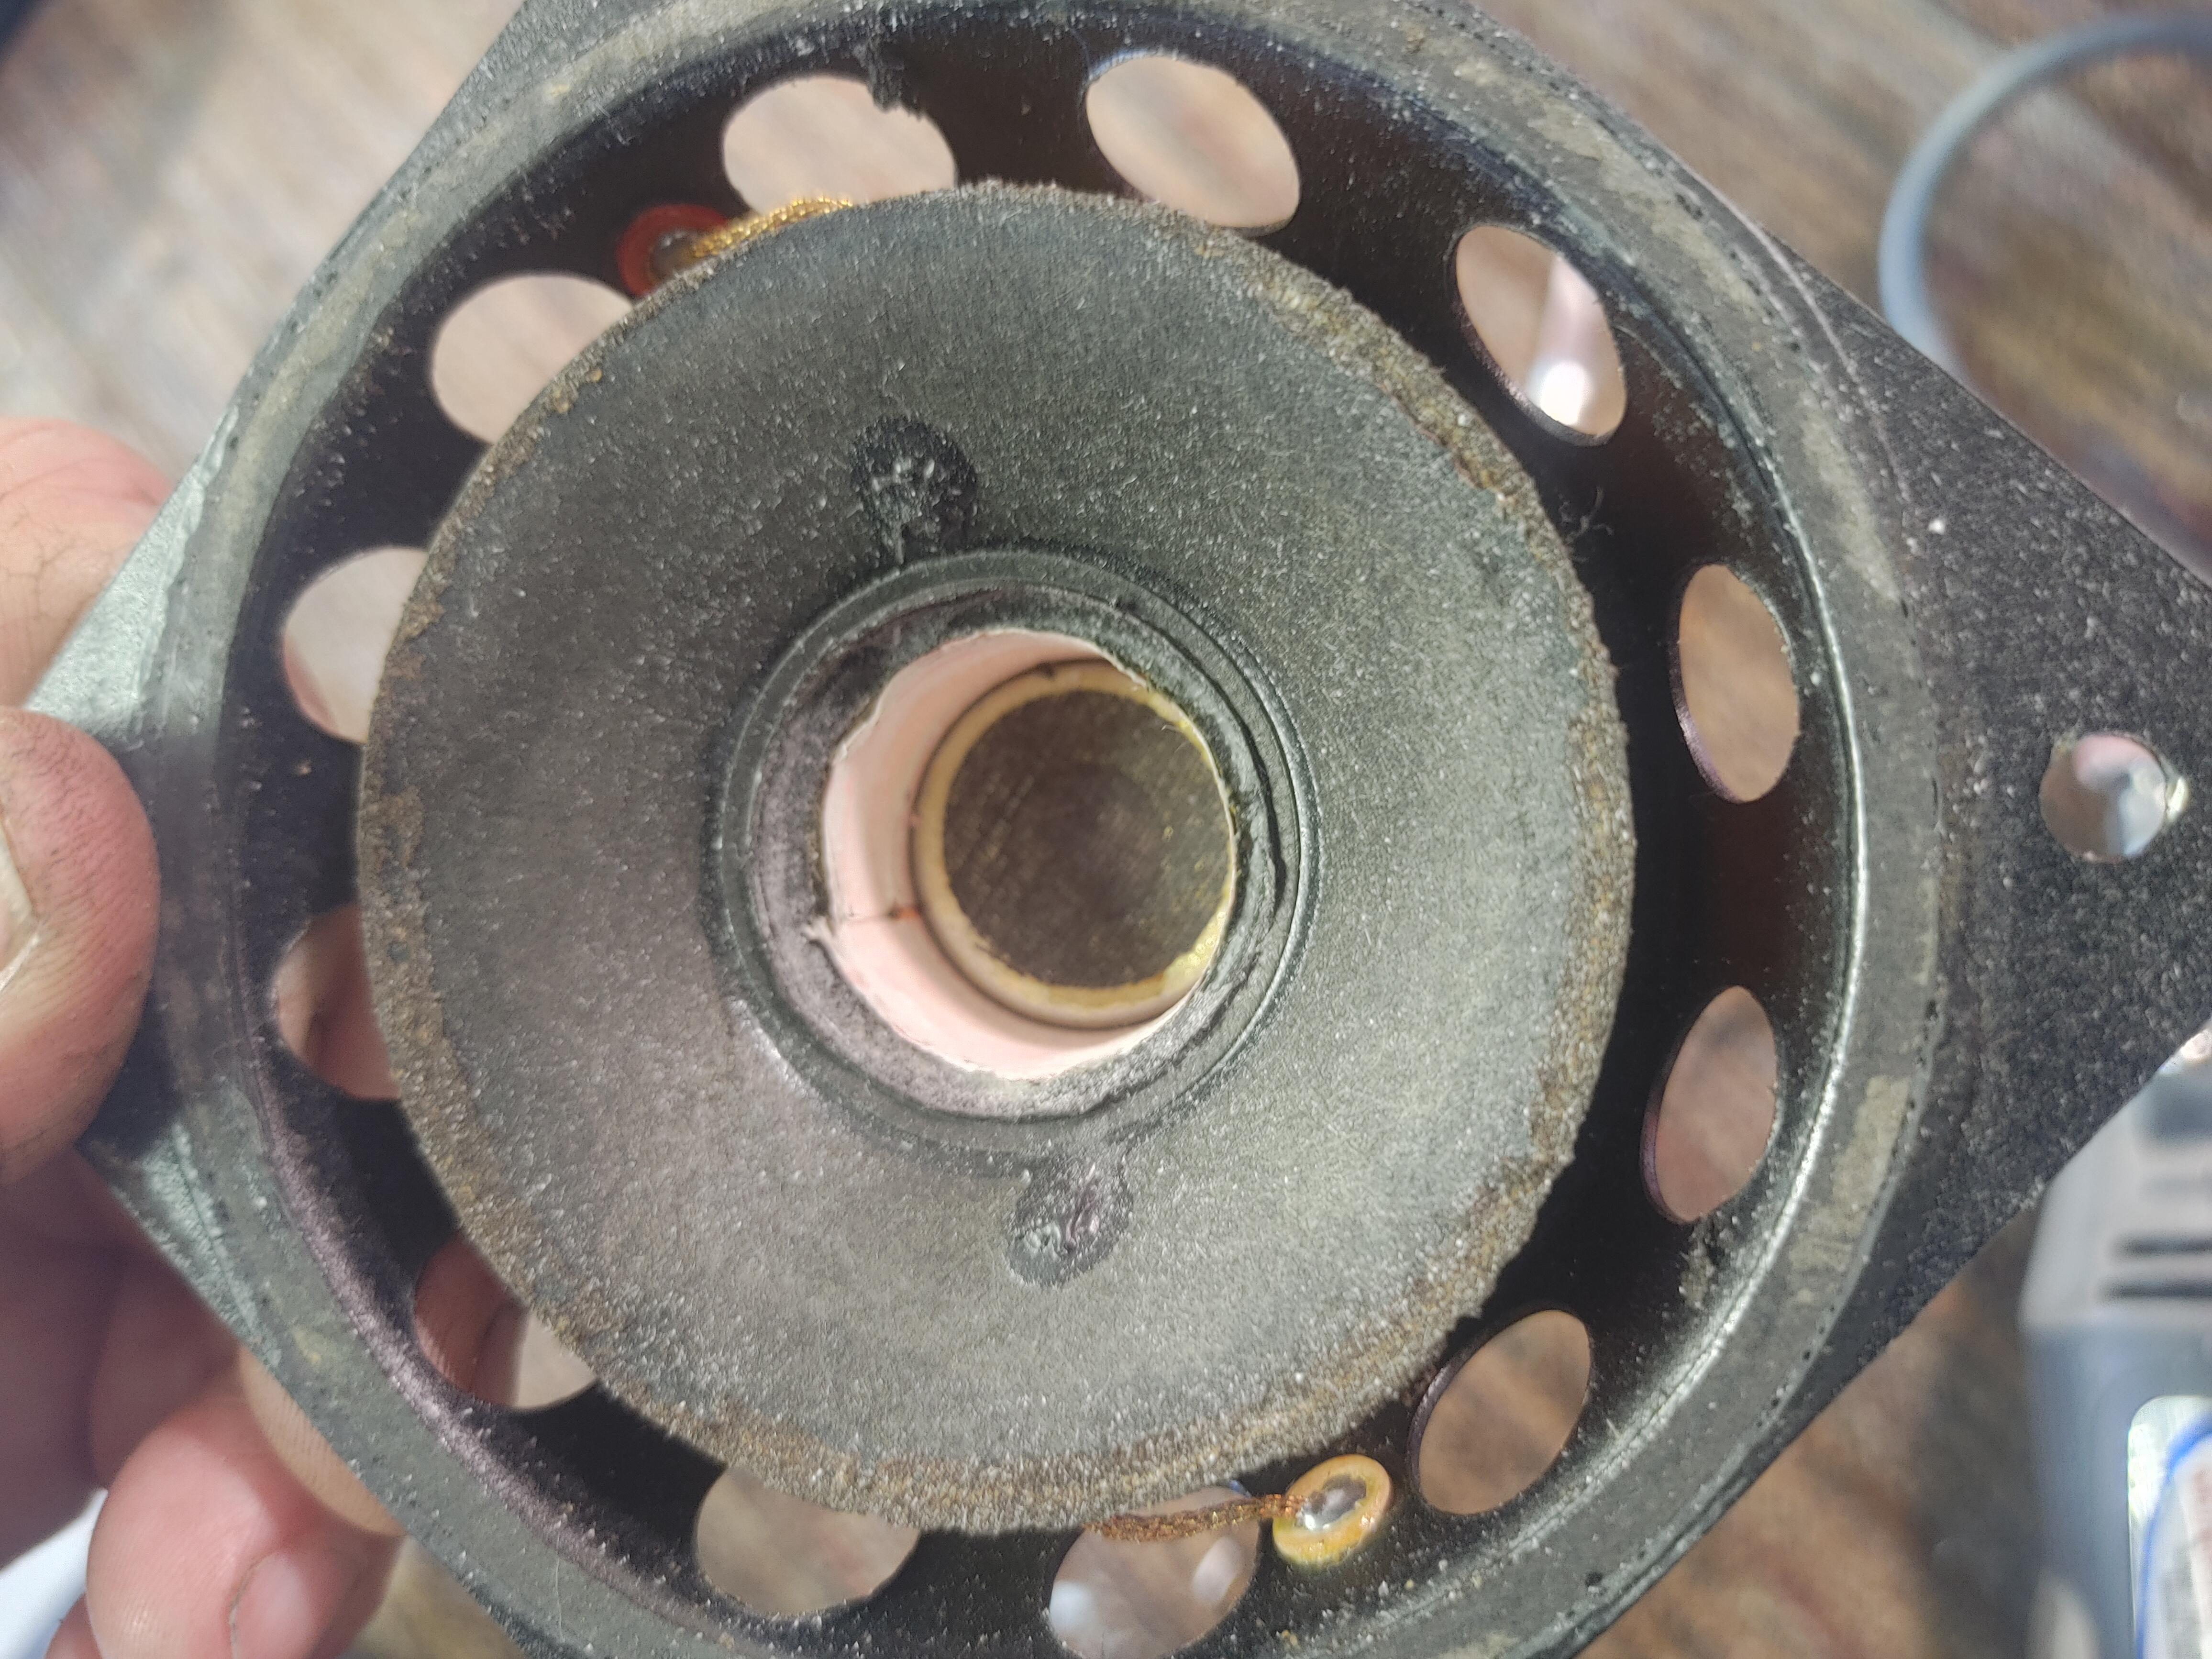
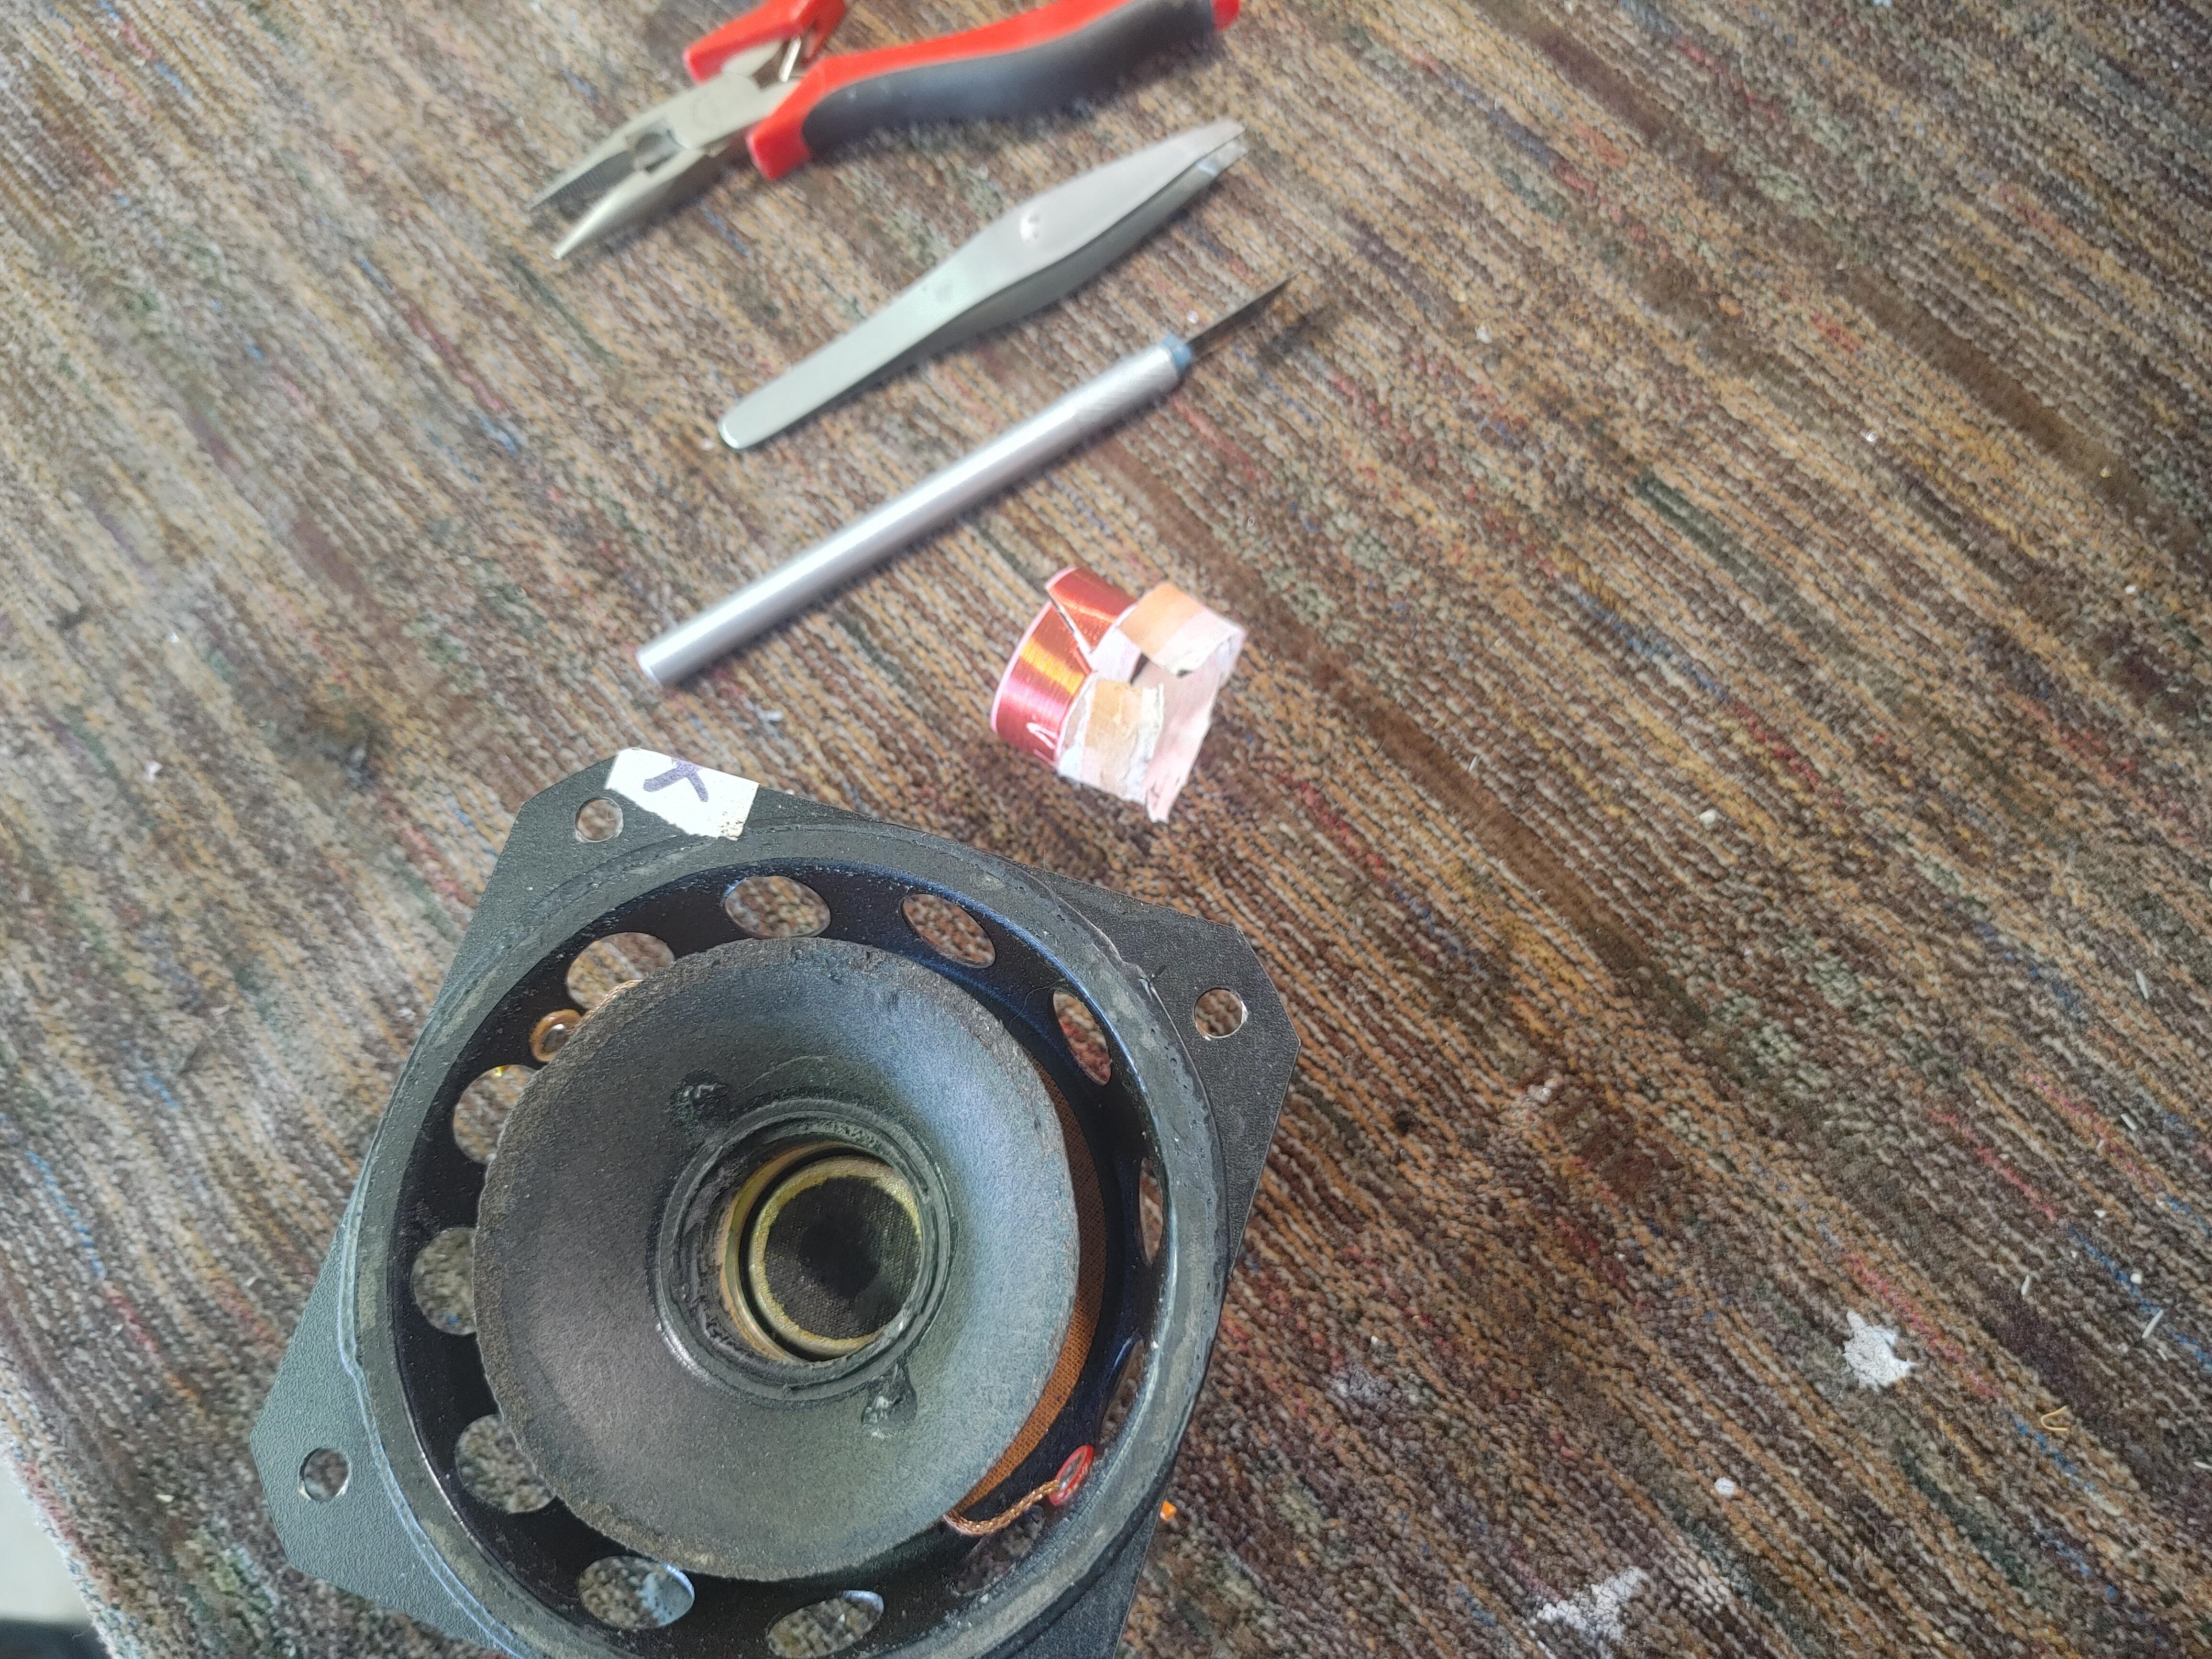
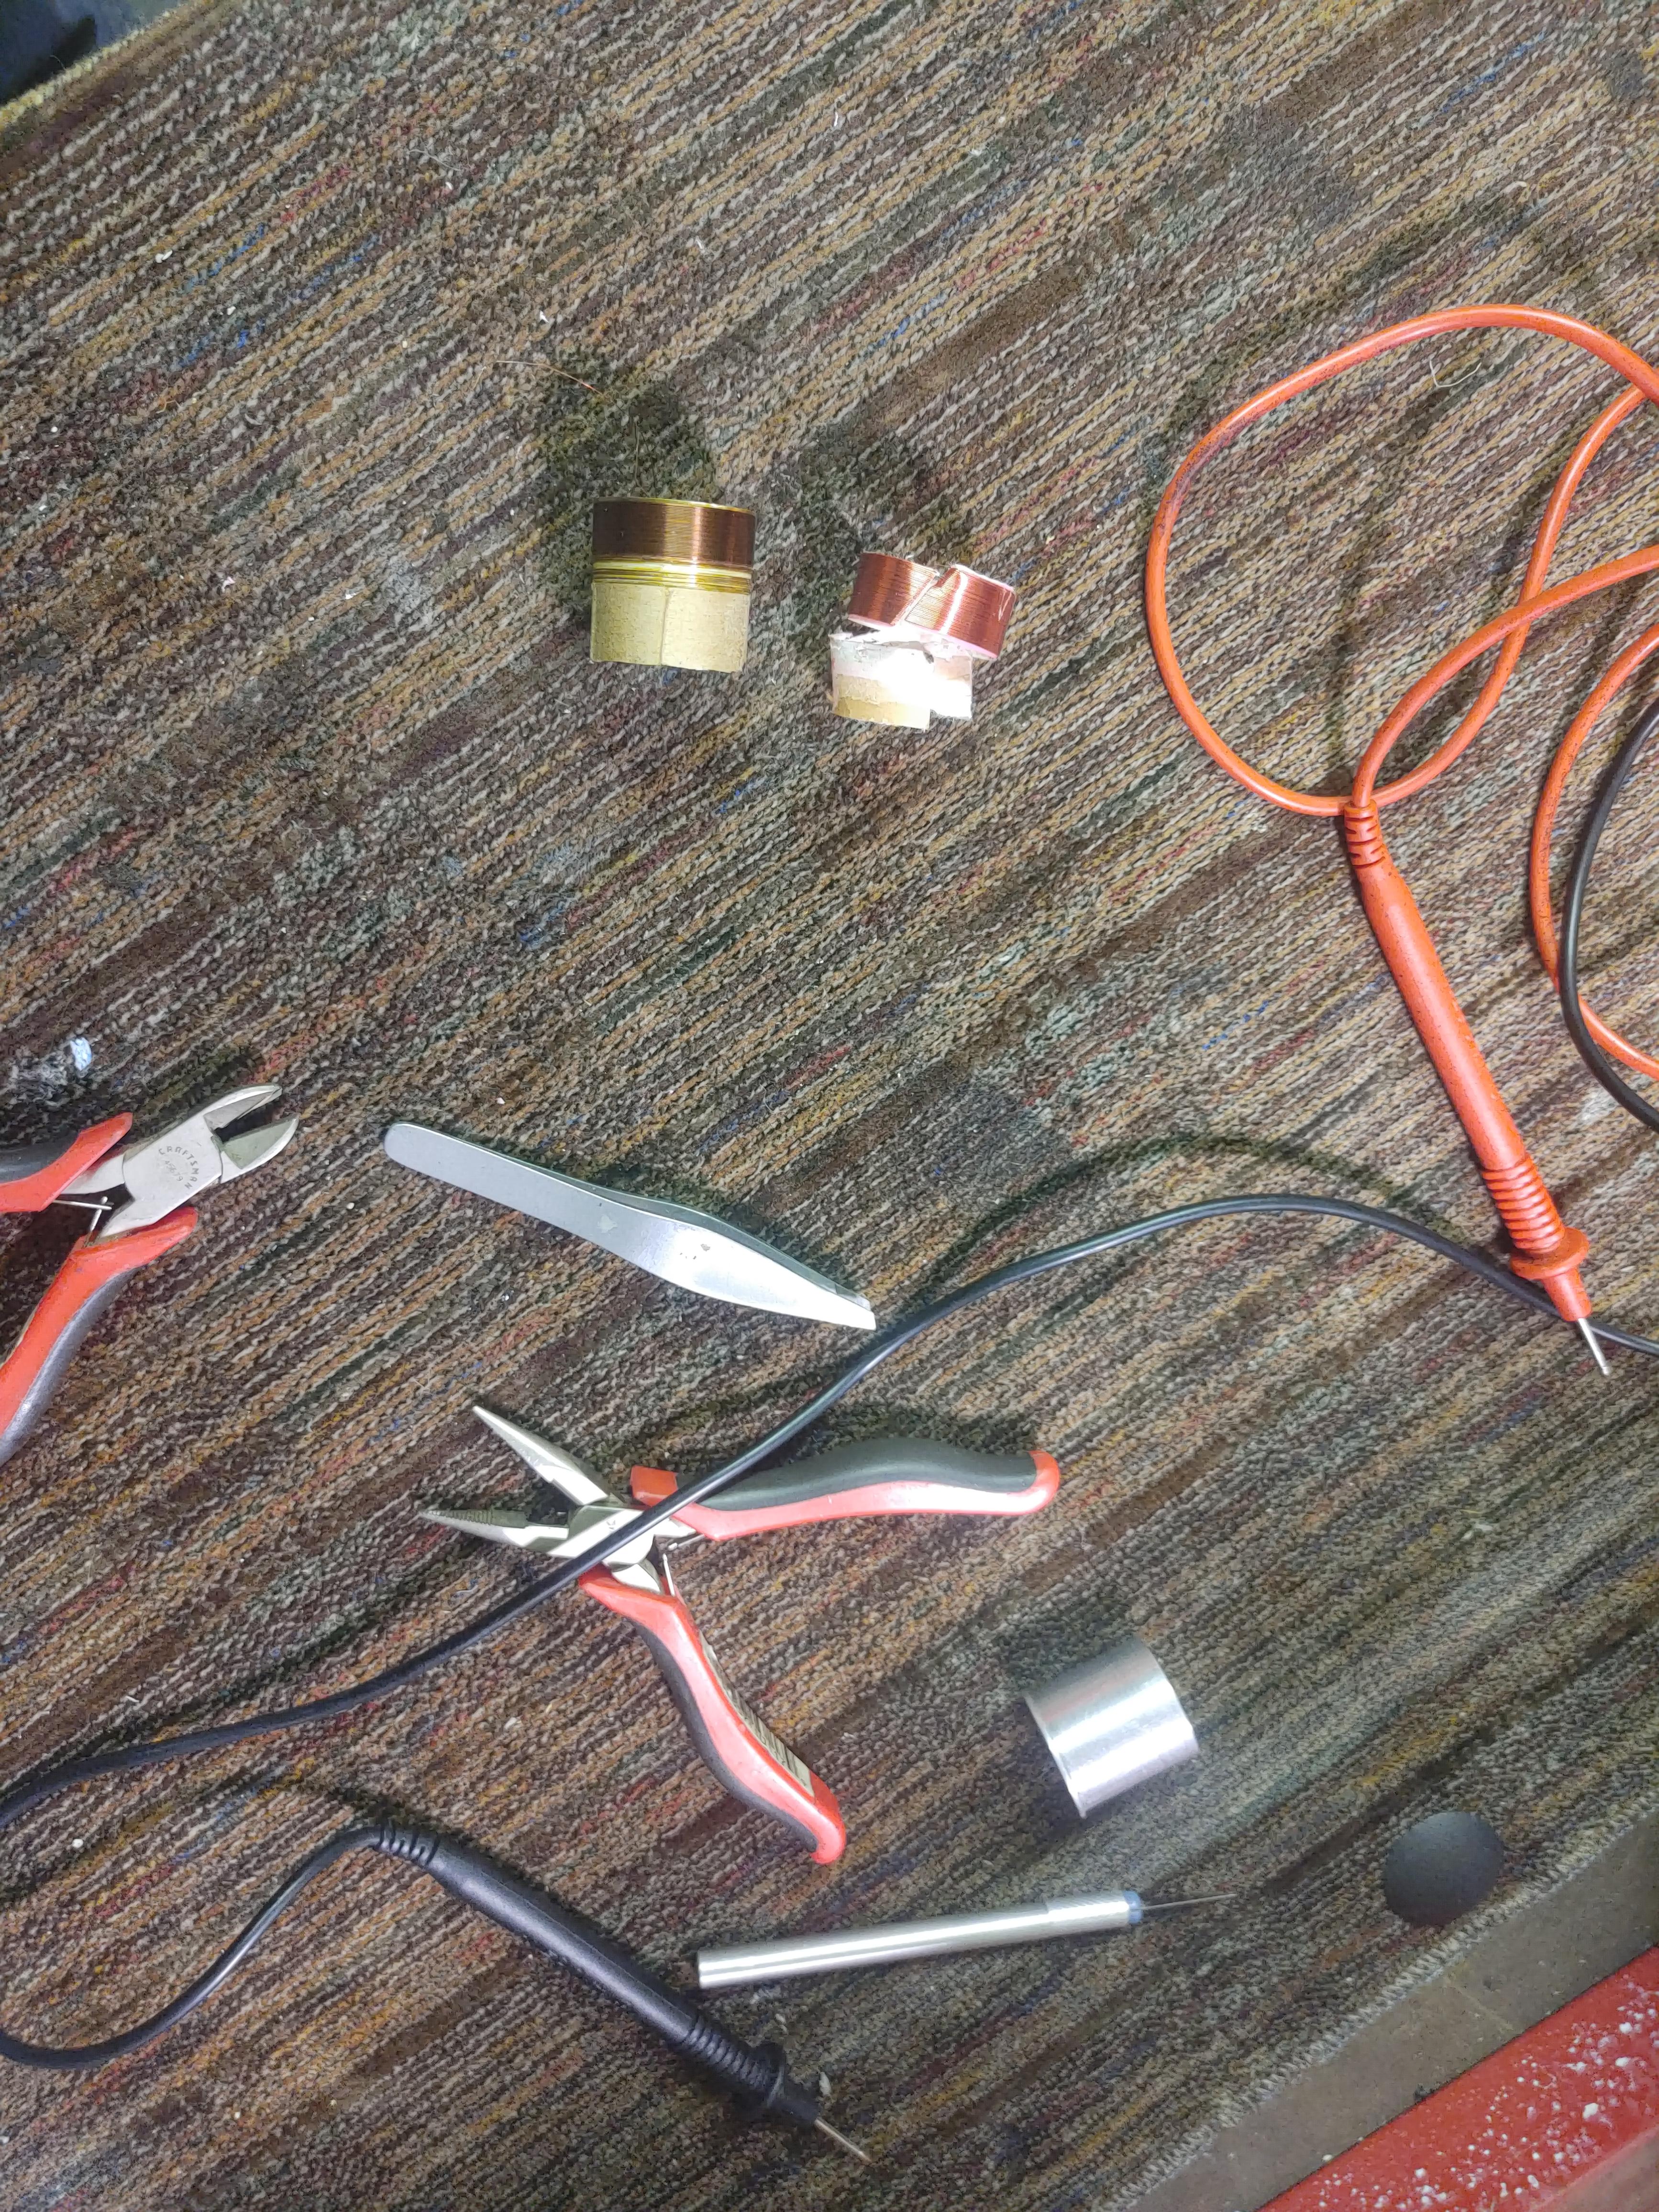
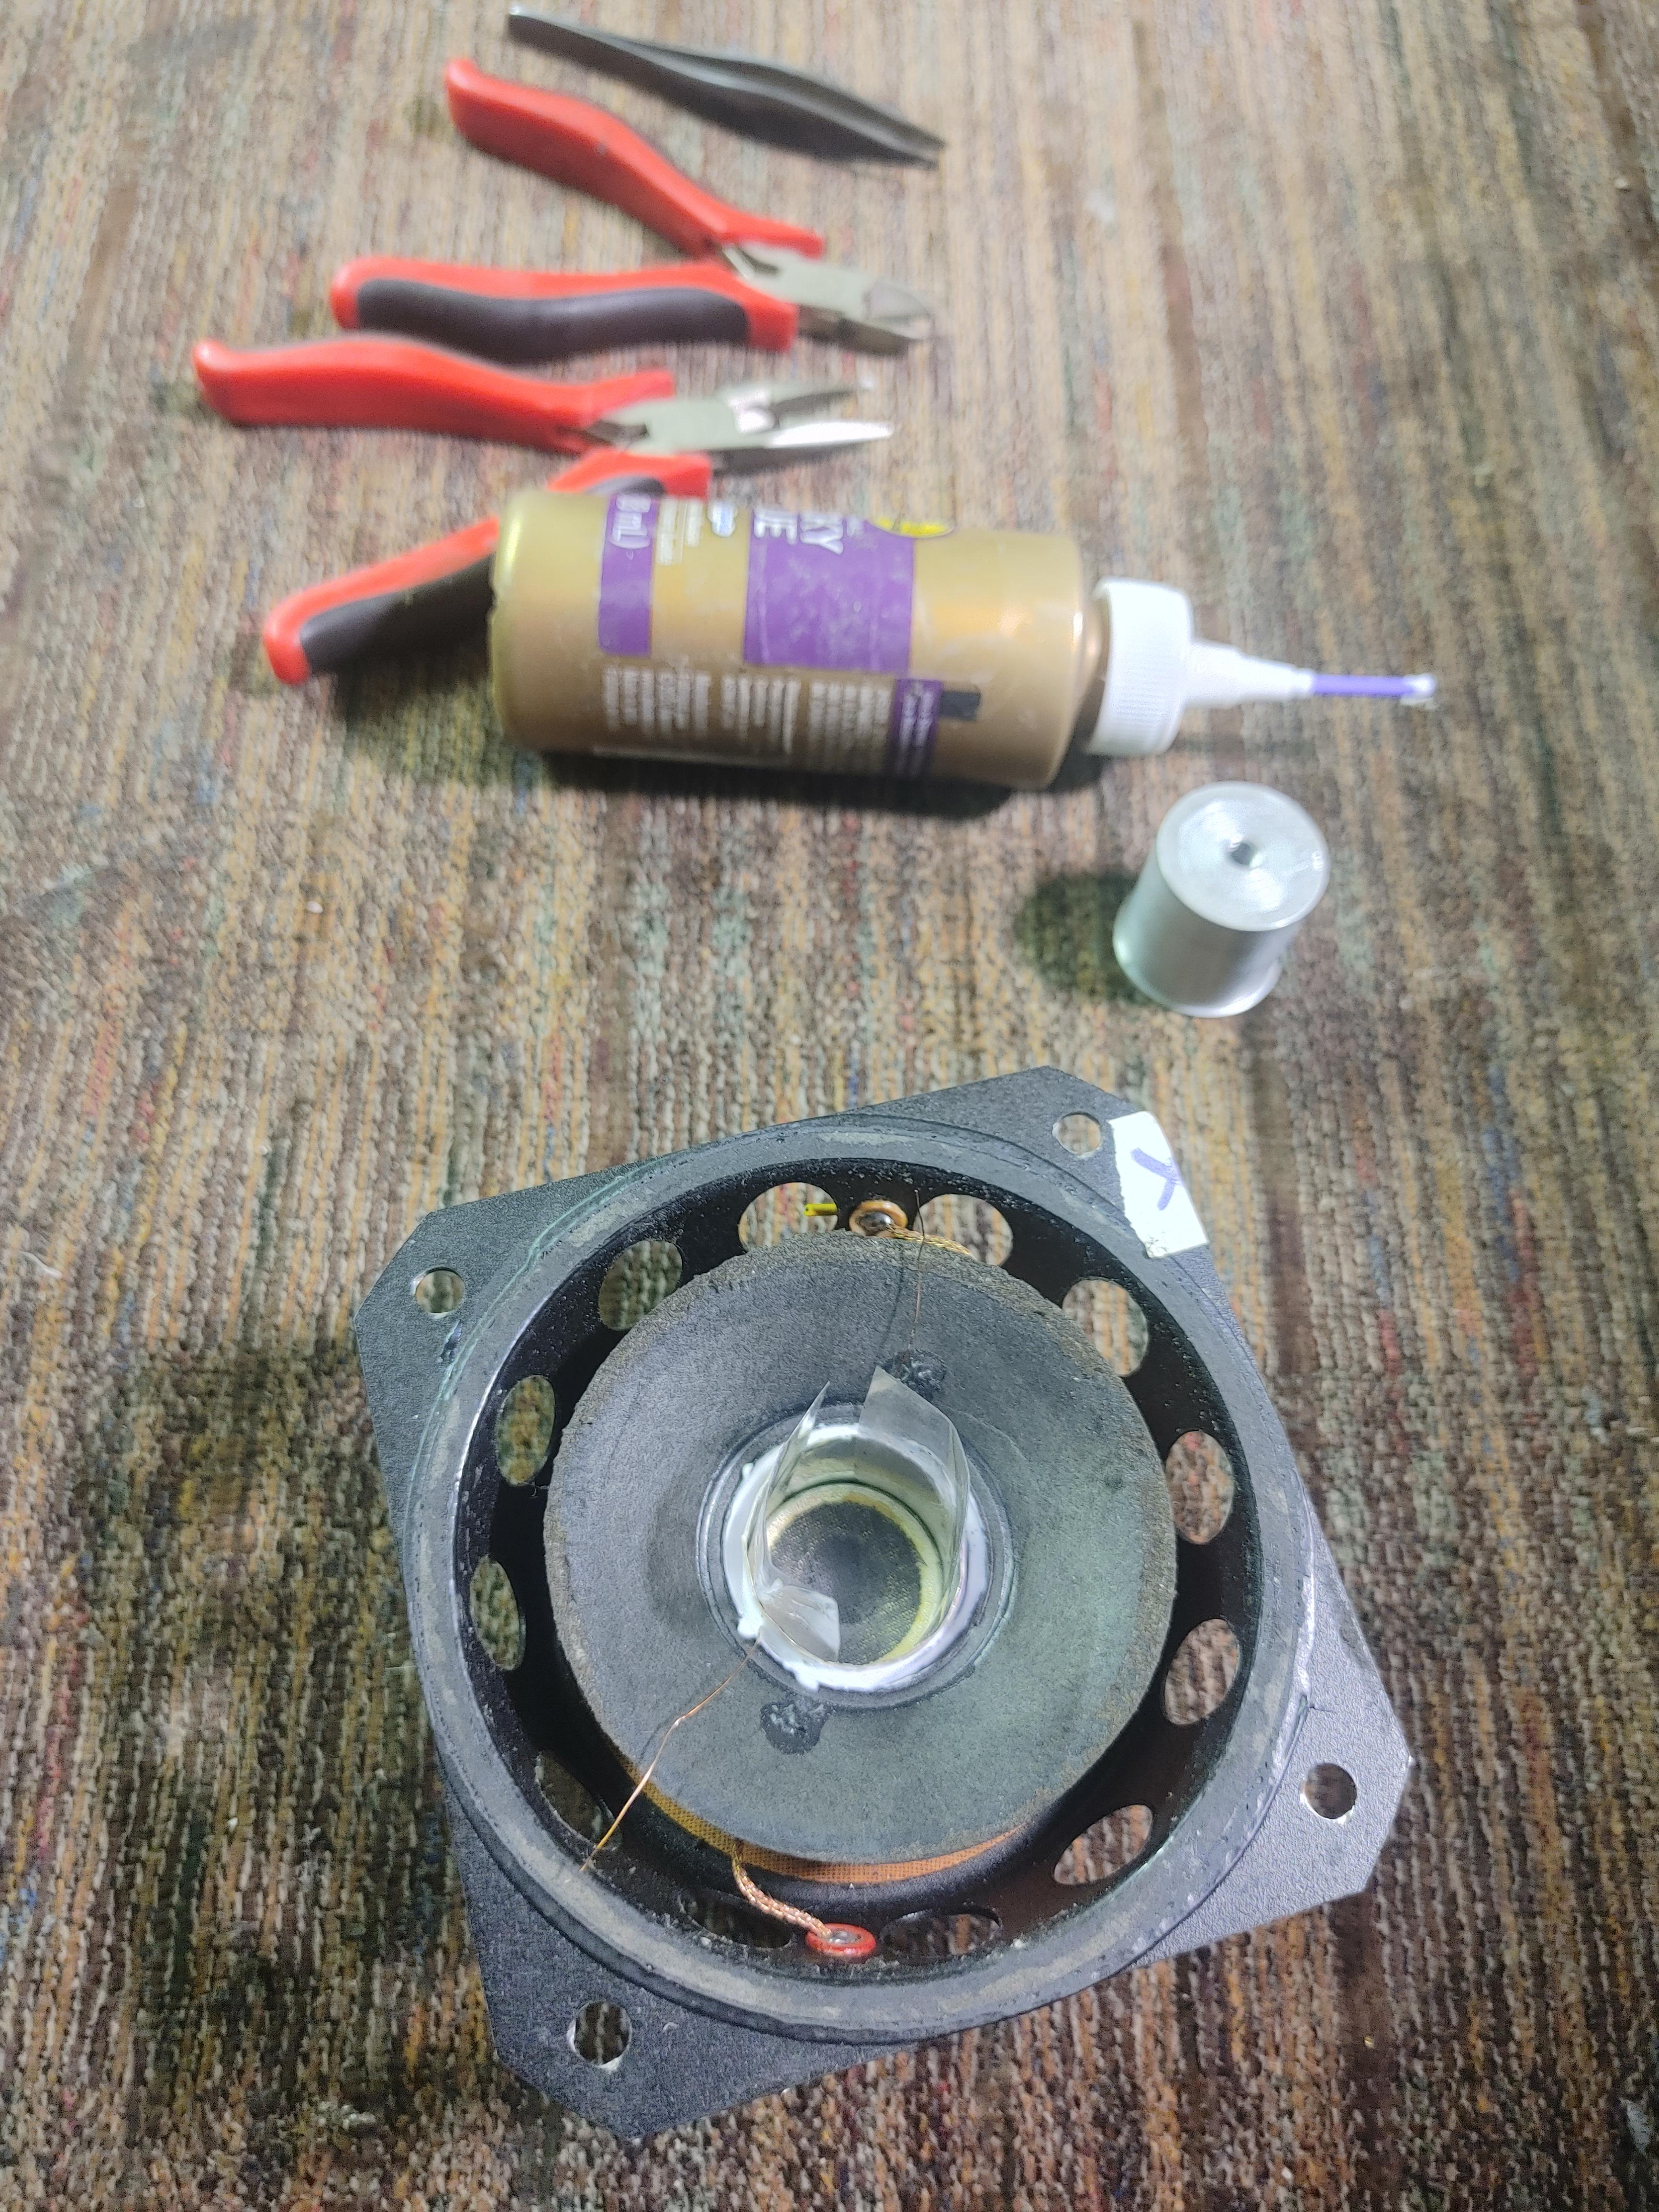
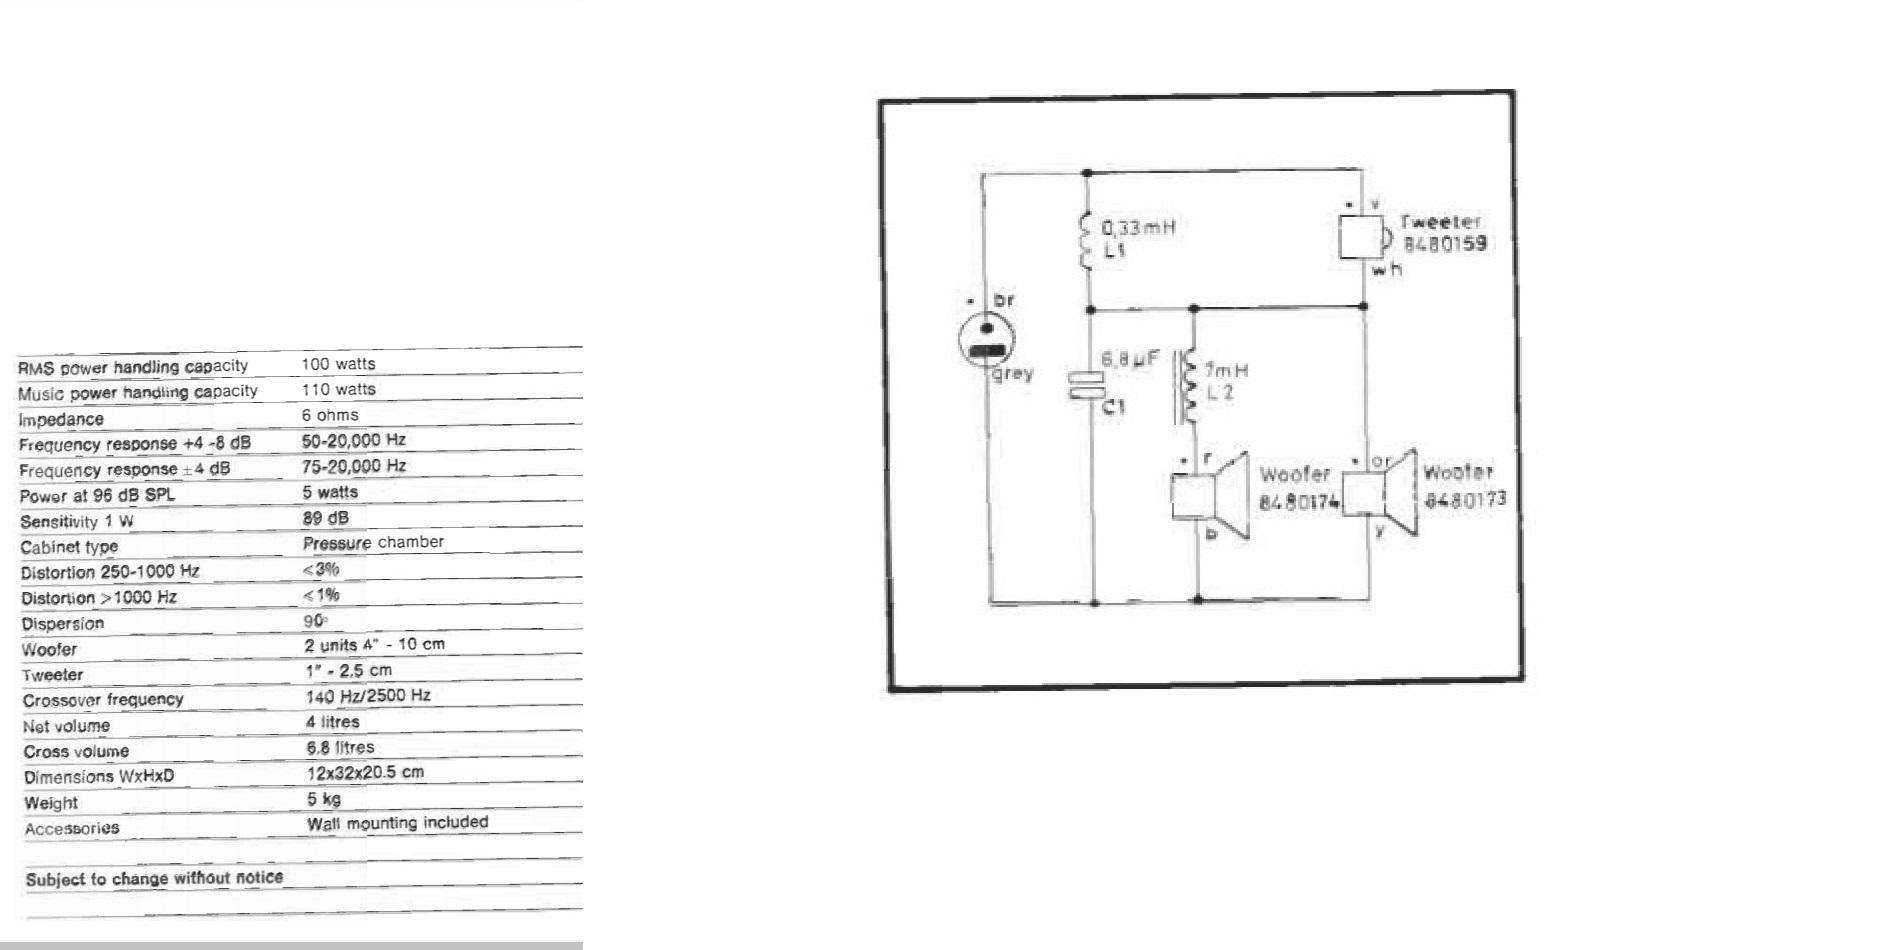
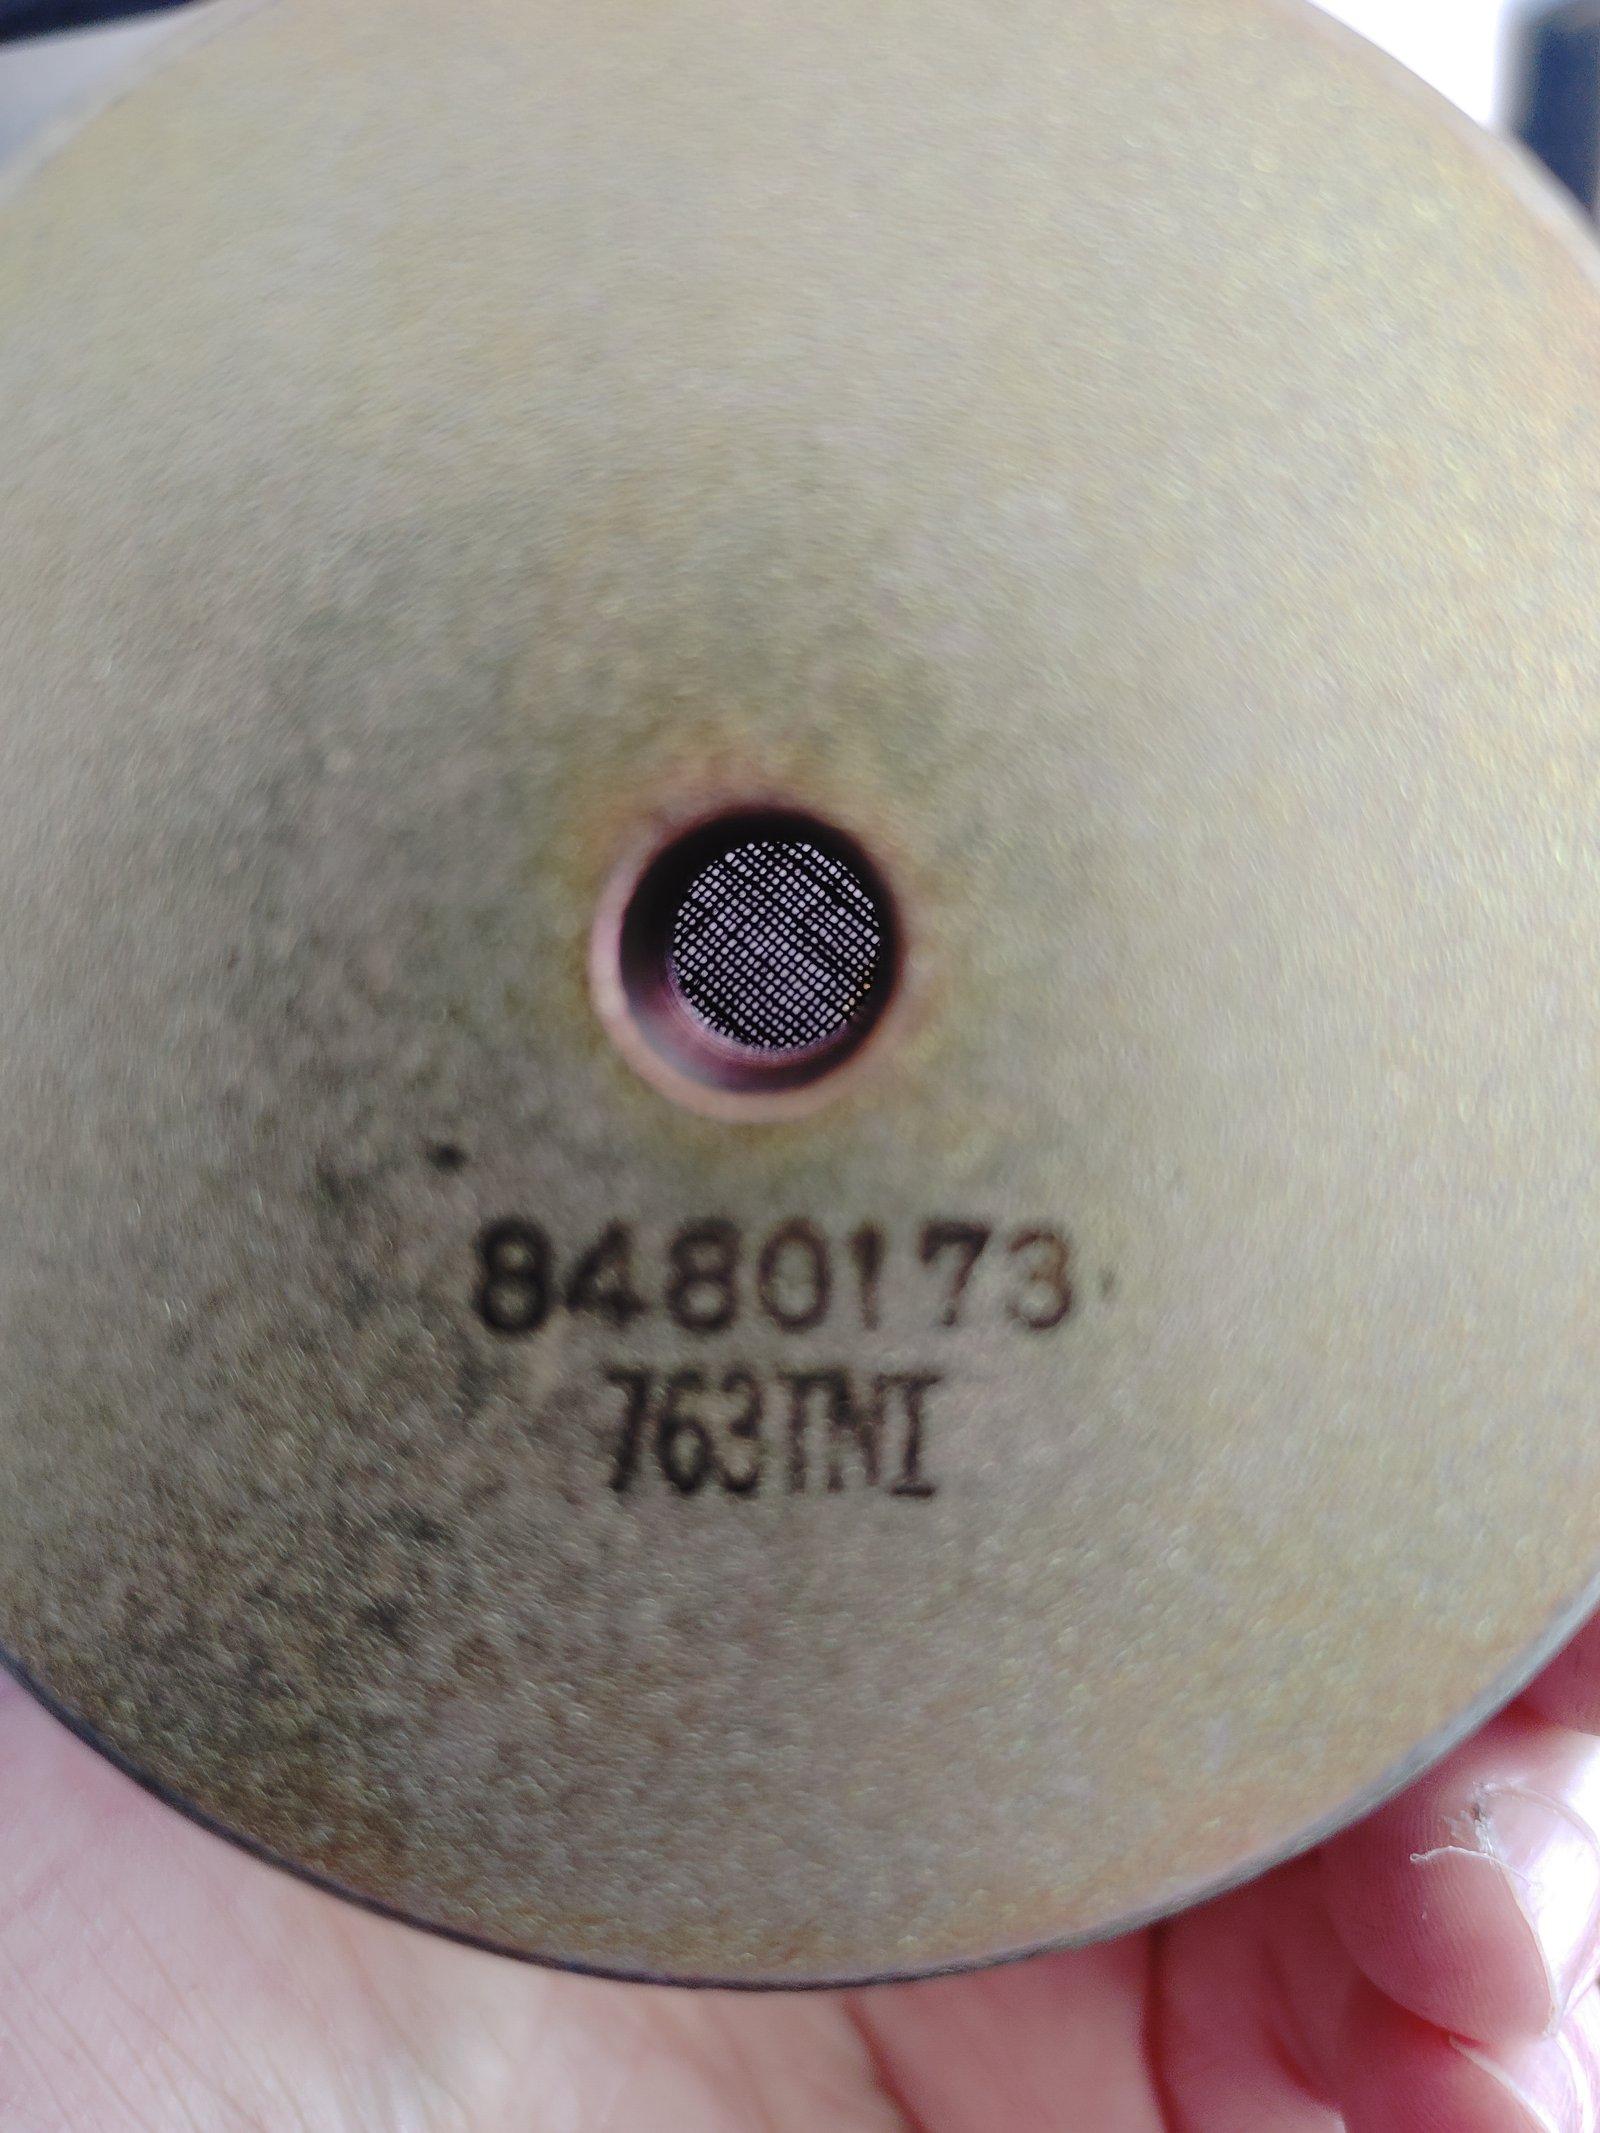
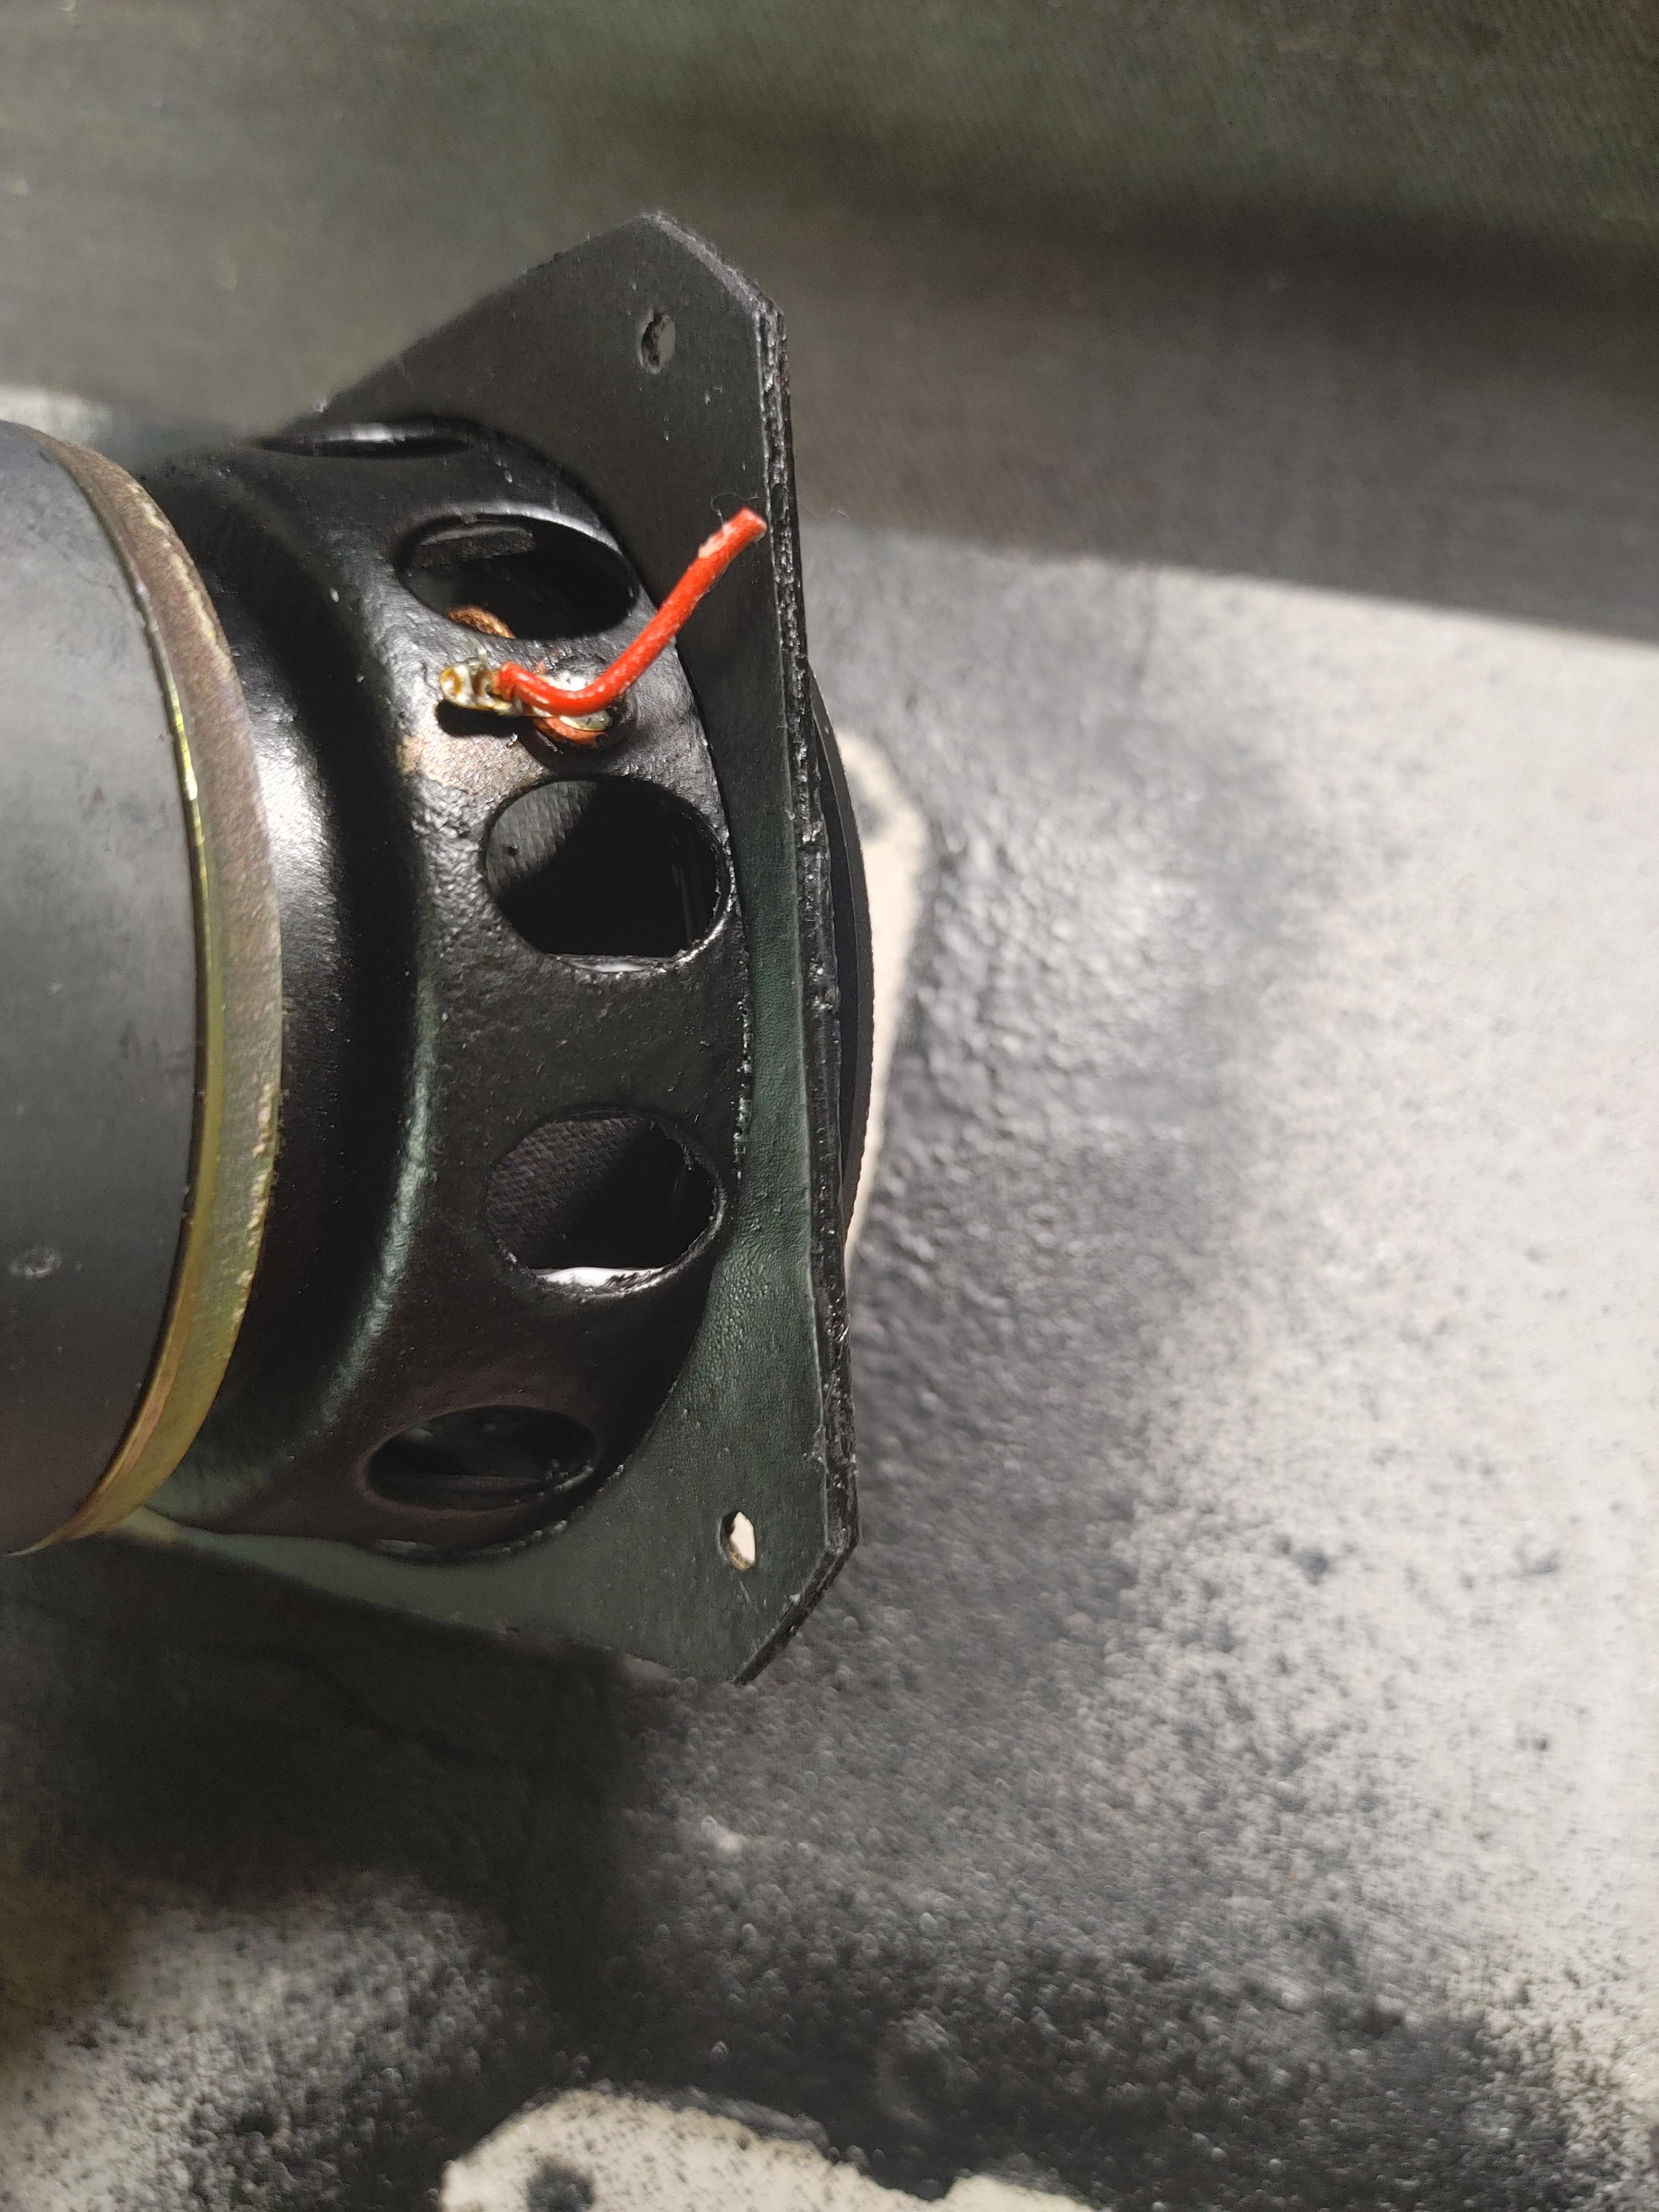
The other midrange coil was fried, so I unwound a 25.5mm ID 6.5ohm coil down to 5.2ohm to match the other midrange driver. Cut to 0.950″ total length with 0.44″ coil length to match as well. Glued in and set with shims leaving wires close to ferrule attachment points for soldering….
 xschopBRONZE Member
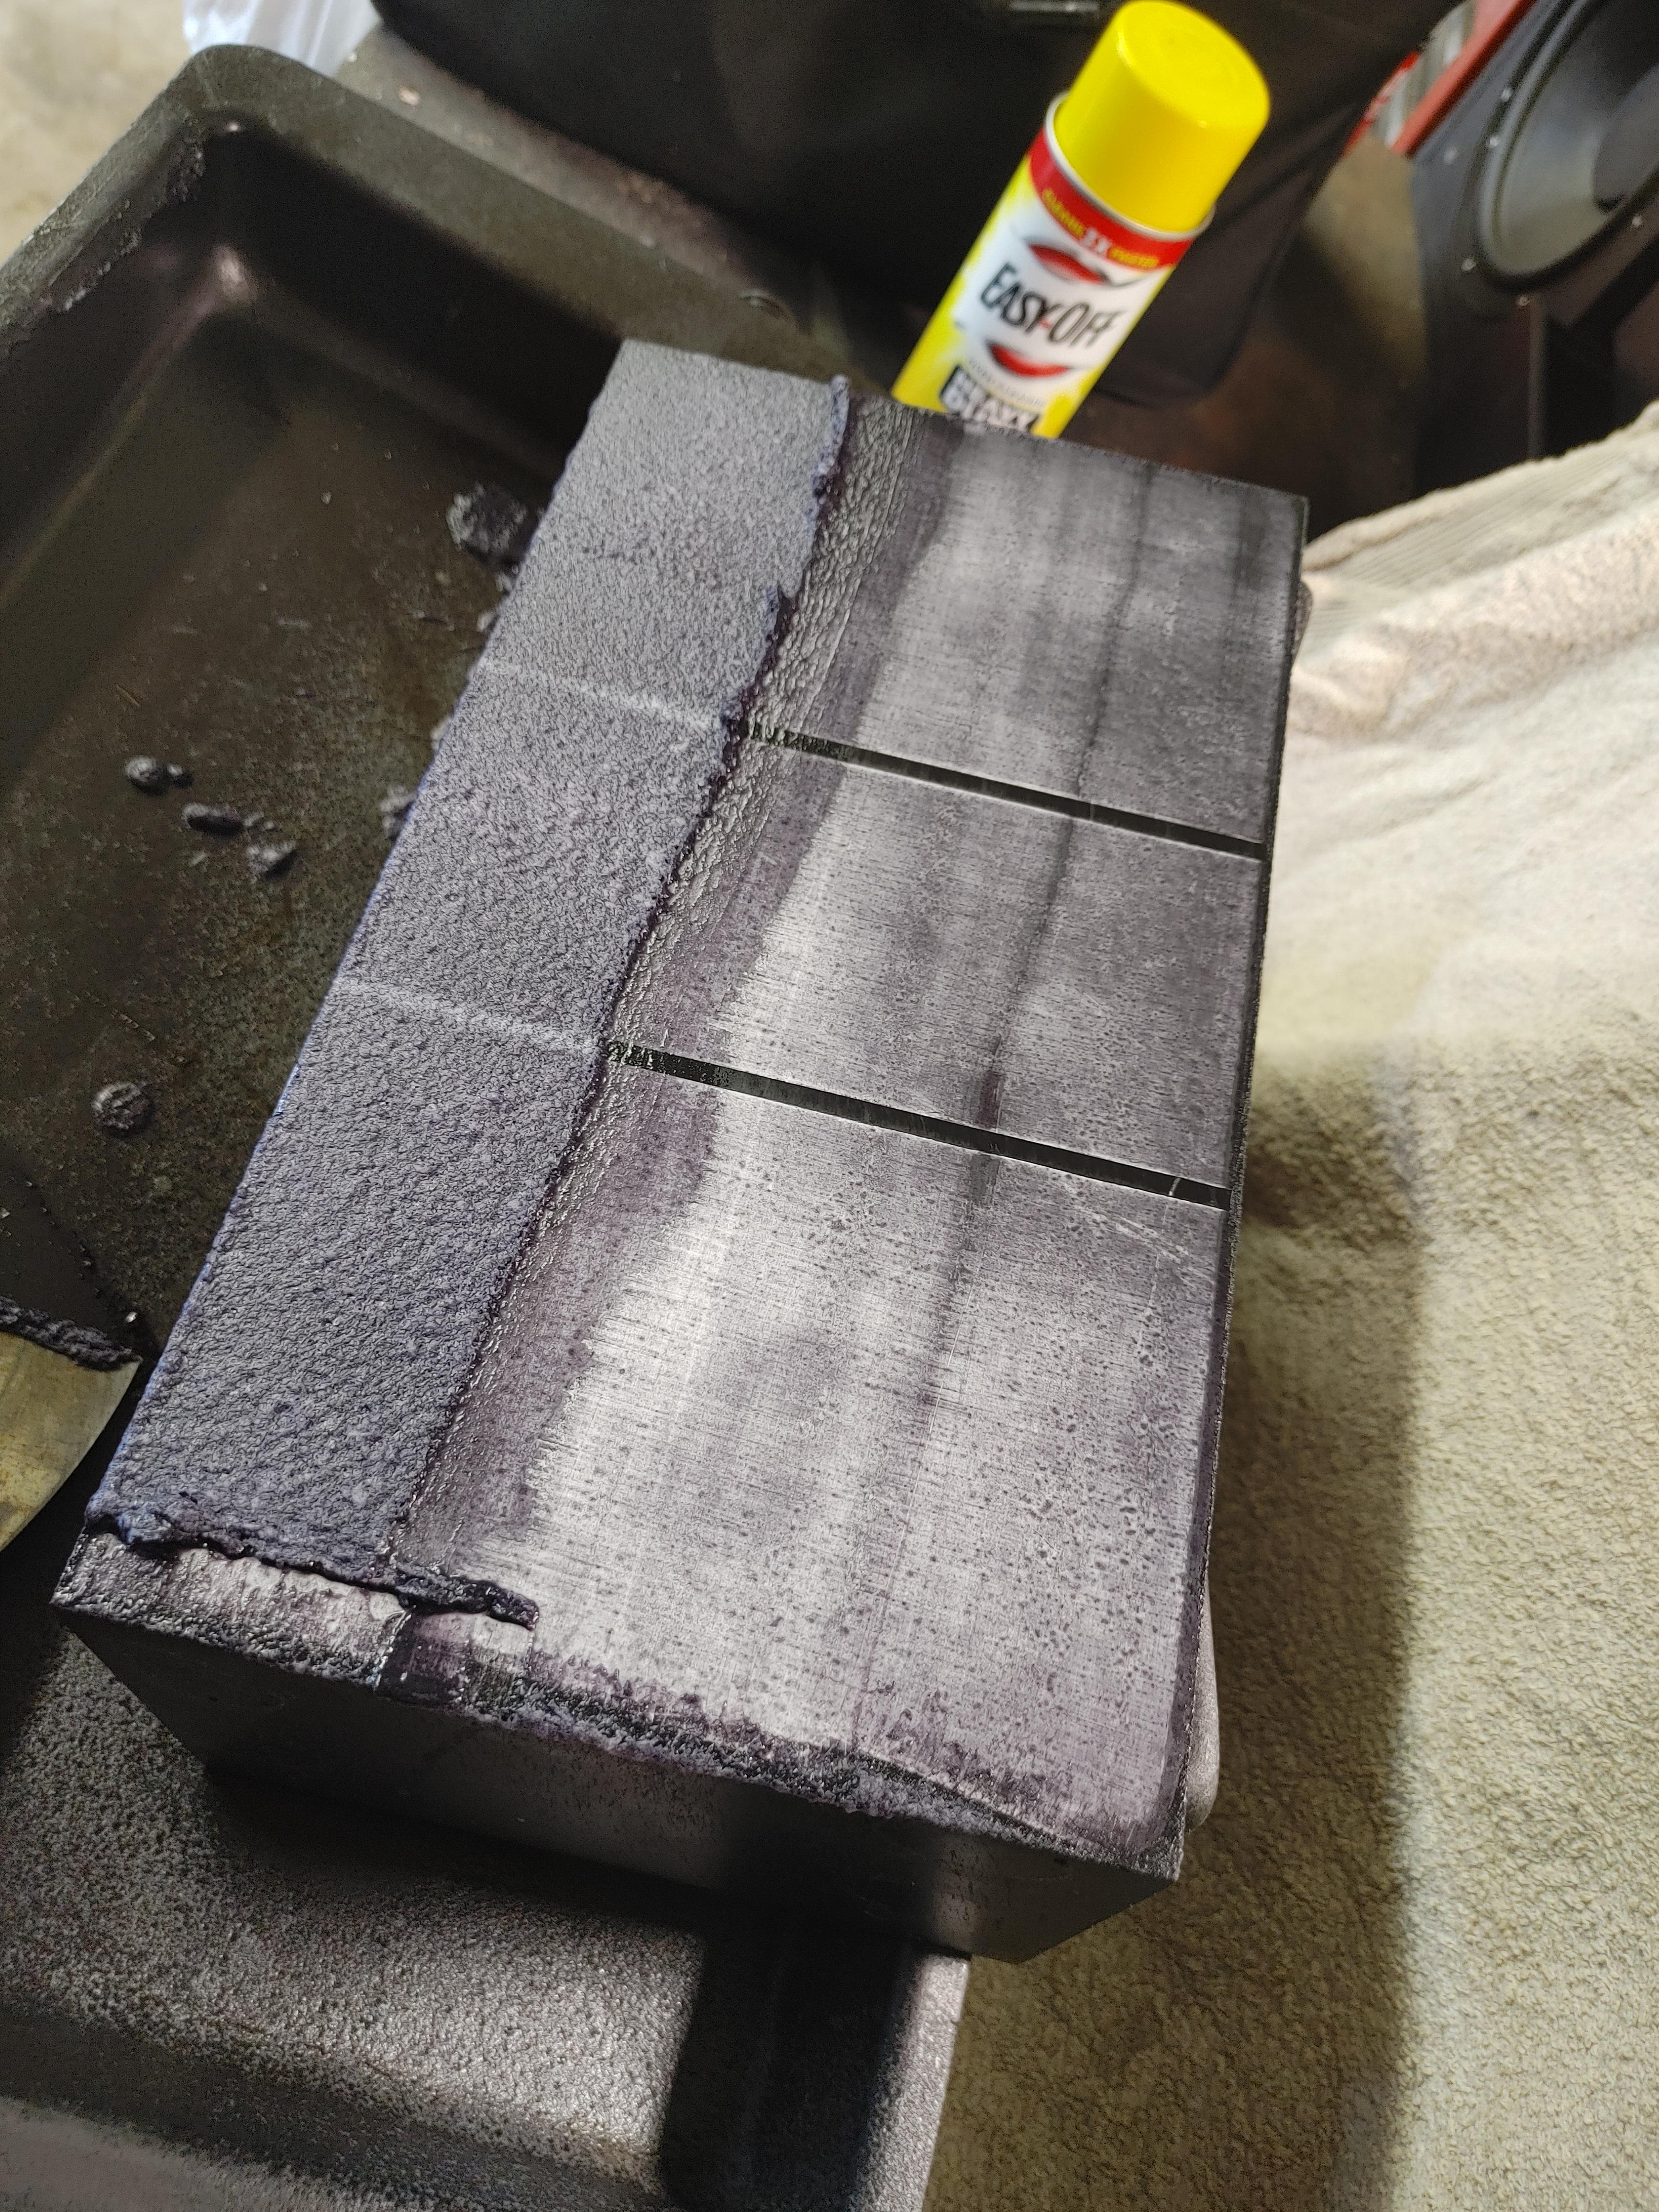
The black anodizing on this particular set was damaged by previous owner, so I’ll make them with the brushed alloy patina… Over the years I’ve used NaOH solutions, but have found heavy duty oven clean works great with 2 applications…
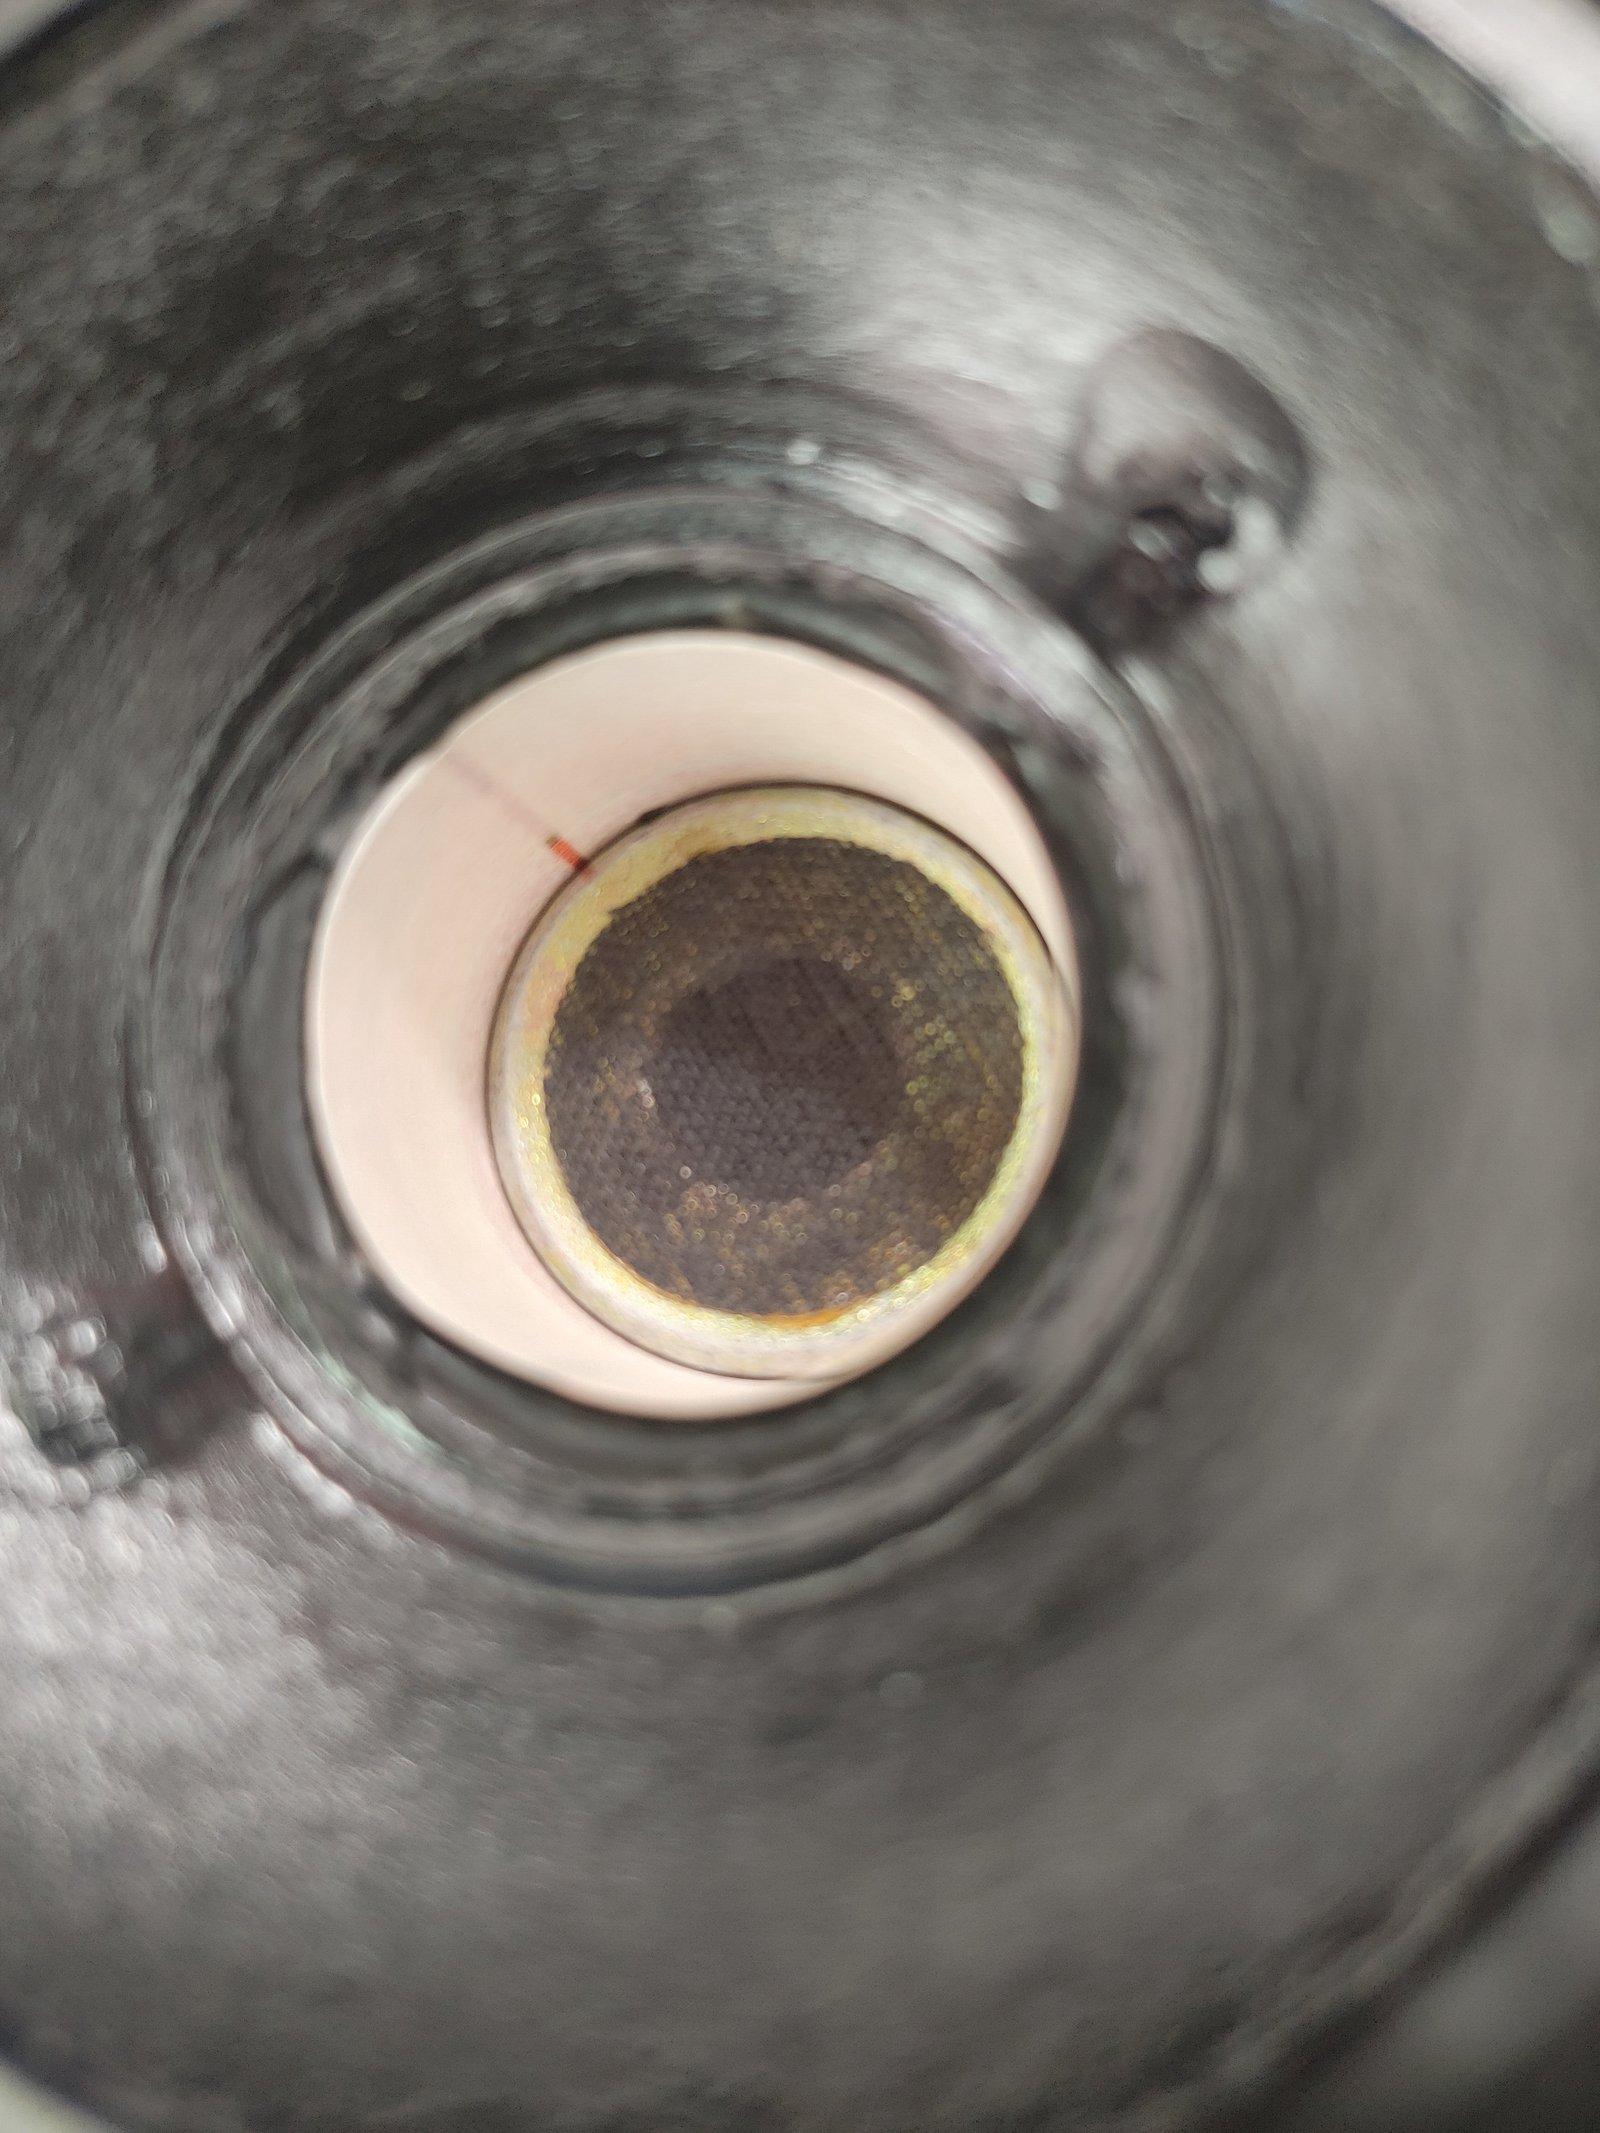
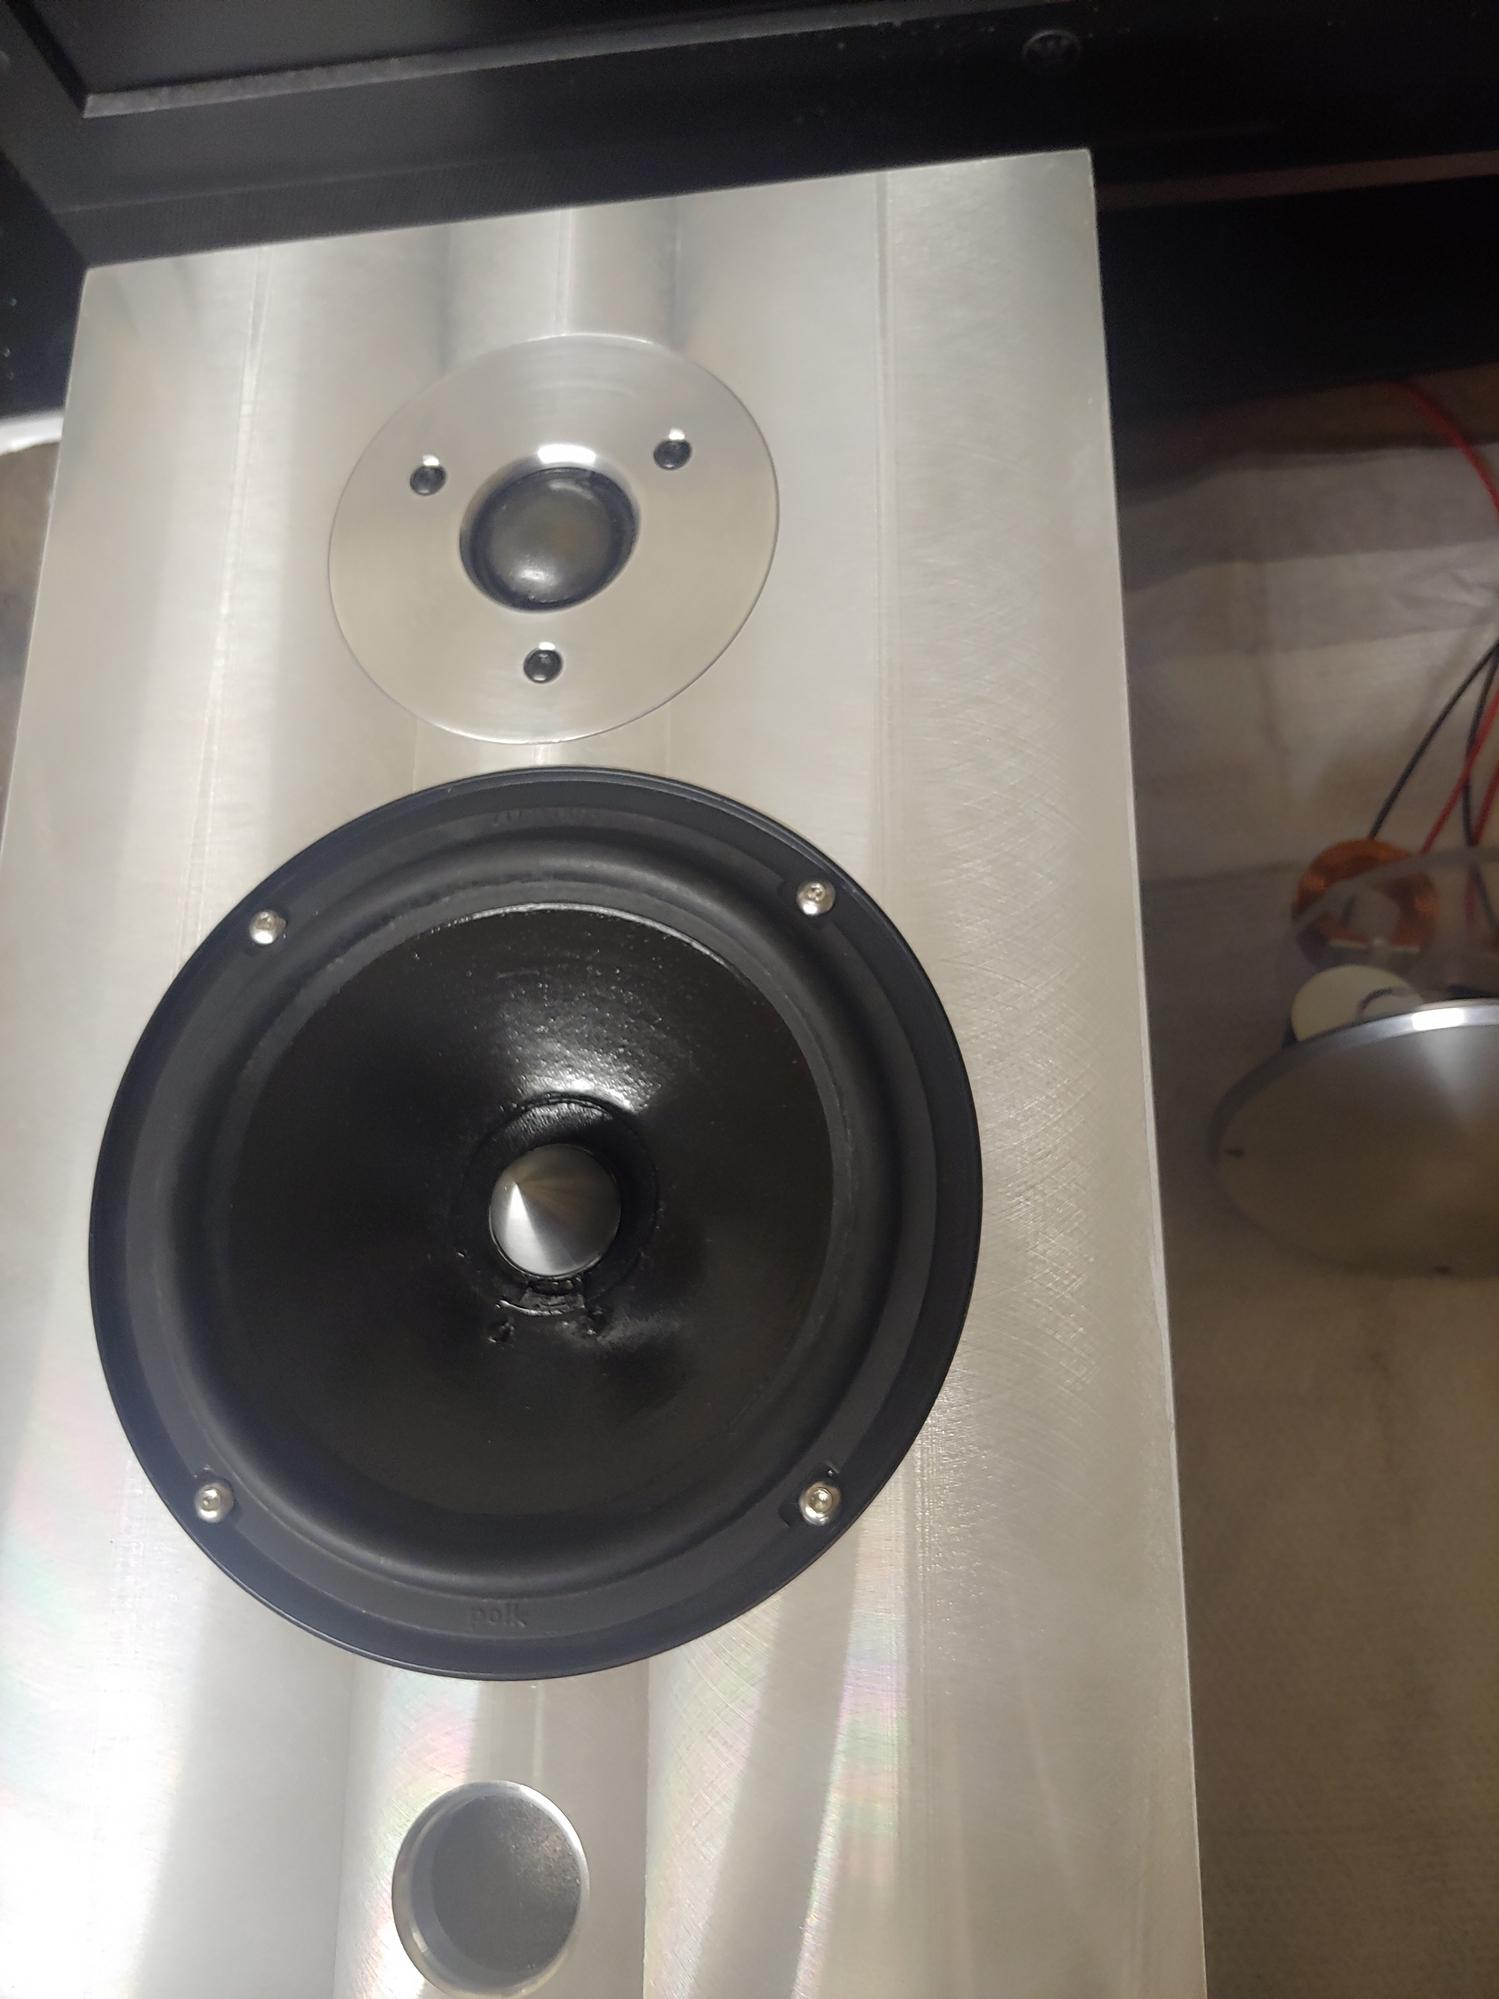
xschopBRONZE MemberIf the driver with the hole in it is NOT the midrange, then B&0 factory installed both my CX100’s backwards and got the wiring WRONG….

I’m only going by ears for the sound improvement. As I stated in another thread that YES INDEED, TS parameters were changed by going from the loose foam to the stiifer rubber. I knew so going in on the first build because it improved midrange performance at the cost of lower frequency SPL. They still went down to @40-50 HZ doing a HZ tone sweep, albeit with lower spl. It was a win-win situation, as I paired them with a passive sub that cuts off @ 200Hz any way. I’ll be doing the same for this set. Just incredible midrange reproduction doing these modifications.
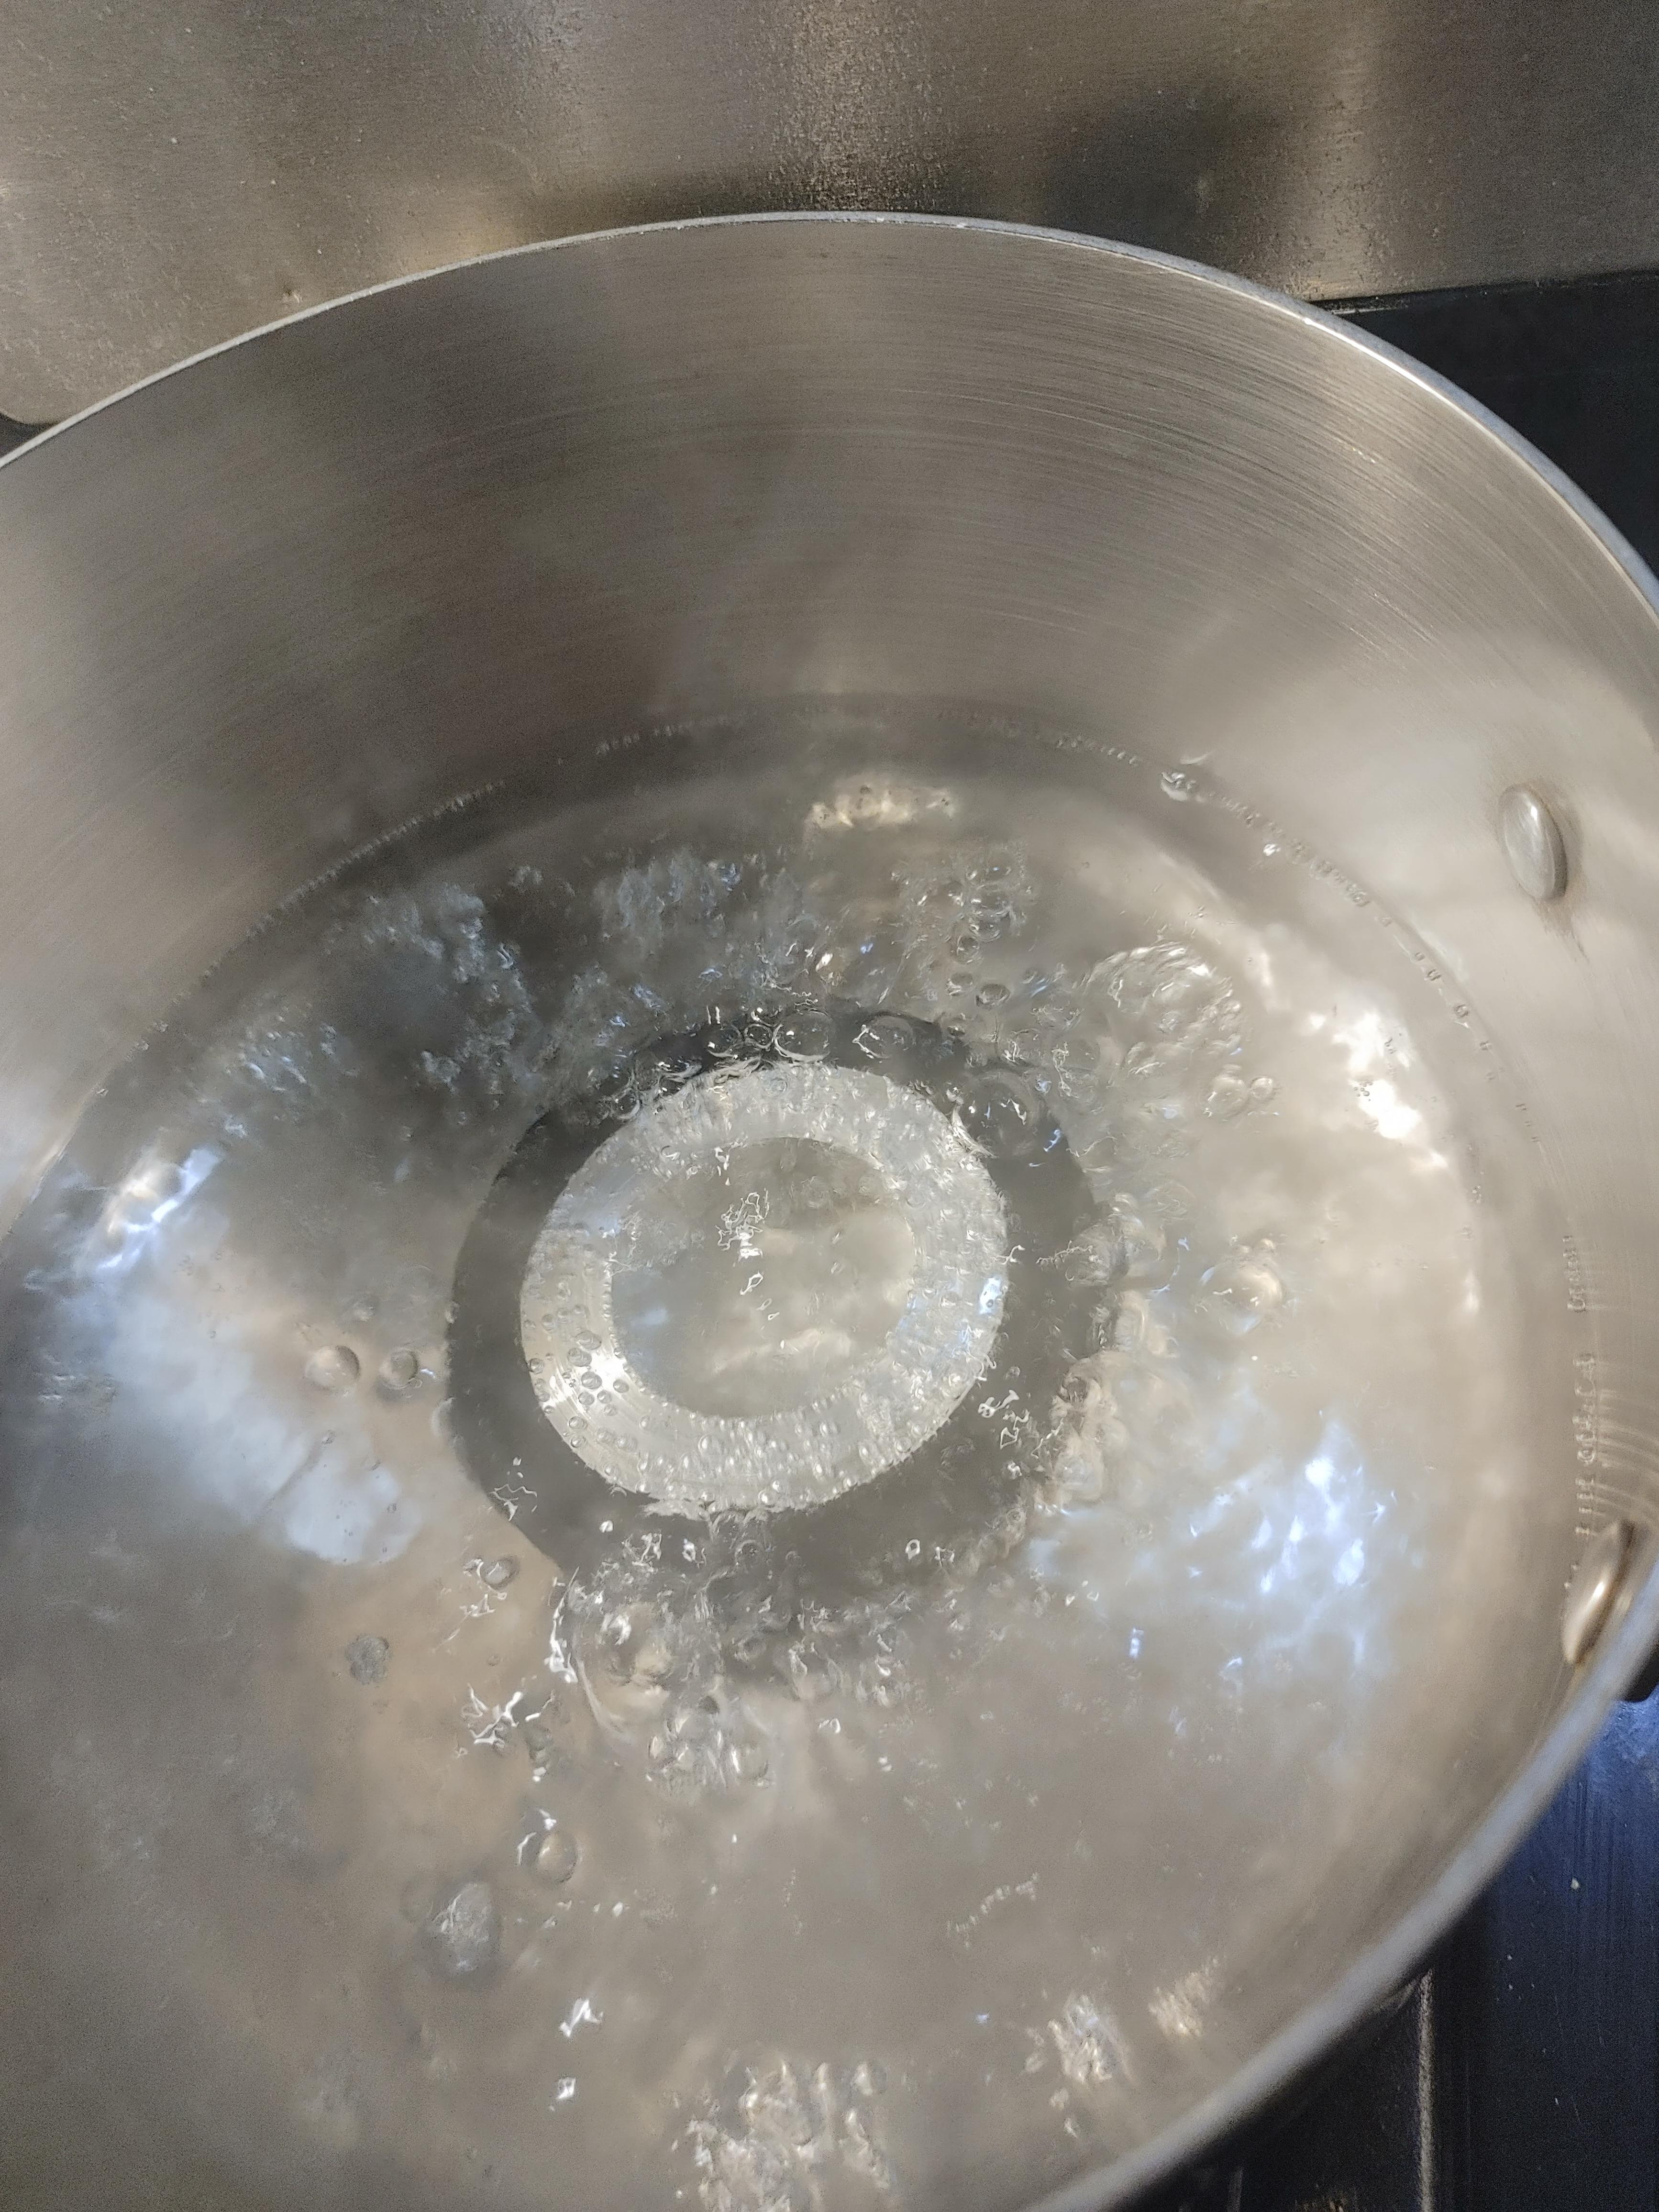
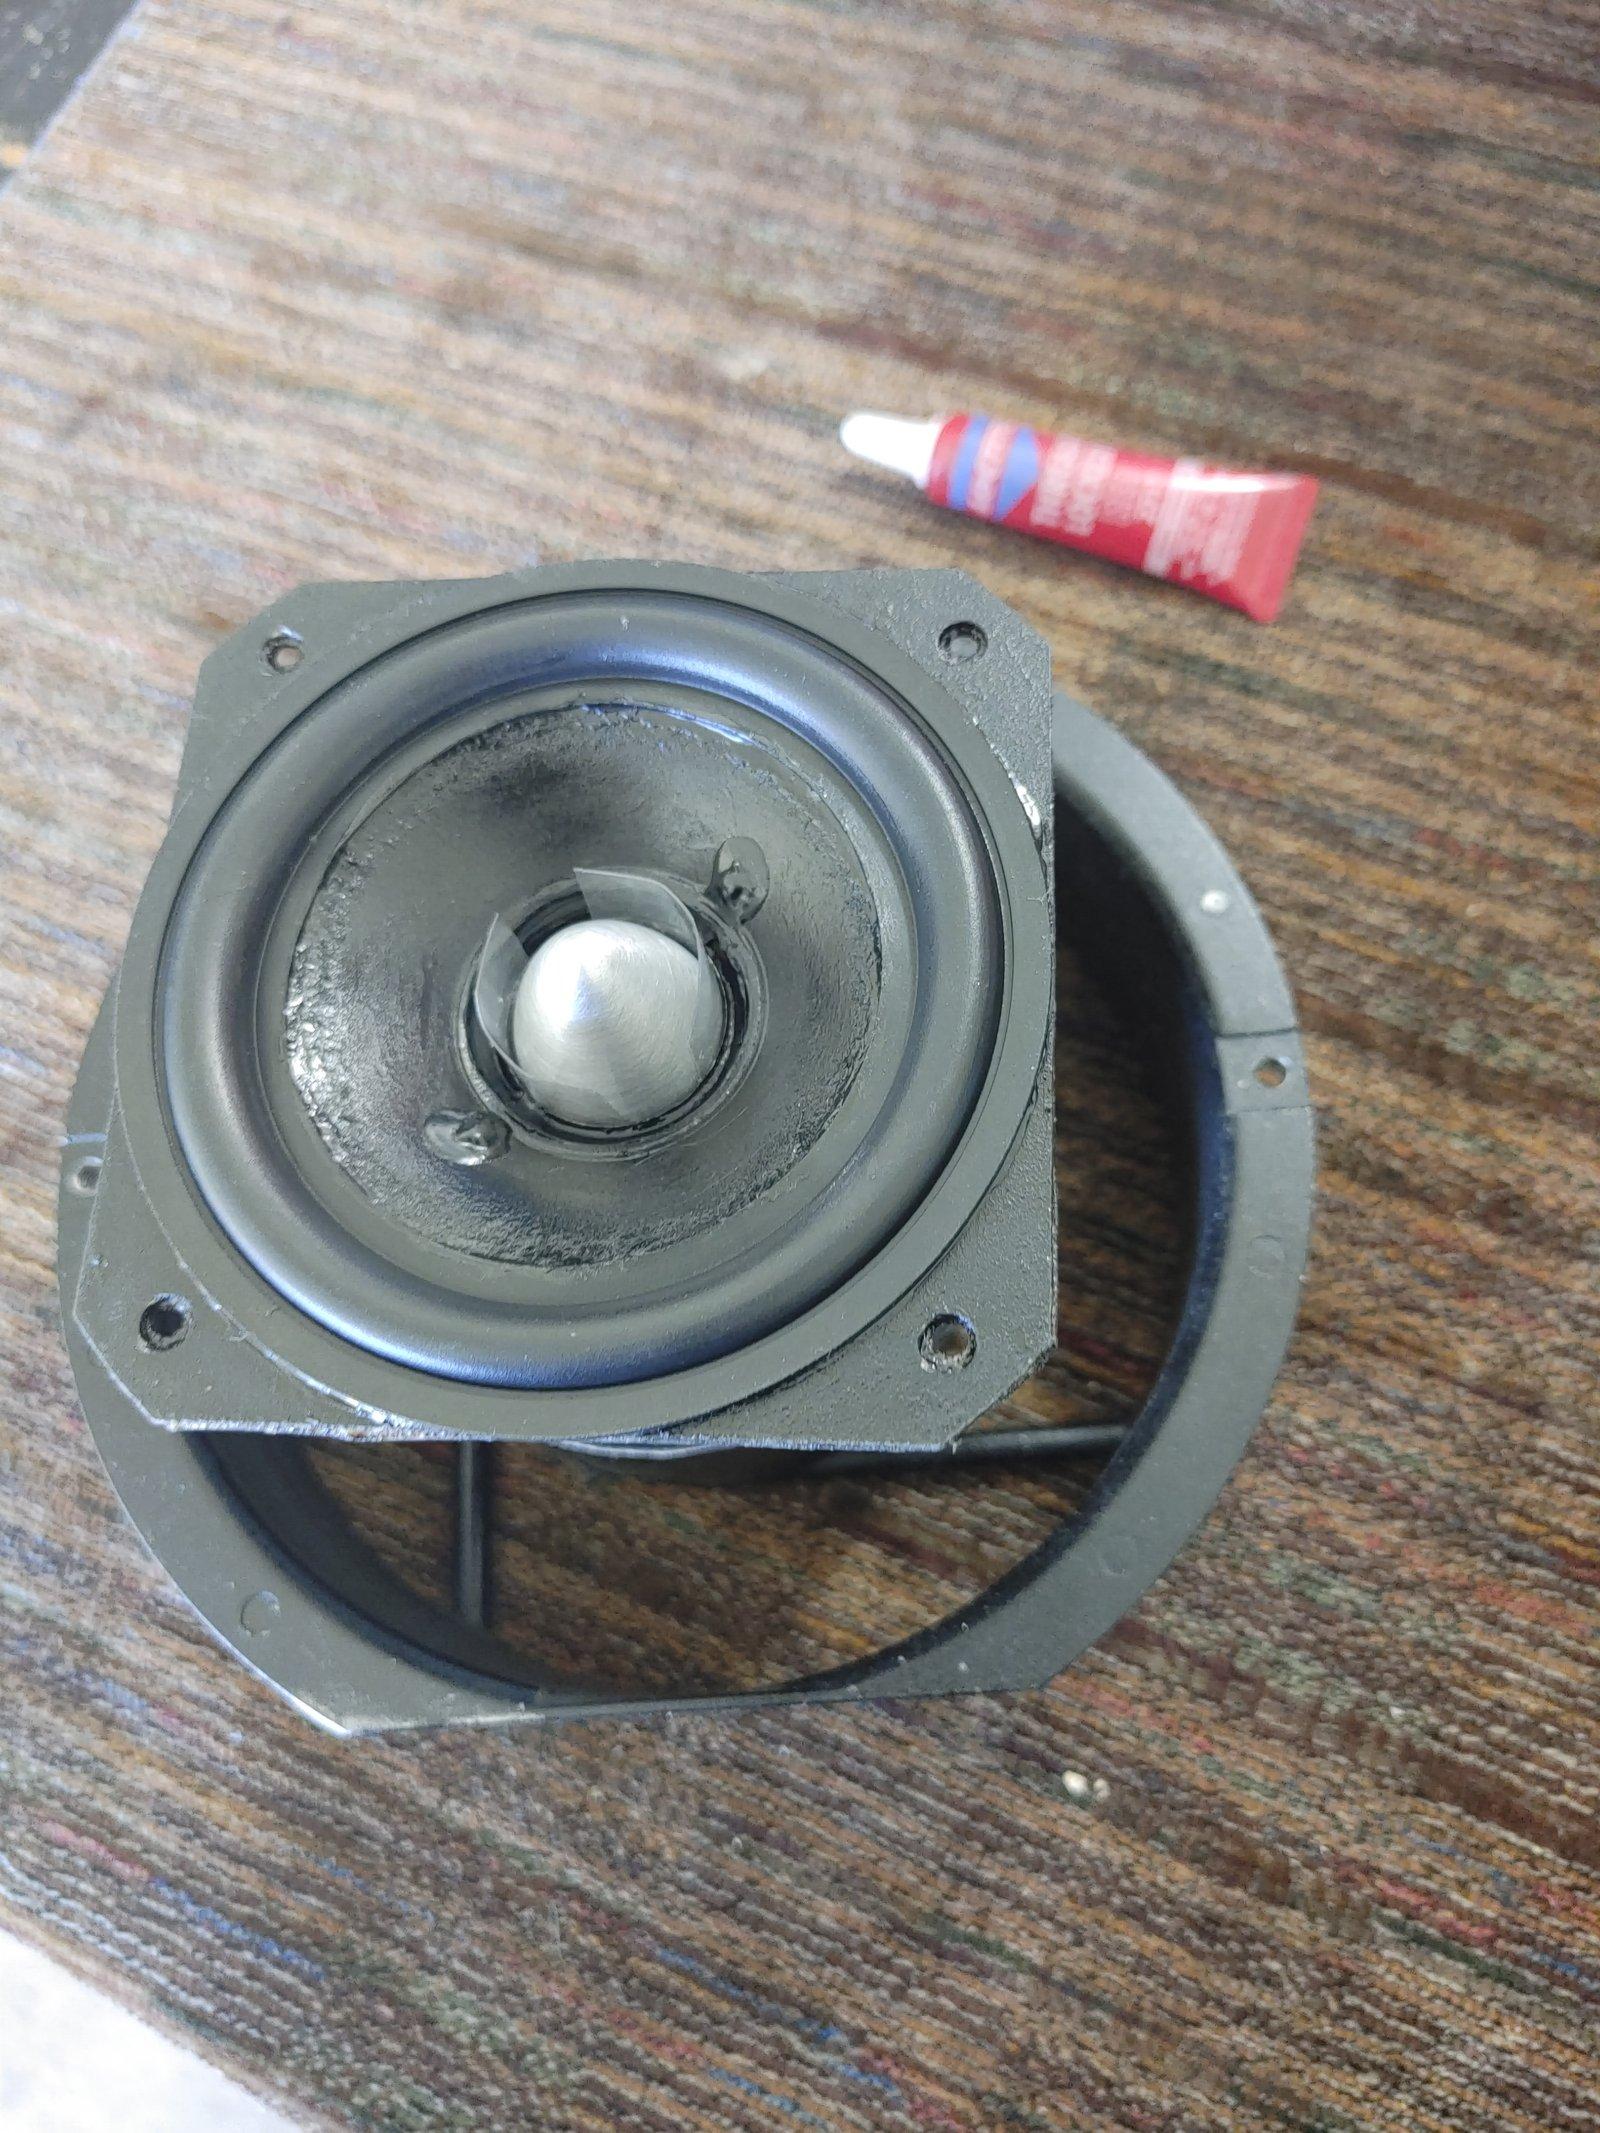
That said, being an experimenter with a biochem degree and many years of industry experience, I loosened these next set of butyl surrounds with a high dilution of methyl salicylate in boiling water for 10min. This was to improve their deformation for cone edge gluing, but indeed also relaxed the butyl rubber nicely…
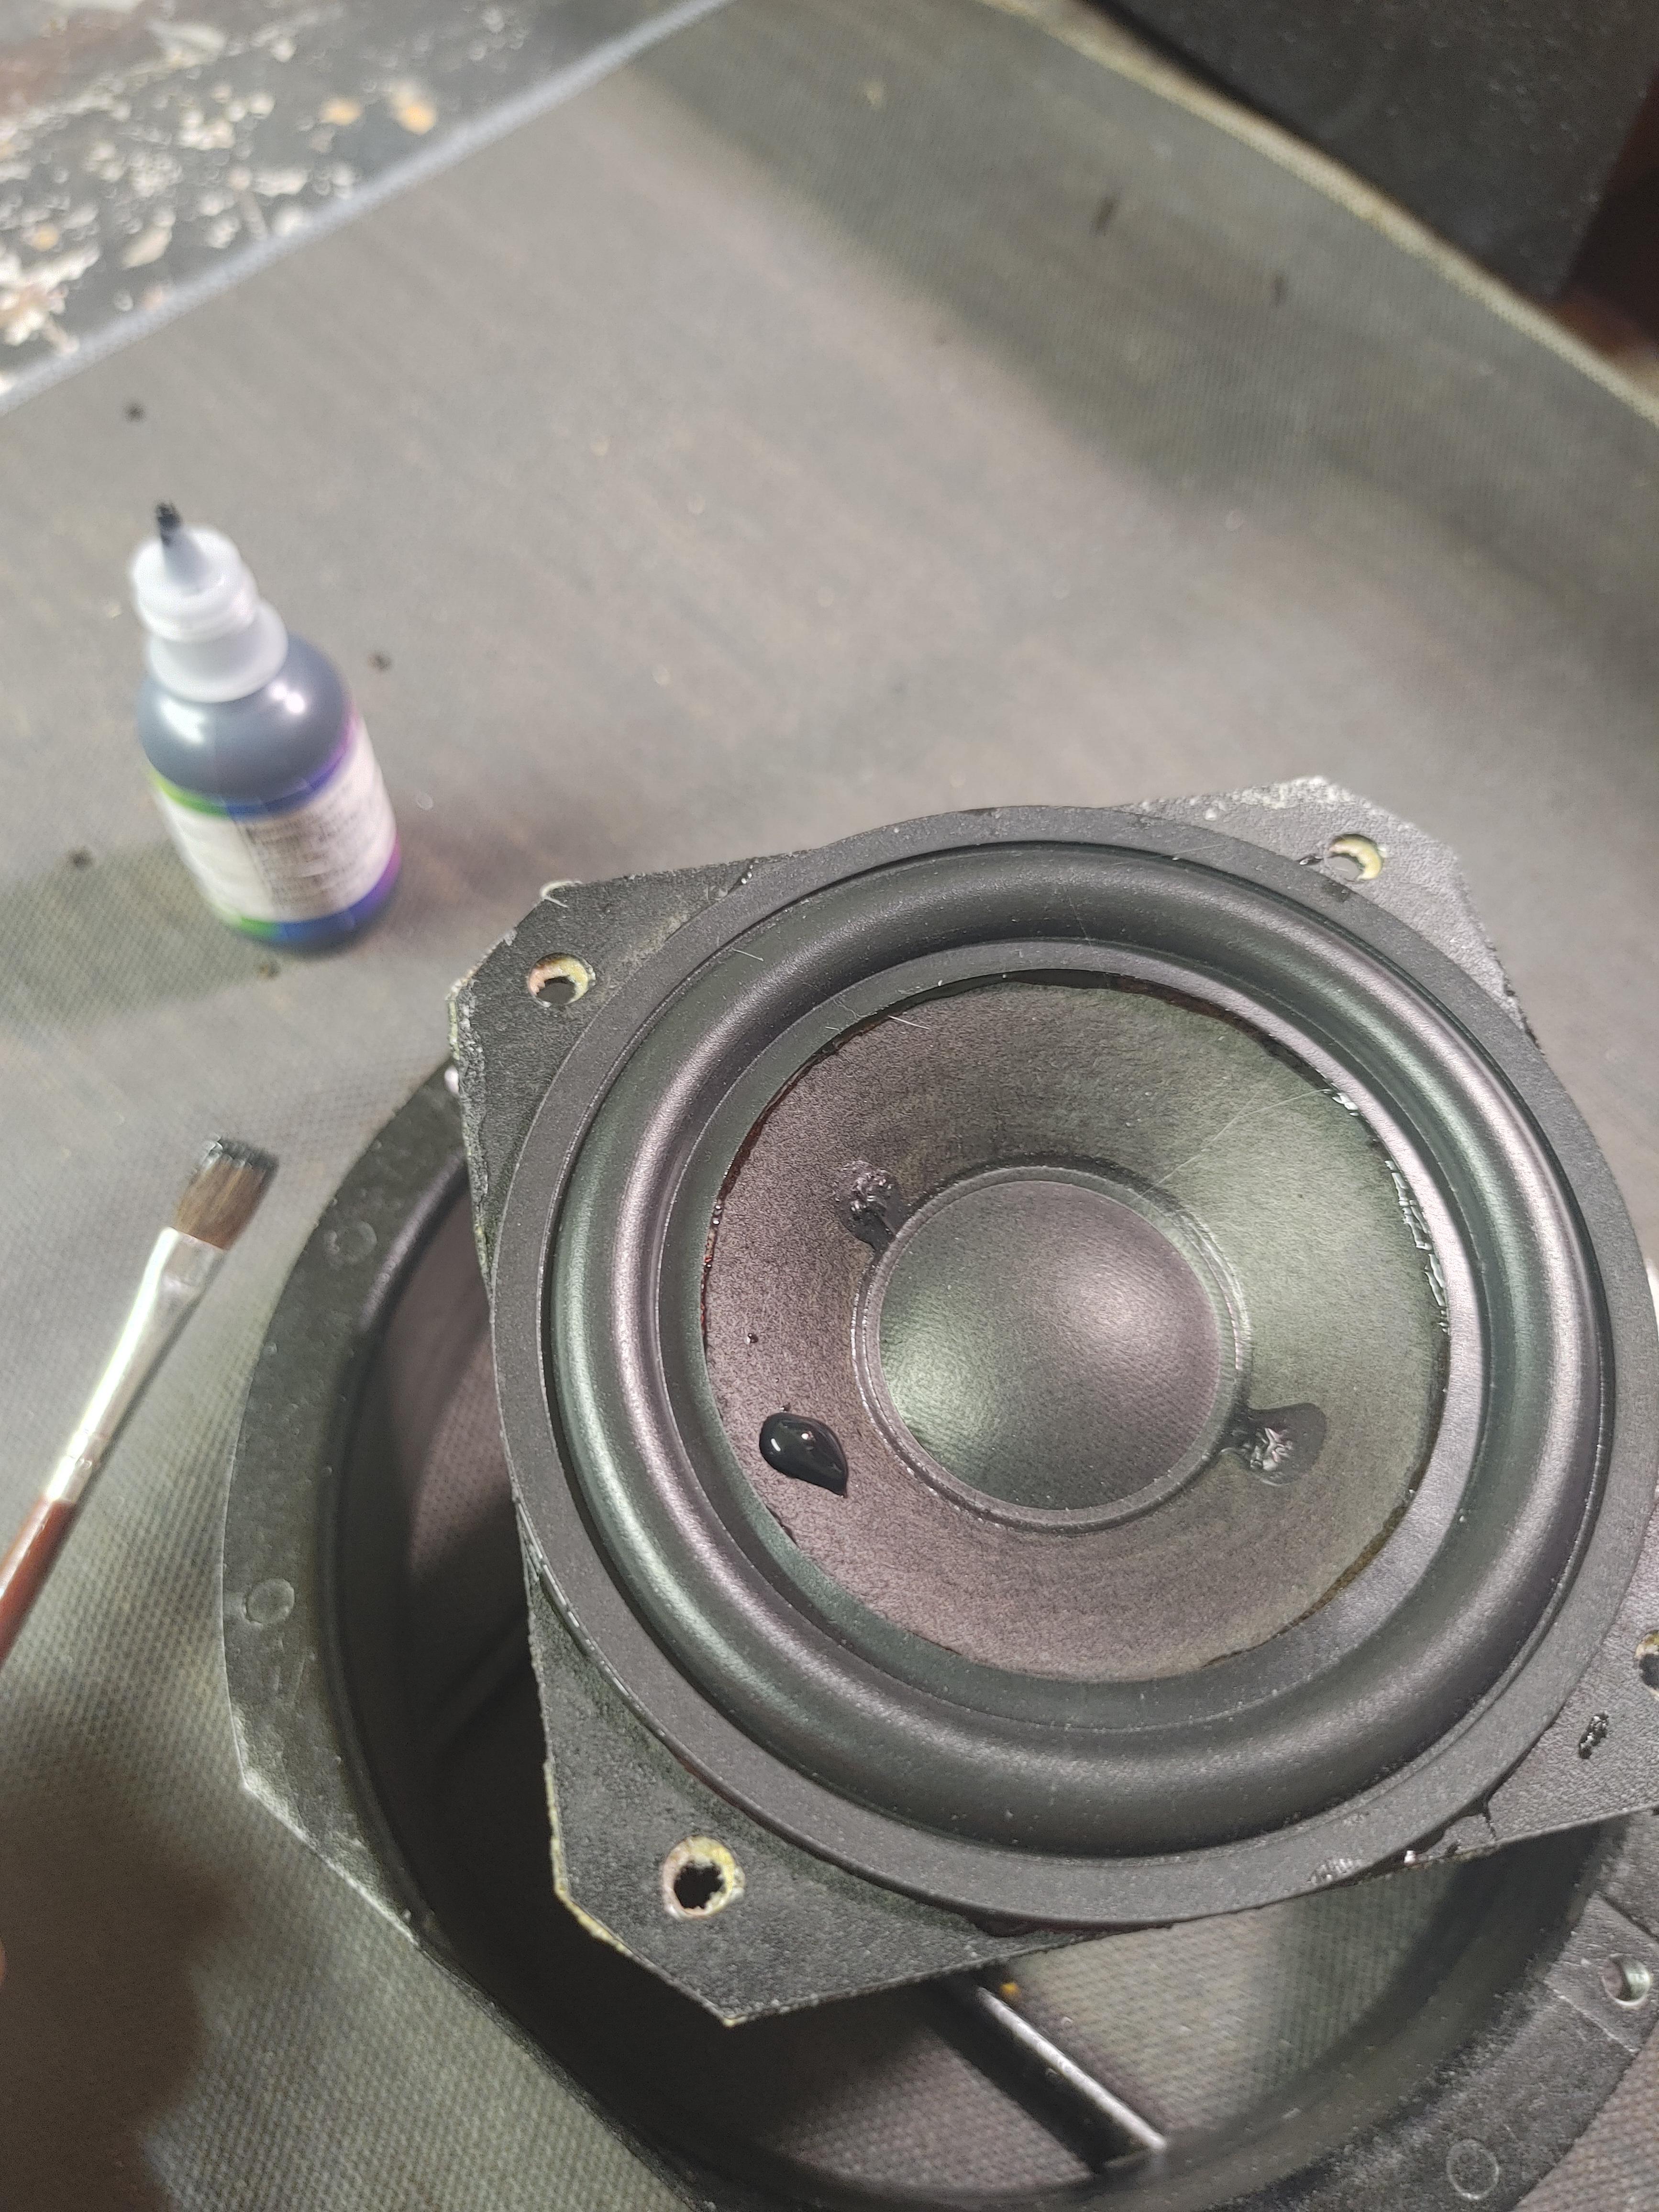
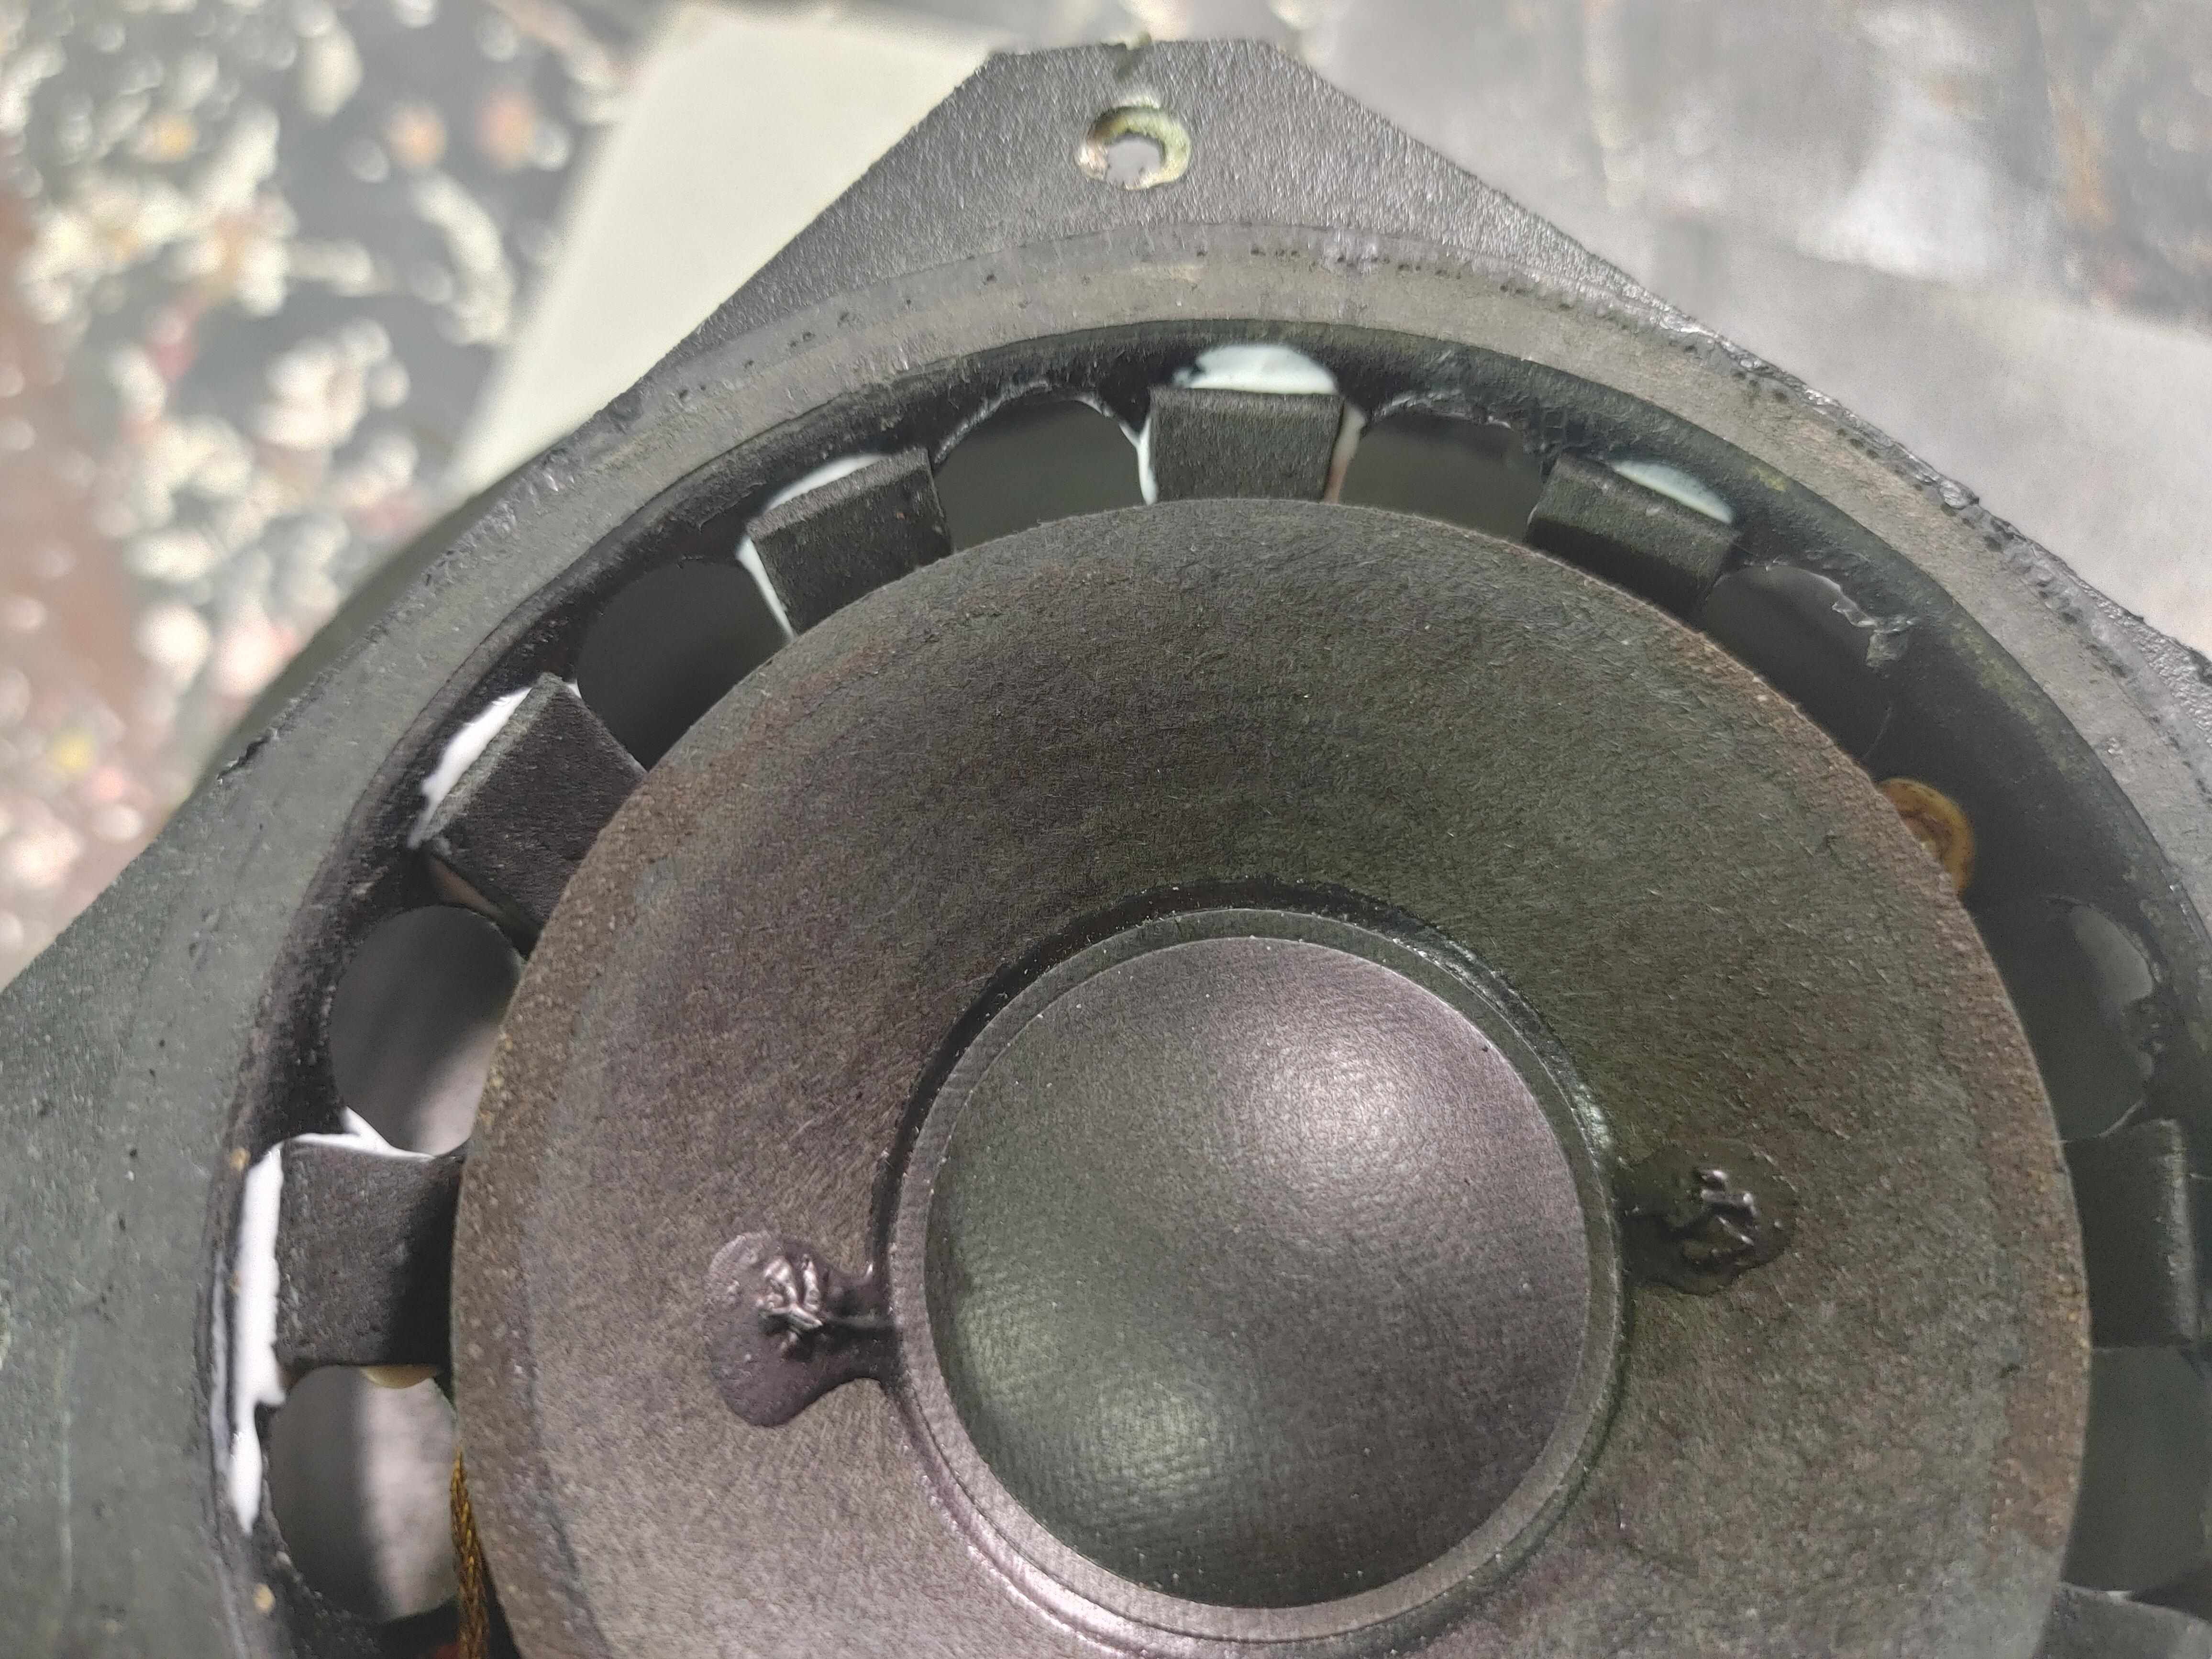
xschopBRONZE MemberAgain, I removed more mass from the moving dust cap than what was added from the thin layer of dried latex (for cone damping). The speed increase of the lighter moving cone translates to better transients. Here’s what B&O did to ameliorate the resonance of the air chamber created under the hard dust cap of their midrange, which is just the same woofer, just modified pole-piece. A phase-plug would have also solved that problem, as well as fix any center cone signal cancellations…
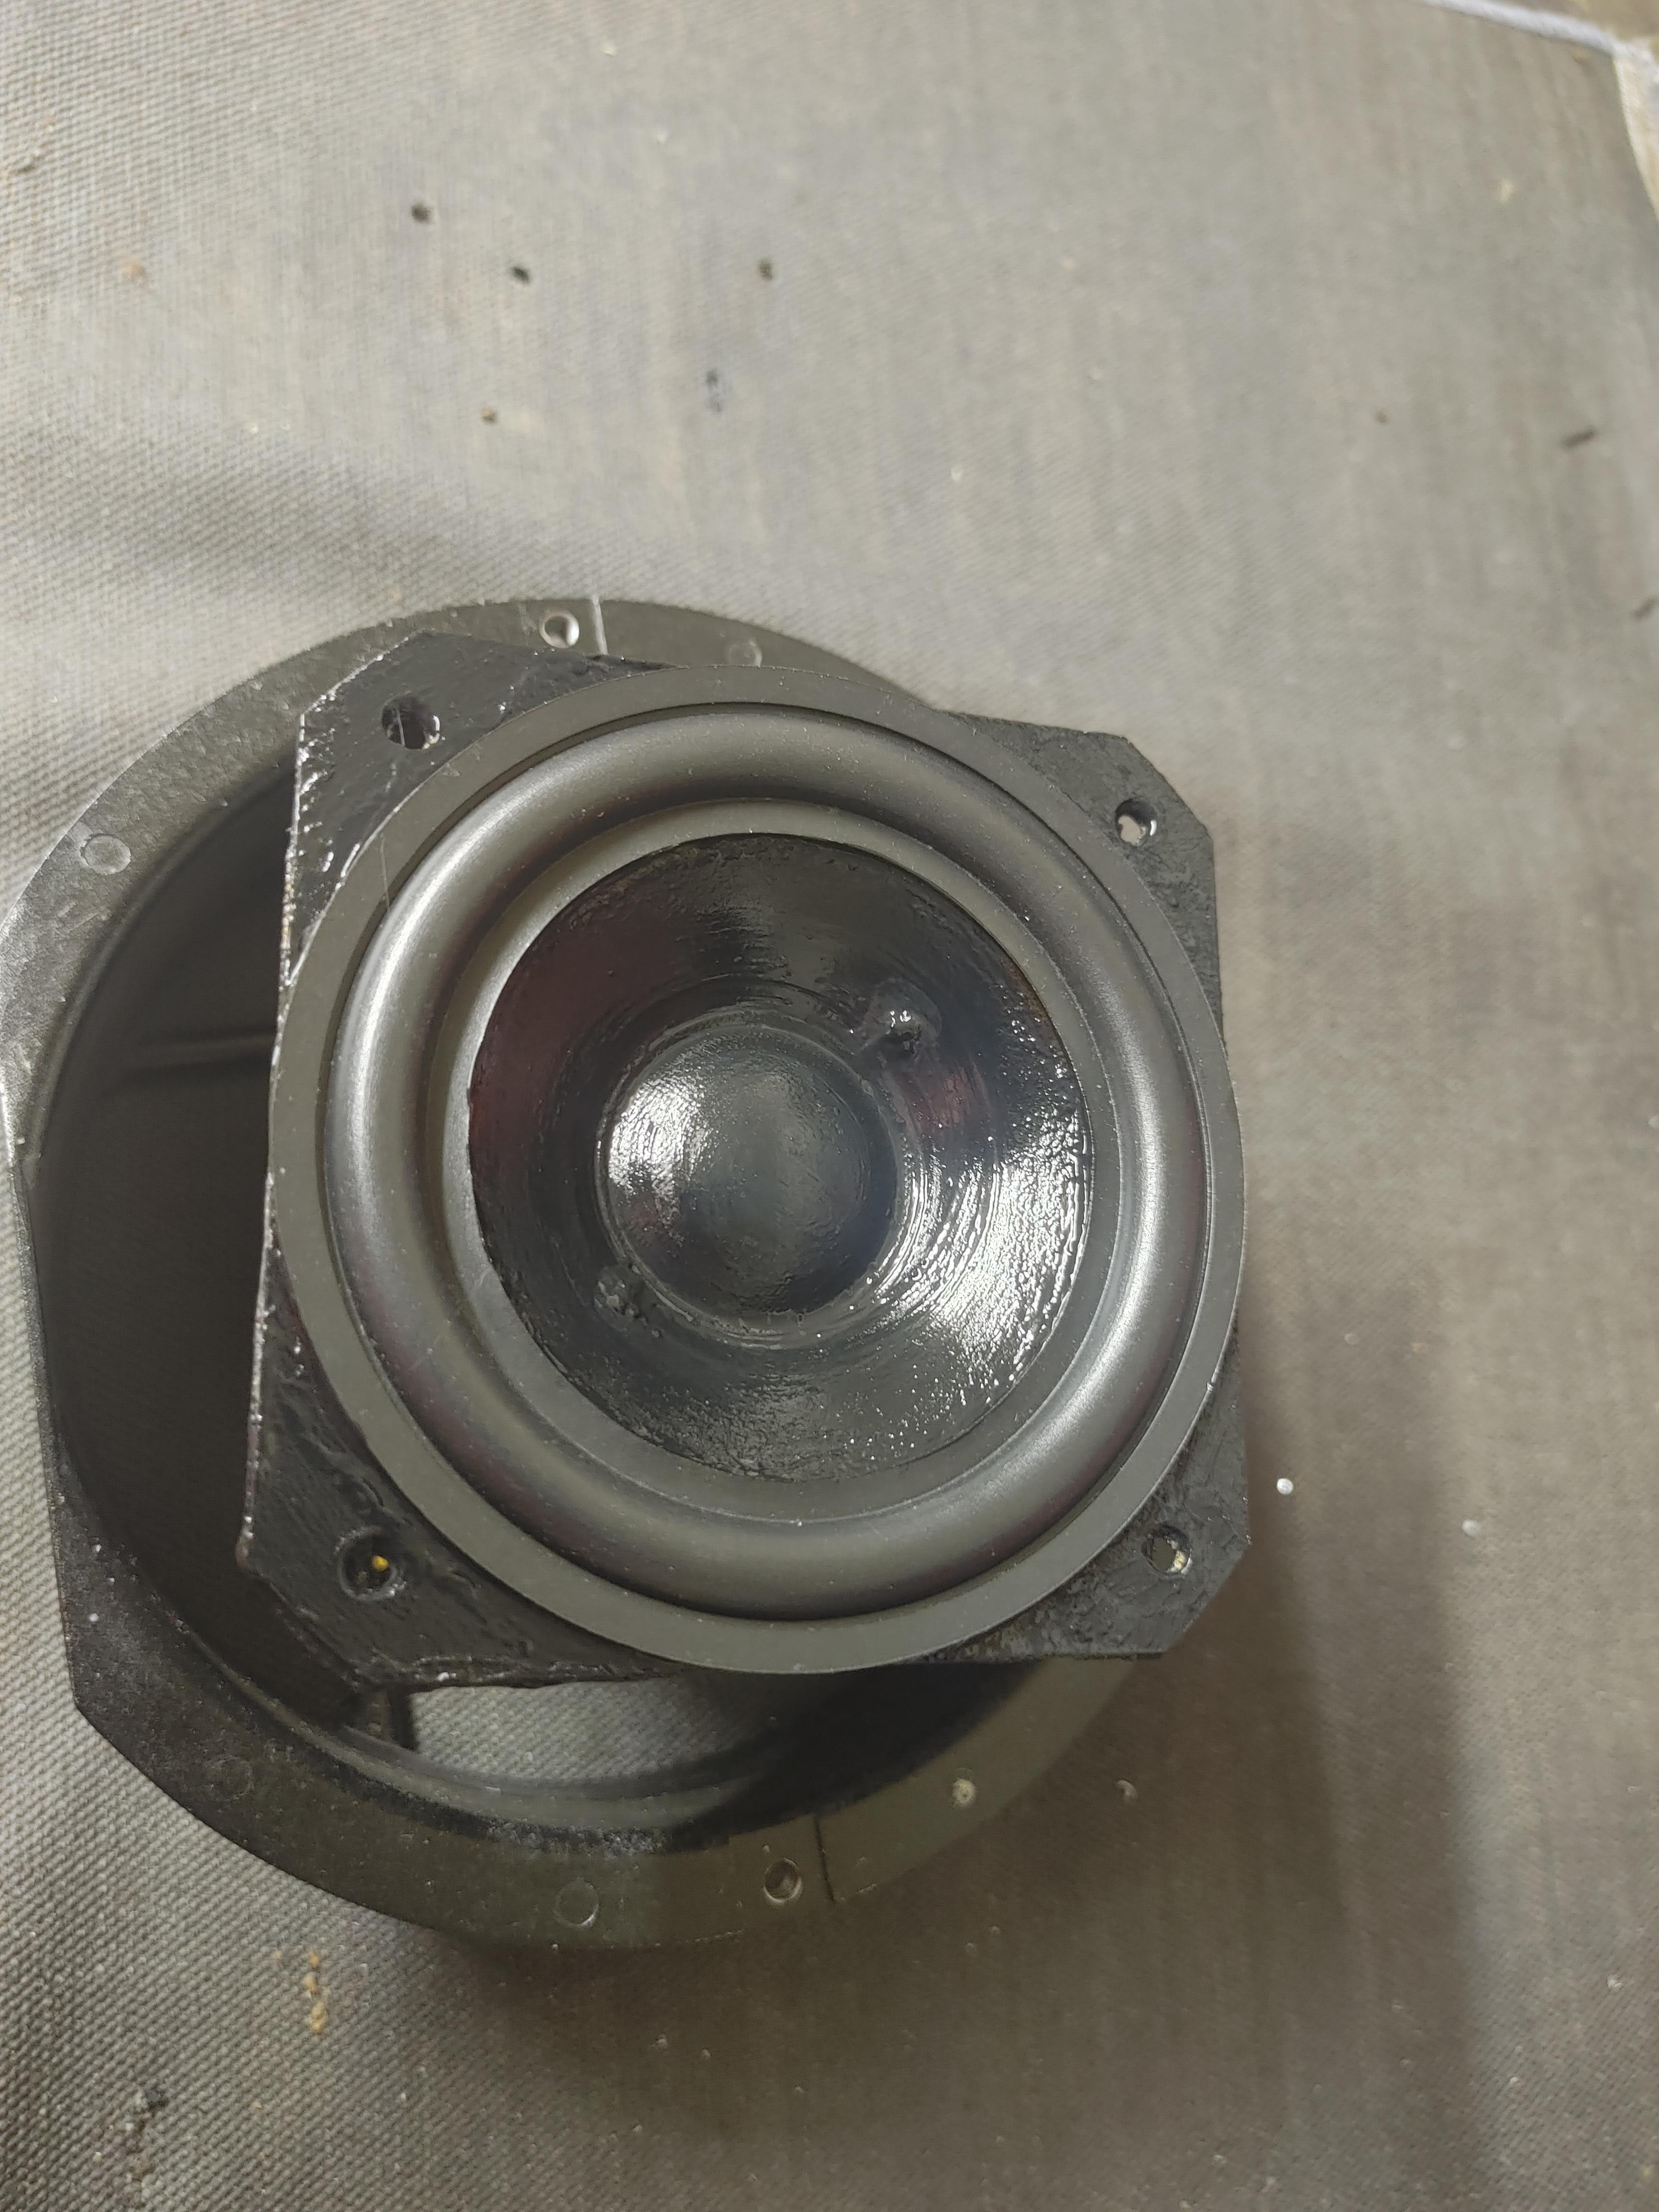
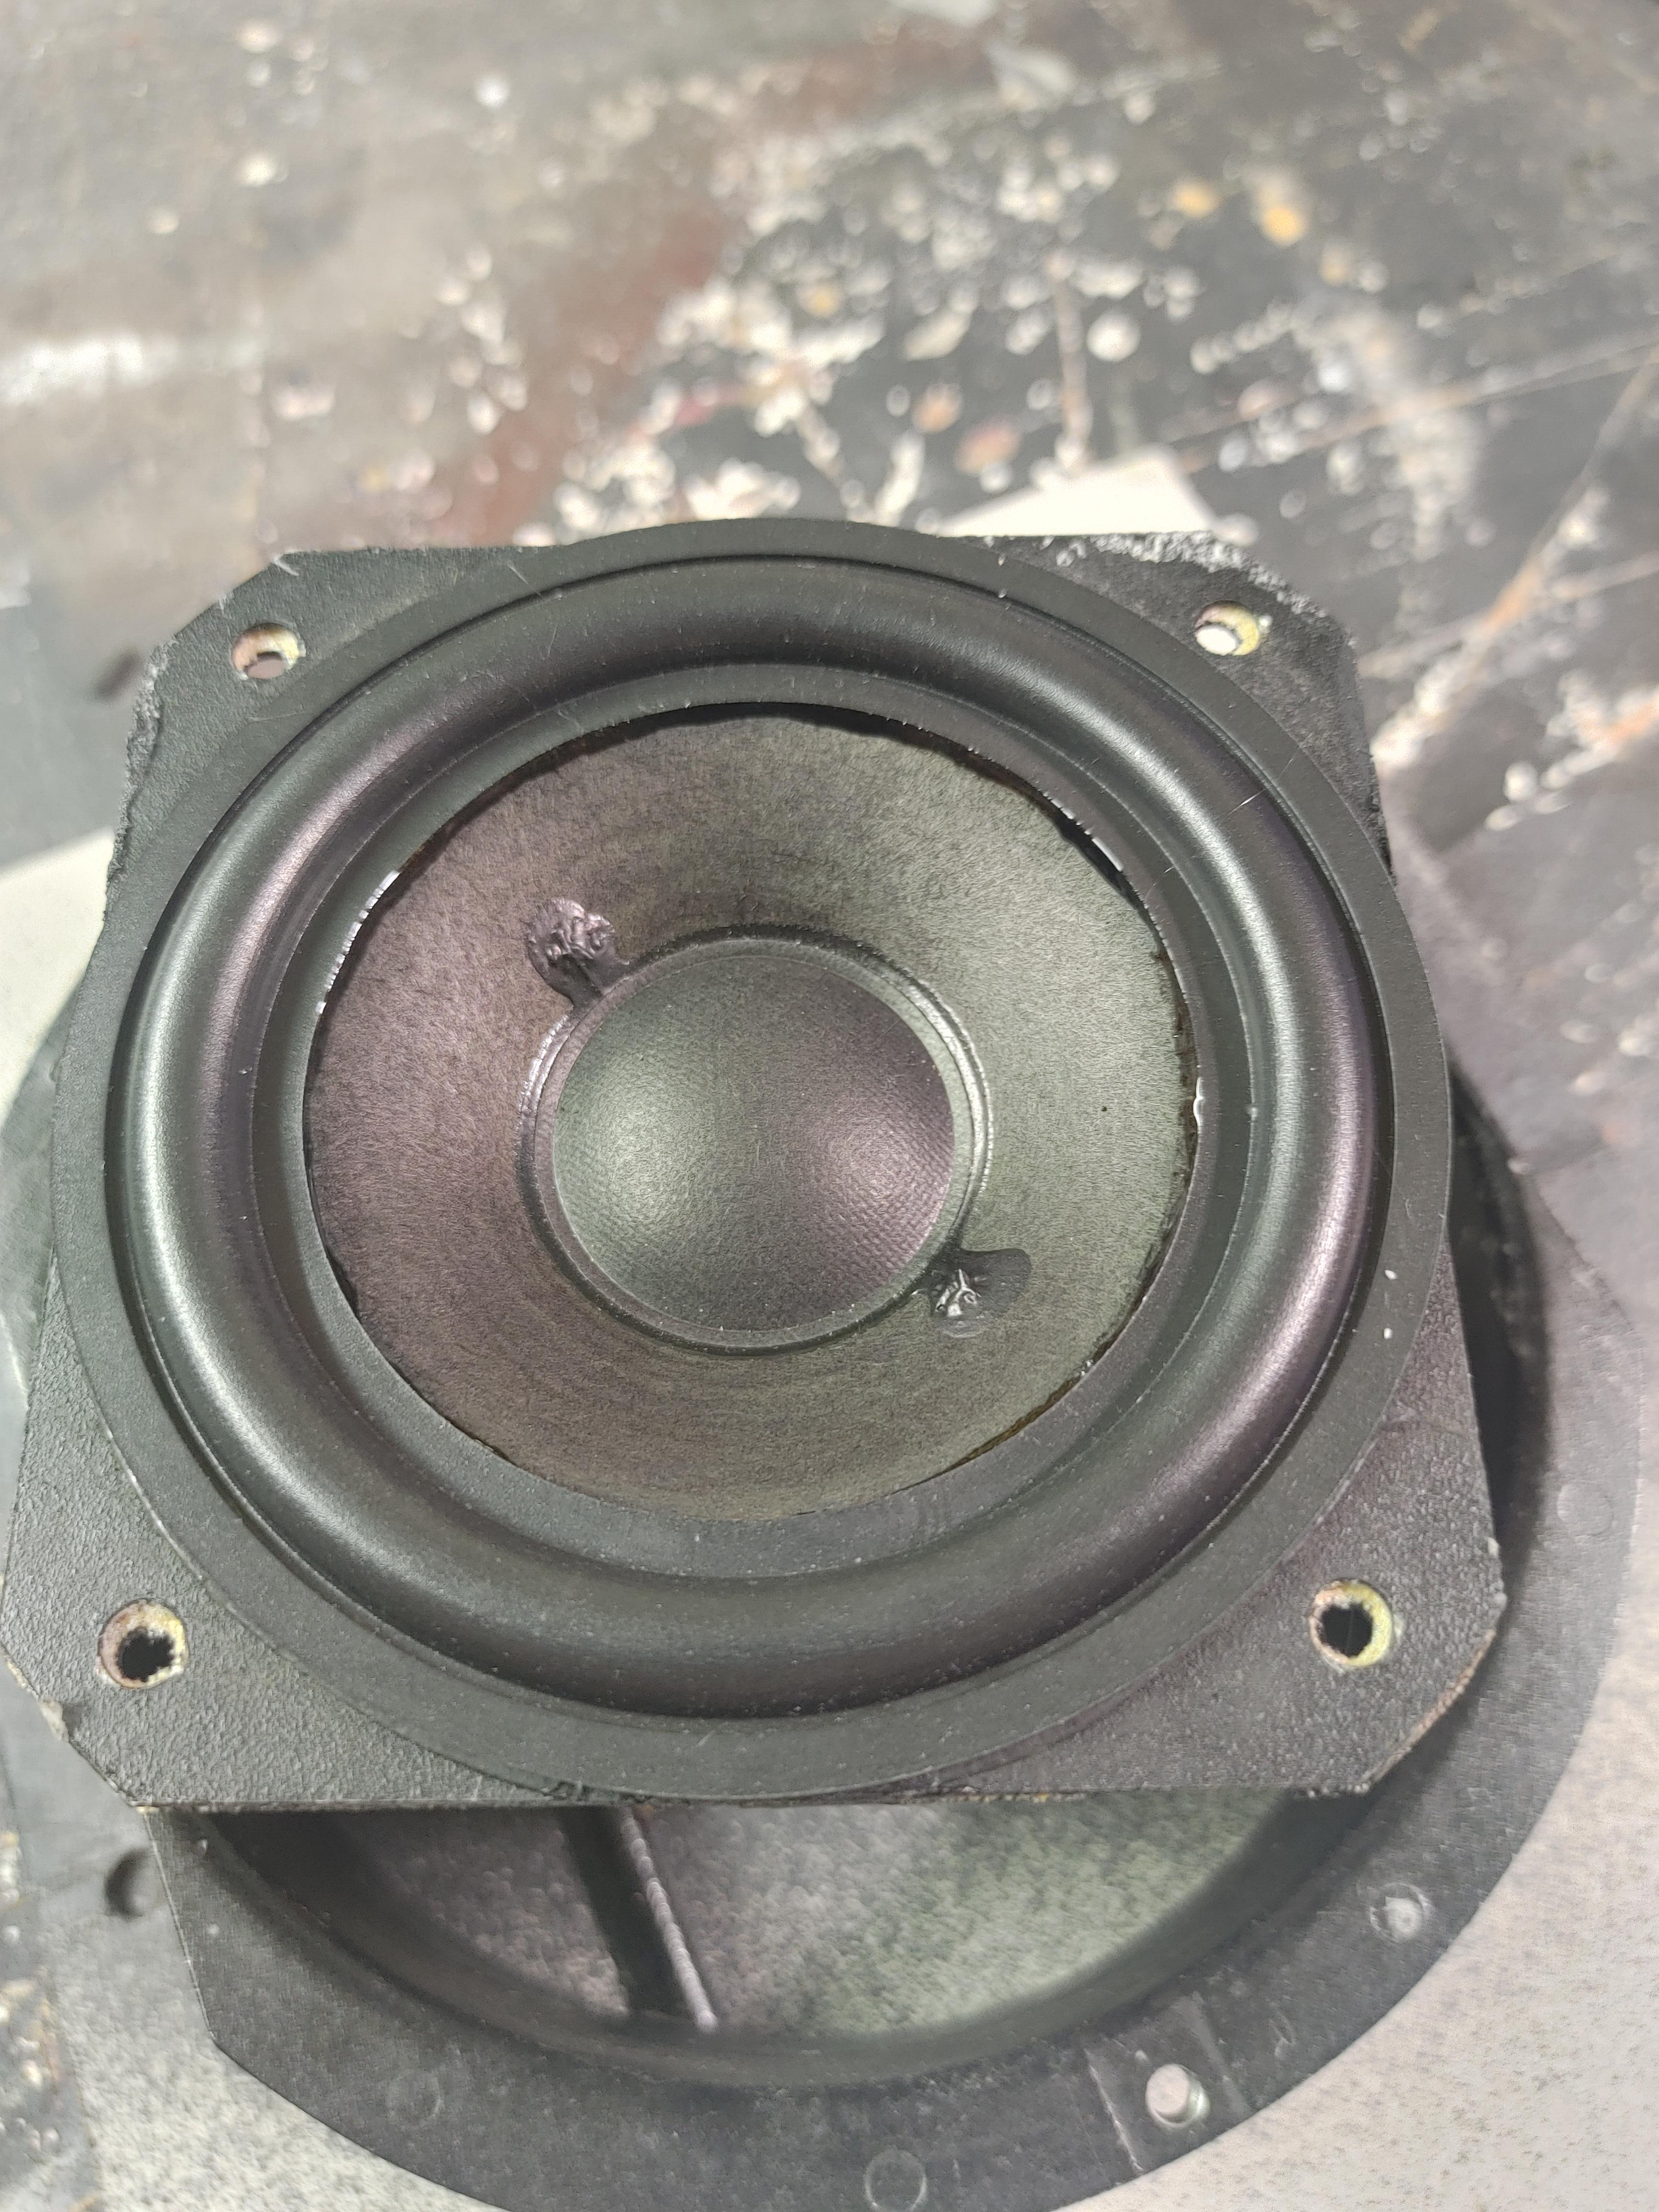
xschopBRONZE MemberAfter new surround is glued and dried to basket frame flange, I use just a drop off black latex paint to dampen the cones and dust cap. It dries to a miniscule added weight and rejuvenates the dried paper cones as well. I go ahead and black out the frame edges too while I’m at it….
xschopBRONZE Member
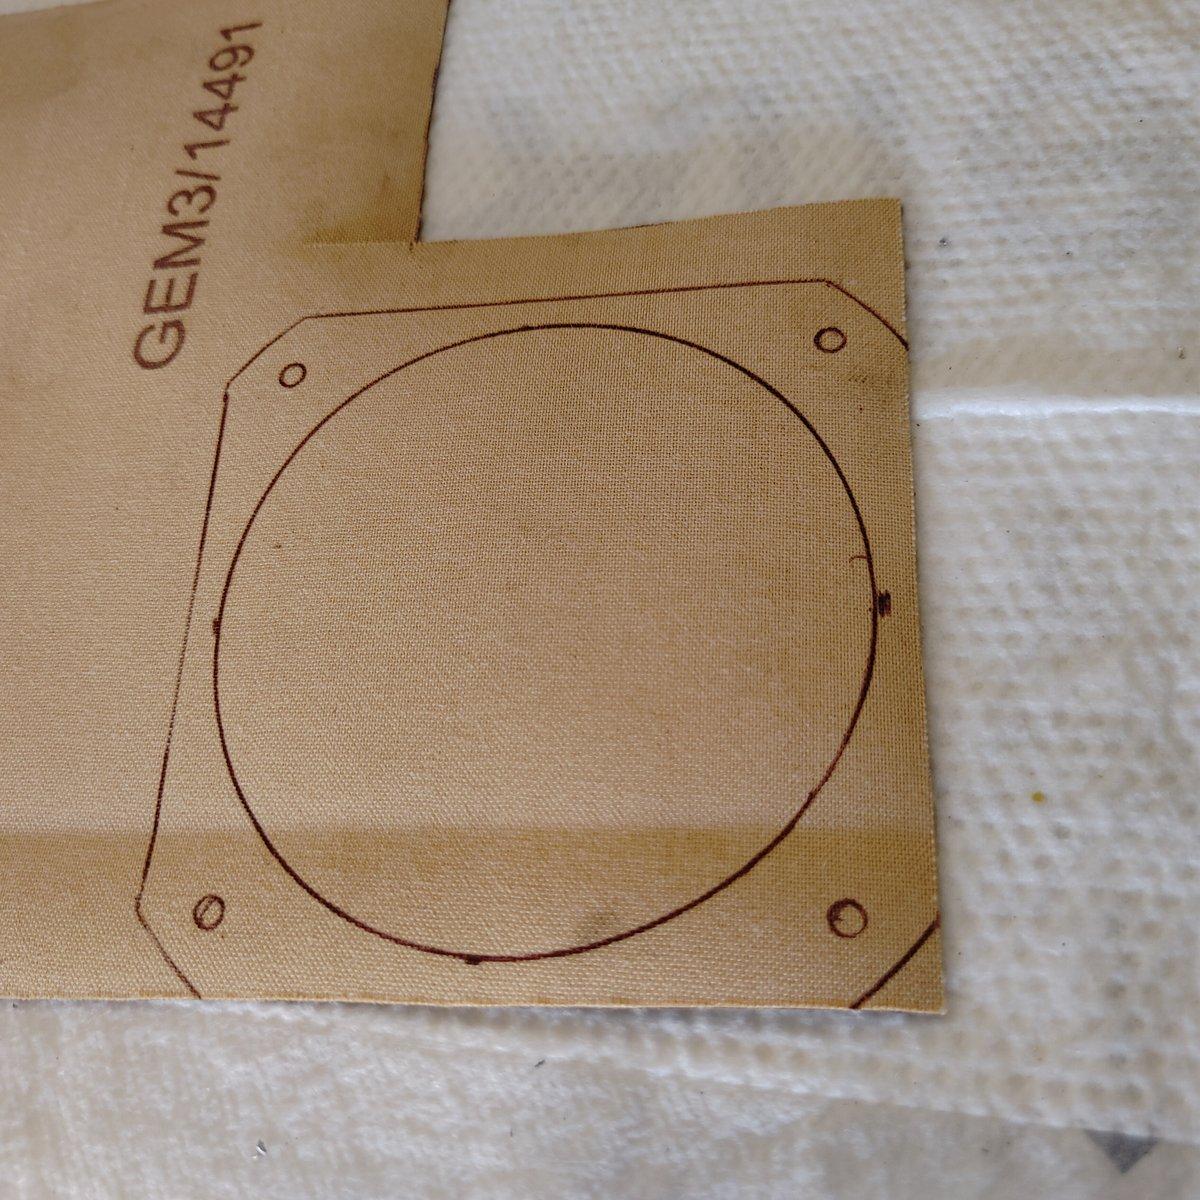
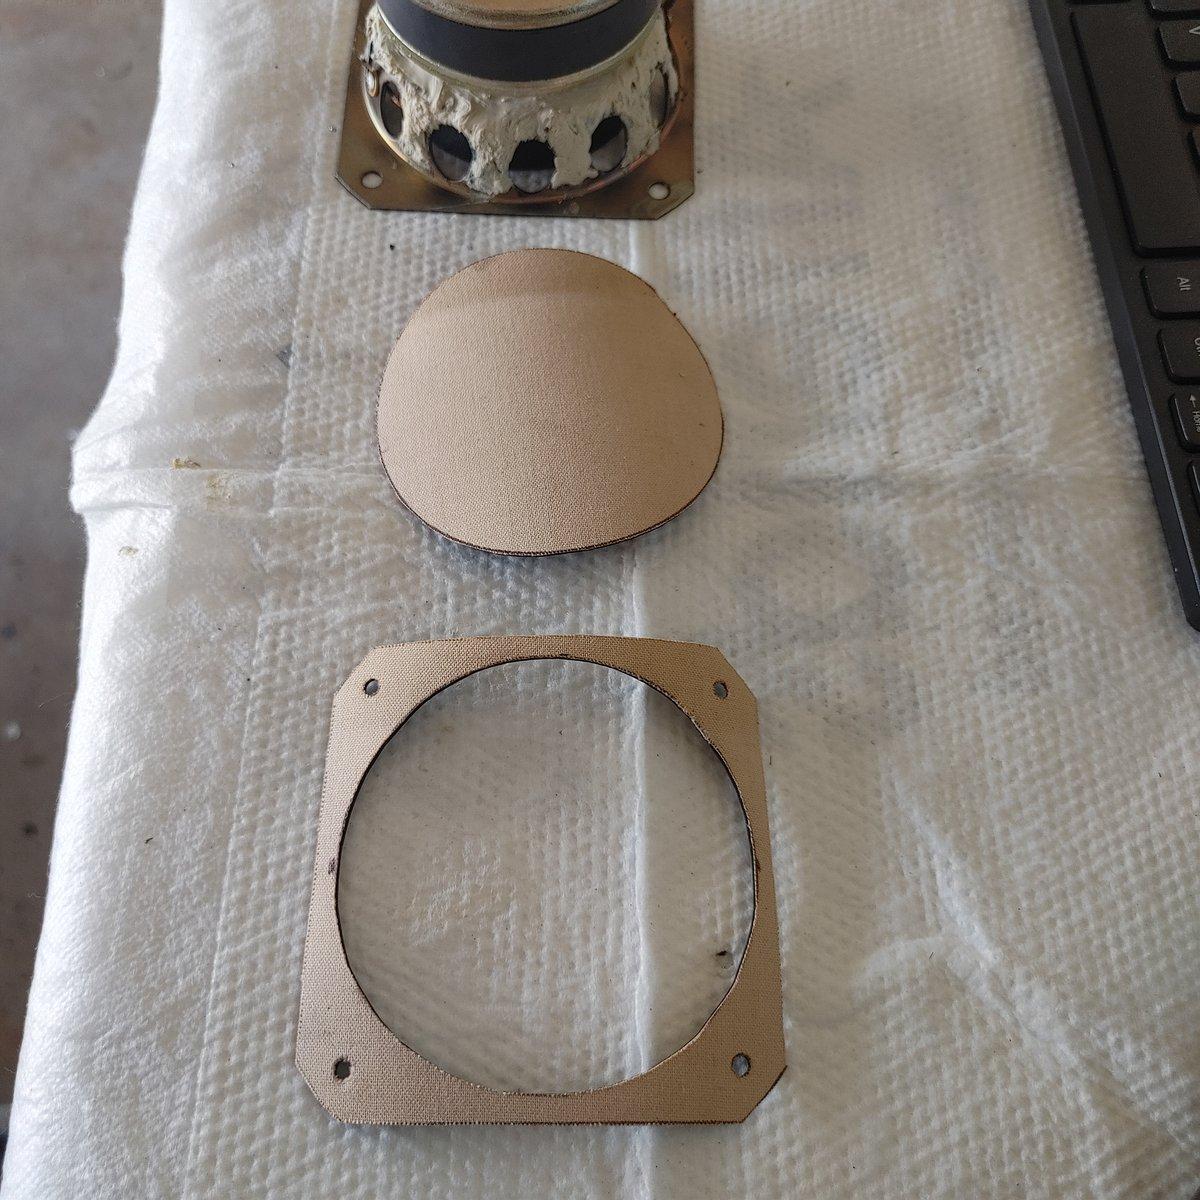
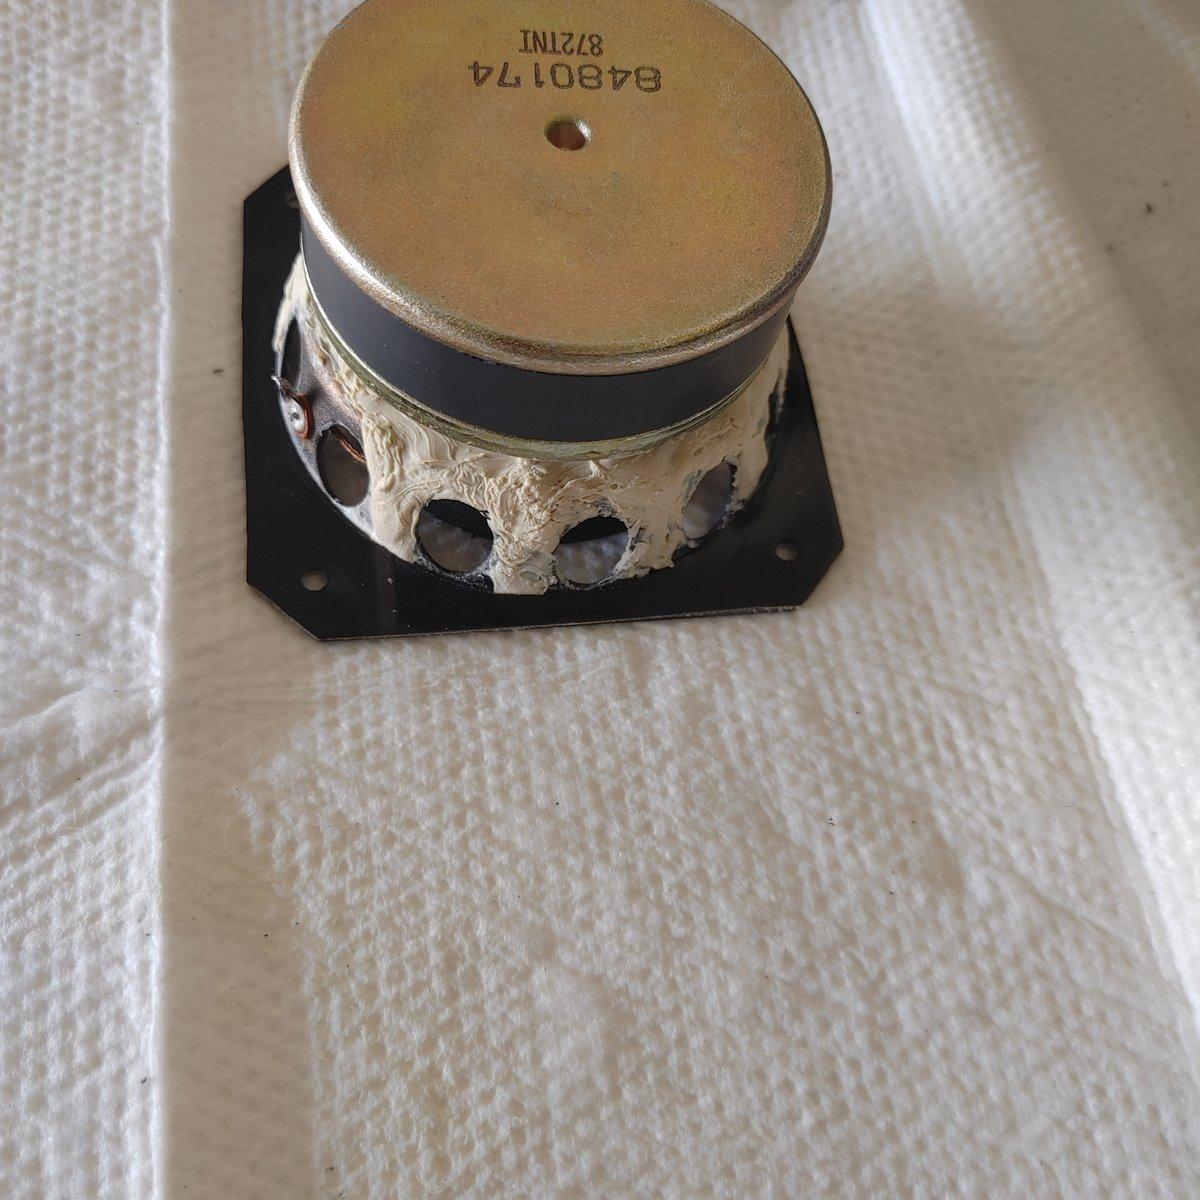
I foamed (1/8″ thick open-cell) the inner frames and applied 2 layers of thick polyurethane adhesive to the outer frame baskets first thing after removing old rotten foam from cones with mineral spirits. I protected the rear cones with a curled strip of bubble-wrap, and terminals with electric wire nuts. I also made fiber-cloth reinforced rubber gaskets and glued directly to frames, rubber side facing towards cabinet openings for positive driver sealing. After polyurethane, foam glue and new frame gaskets dried, I glued the inner cone perimeter and attached new butyl surrounds there first.
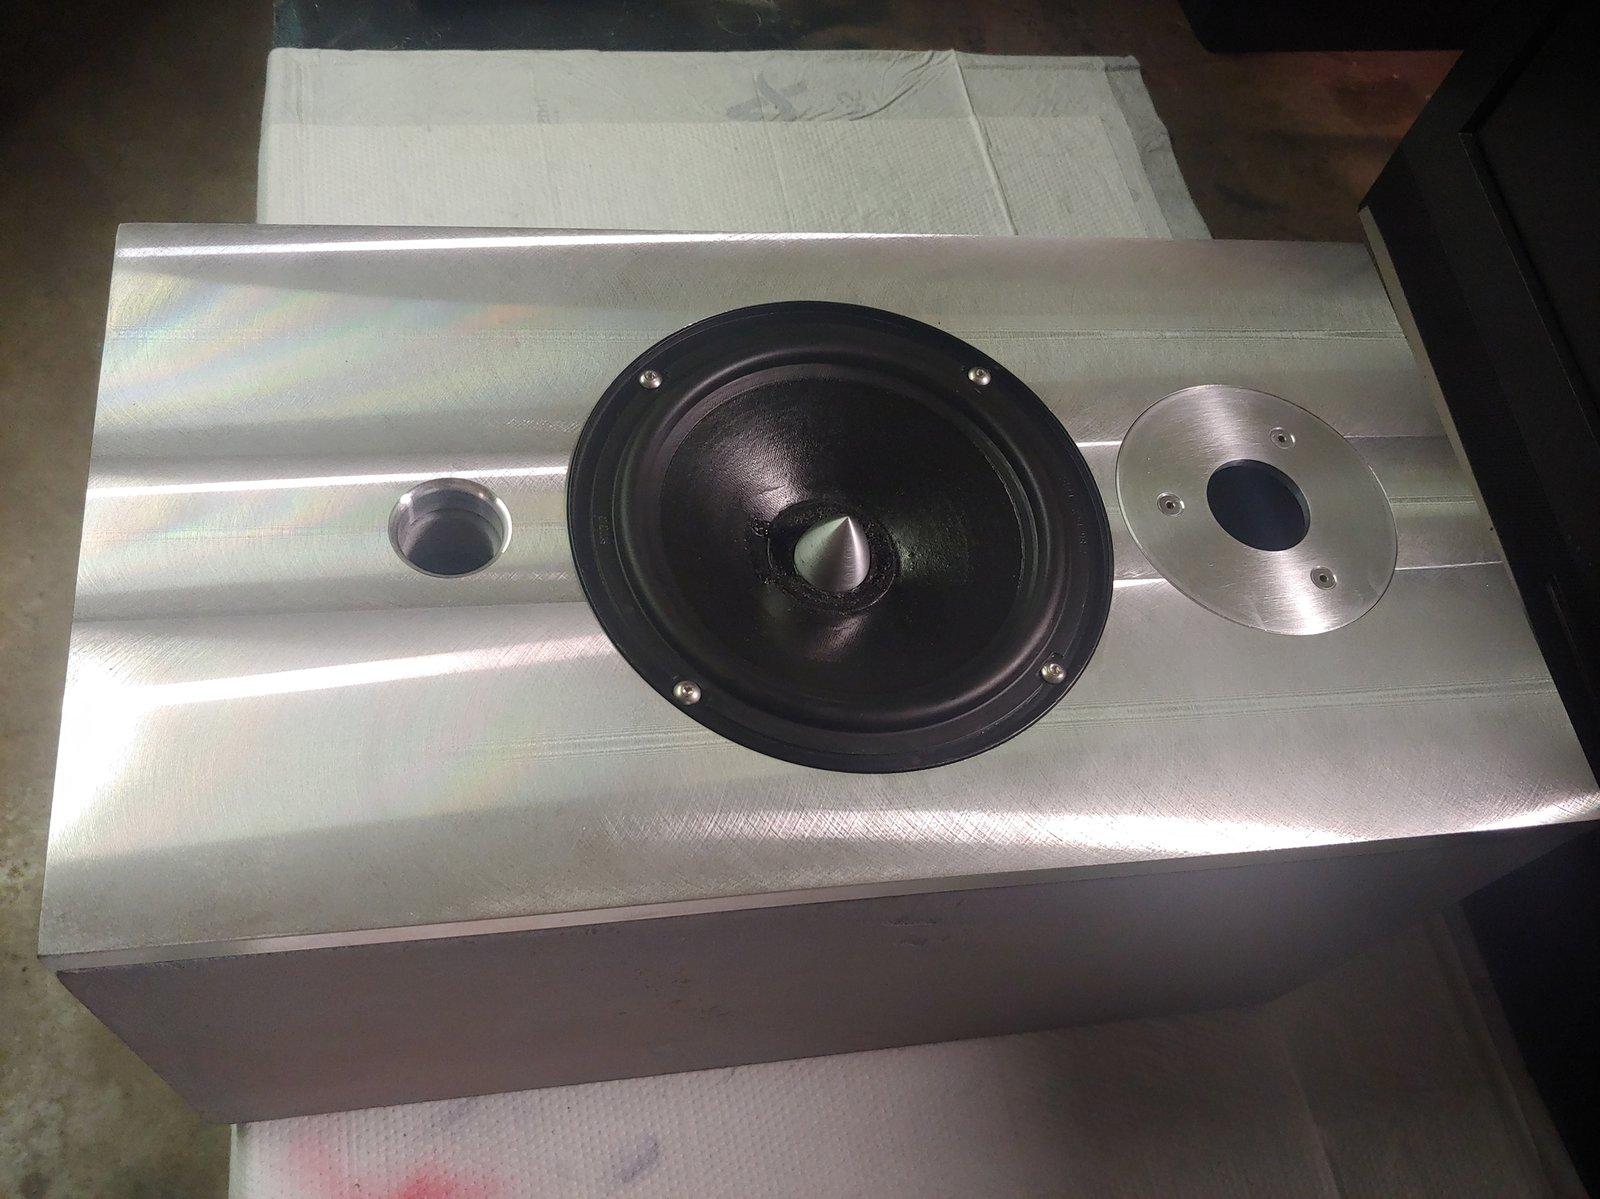
xschopBRONZE MemberI’ve owned quite a few classic Beovox and I have to say these are the best imaging and midrange-detailed for their size. I have another set that I will do the exact same modifications to. I have built custom baffles out of solid alloy and it is the go-to medium in my opinion.
Again, kudos to B&O for the quality of alloy they used in making these back in the day. They simply need a layer of dampening applied internally to make them almost dead-quiet.

 xschopBRONZE Member
Thank you. I look forward to building another one.
xschopBRONZE MemberHello xschop, with frets I meant the cloth covered plastic speaker fronts. Nothing much to mod there I guess :-). Best of luck, regards, Johan
Ah, ok. In my neck of the woods they’re called grills. Makes sense.
I really like the look of the brushed-alloy finish of the C75’s.
A good question for the engineers is what specific alloy was used for the panels and what technique was employed to weld them together?
I have worked with many different alloys and these alloy cabinets are top quality. Kudos to B&O.
xschopBRONZE Member“I just touched up the metal of the drivers with a black marker as they will be playing with (freshly washed) frets.”
I have to ask what is a “fret”? I am currently looking for a set of C75’s to rebuild as well. I see they don’t have the mid-drivers angled like the CX100’s.
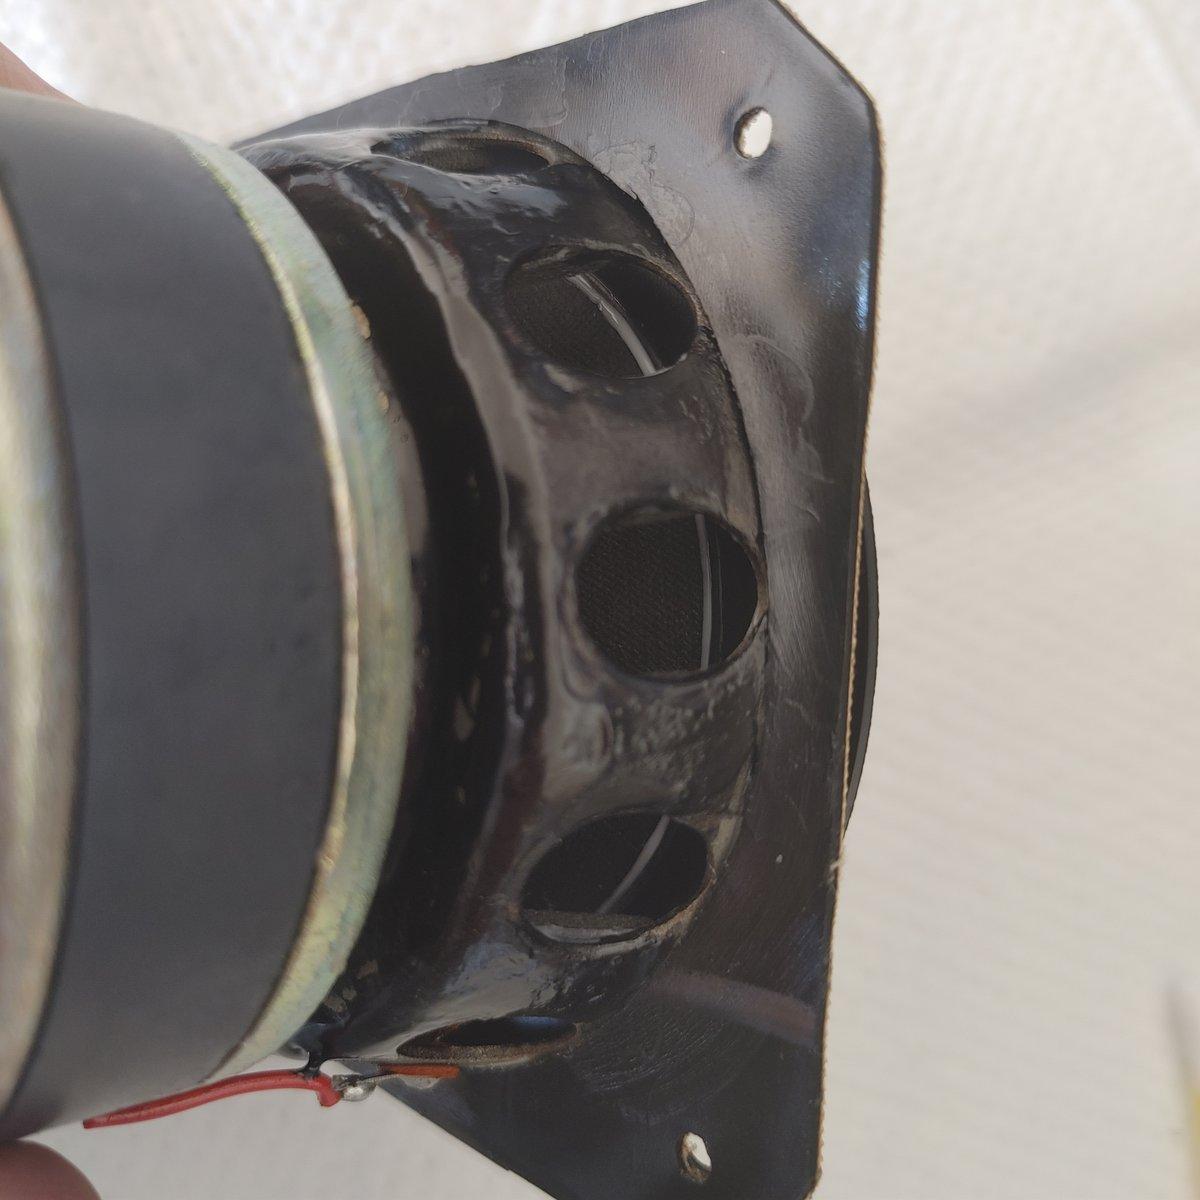
xschopBRONZE MemberFound my build pics in those units to show a modification not mentioned previously to dampen the stamped-steel basket frames. Having done this to many other drivers with stamped steel baskets, I followed suit with fiber-reinforced butyl rubber gaskets and high density polyurethane rubber adhesives. This negates the ringing/resonance from the frames as well…

-
AuthorPosts