Forum Replies Created
-
AuthorPosts
-
 EvanGOLD Member
I have been dreaming of this for 10 years…

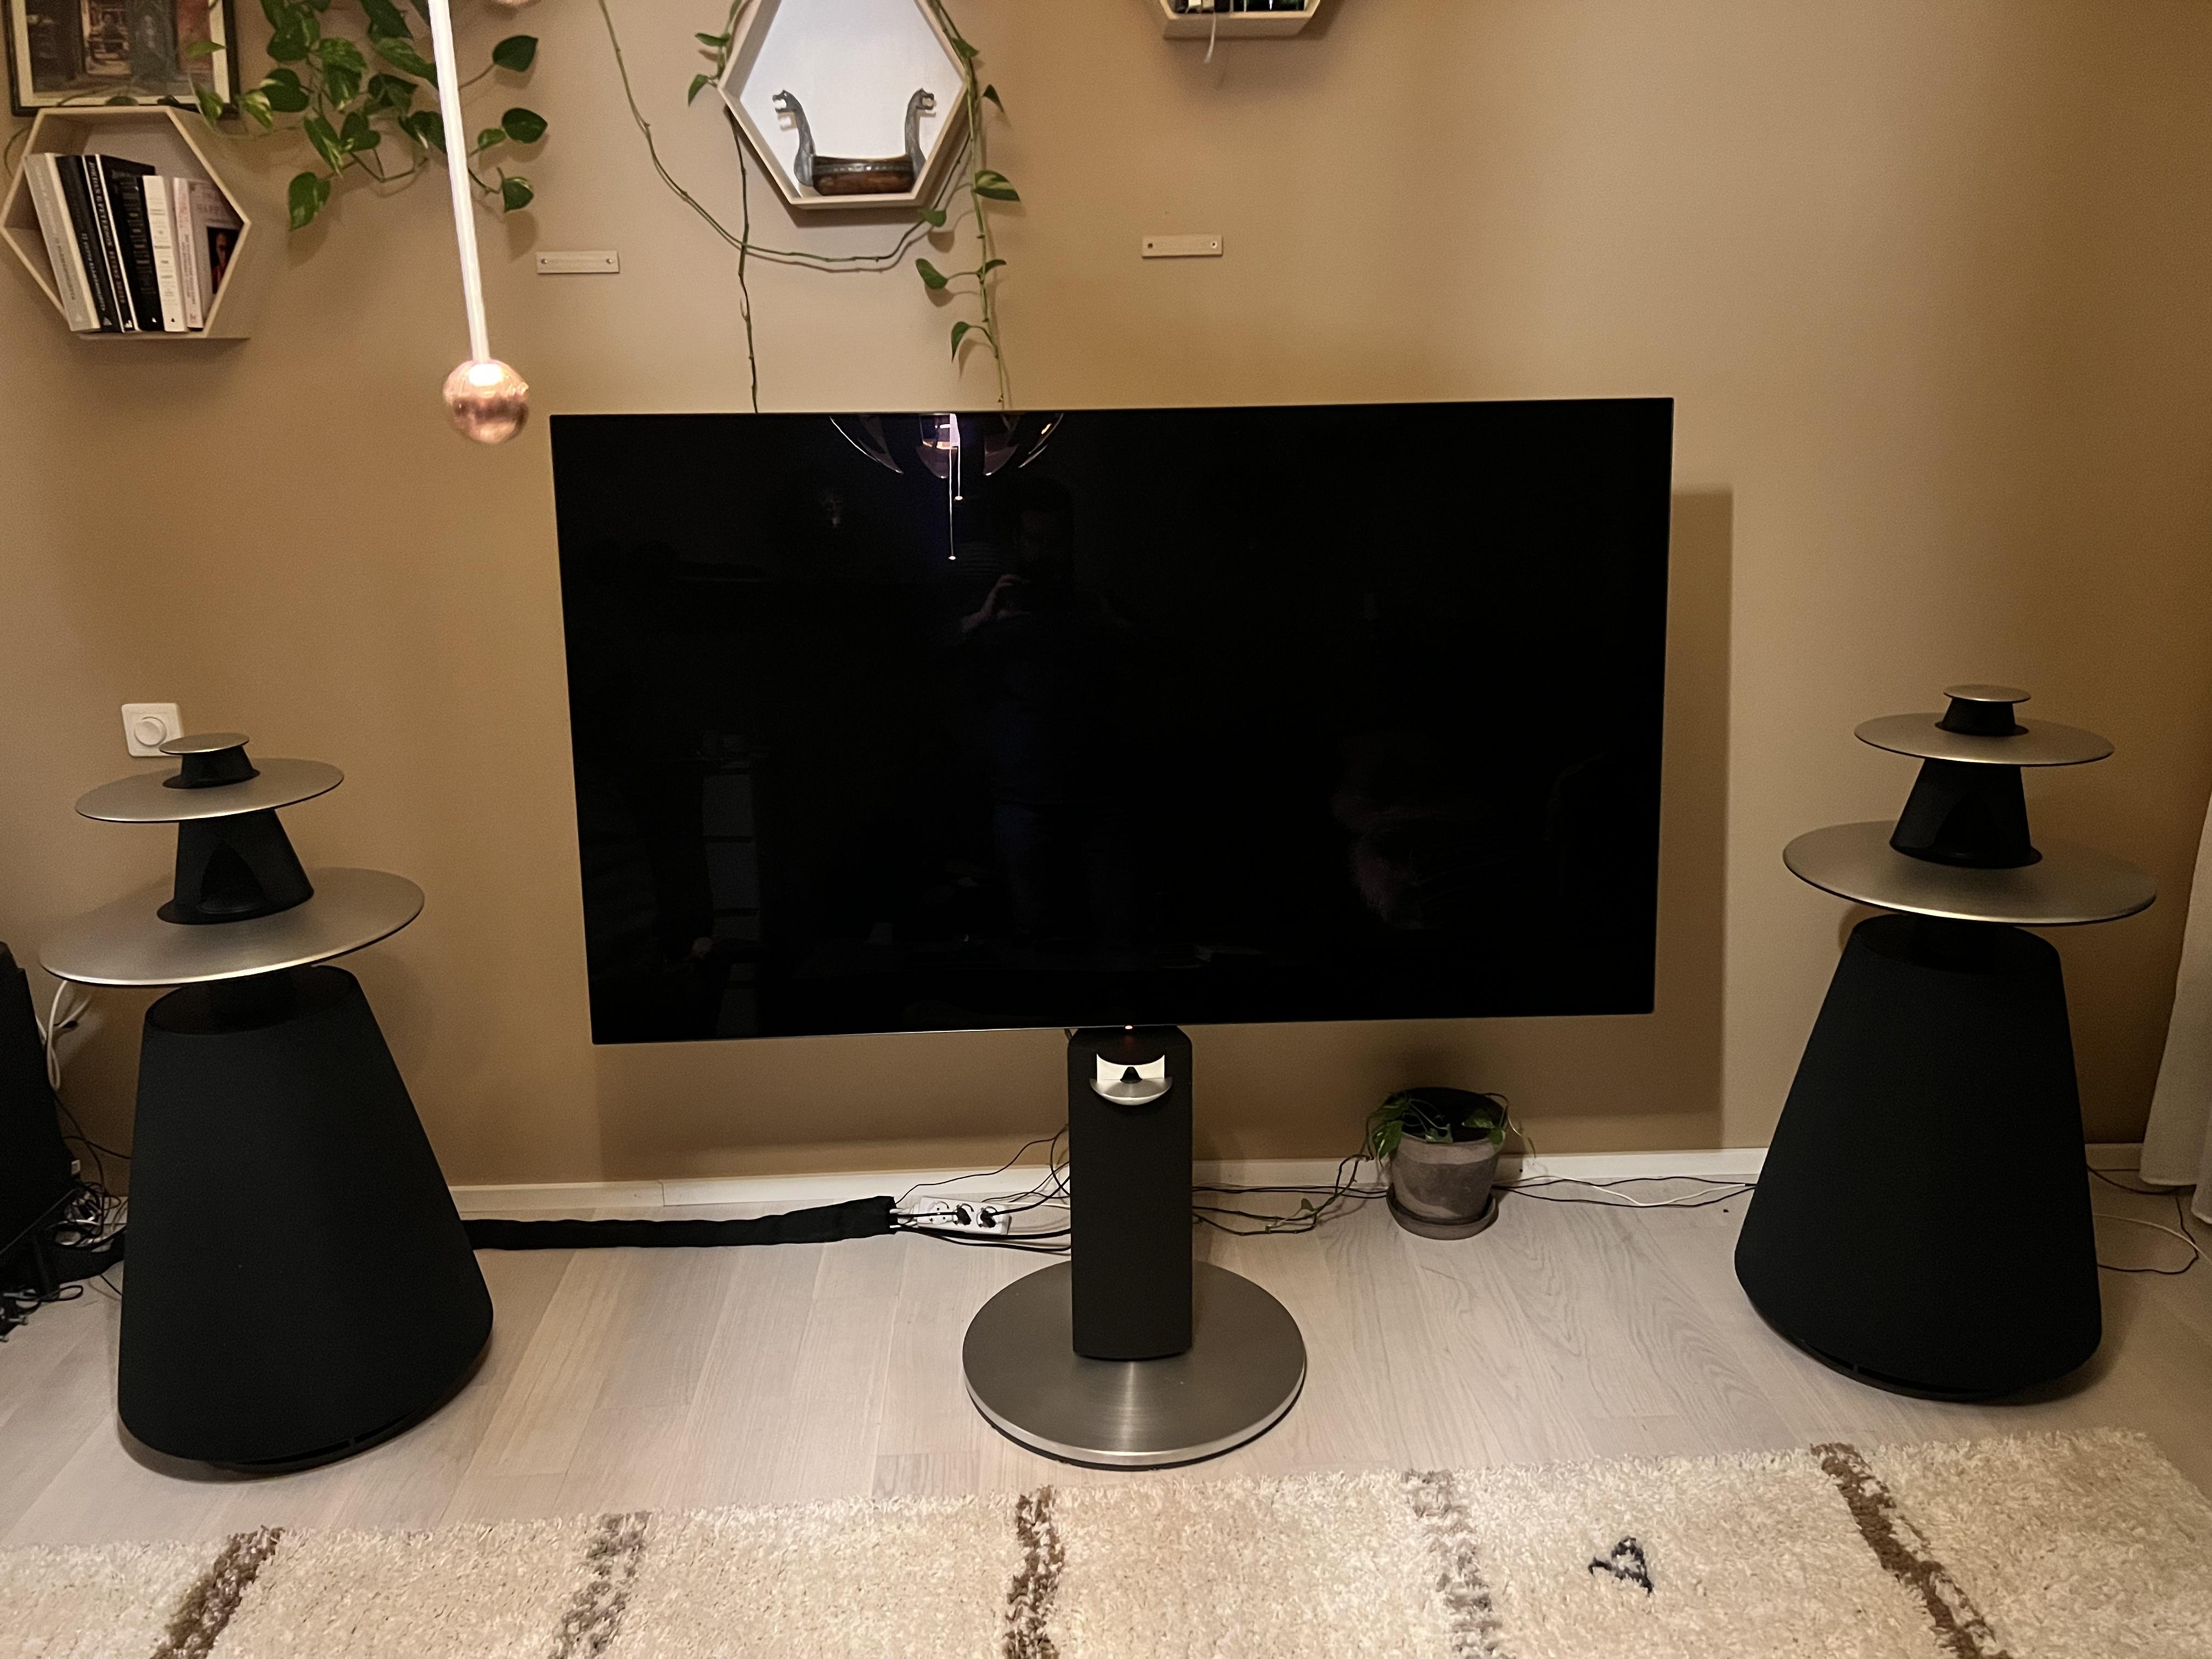
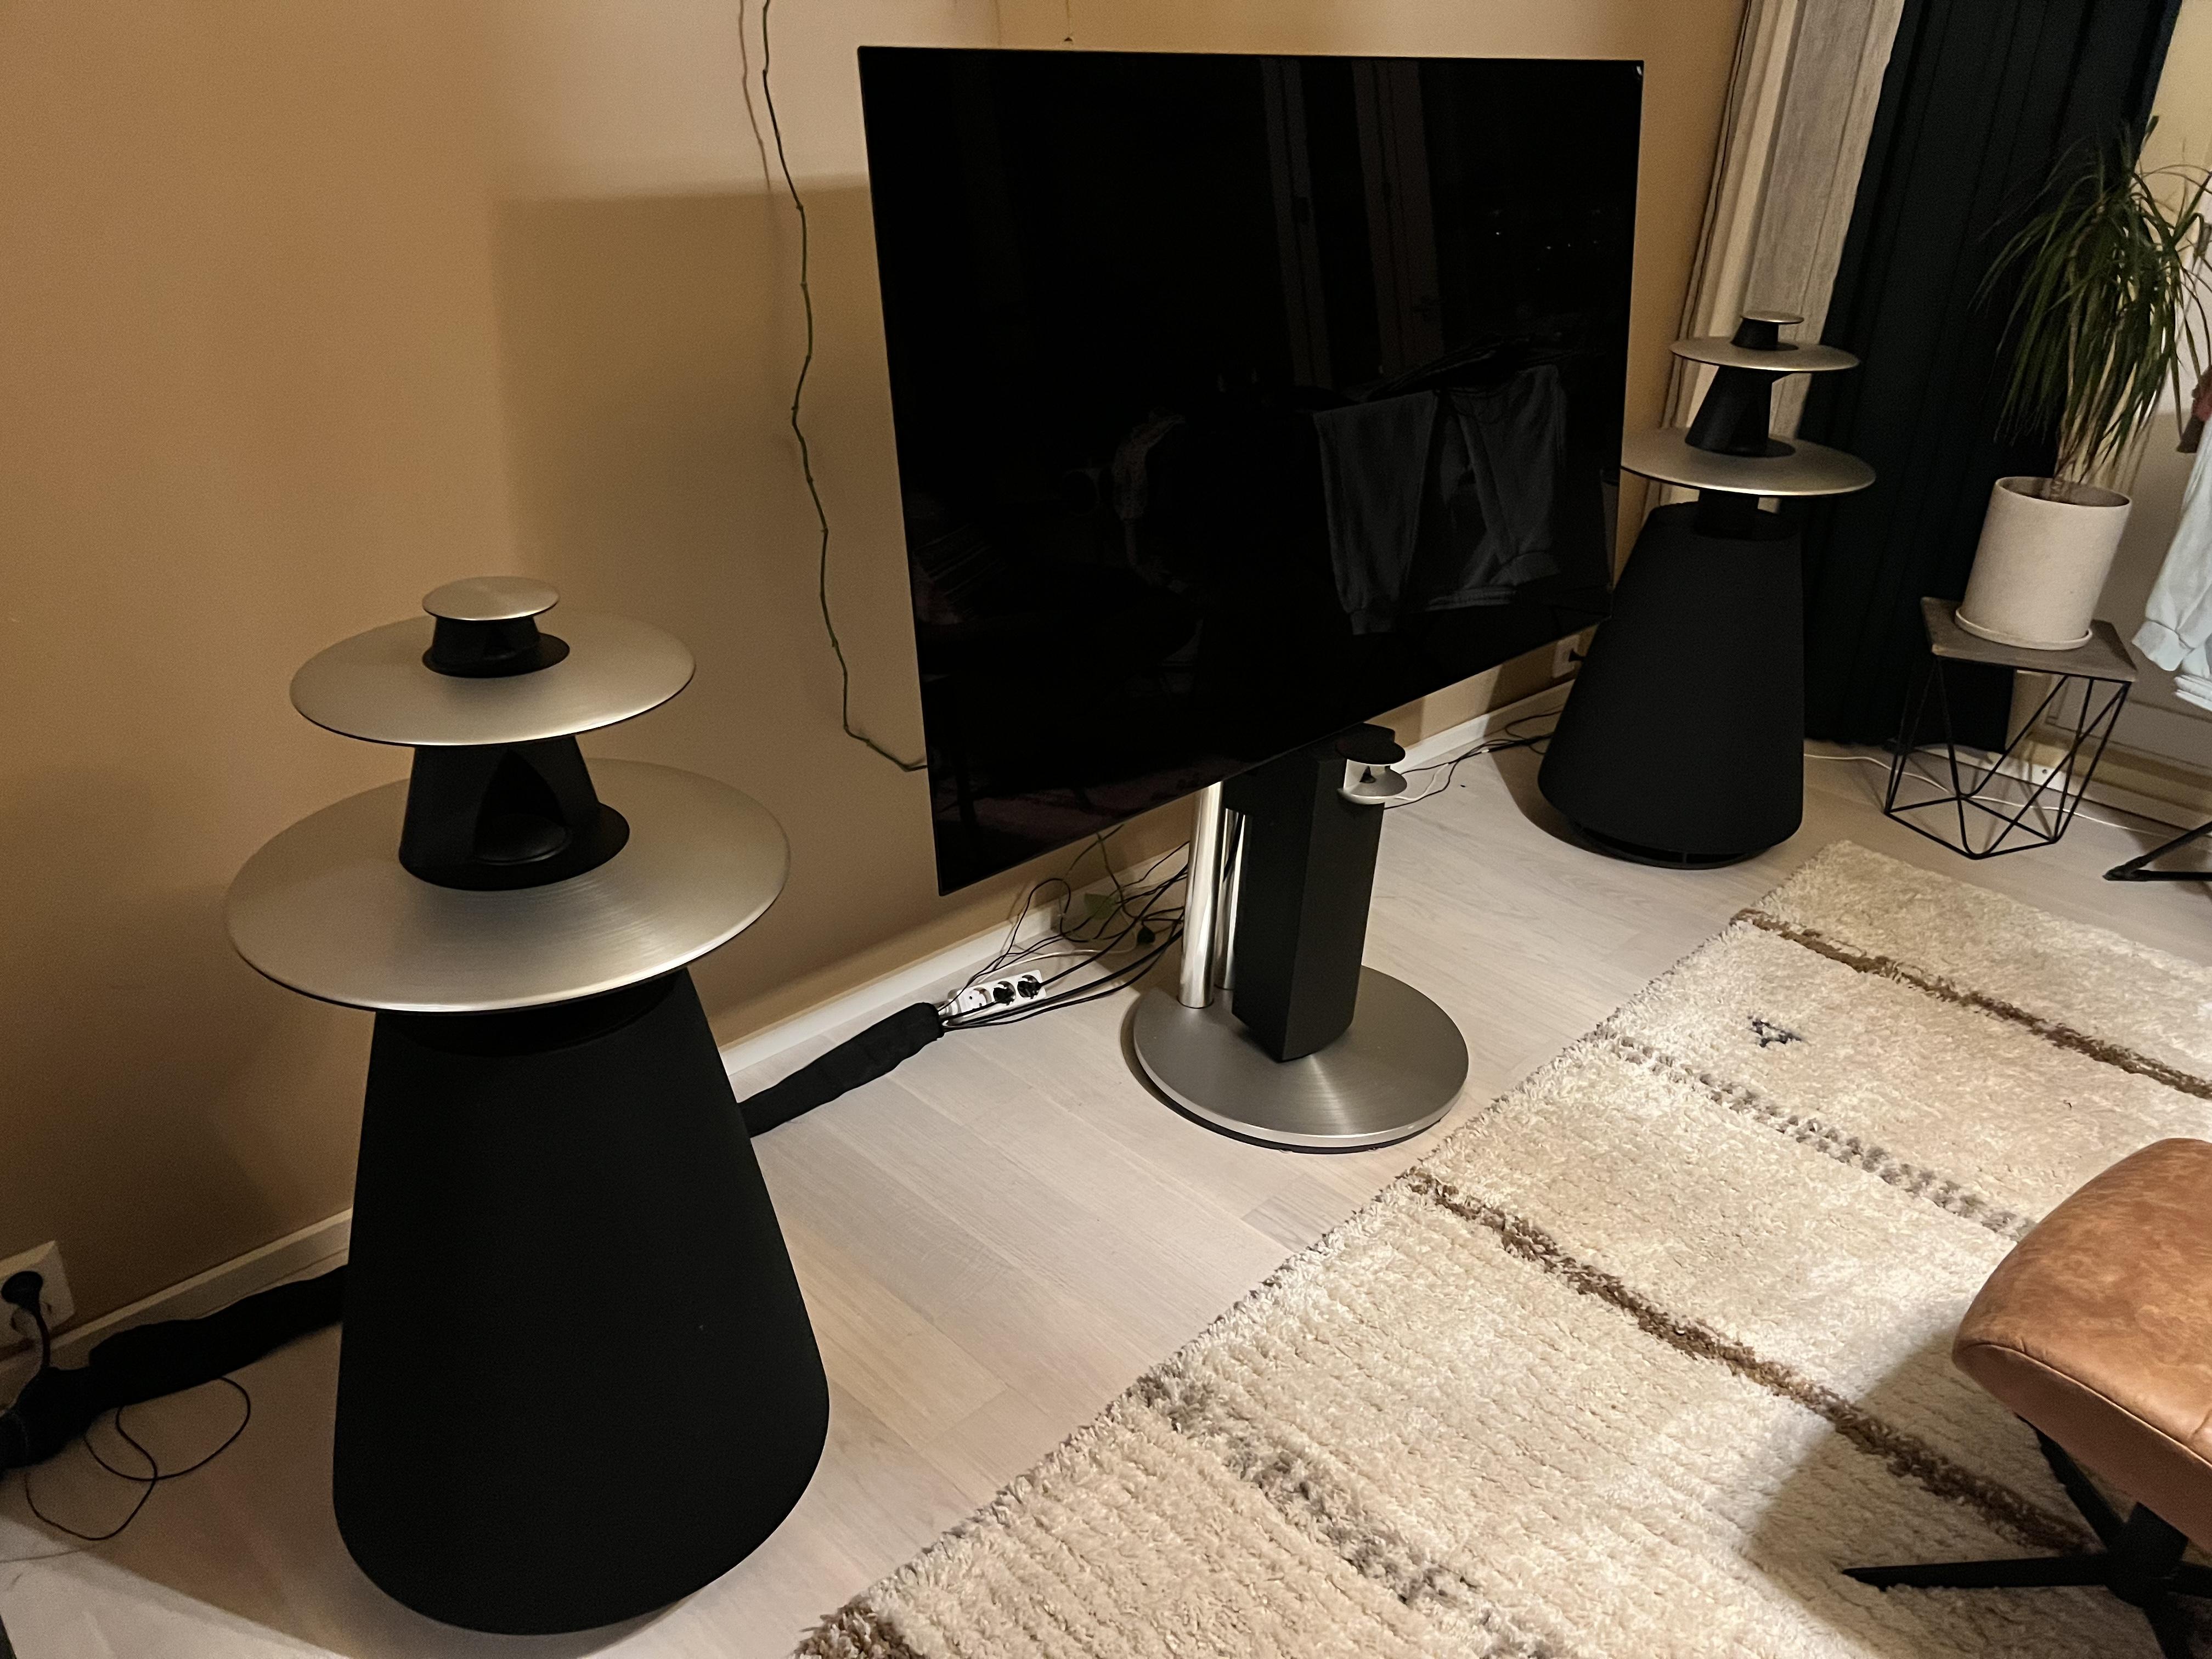
Congrats, Leo! Please add your listening impressions of the BeoLabs after some listening time! The all-black BV7 looks awesome, too.
I’d be very interested to hear how/if you recommend the BL7-4. I’m running a BeoLab 10 as my center channel and I never thought I would need more from a center channel until I put it in-between a pair of Beolab 5s. The BeoLab 10 is of seriously outgunned on SPL and low end (not the BL10’s fault) but the timbre of the 10 and 5 are extremely different. I wish I could fit a third 5 underneath my BV. The Beolab 10 seems to be very midrange-forward compared to the 5s (much sharper in the HF). I wonder if people reading this have the same opinion? MY Beolab 10 sounds so “warm” in the middle by comparison that I wonder if the tweeter is operating correctly.
Location: San Francisco
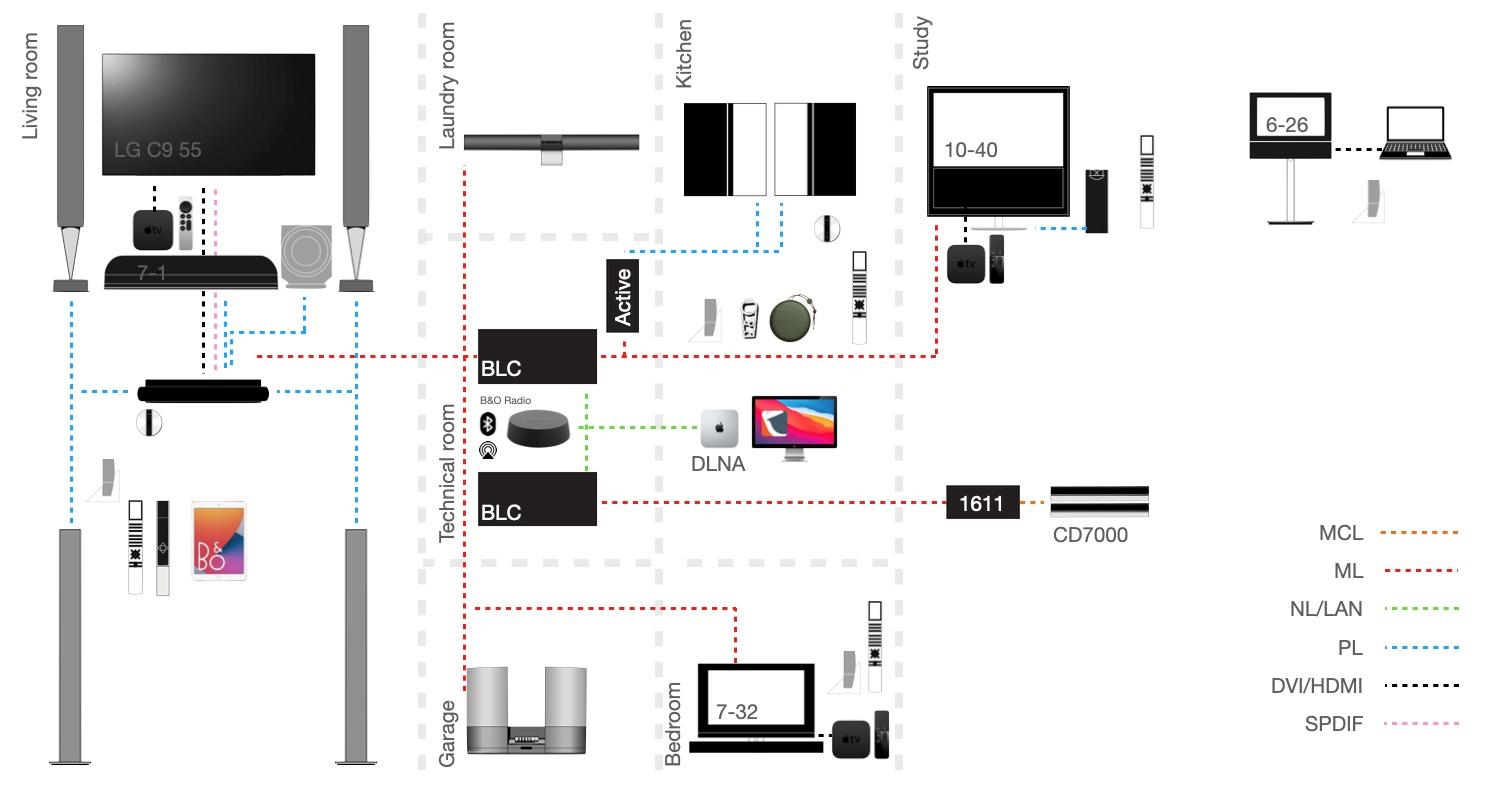
EvanGOLD MemberToday I finally replaced some unused coax wires with Cat7 cables and re-added my BeoMaster 6500 / BeoGram CD 7000 combo to my set-up. They are in the attic (study) and connected through a 1611 to go from MCL to ML, and a BLC to go from ML to NL.
 I made a little overview of the whole network :-).
  Next trial will be to connect the BL4000s directly to the Core. Until now I kept them in the larger ML network to avoid sync issues, but if they sound better without the Active and BLC in the chain, I will see to fix any delay issues and get an IR eye connected to the Core for Beo4 control in the kitchen. Regards, Johan
This is a true “system”! Nice work integrating everything and that “little overview” is actually an epic graphic!
That BV10 looks great by the way. I always miss mine.
Location: San Francisco
EvanGOLD MemberHey Lee –
First of all, good to see you are still poking around! I am very appreciative for your efforts in running BeoWorld. This platform helped me discover and develop a subject I have become quite passionate about – it has literally changed my life. For that I will always be grateful. As well there’s no doubt that Keith is an absolute legend and powerhouse making it all work.
The diehard enthusiasts will always be here, you can count on us. In my experience, the BeoCommunity used to be very centralized around BeoWorld in its 2007-2012 iteration (maybe a few more years after that). The seemingly endless number of FB groups/pages seem to have been the main undoing of the traffic we used to see at BW. BeoWorld will always be the place I go to share, though.
I think a price increase is overdue for Gold members but I can see how that might drive membership down even further. Chicken and egg indeed.
I also see the identity of the Prize Draw (and sir BottsWorth himself) are part of the BeoWorld brand, to lose it would be like losing part of BeoWorld. How many forums do you know do this?? Truly unique. However, I understand that we can’t live in fantasy land anymore. I agree with MM on maybe working the sponsorship angle more or attempting to find a way to subsidize somehow so you aren’t footing the bill yourself.
Evan
Location: San Francisco
EvanGOLD MemberSan Francisco store is open for business. Nice store, directly connected to a BoConepts furniture store as well. Several BS Theatre systems on display, as well as Shape, Horizon, Balance, headphones, etc…
This is great news! I thought they were closed for good.
Location: San Francisco
EvanGOLD MemberBrilliant idea for a series, Steve!
Location: San Francisco
EvanGOLD MemberCheers, Kirin! Thank you very much.
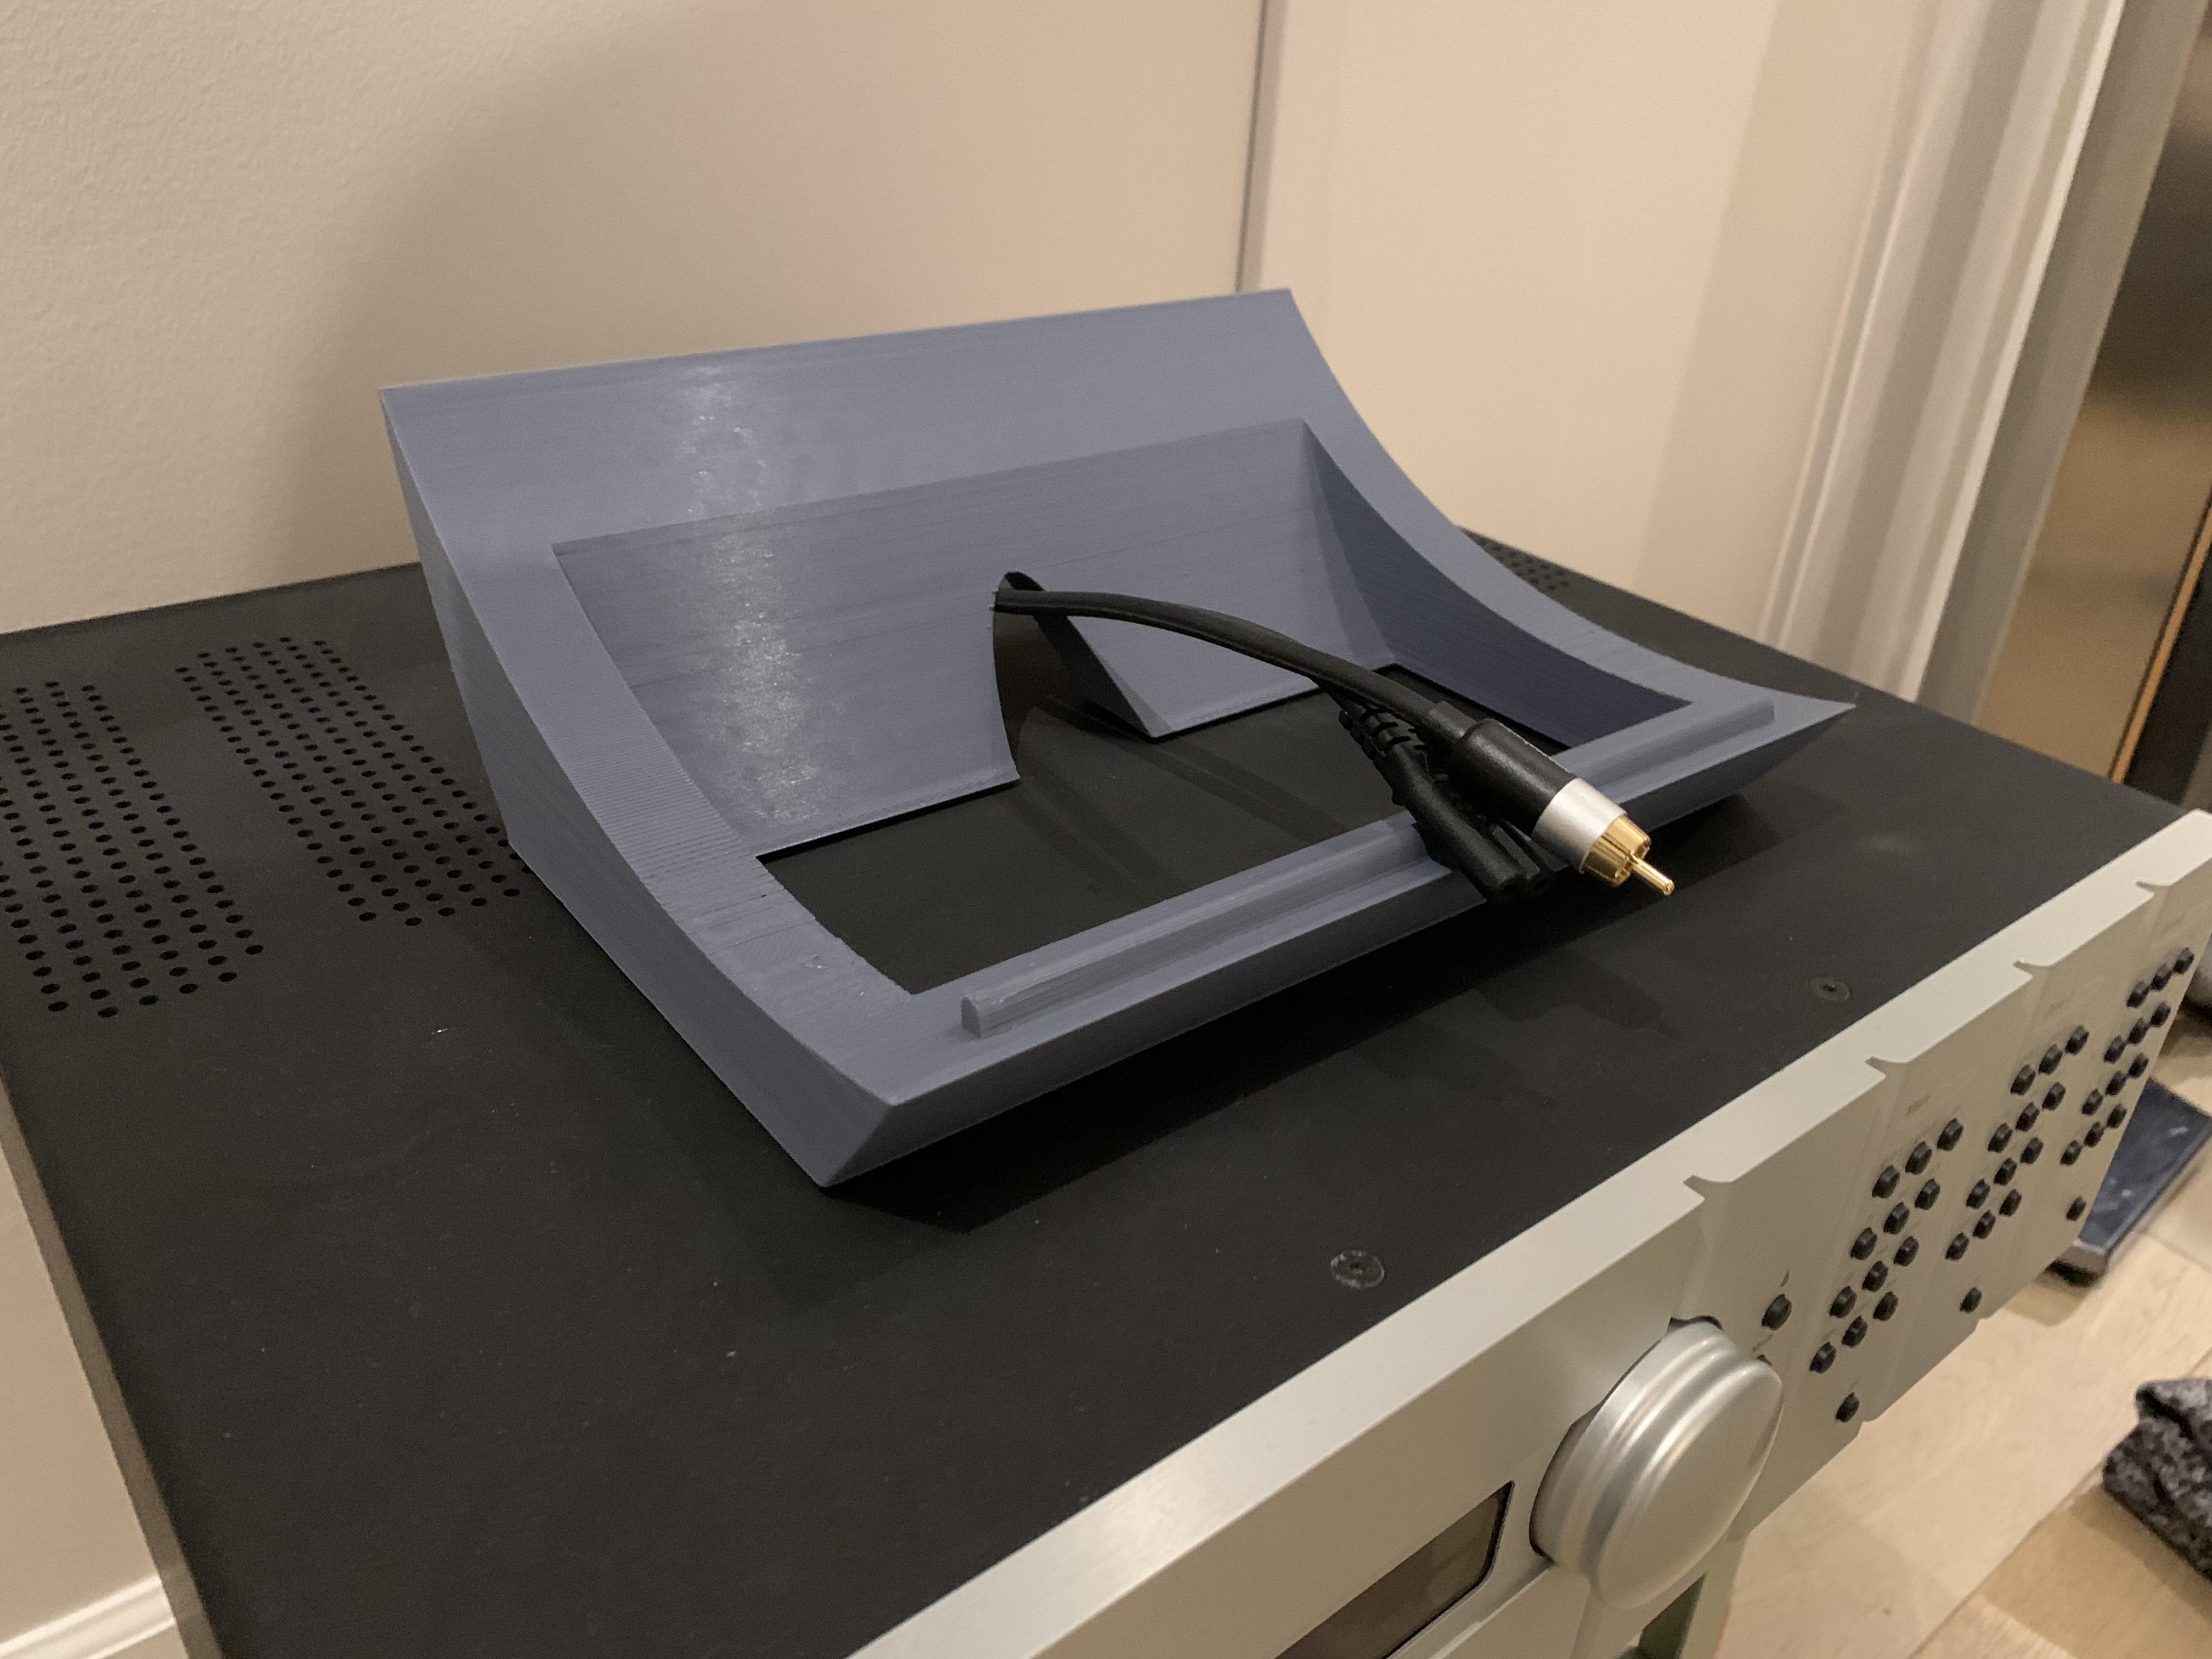
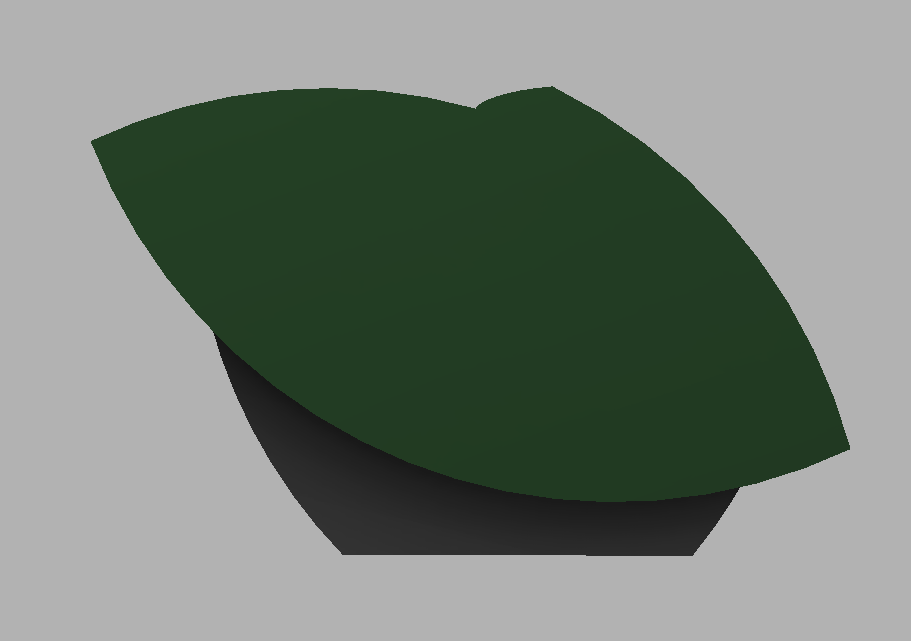
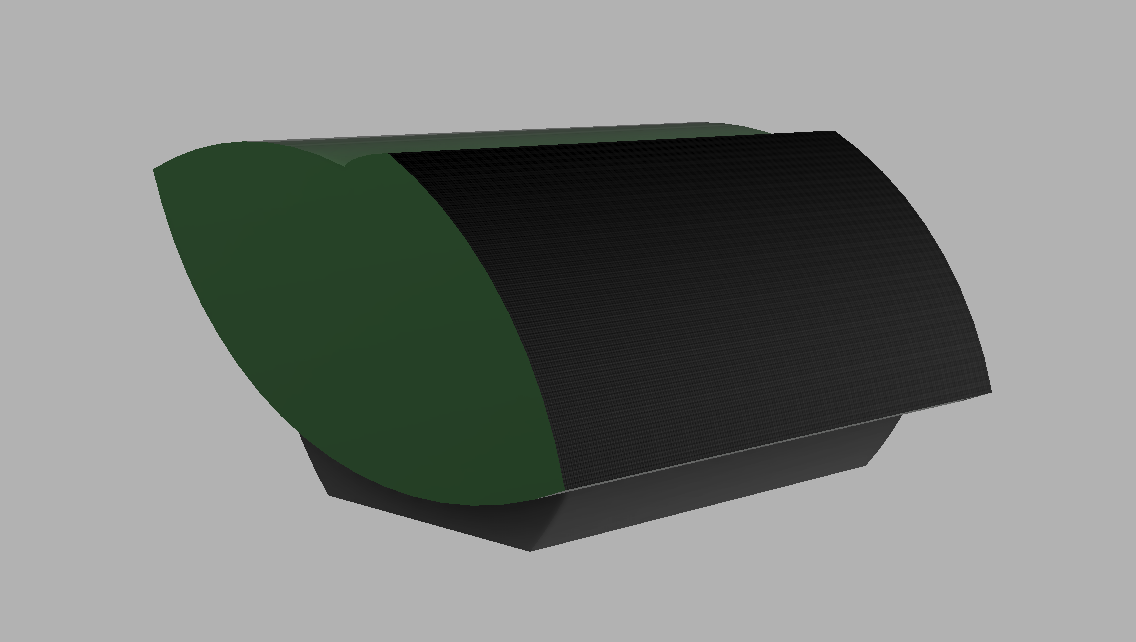
For anyone interested in printing their own, I have made the design available HERE.
When I have the time I’ll make another design available where it is more upright with the speakers that are more on-axis.
Location: San Francisco
EvanGOLD MemberWhere in USA?
Thanks!
EvanLocation: San Francisco
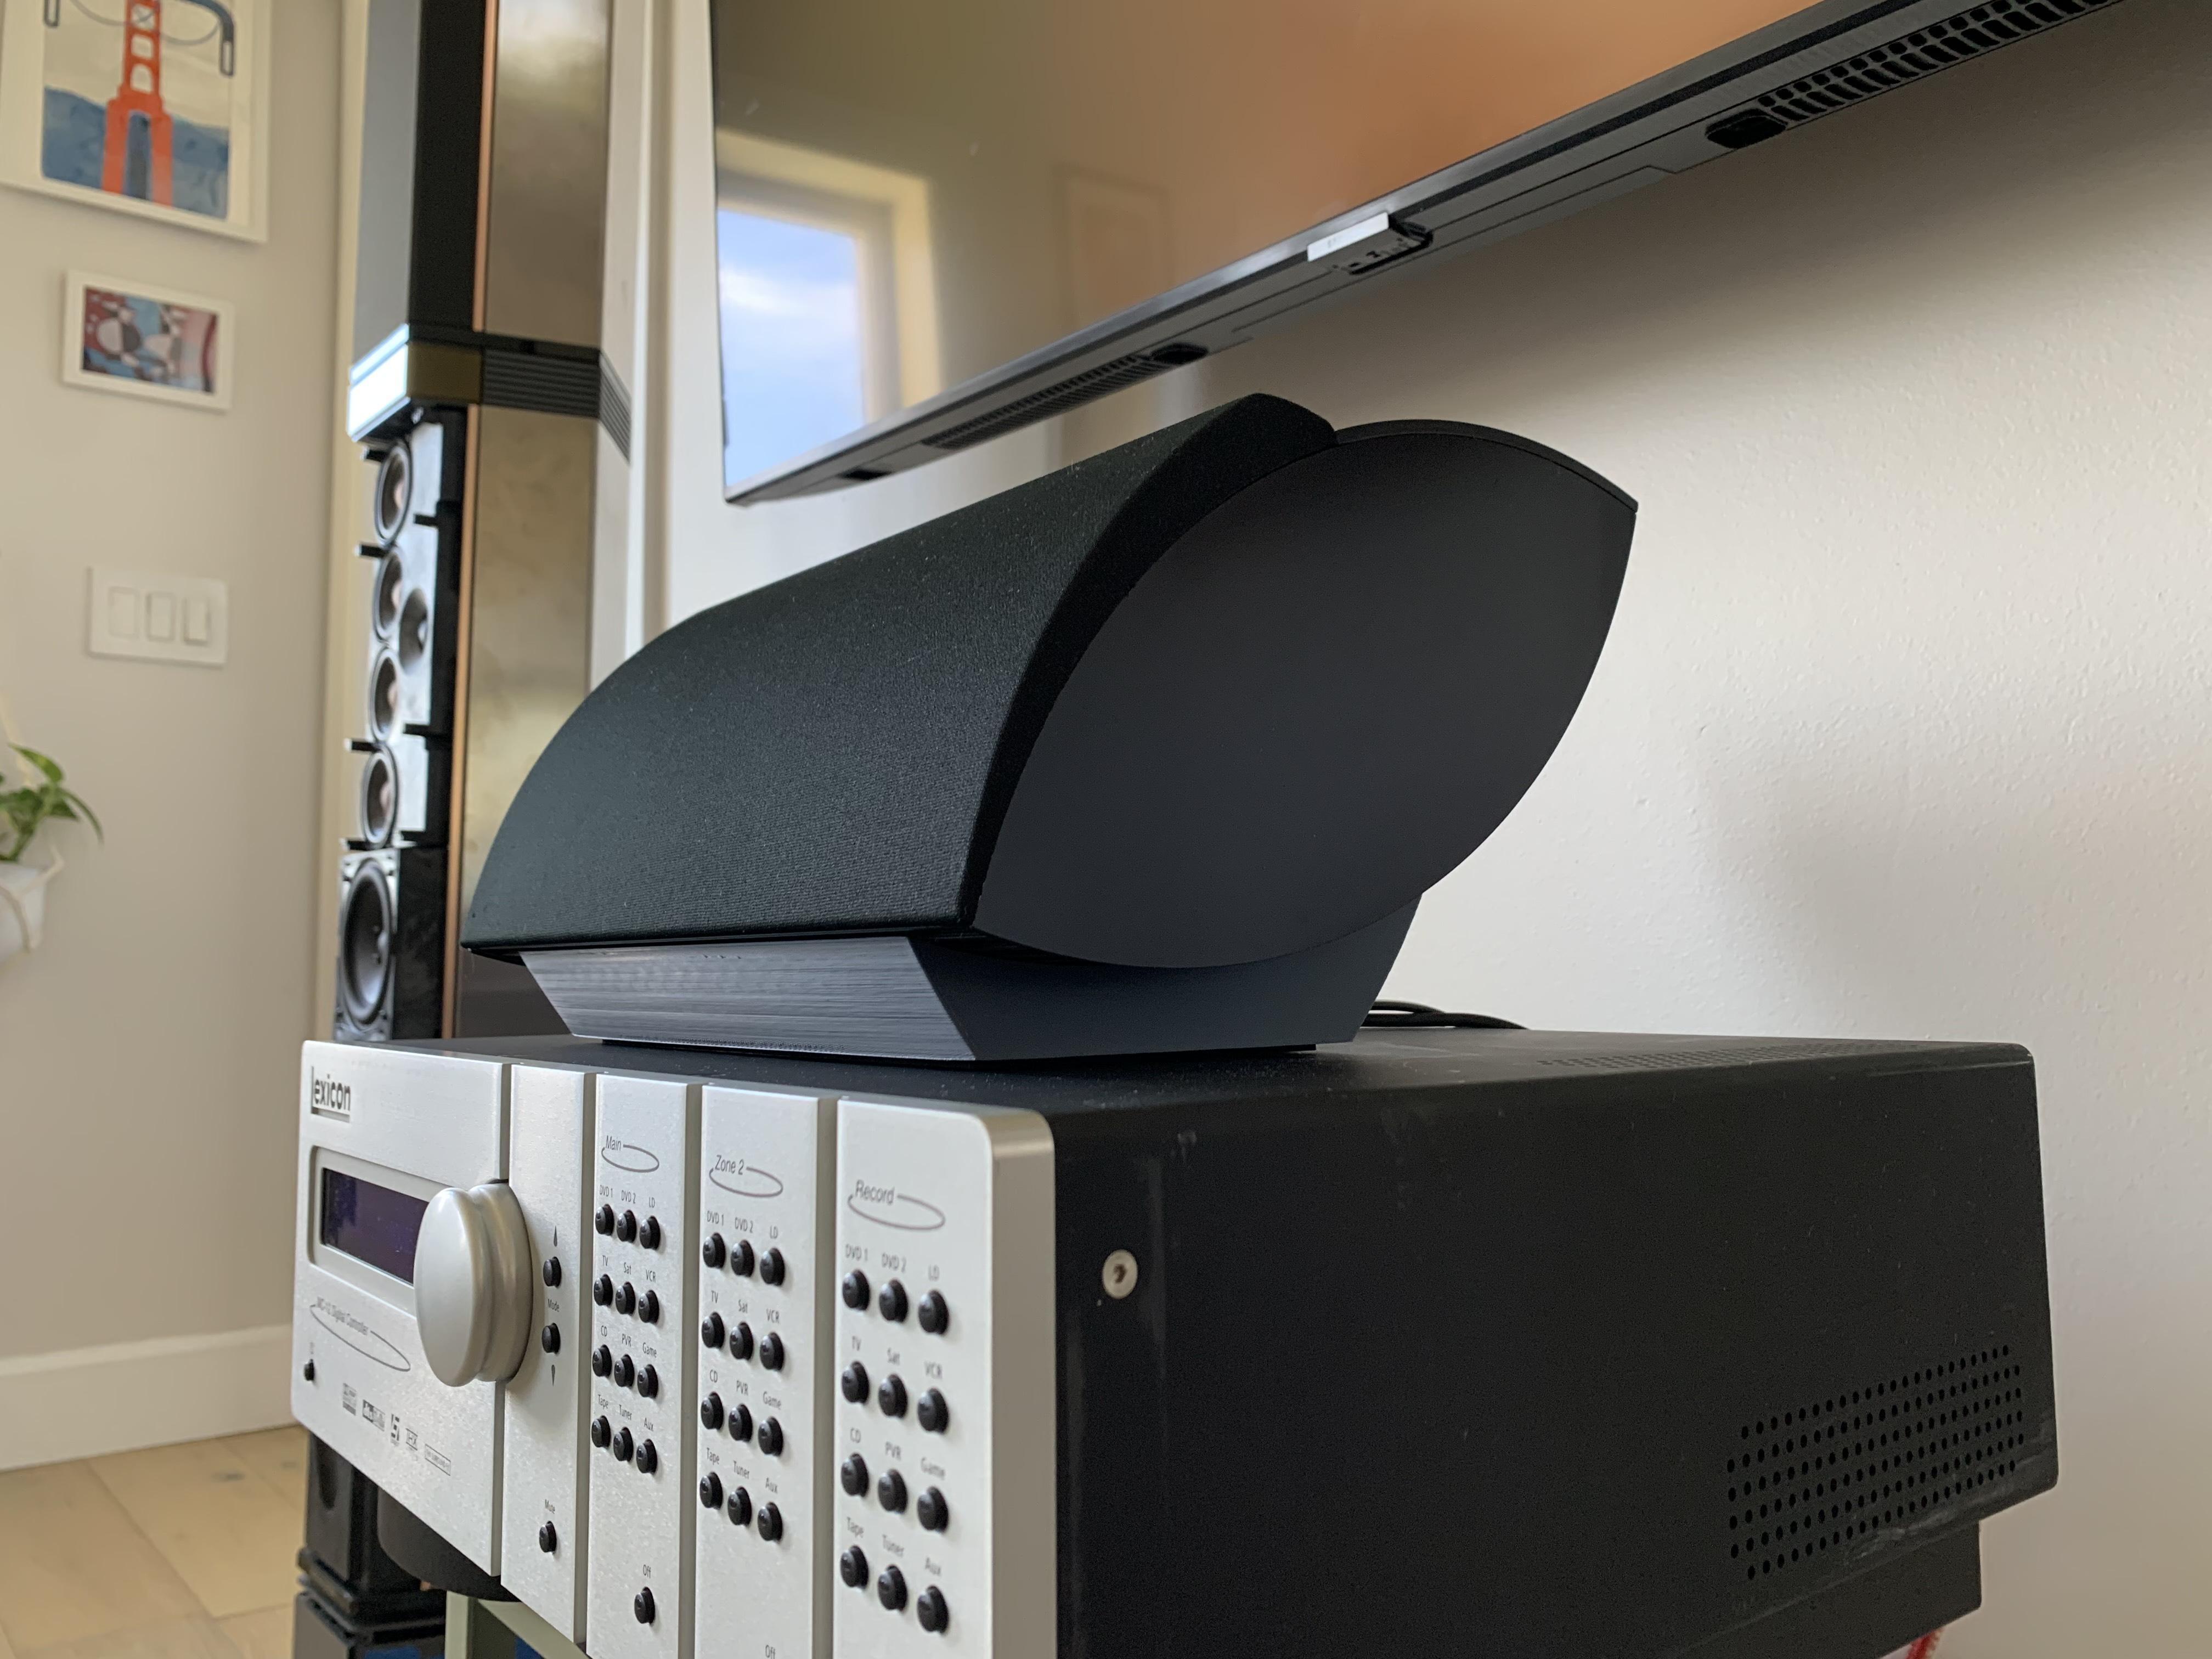
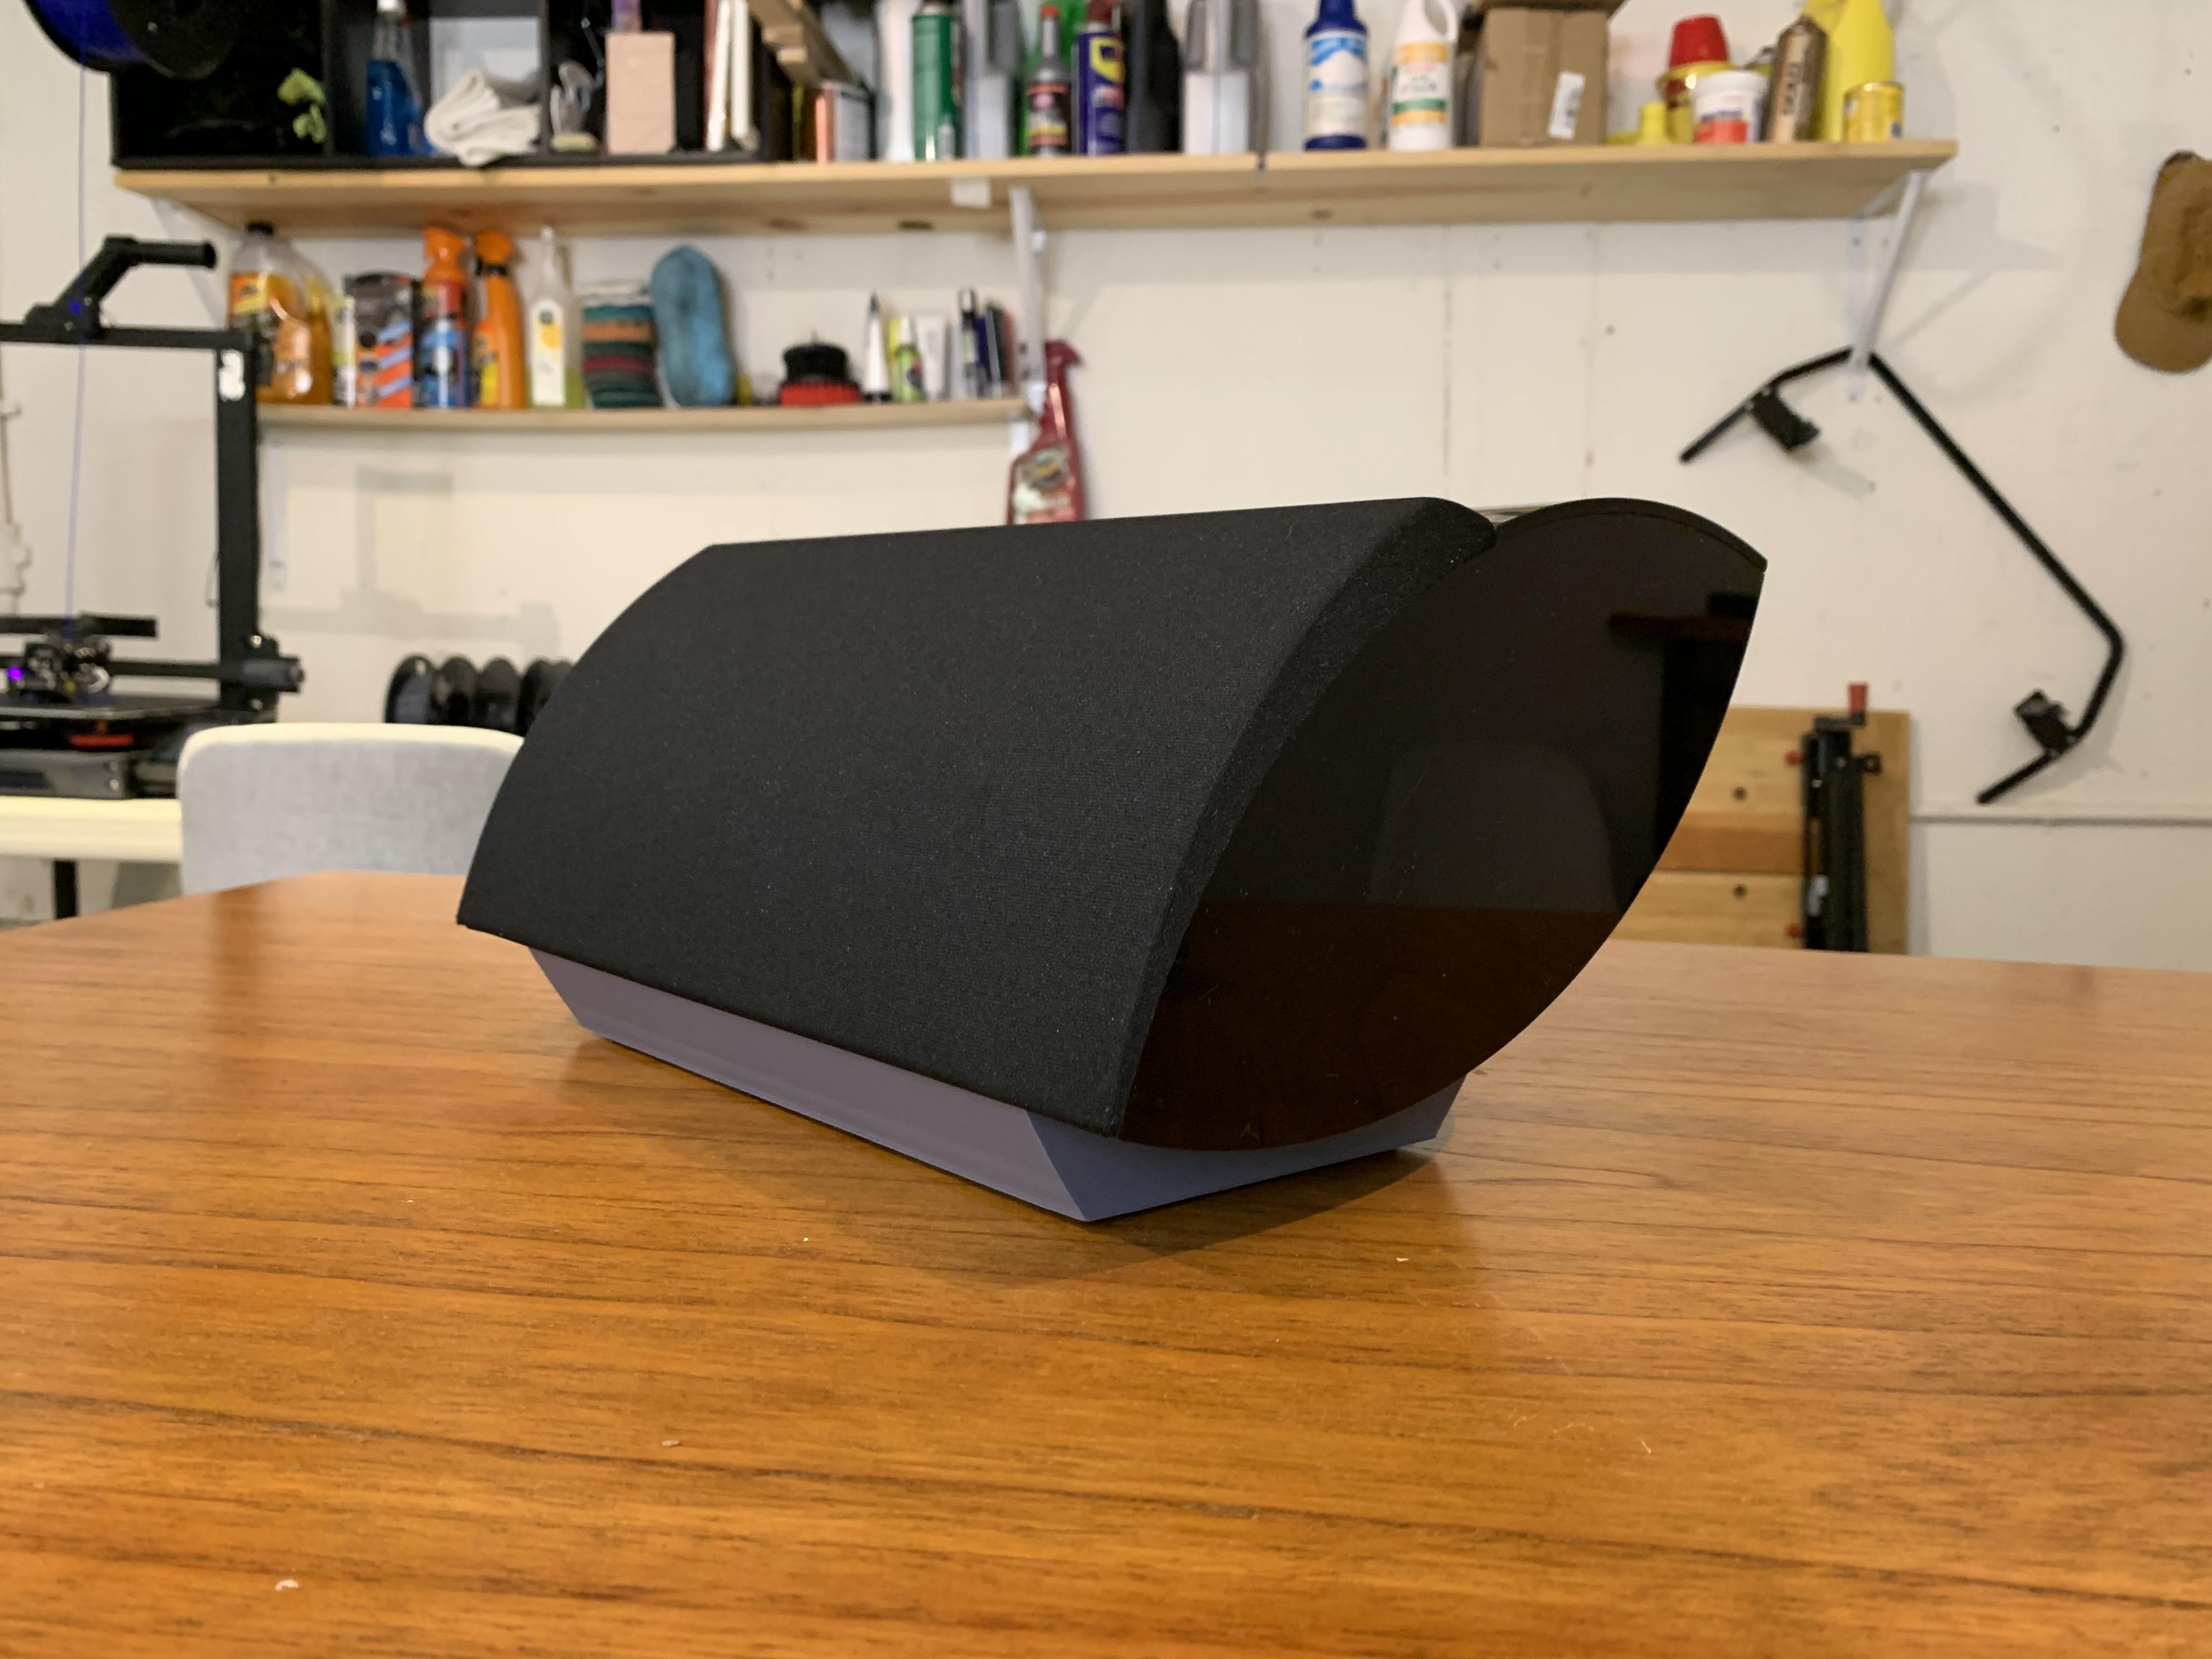
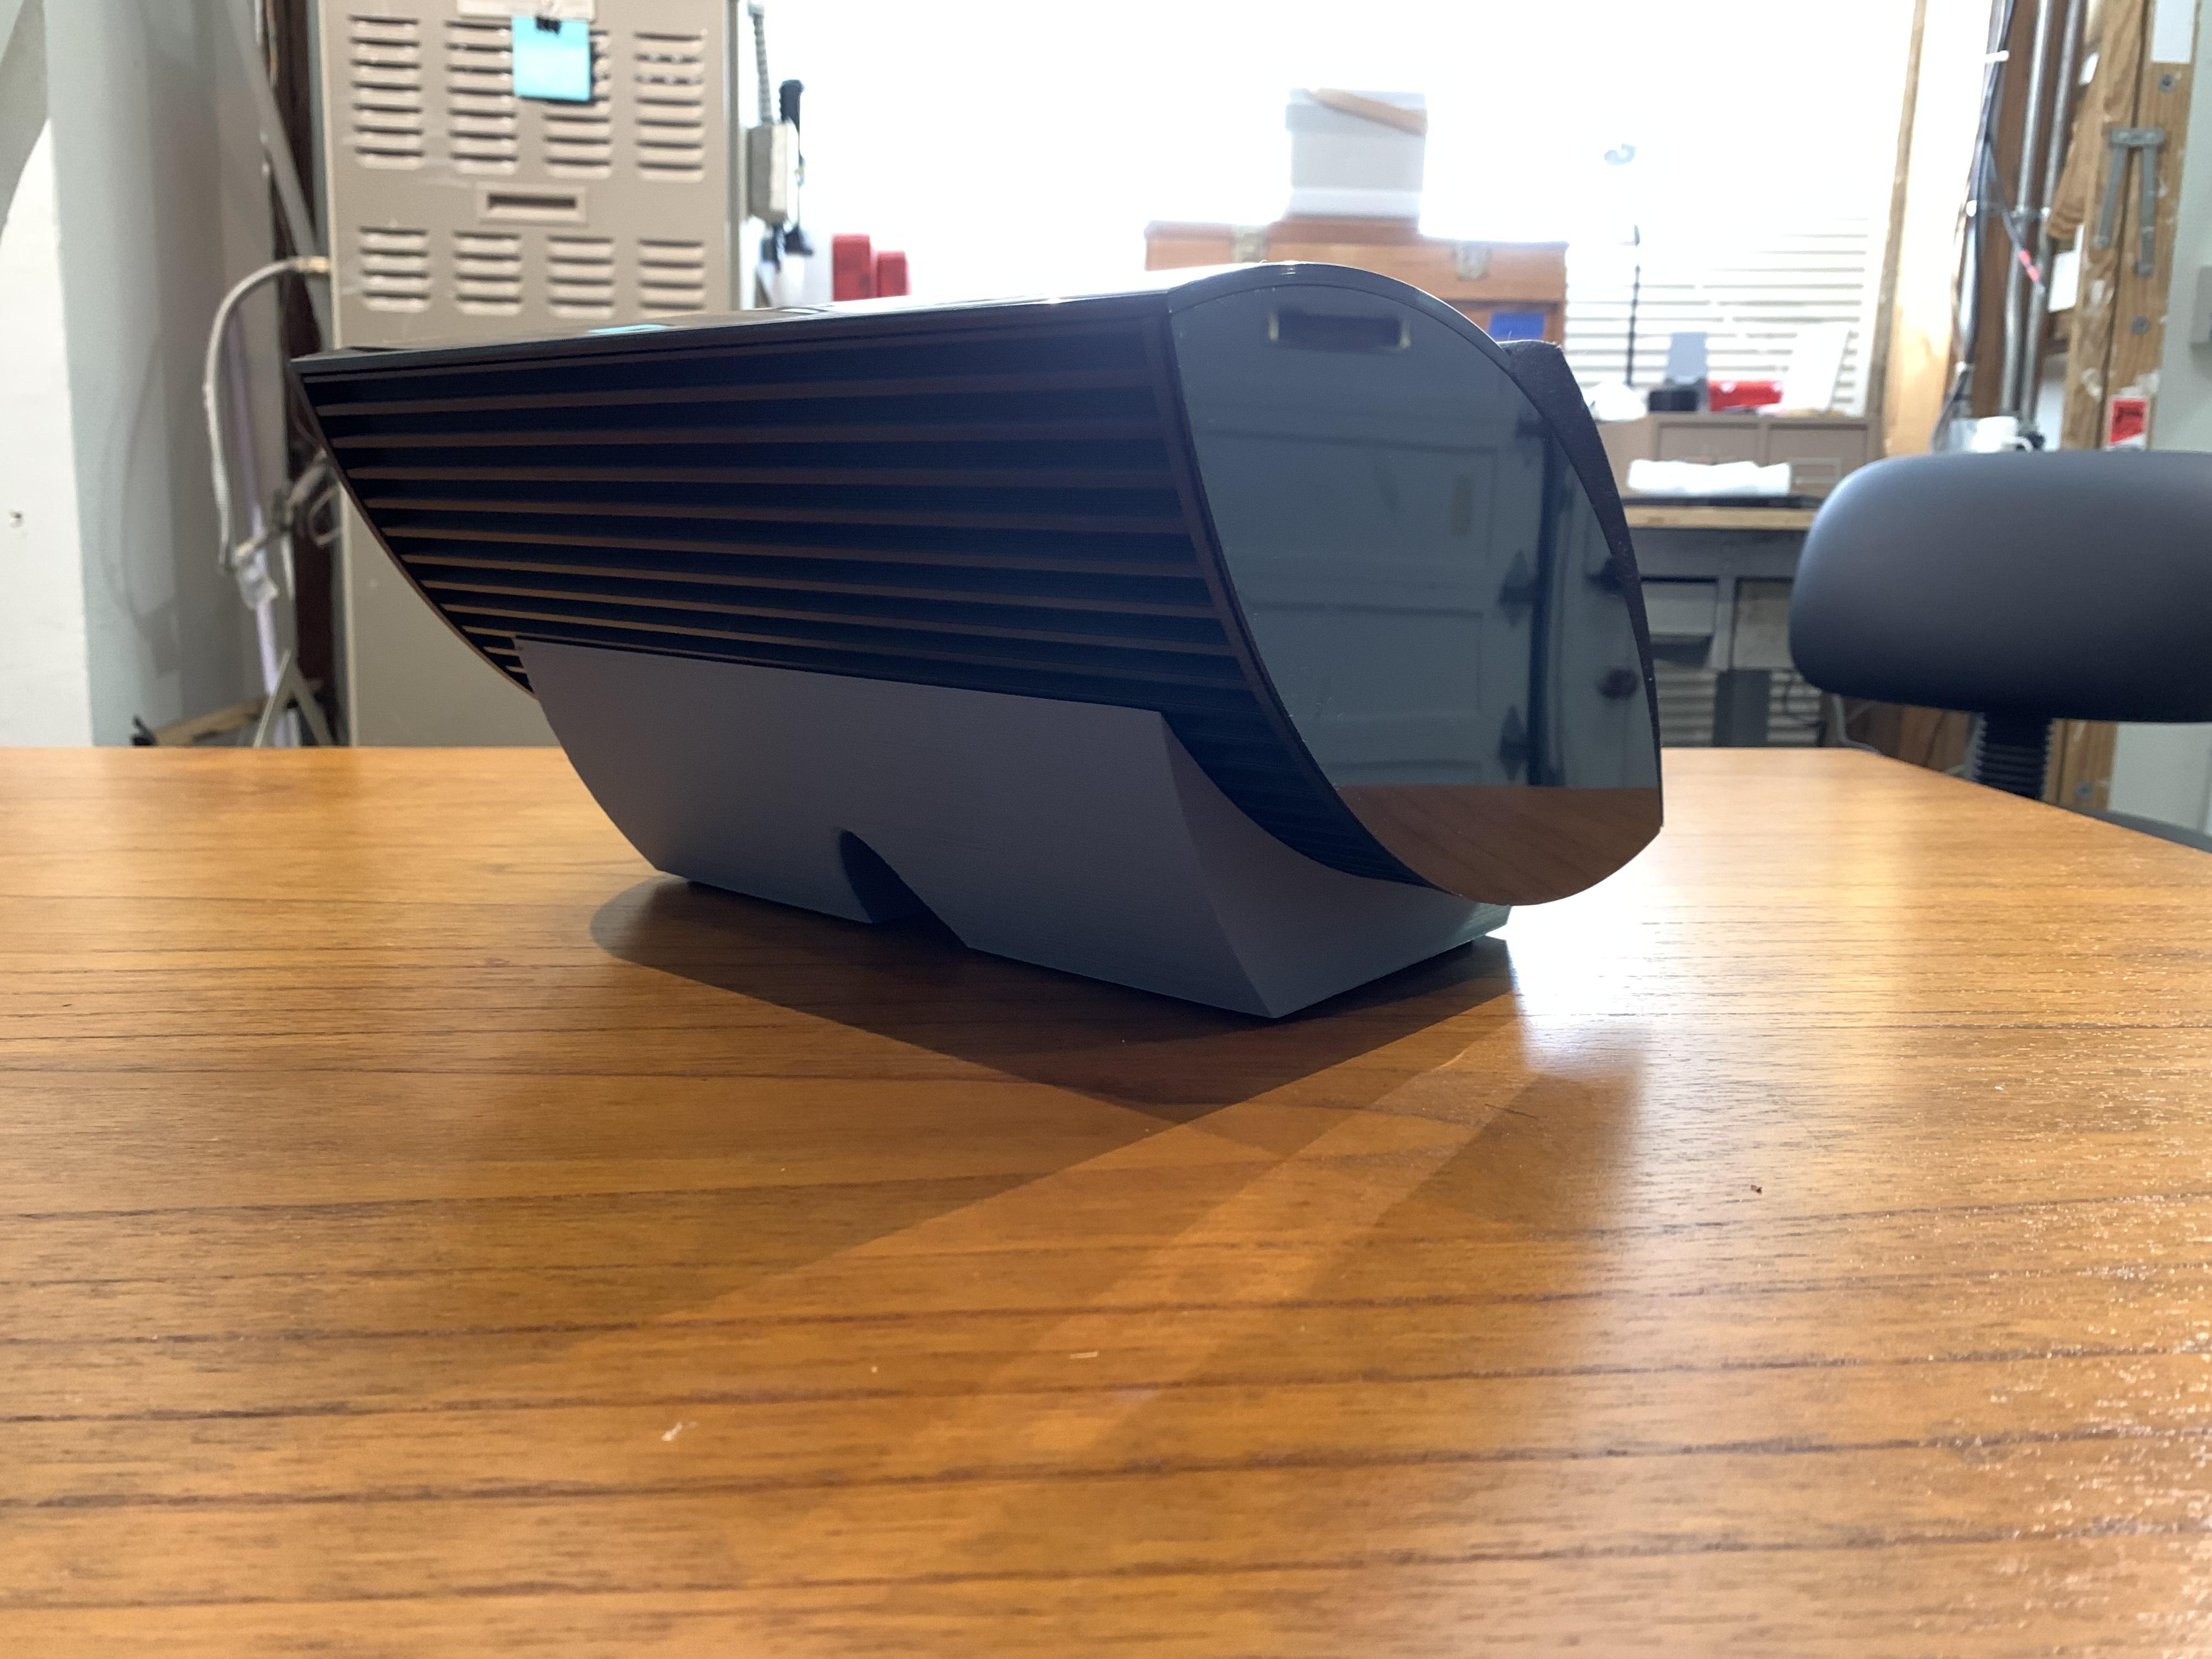
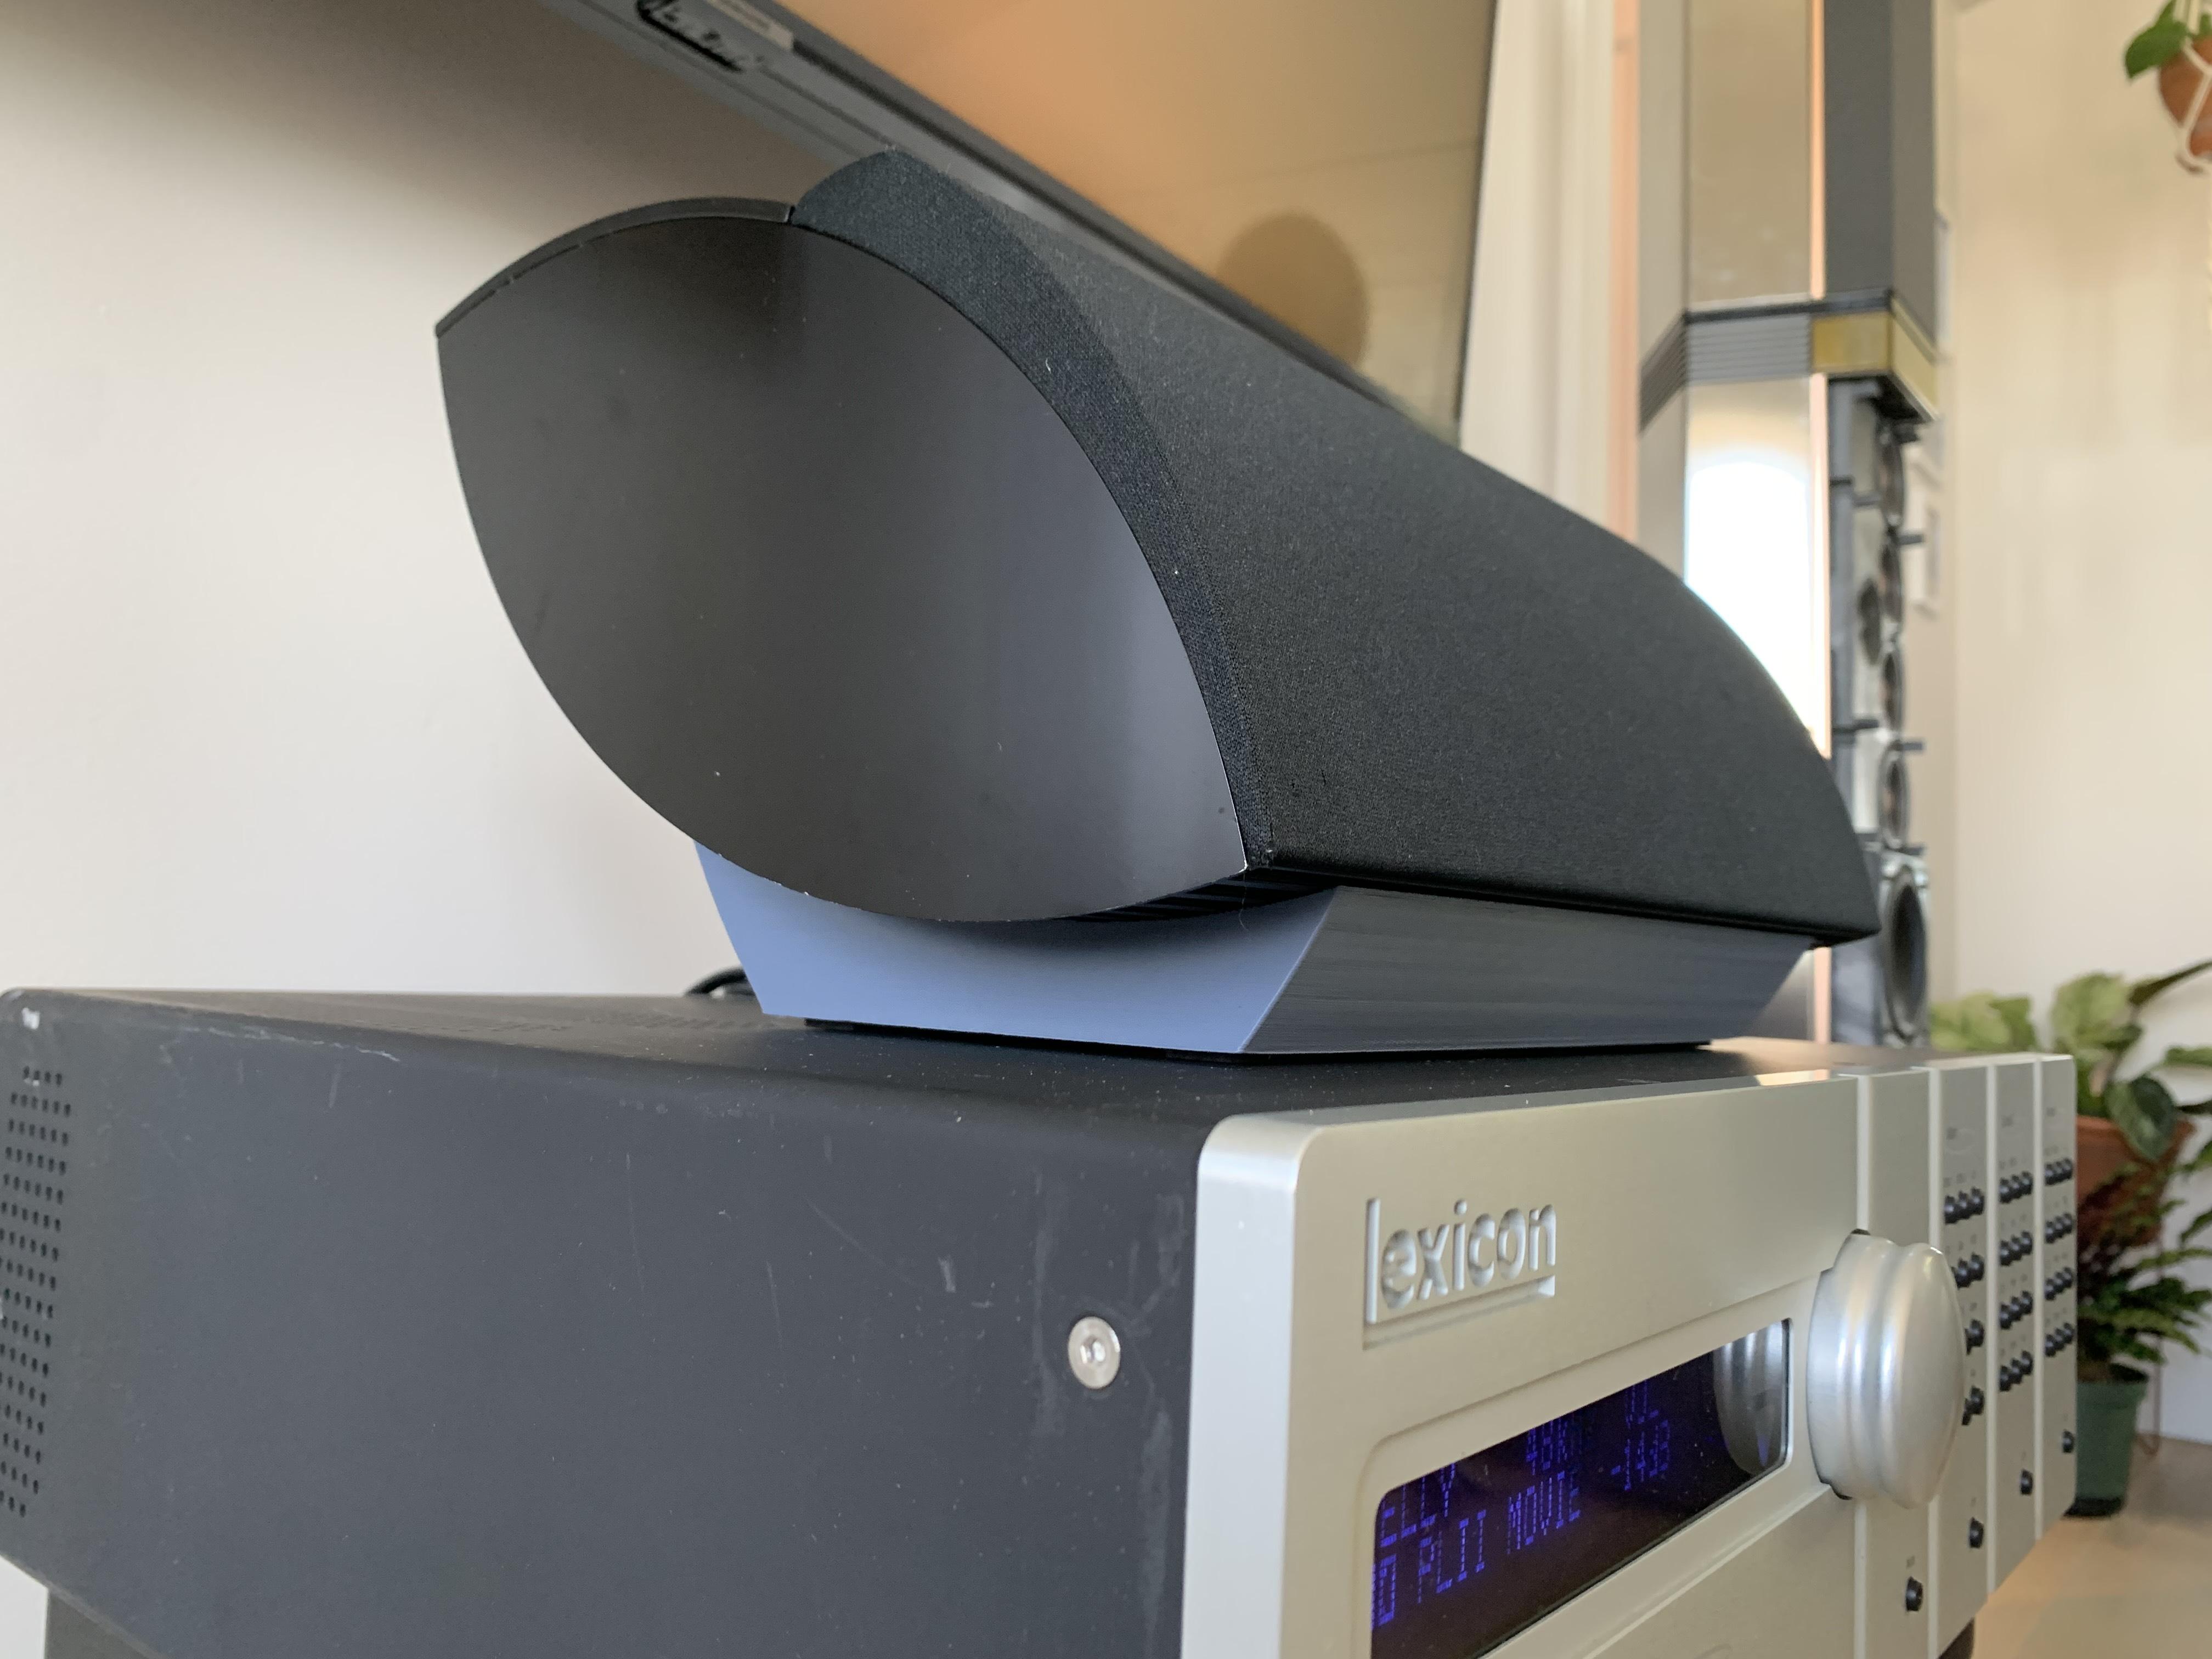
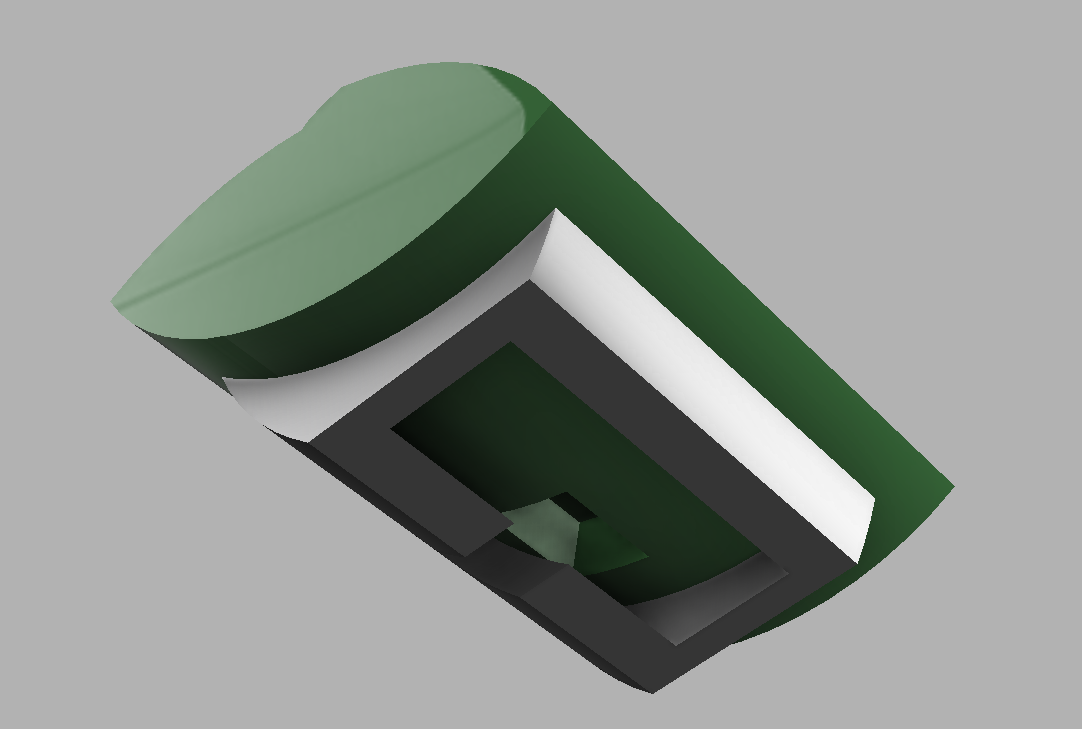
EvanGOLD MemberThanks, Johan! I’m very pleased that it worked on the first iteration. It does indeed have a groove that fits between two of the heatsink fins. It gives a bit of flexibility to the angle. The only thing I might change is its overall angle, I think its too far laid on its back as the on-axis high frequency is reduced quite a bit compared to it standing up vertically as I had before. At any rate, it fits and works great. Check it out:
Location: San Francisco
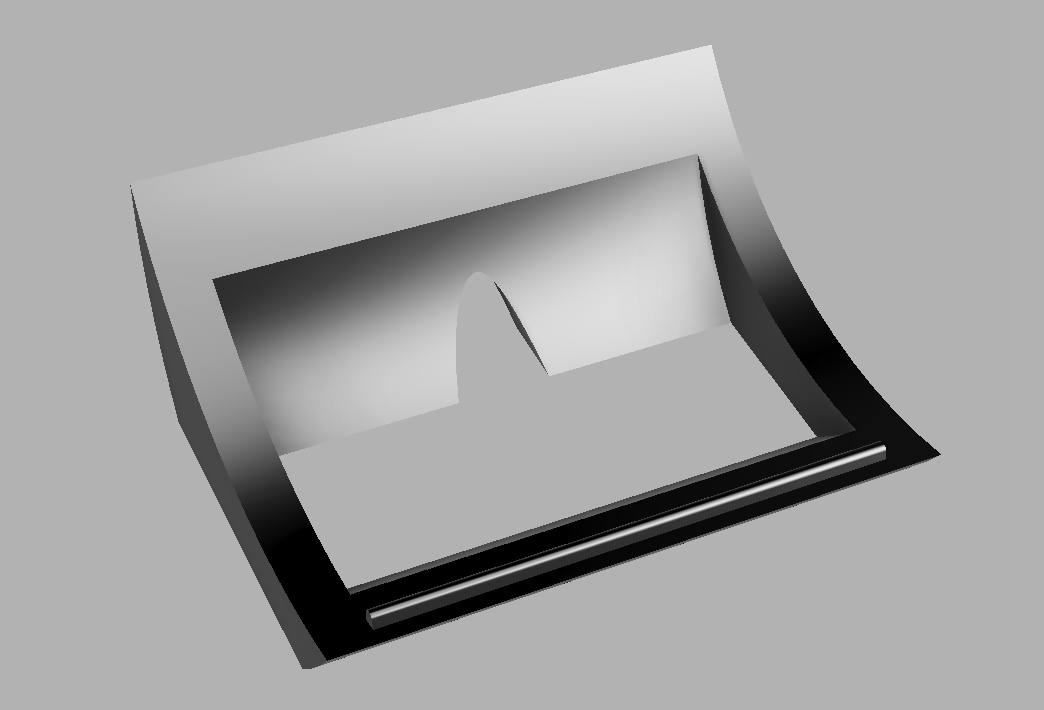
EvanGOLD MemberLast night was a late one with sparse meetings which means doing conference calls from the workbench in the garage. In between some of them I designed a new table stand last night to hold a BeoLab 4000 horizontally. Should be done printing when I get home.
If it fits / works well I’ll make the design available if anyone is interested.


Location: San Francisco
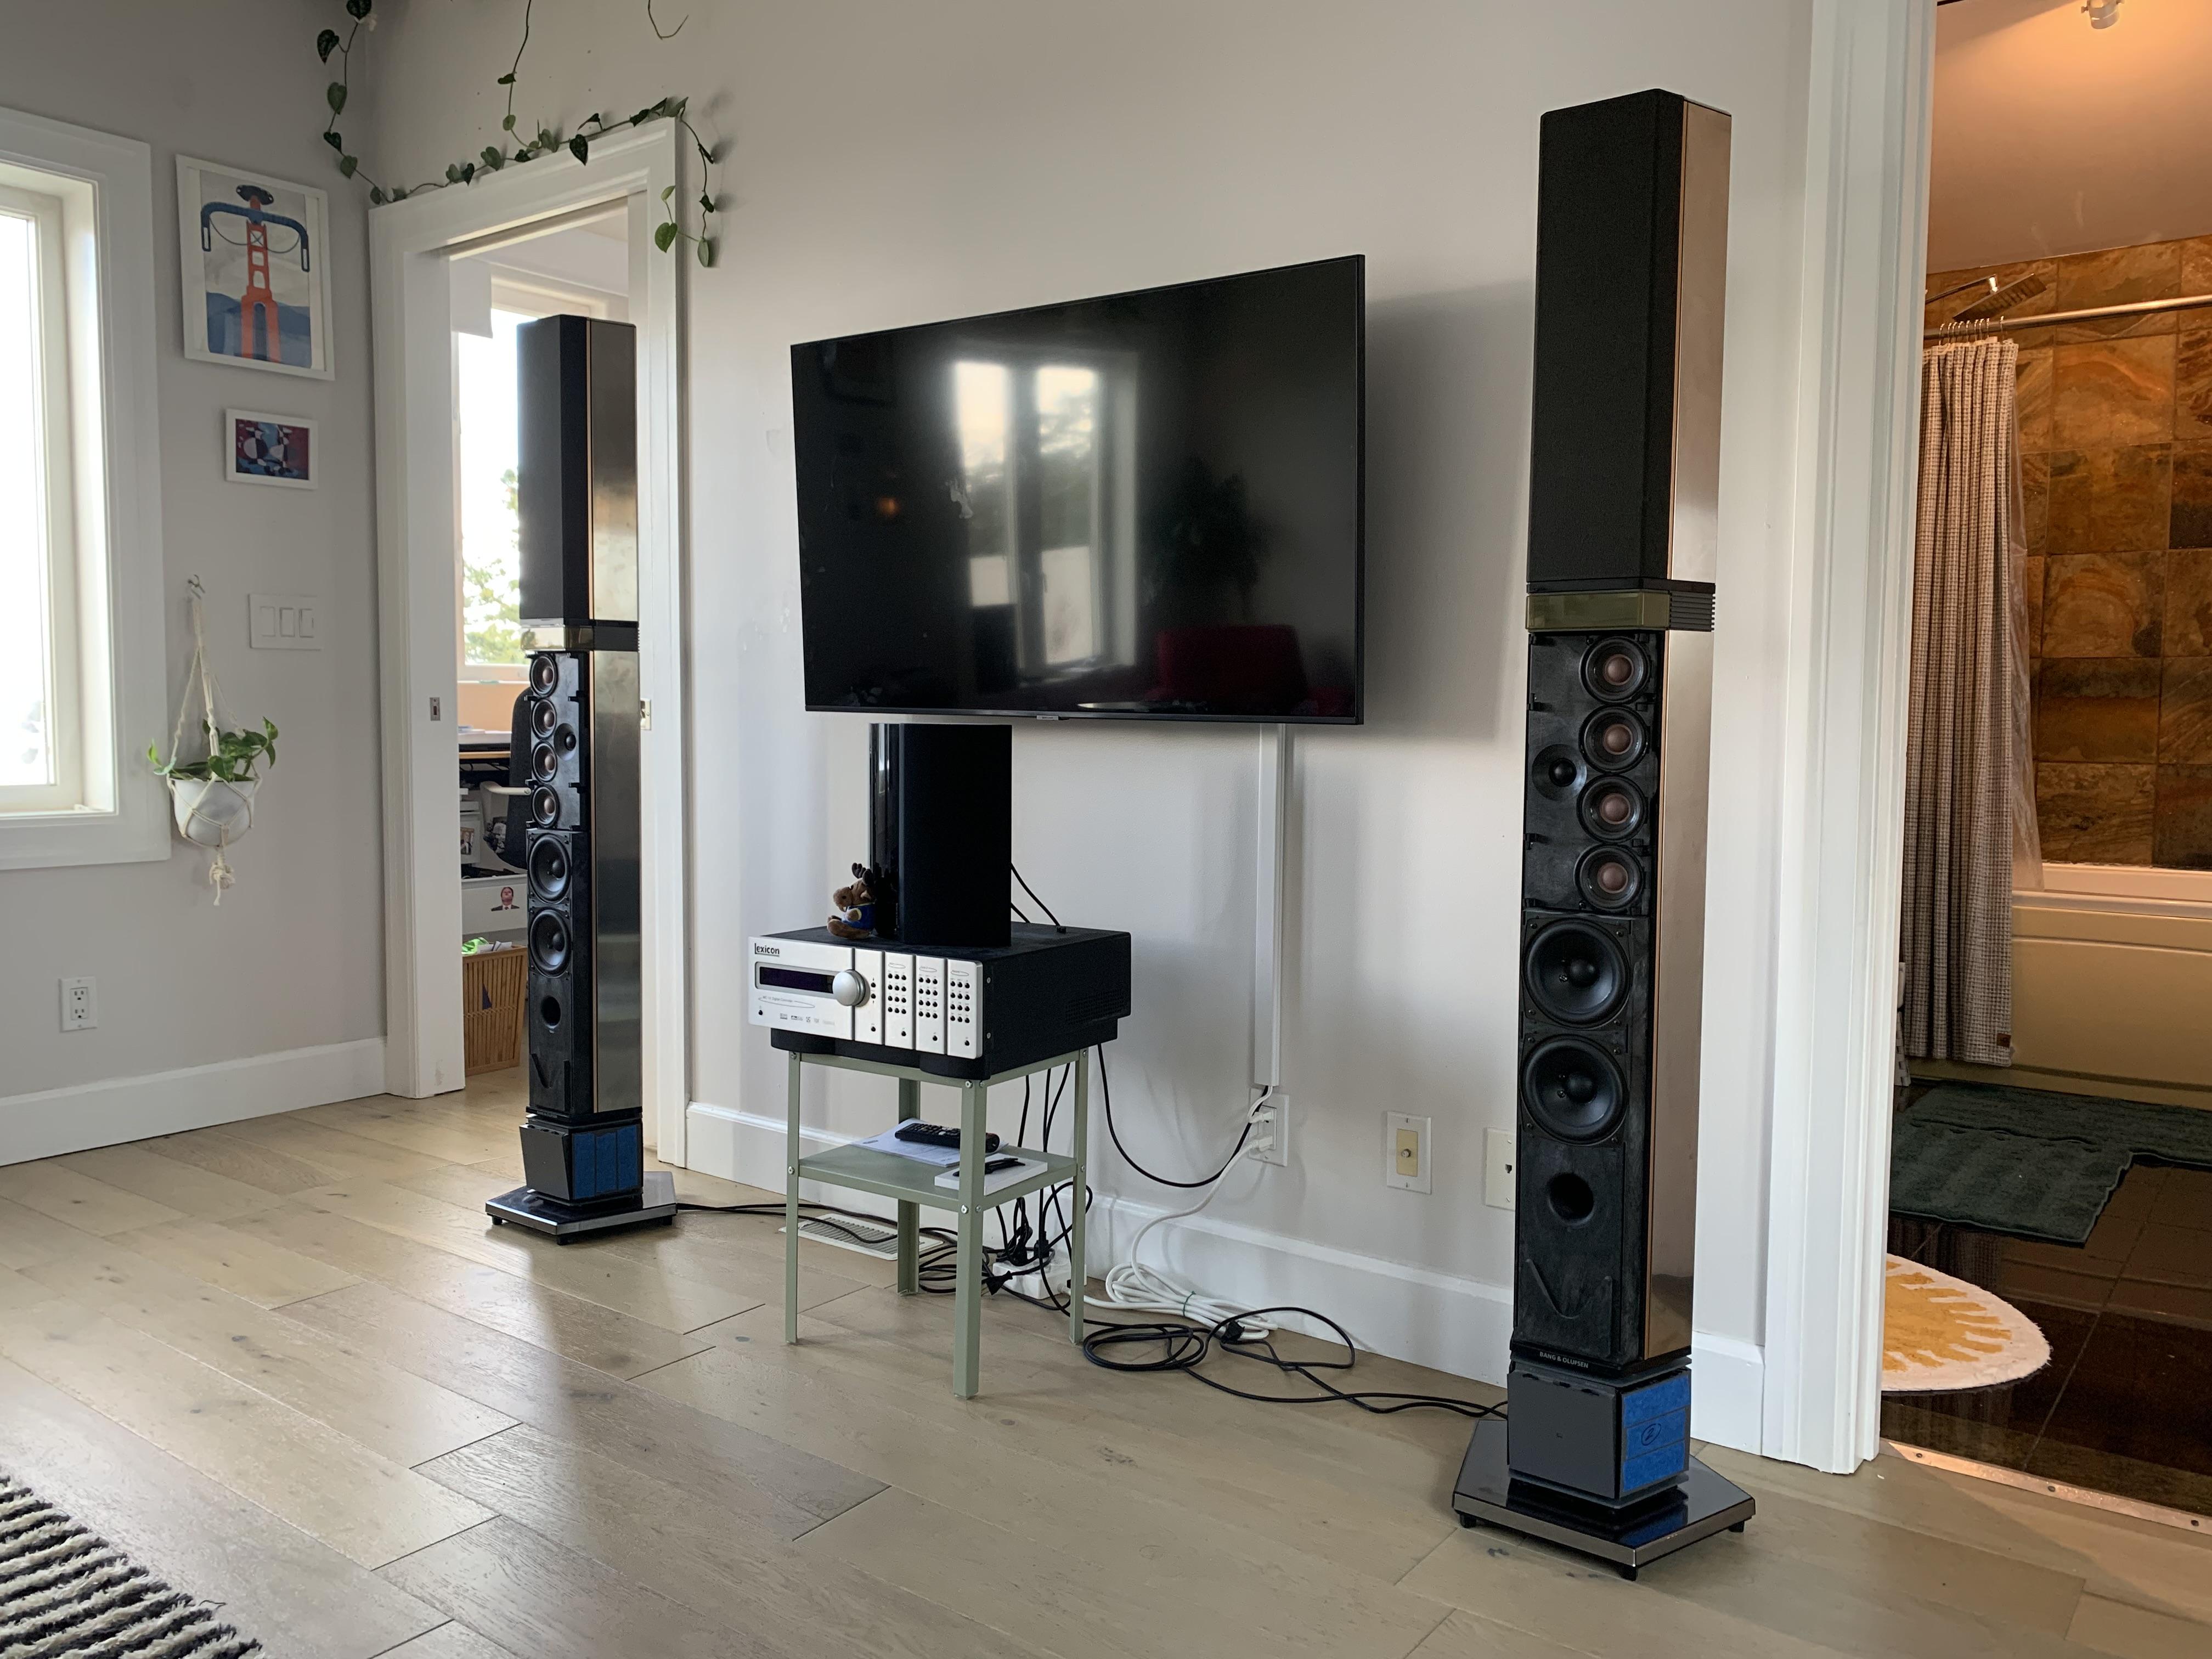
EvanGOLD MemberLast night was when everything came back together. I hauled them up stairs and plugged them in to the AVP. Just in time to watch an episode of our current series before falling asleep.
That glorious moment I have been working toward had finally come – time to flip the switch(es)!
The left BeoLab played sweet, sweet music but the BeoLab on the right was playing very loud 60Hz. Something is very horribly wrong. Sadly they will probably just sit for a while because I have been going hard on this project lately and as I pointed out earlier, those amps don’t make life easy. So unless I find another amp to run them on temporarily, it will likely be a while before this gets wrapped up. Wales is calling.
Luckily they are nice to look at. Thanks for reading and following along! If you happen to have a spare, functional amplifier I’d love to hear from you. Additionally if you have an extra Penta tweeter (SEAS 25 TNF H386) I’d love to take it off your hands.
This isn’t over, but over for now.
Location: San Francisco
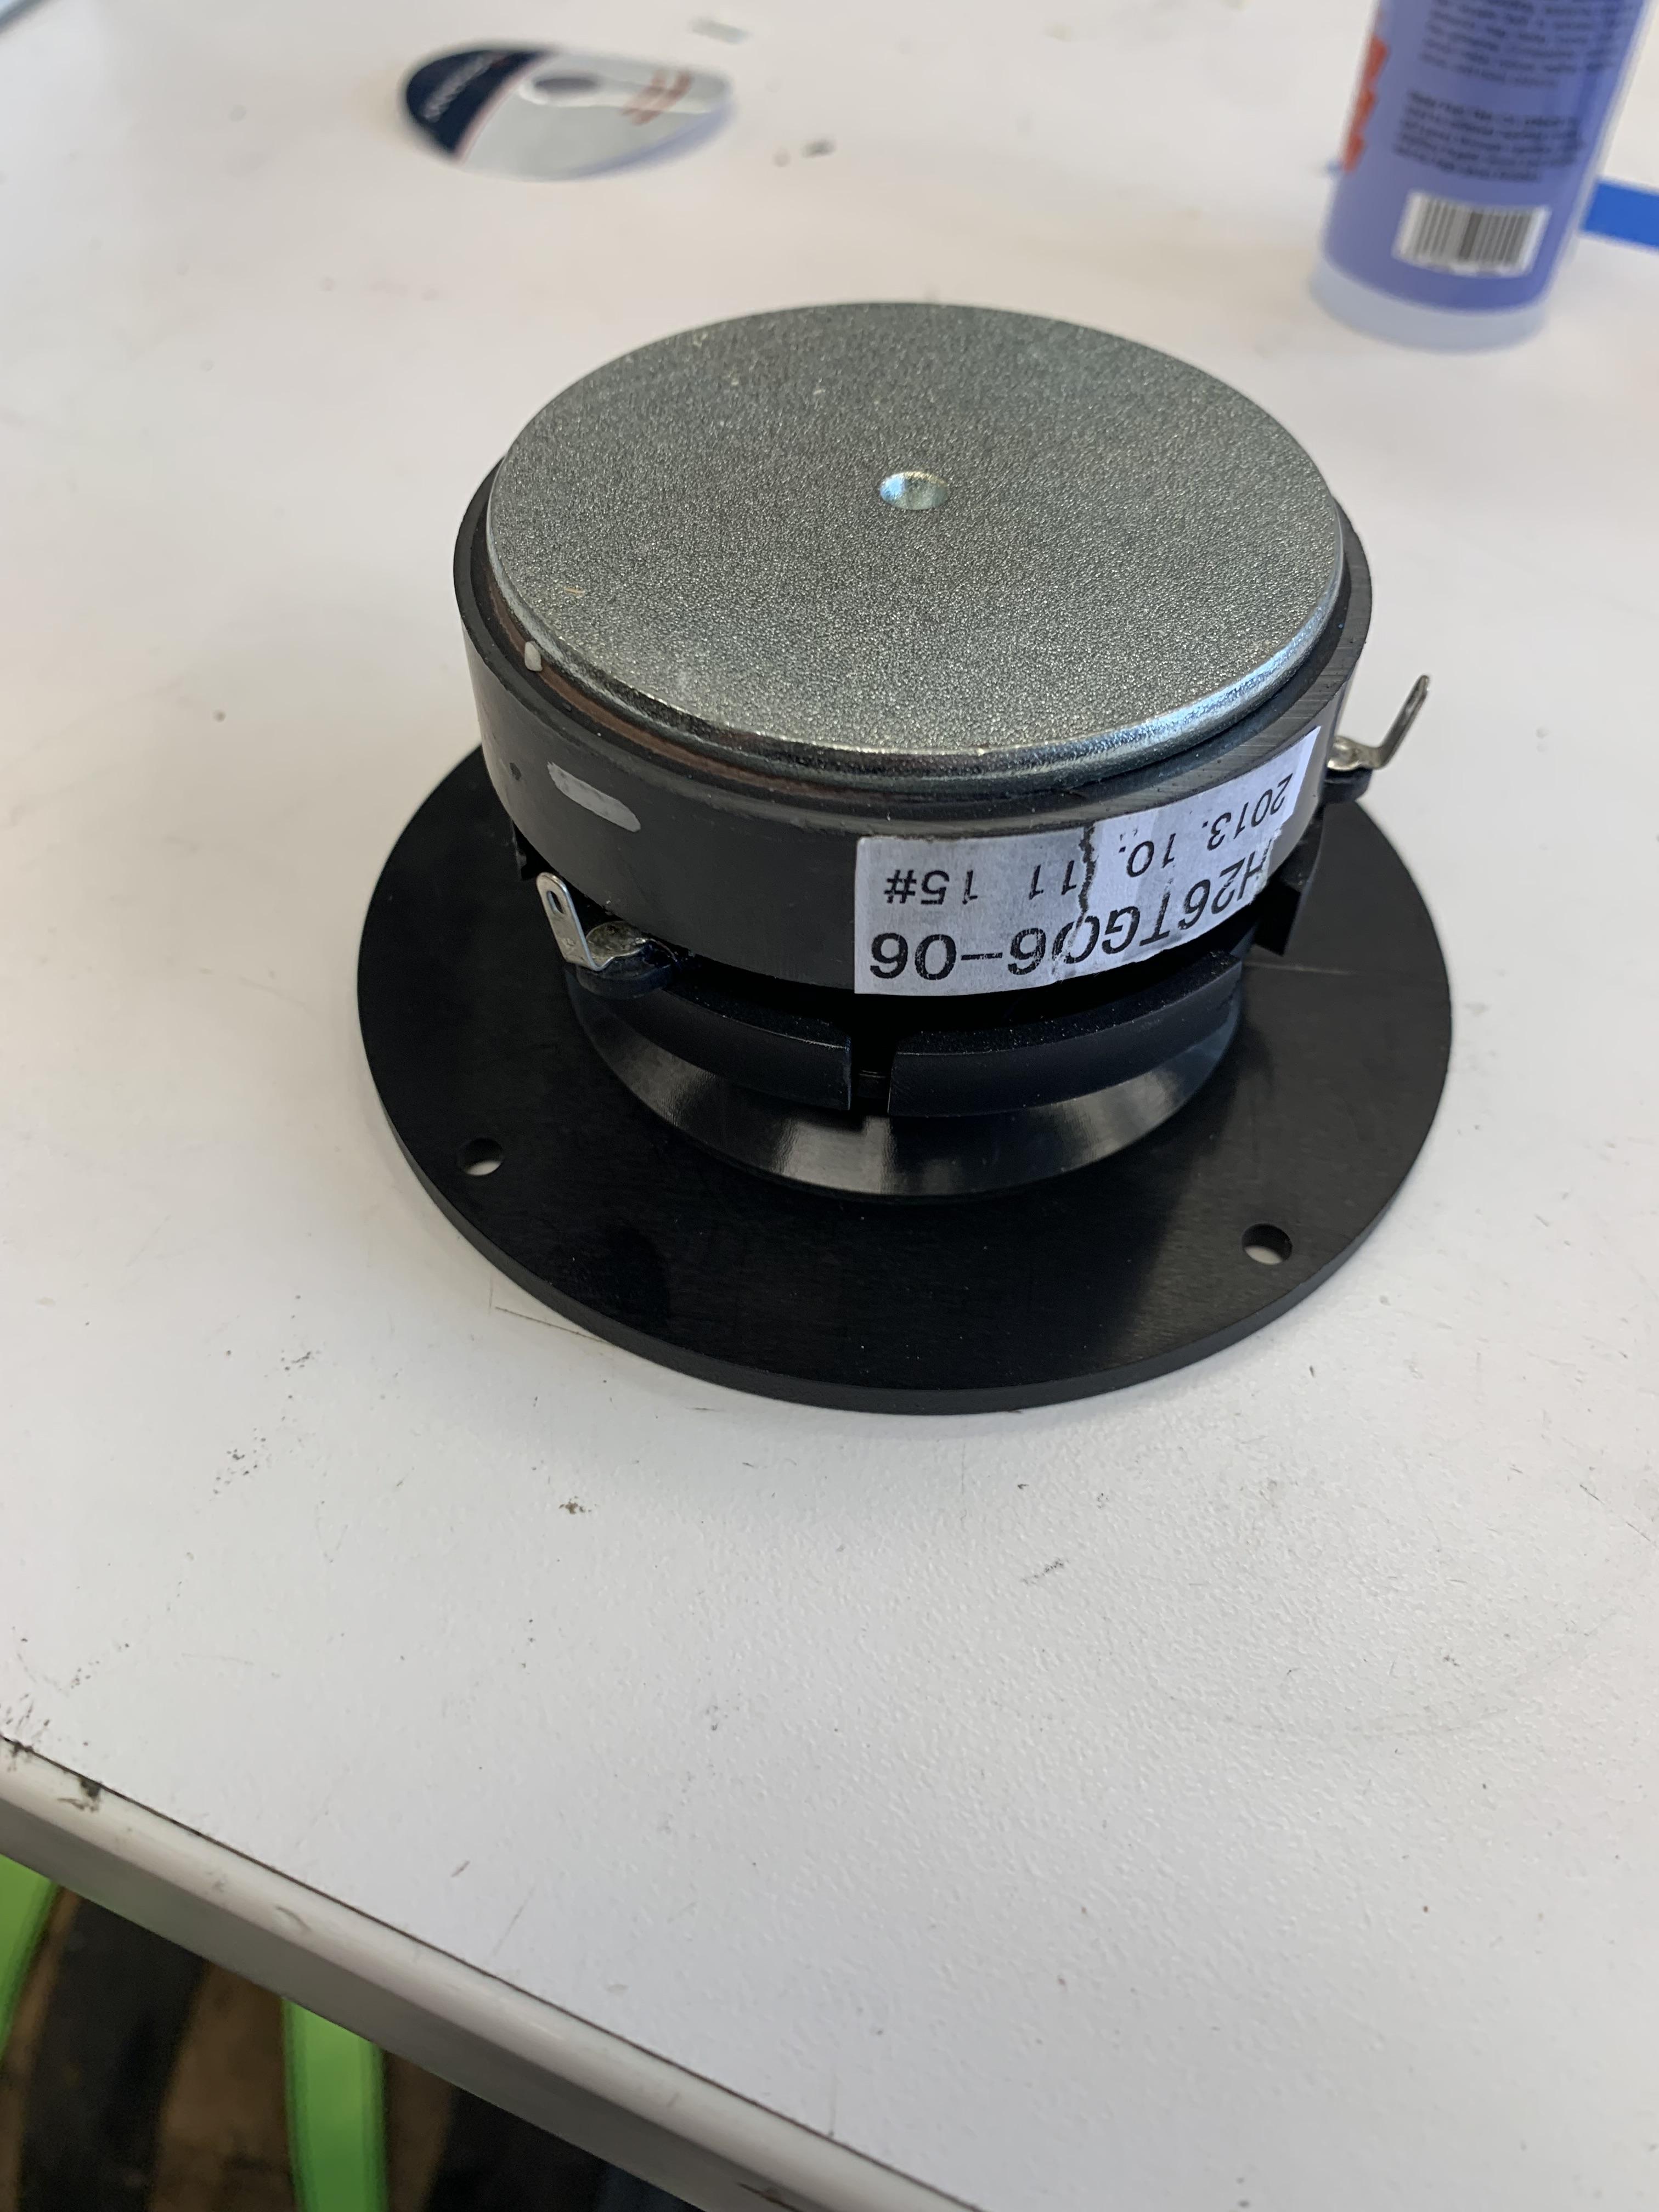
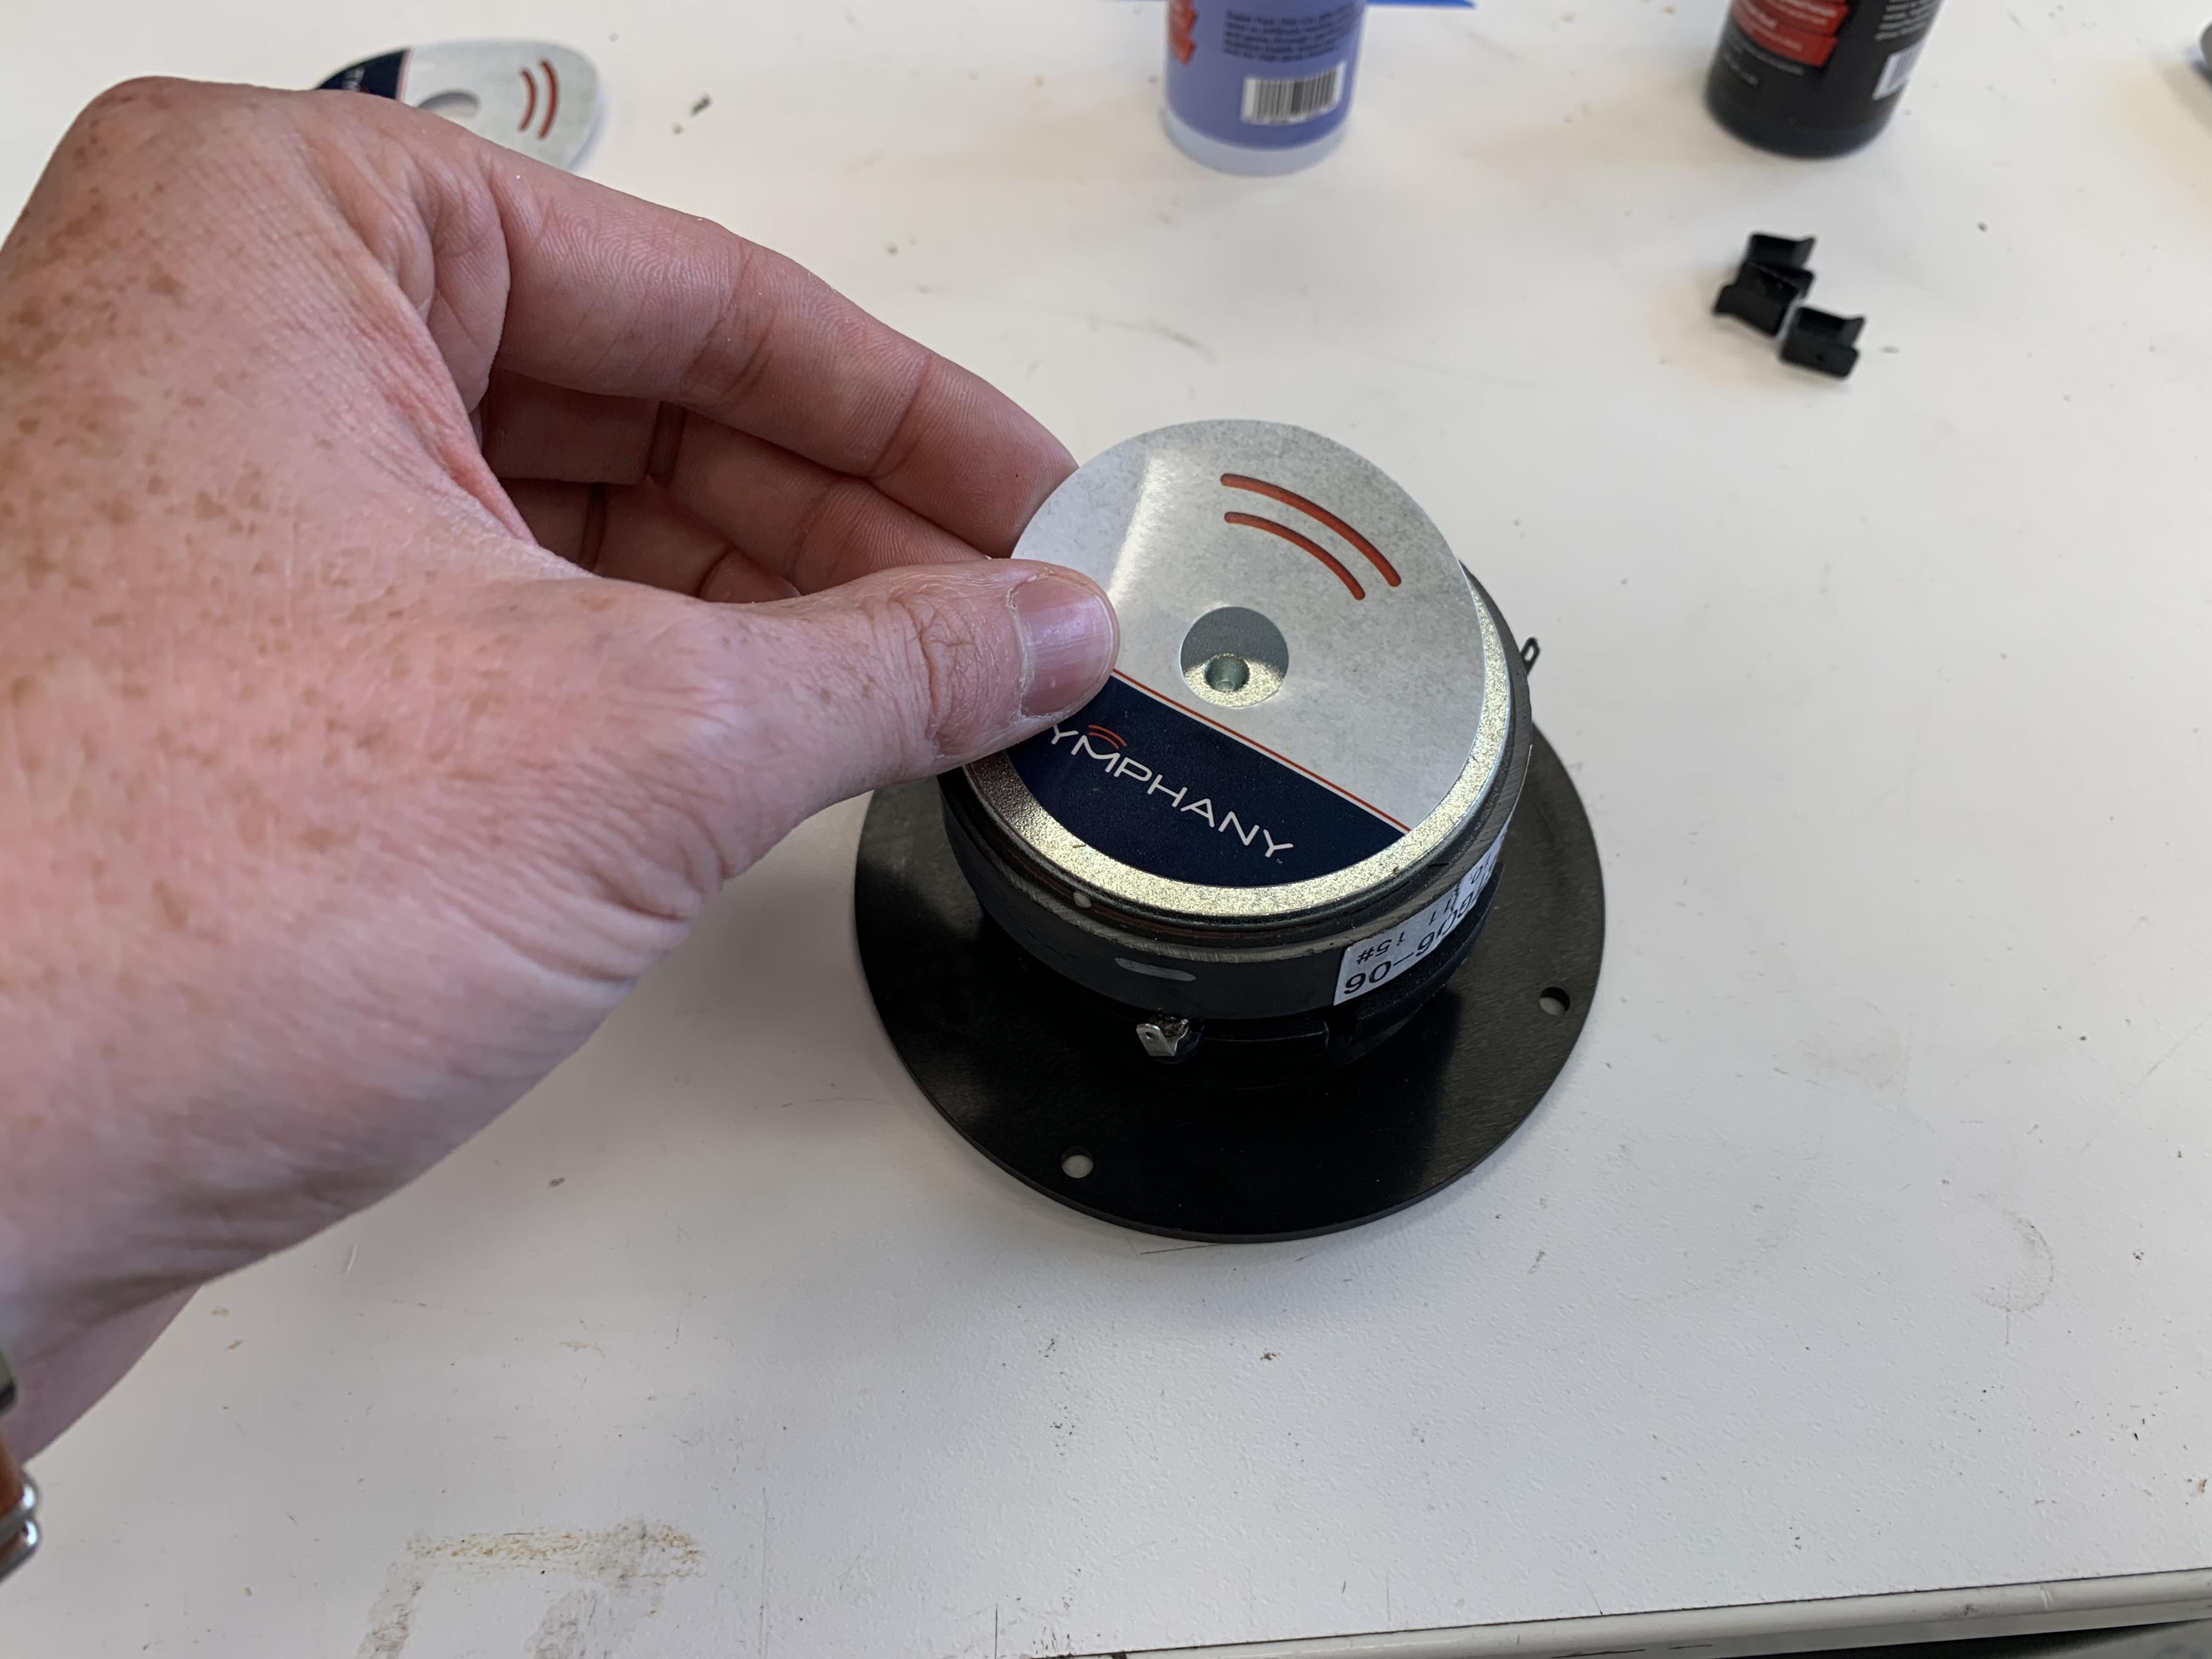
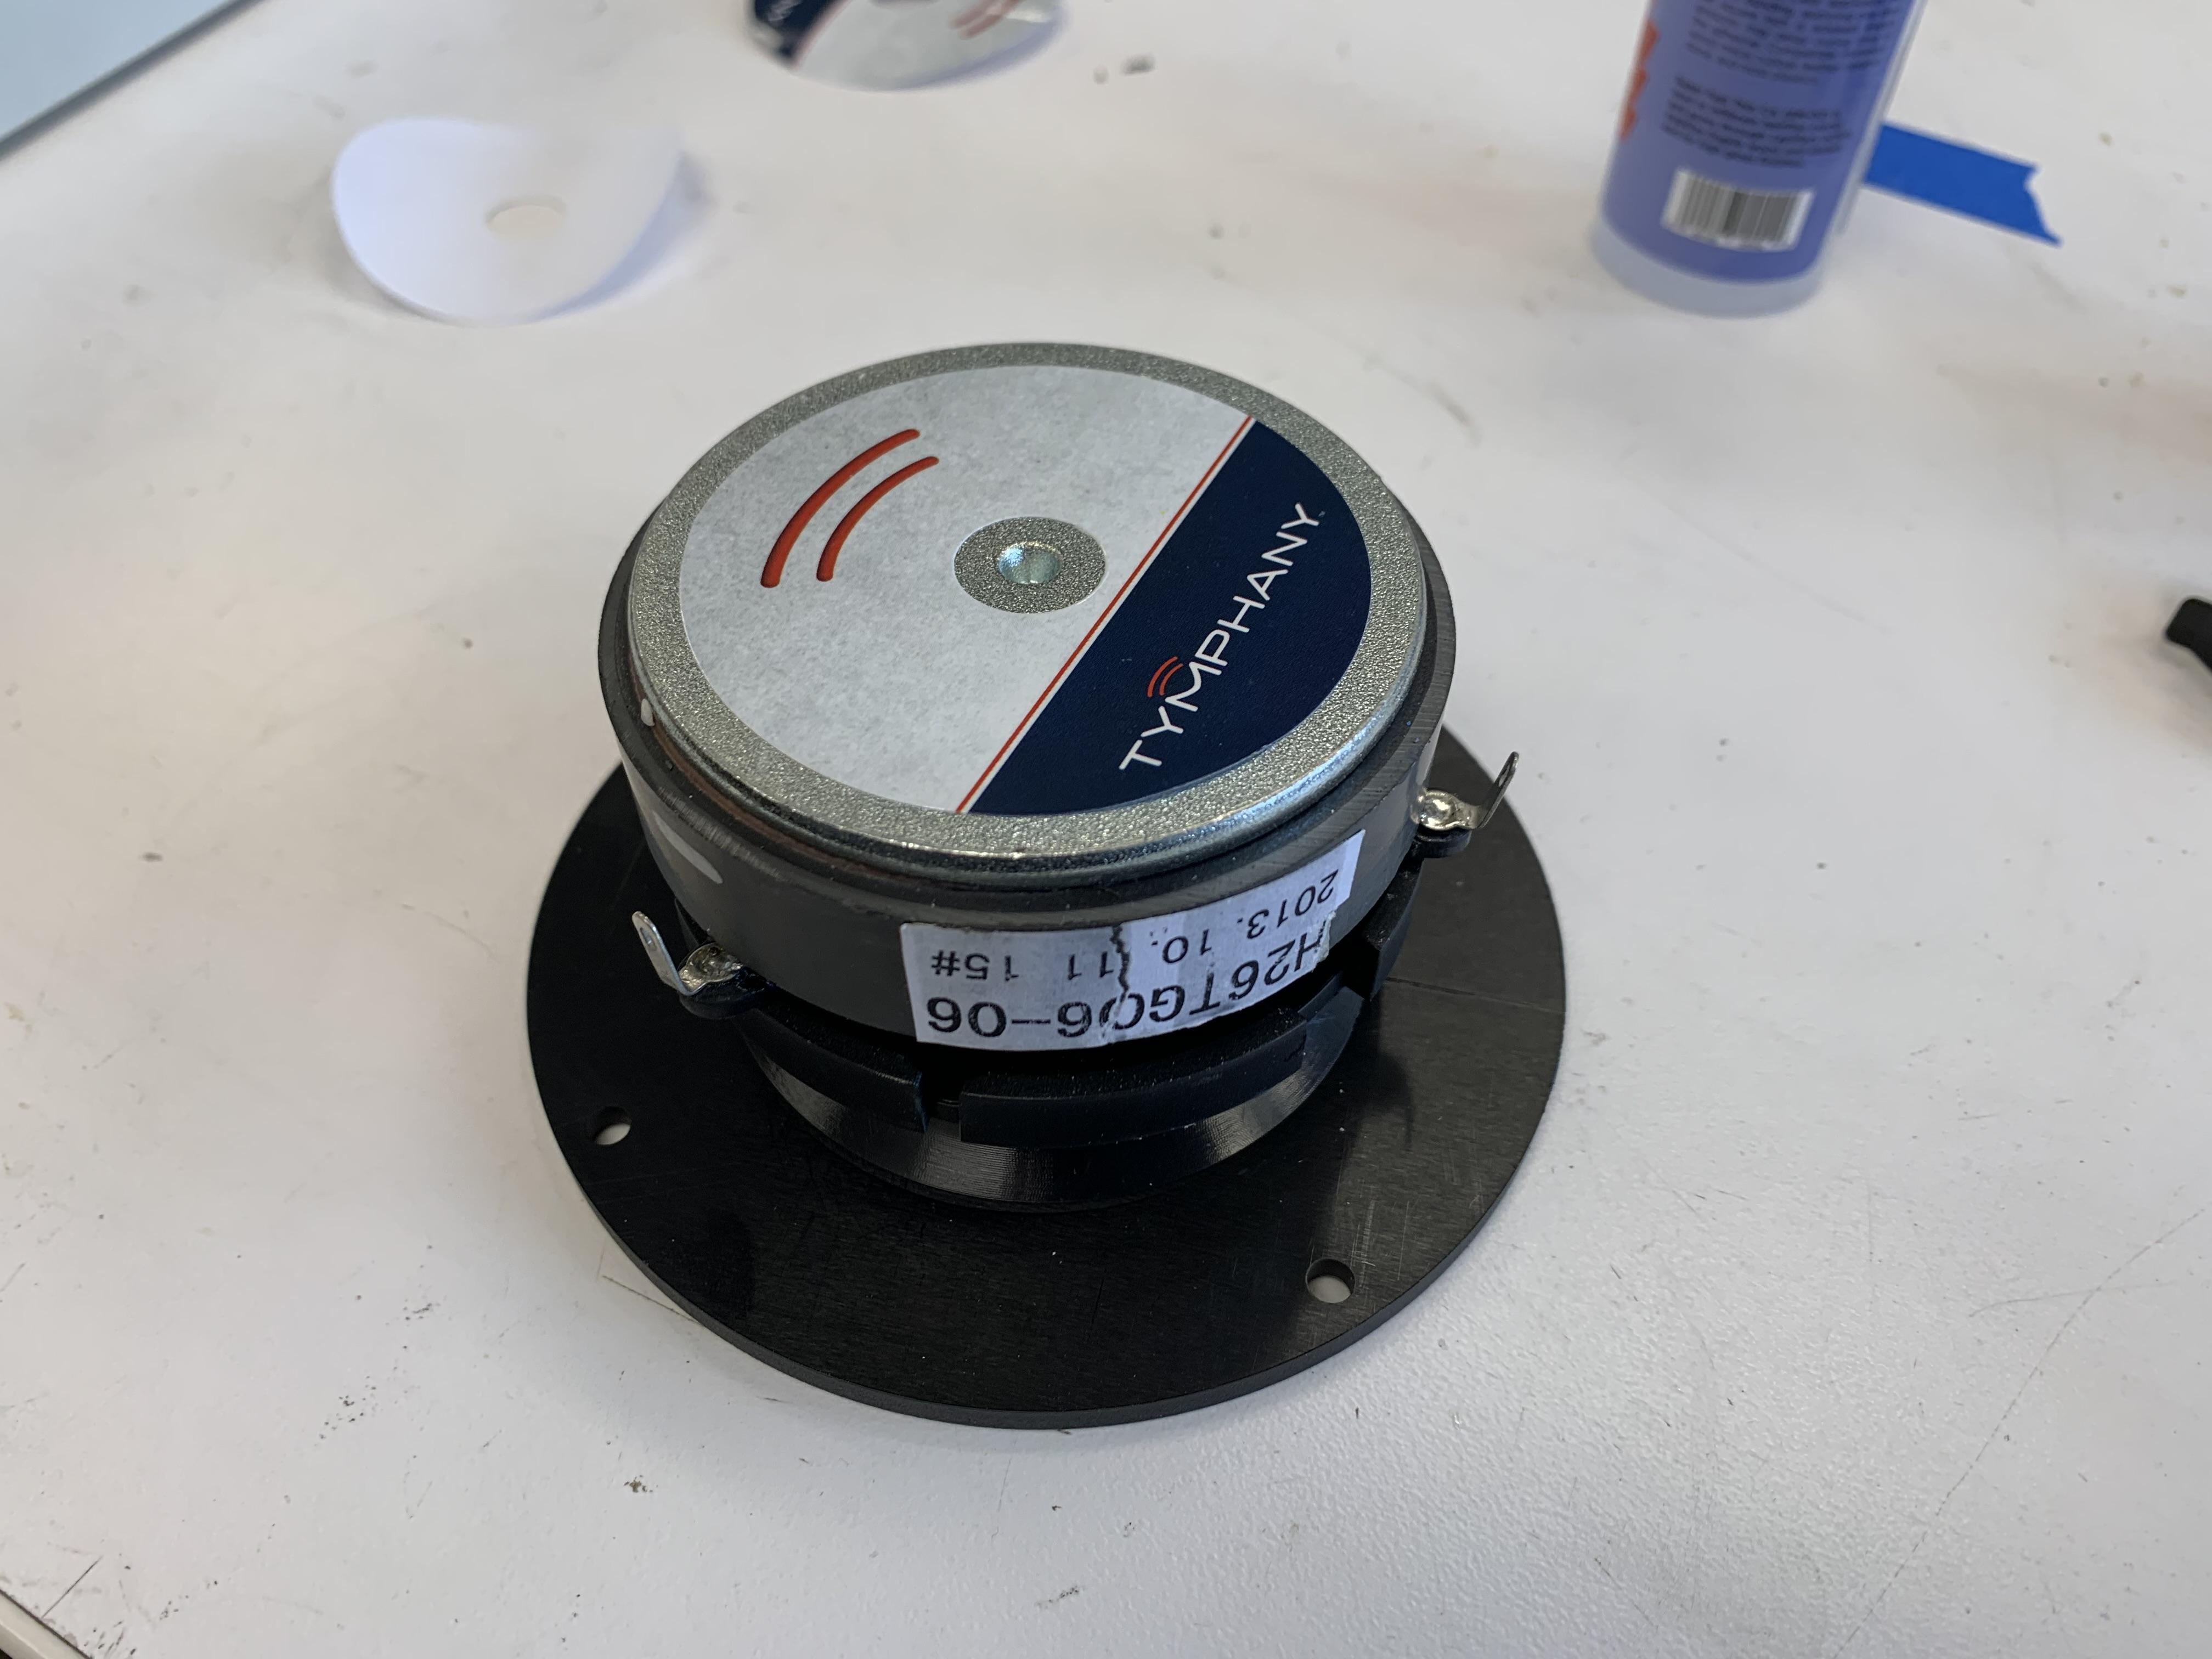
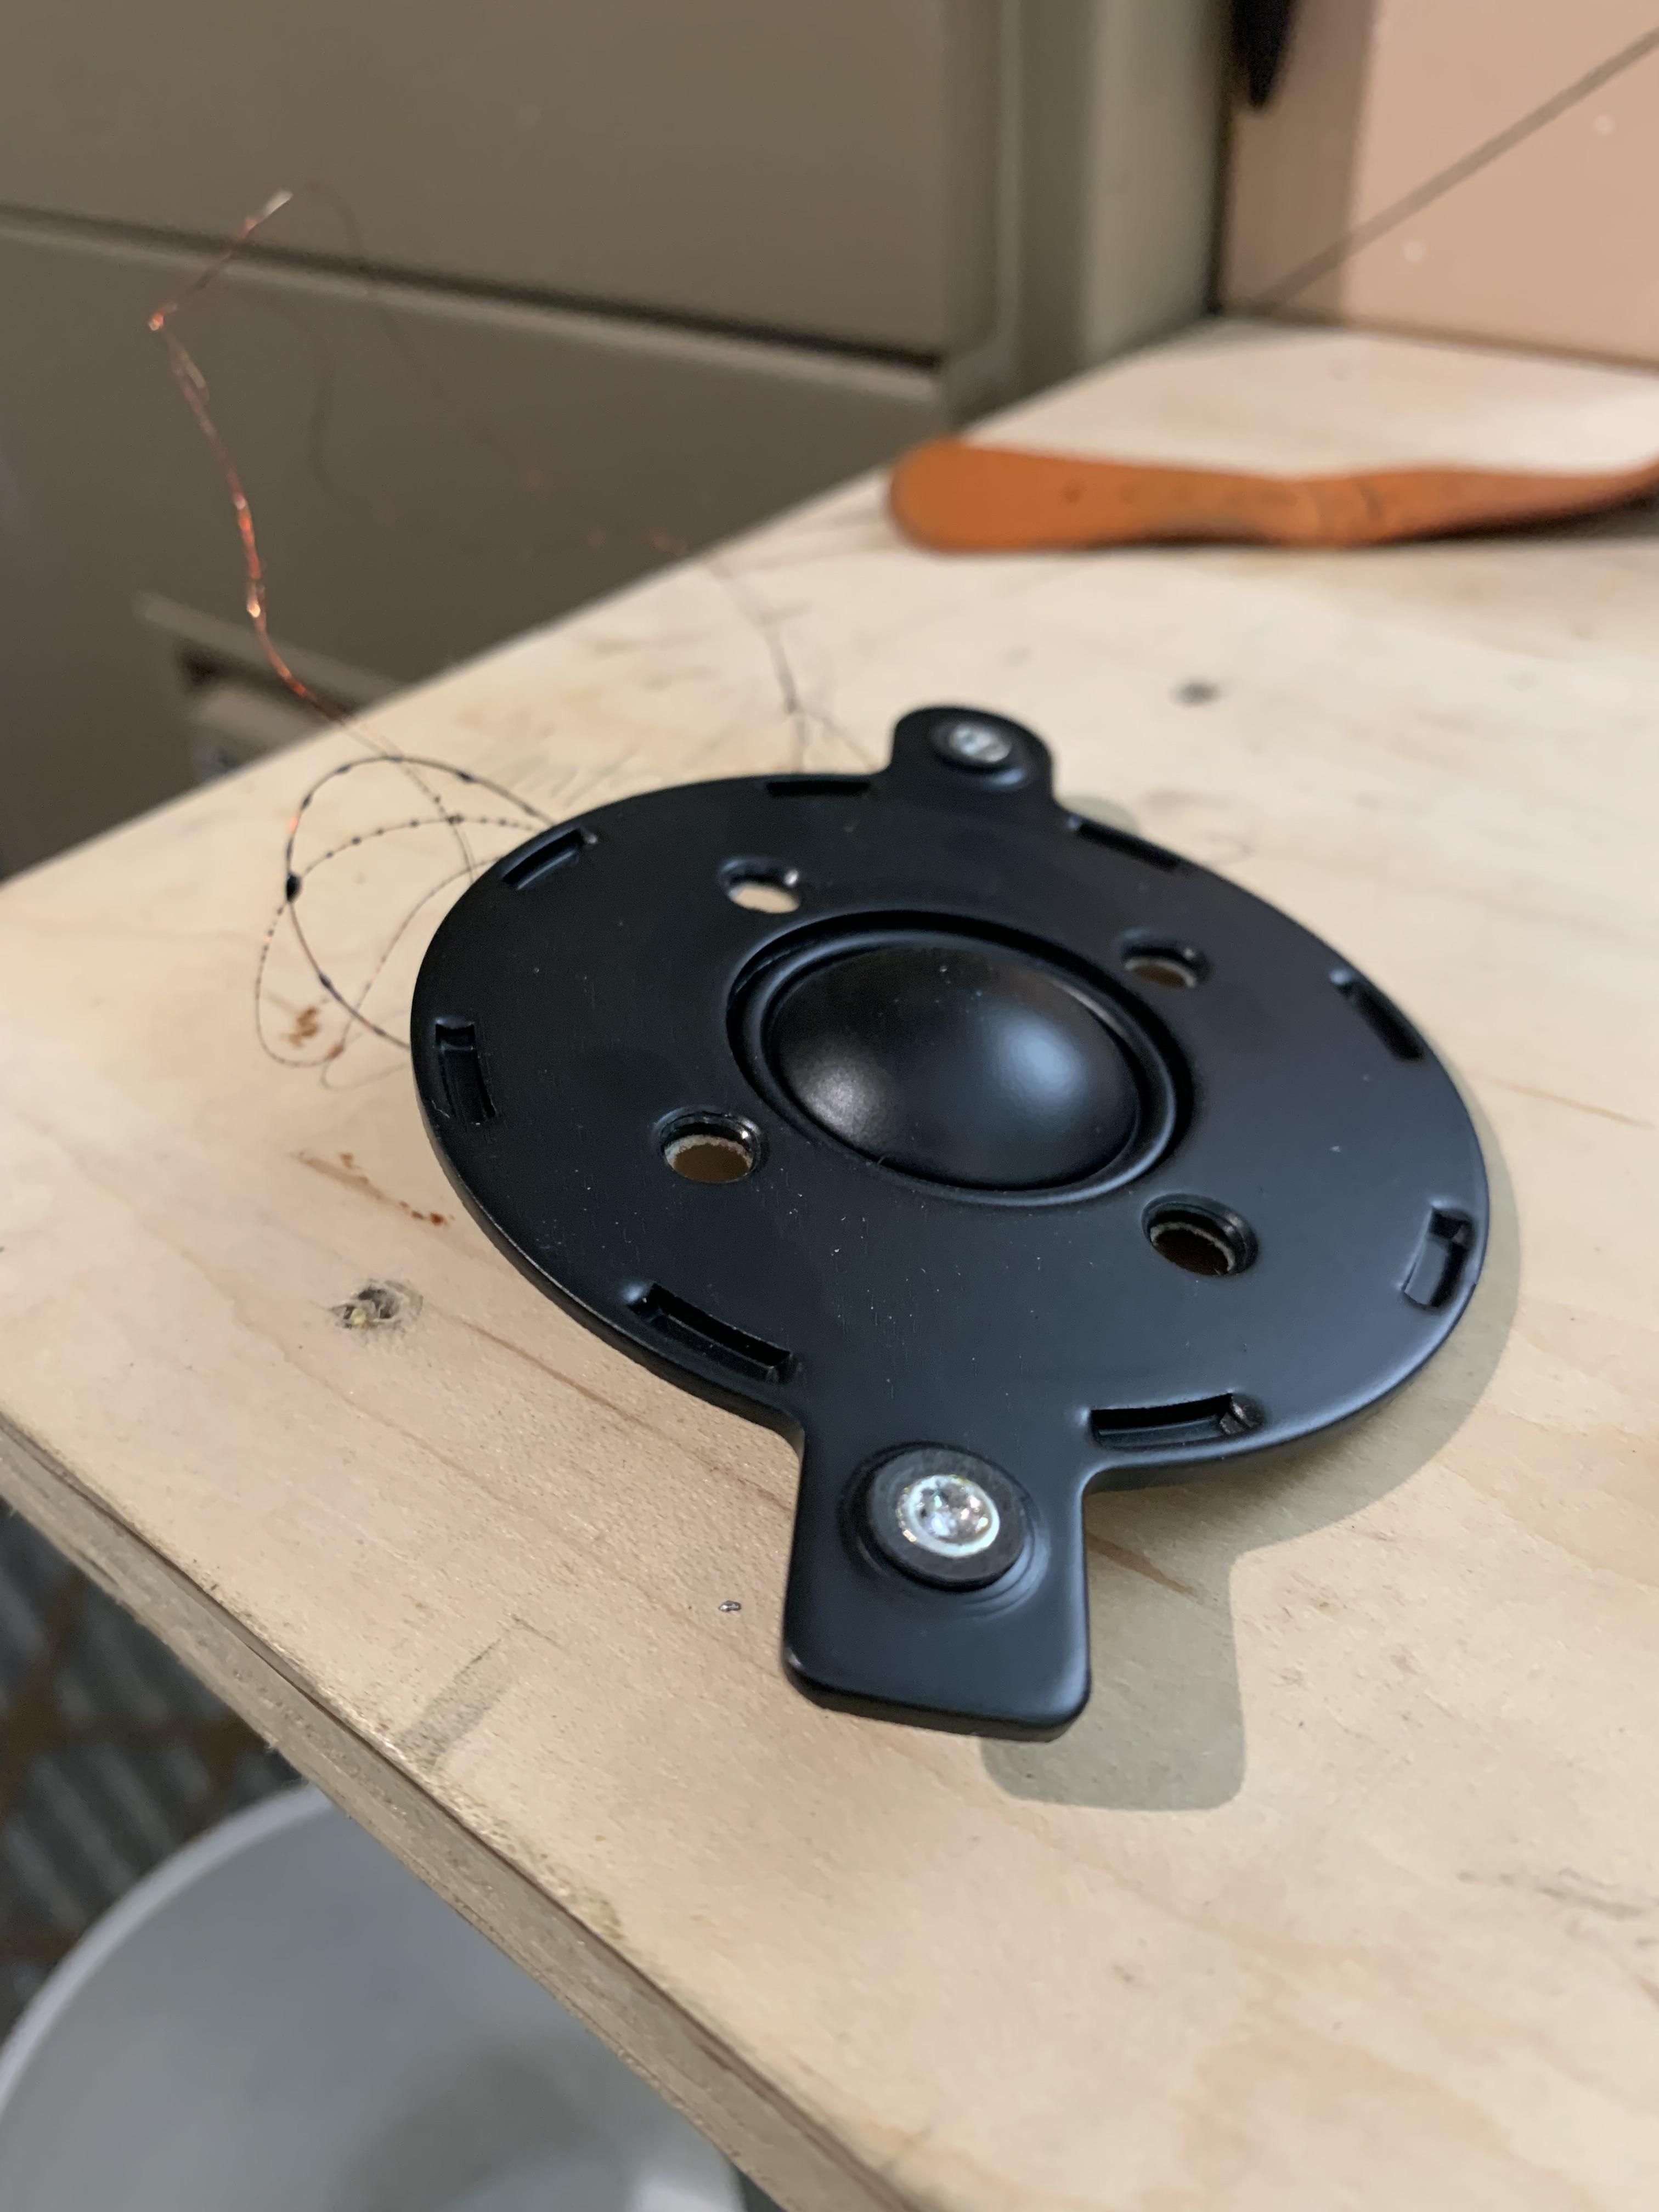
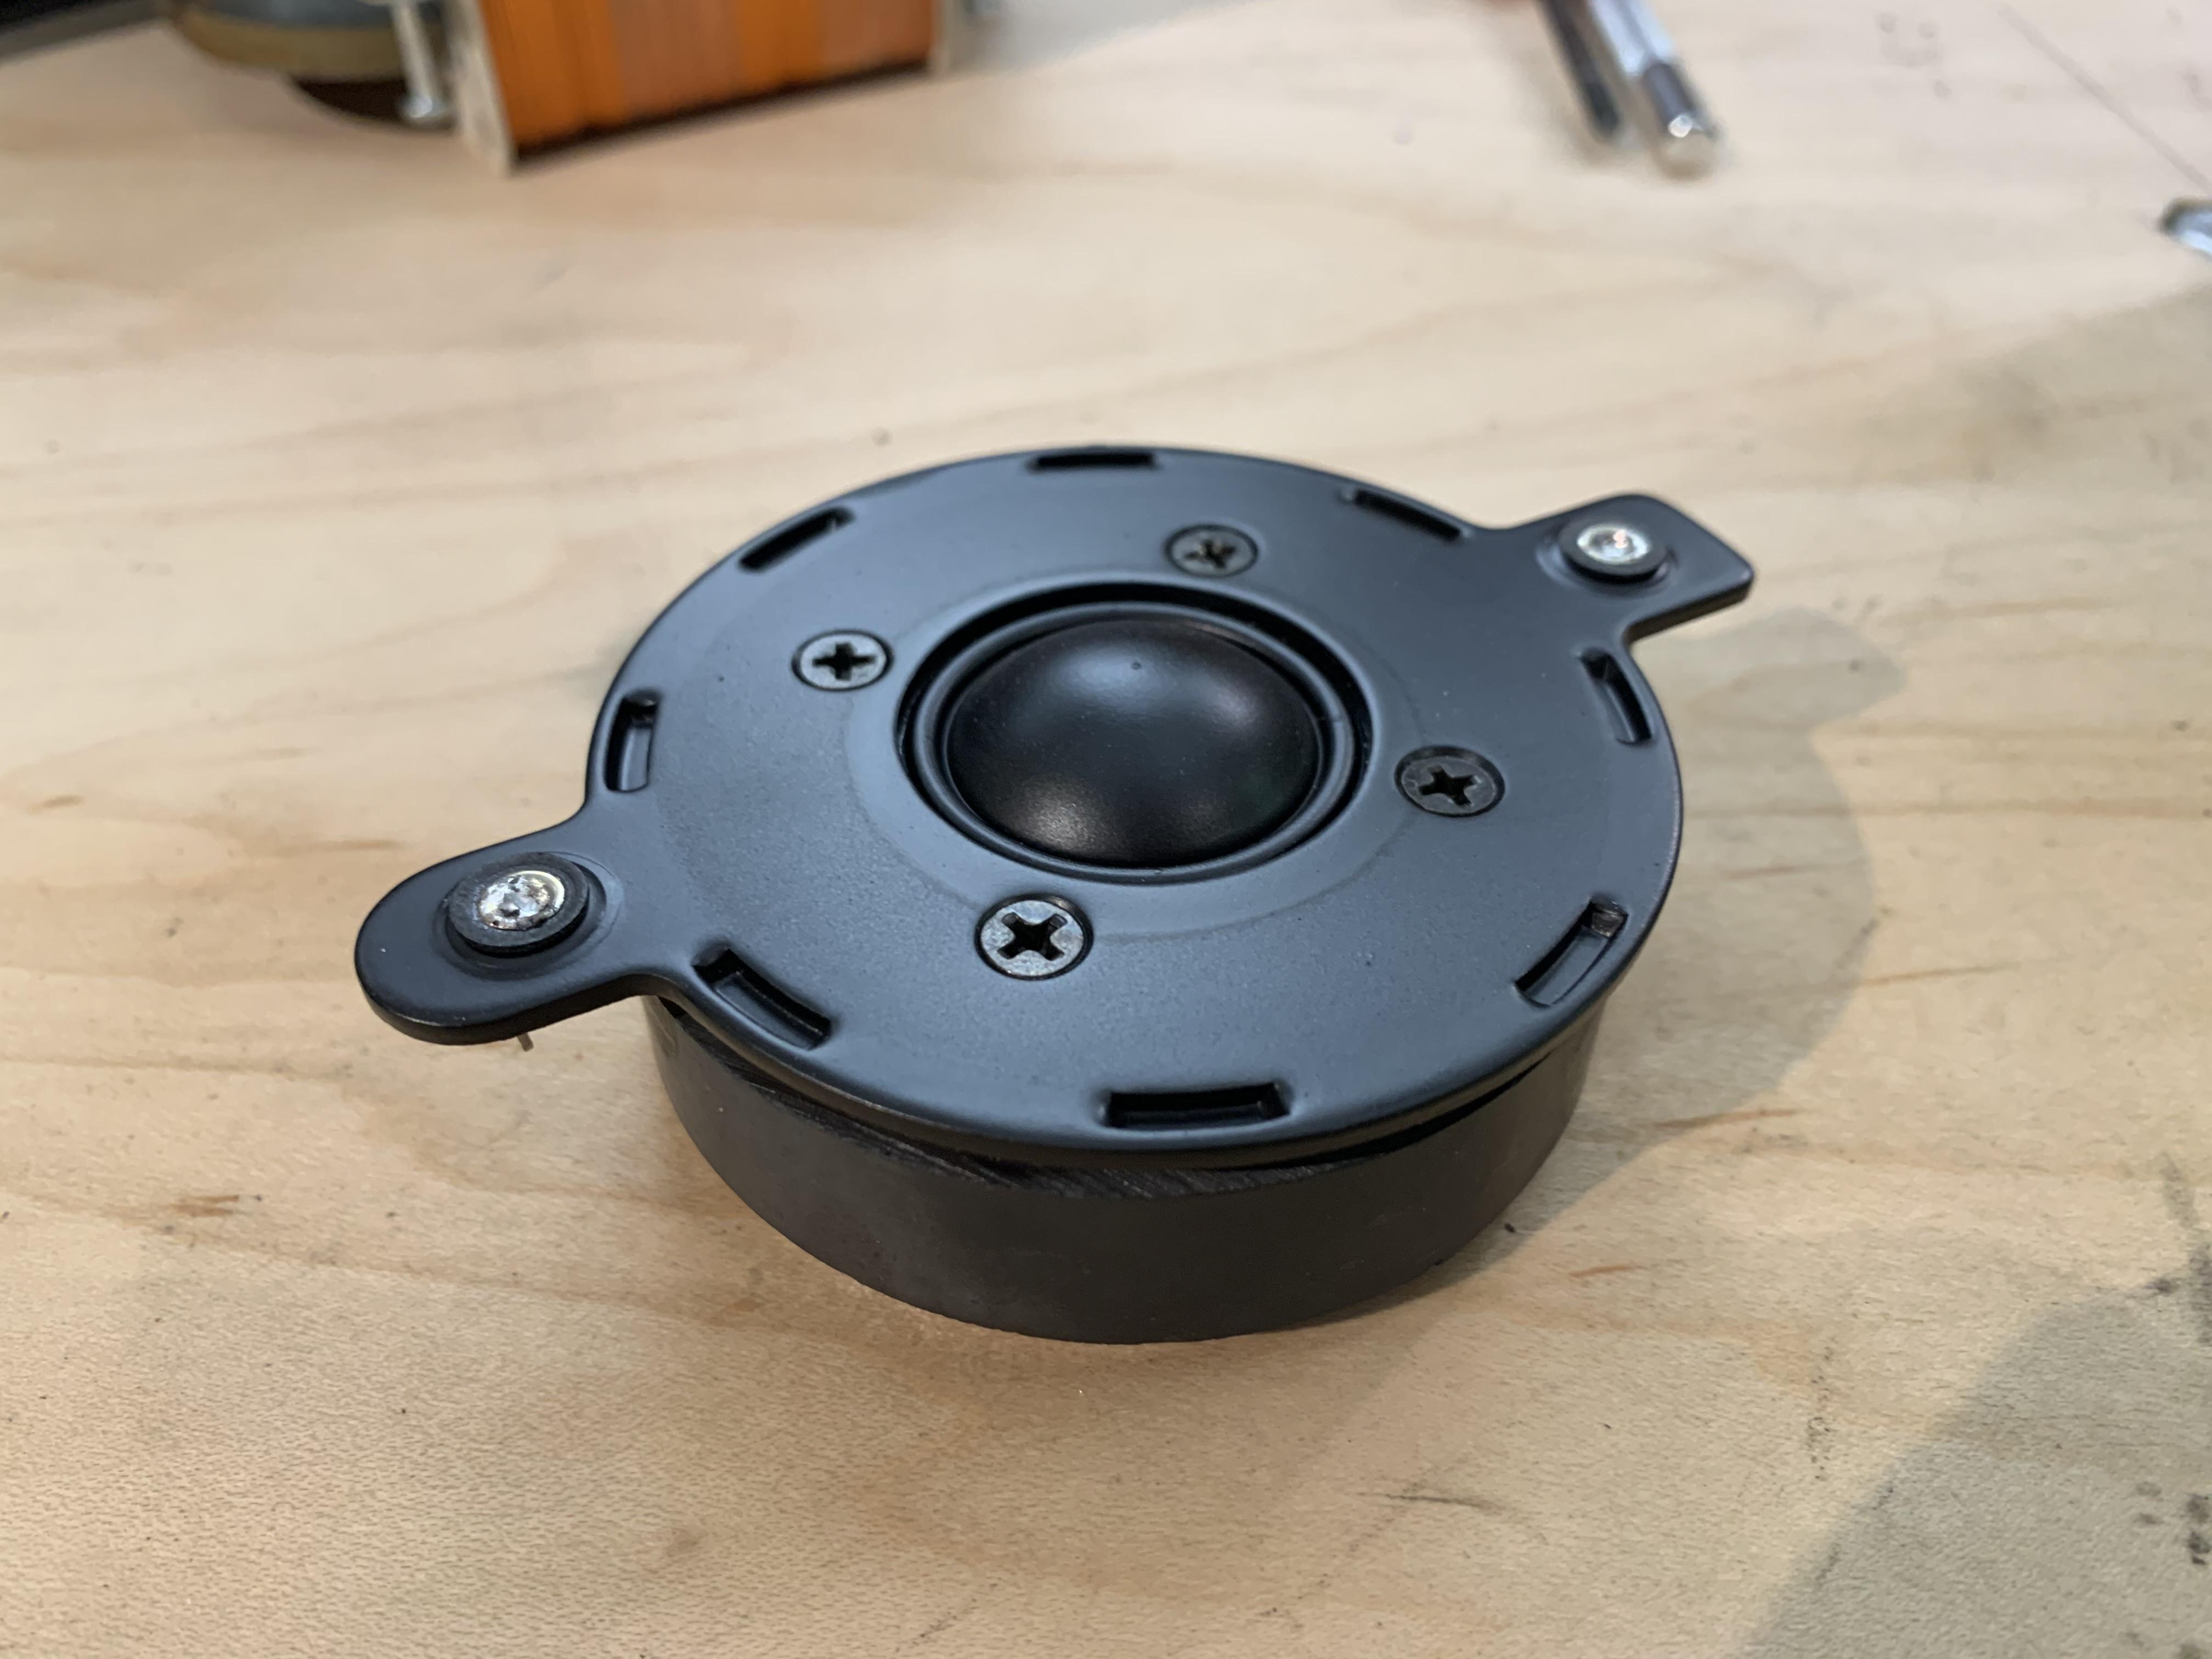
EvanGOLD MemberOk so I’m officially up the creek with only one working tweeter at this point. Being the time-impoverished individual that I am, I leapt up from my workbench and into the car. Drove up to the office to rummage around for some tweeters that might hold me over until I replace the fried one with another original SEAS unit.
We seemed to be overstocked on these [very old build] H26TG06-06 units. These are almost completely unmatched in every way from the originals acoustically but they are an epic tweeter overall. I had to take the waveguide off of course and add some branding because stickers make everything better. Also had to glue down the butterfly as the clips that hold the waveguide on also secure the butterfly.

Location: San Francisco
EvanGOLD MemberWonderful thread Evan, congrats to a very nice work, looking good
Cheers, Soren! Thank you very much!
Location: San Francisco
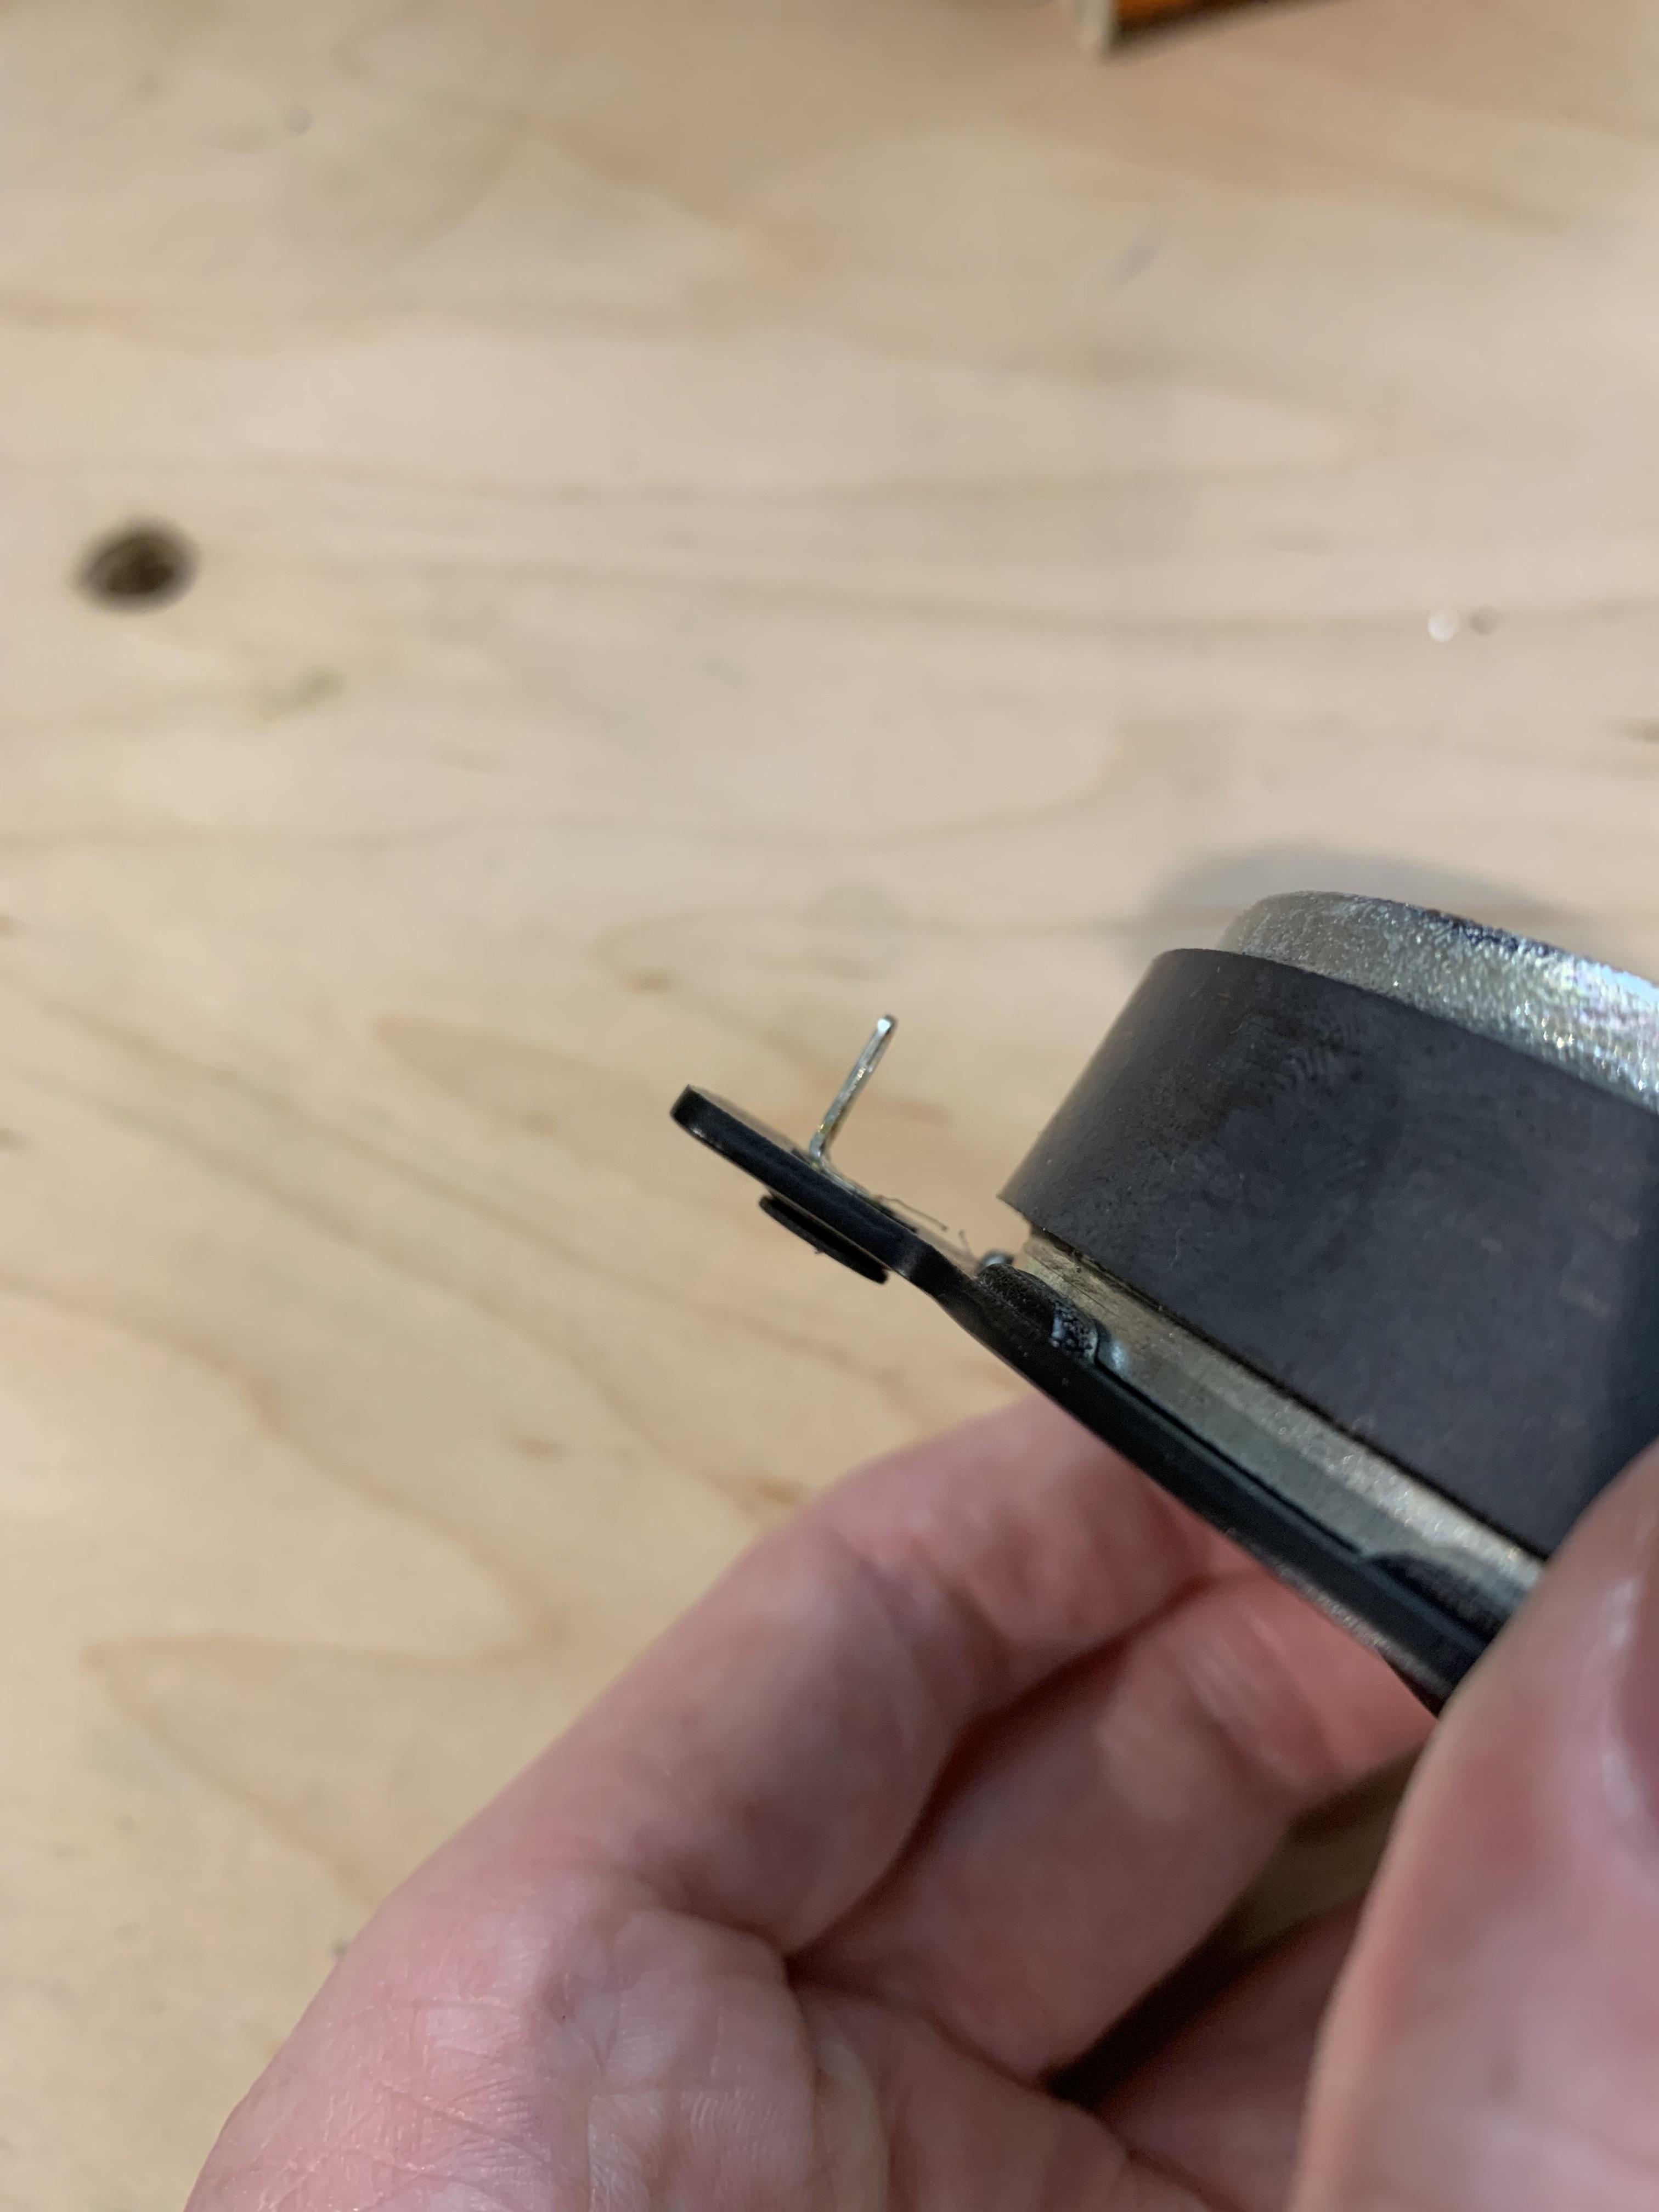
EvanGOLD MemberI attempted to solder the broken lead wire but unfortunately it is coated so nothing stuck to it. Next path was to take the butterfly off and take a turn off the coil and unwind some fresh lead wire. Sadly some more bad evidence of restaurant thrashing was hidden inside.
I think someone cooked this coil a little too hard! The coil was loose in the gap and had come off the former!
Location: San Francisco
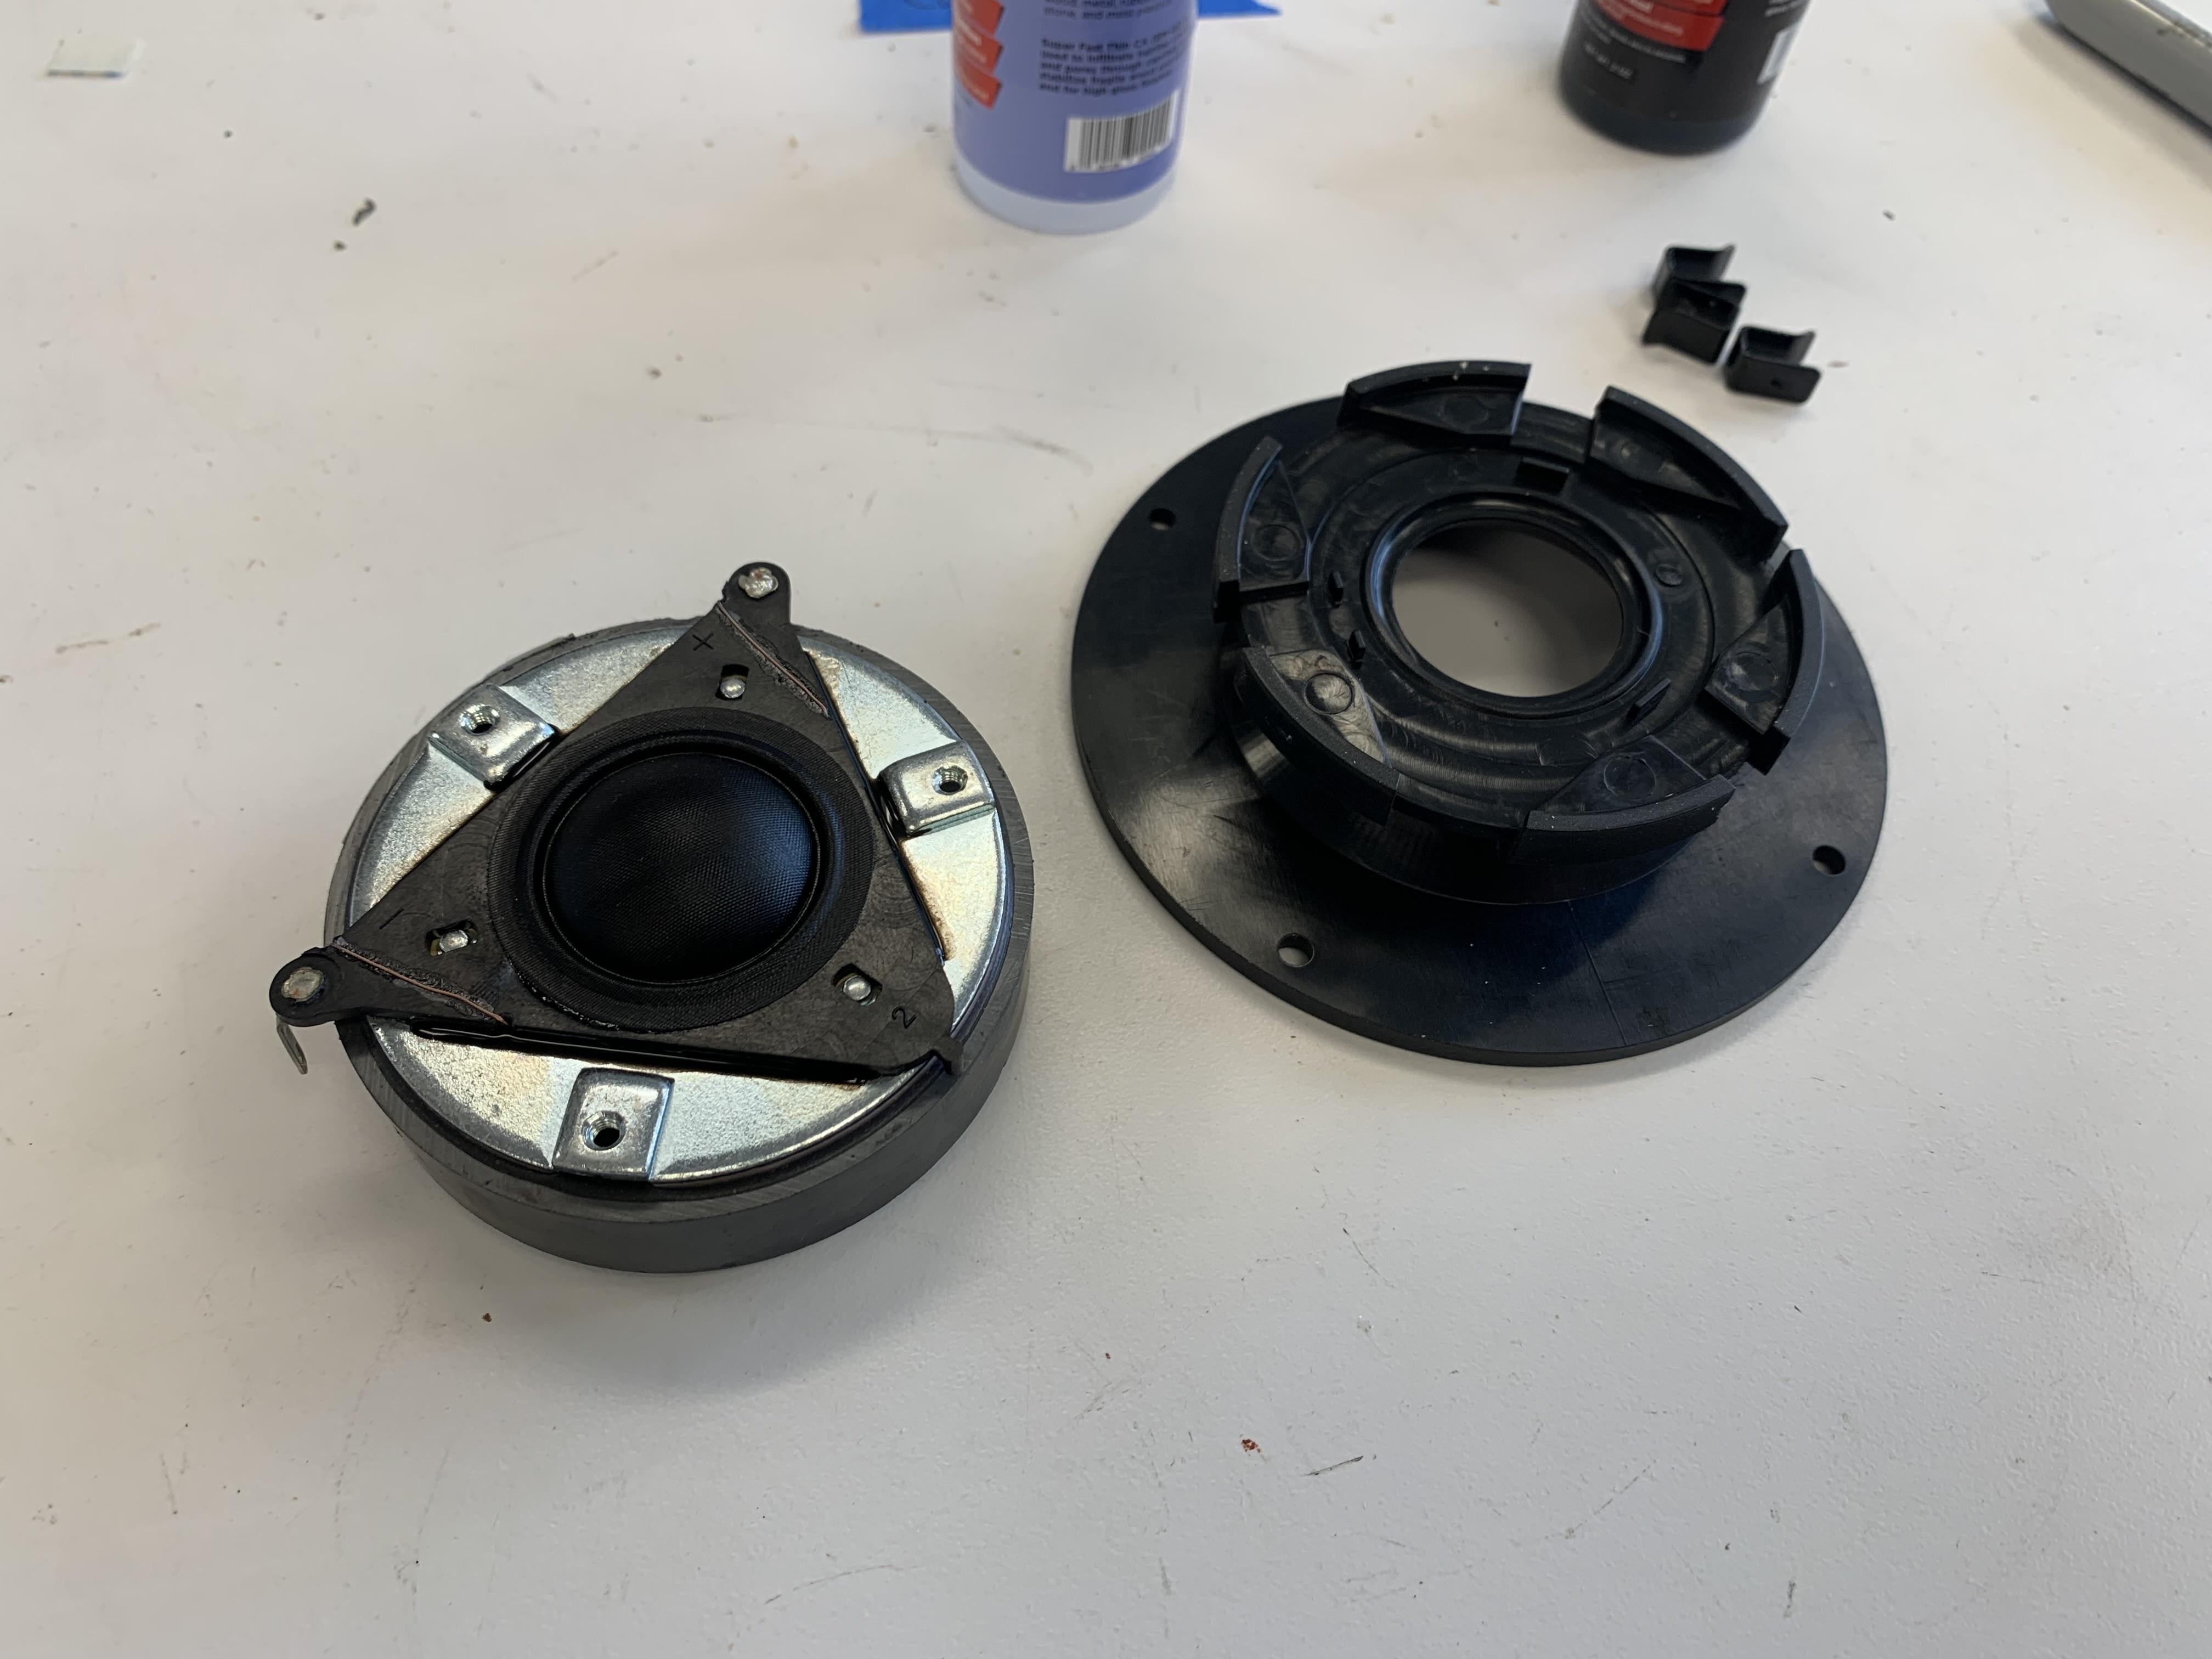
EvanGOLD MemberNow its time to talk tweeters. As I mentioned earlier on, one of them was making zero output.
One of my eagle-eyed colleagues noticed that the lead wire was broken. The coil measured ok (from the broken end) so I decided to do a repair.
Location: San Francisco
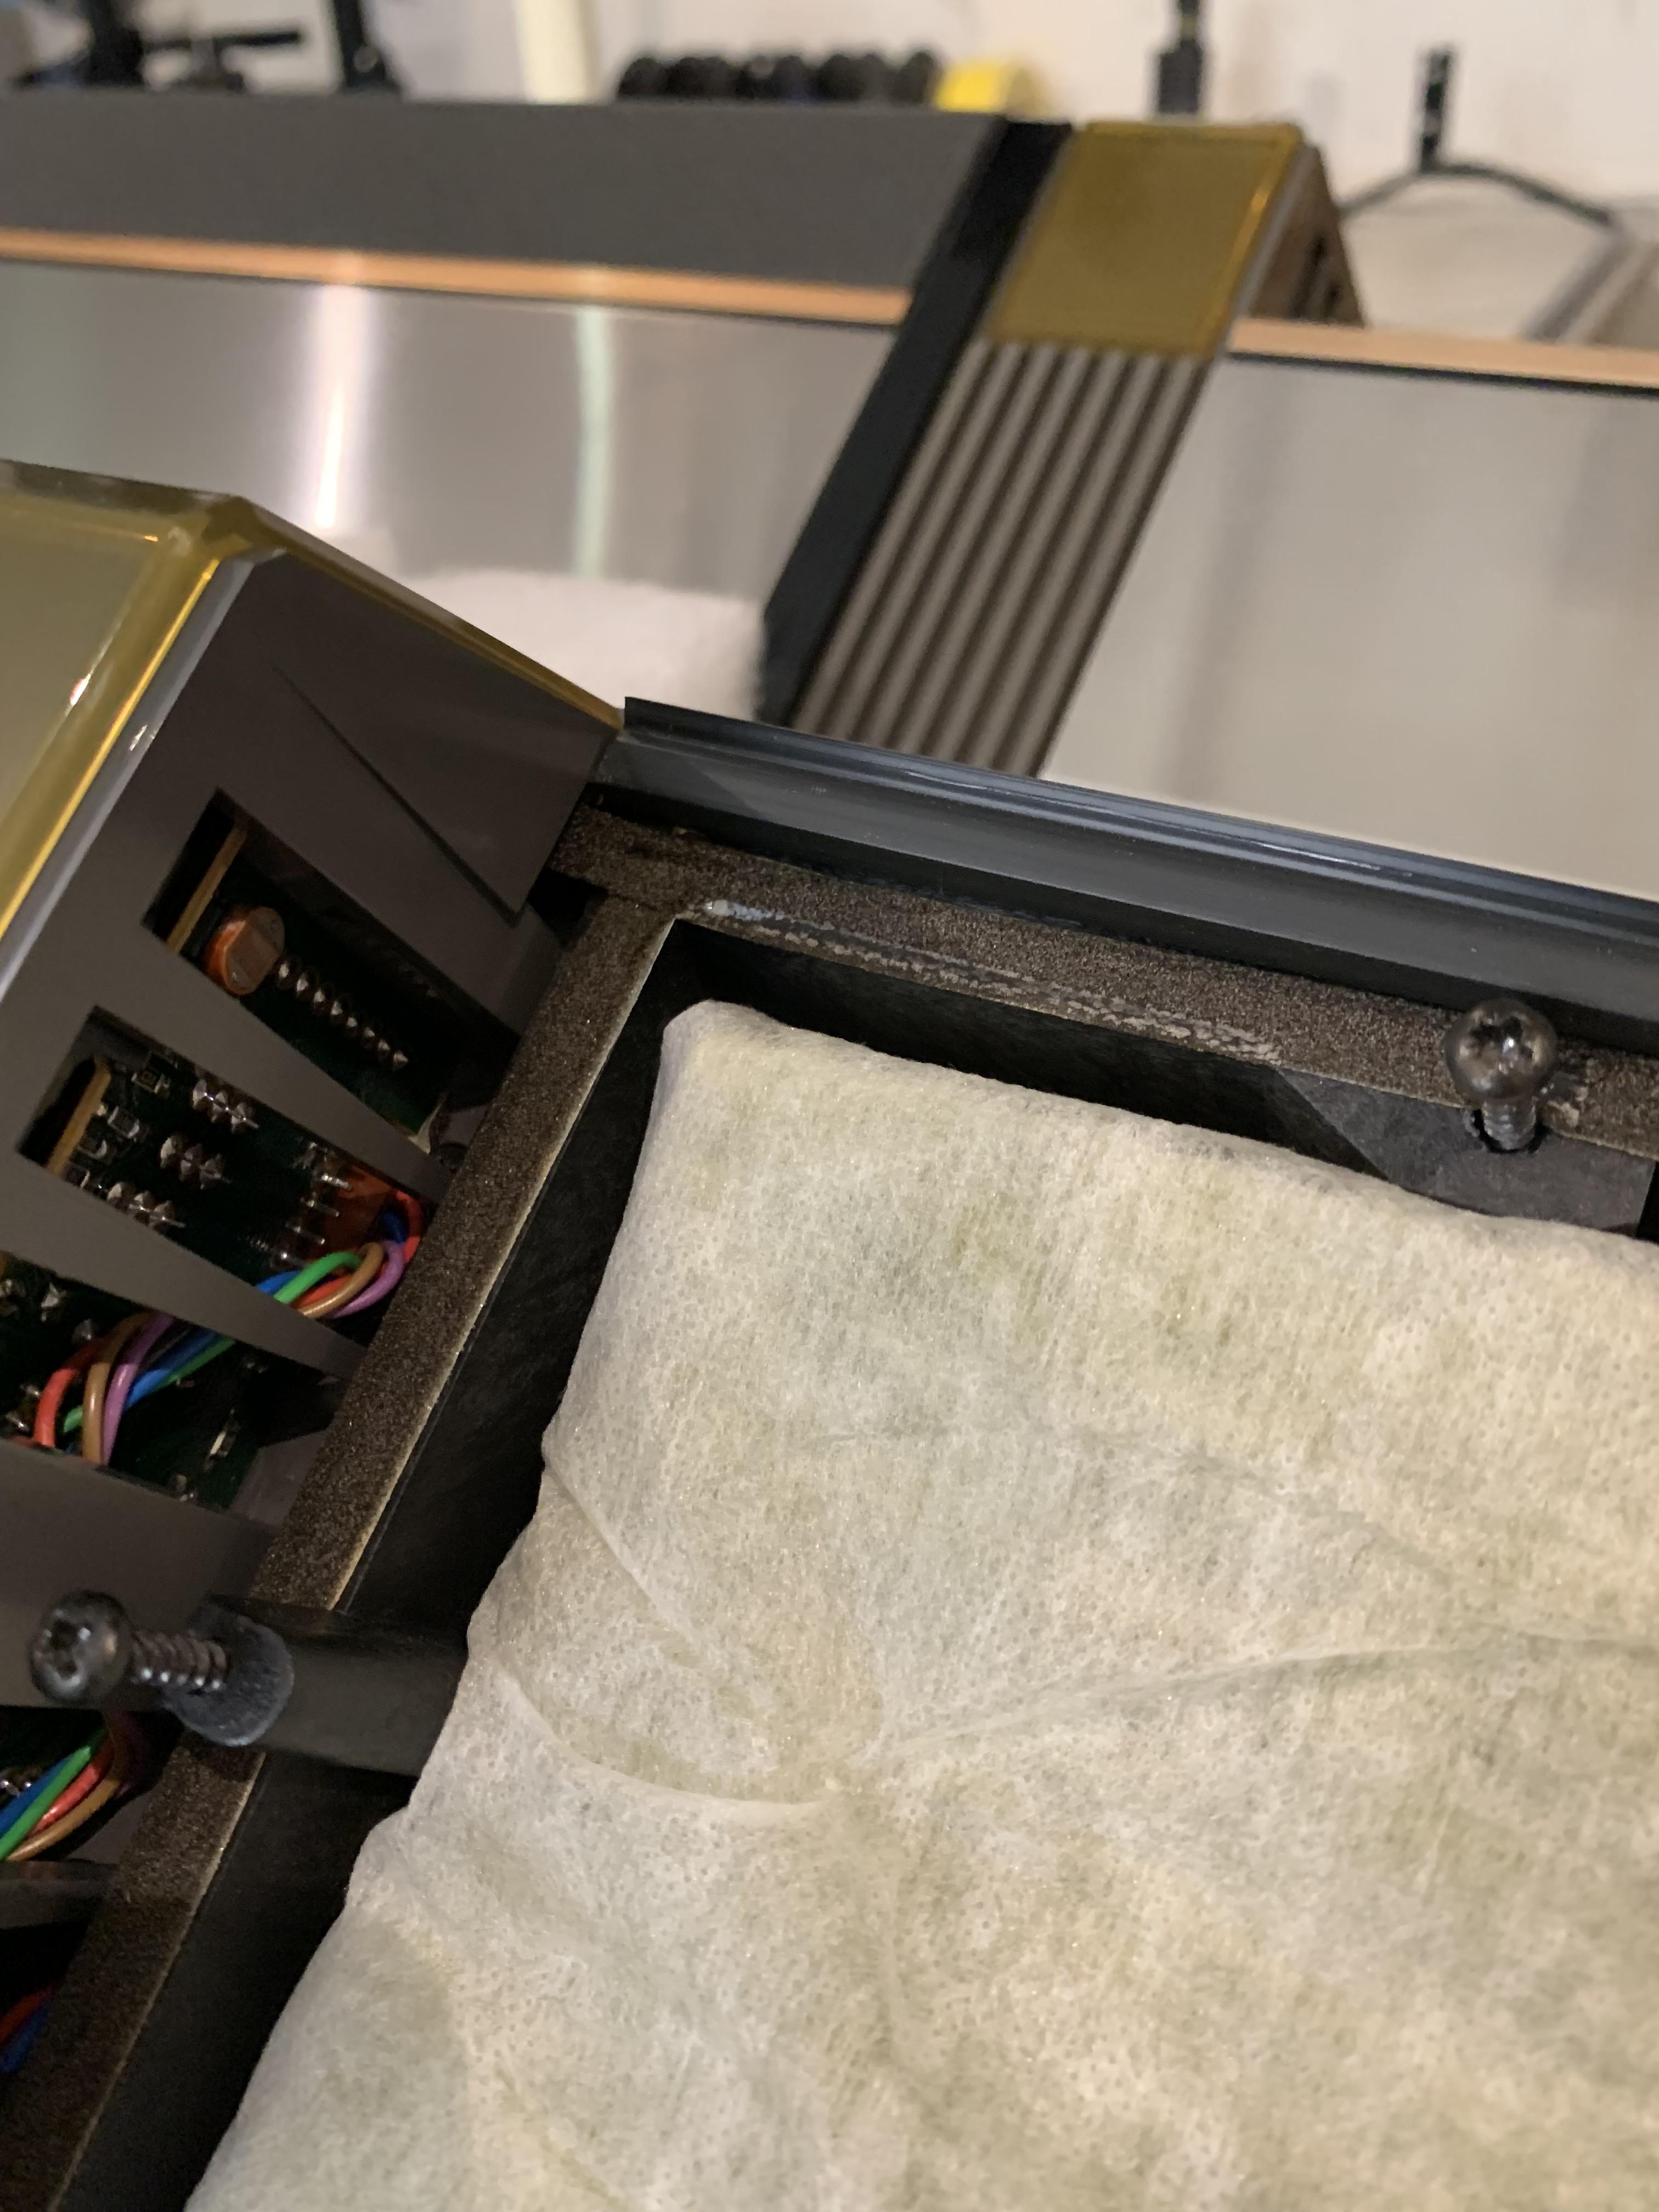
EvanGOLD MemberThe worst of the sealing issues I found was actually around the twee-mid baffle edge. The foam is predictably rotted and without any life left however that wasn’t the worst part. Whoever assembled this foam tape originally back in the day completely missed the actual sealing edge / contour of the baffle. This is effectively an acoustical “short circuit”.
Location: San Francisco
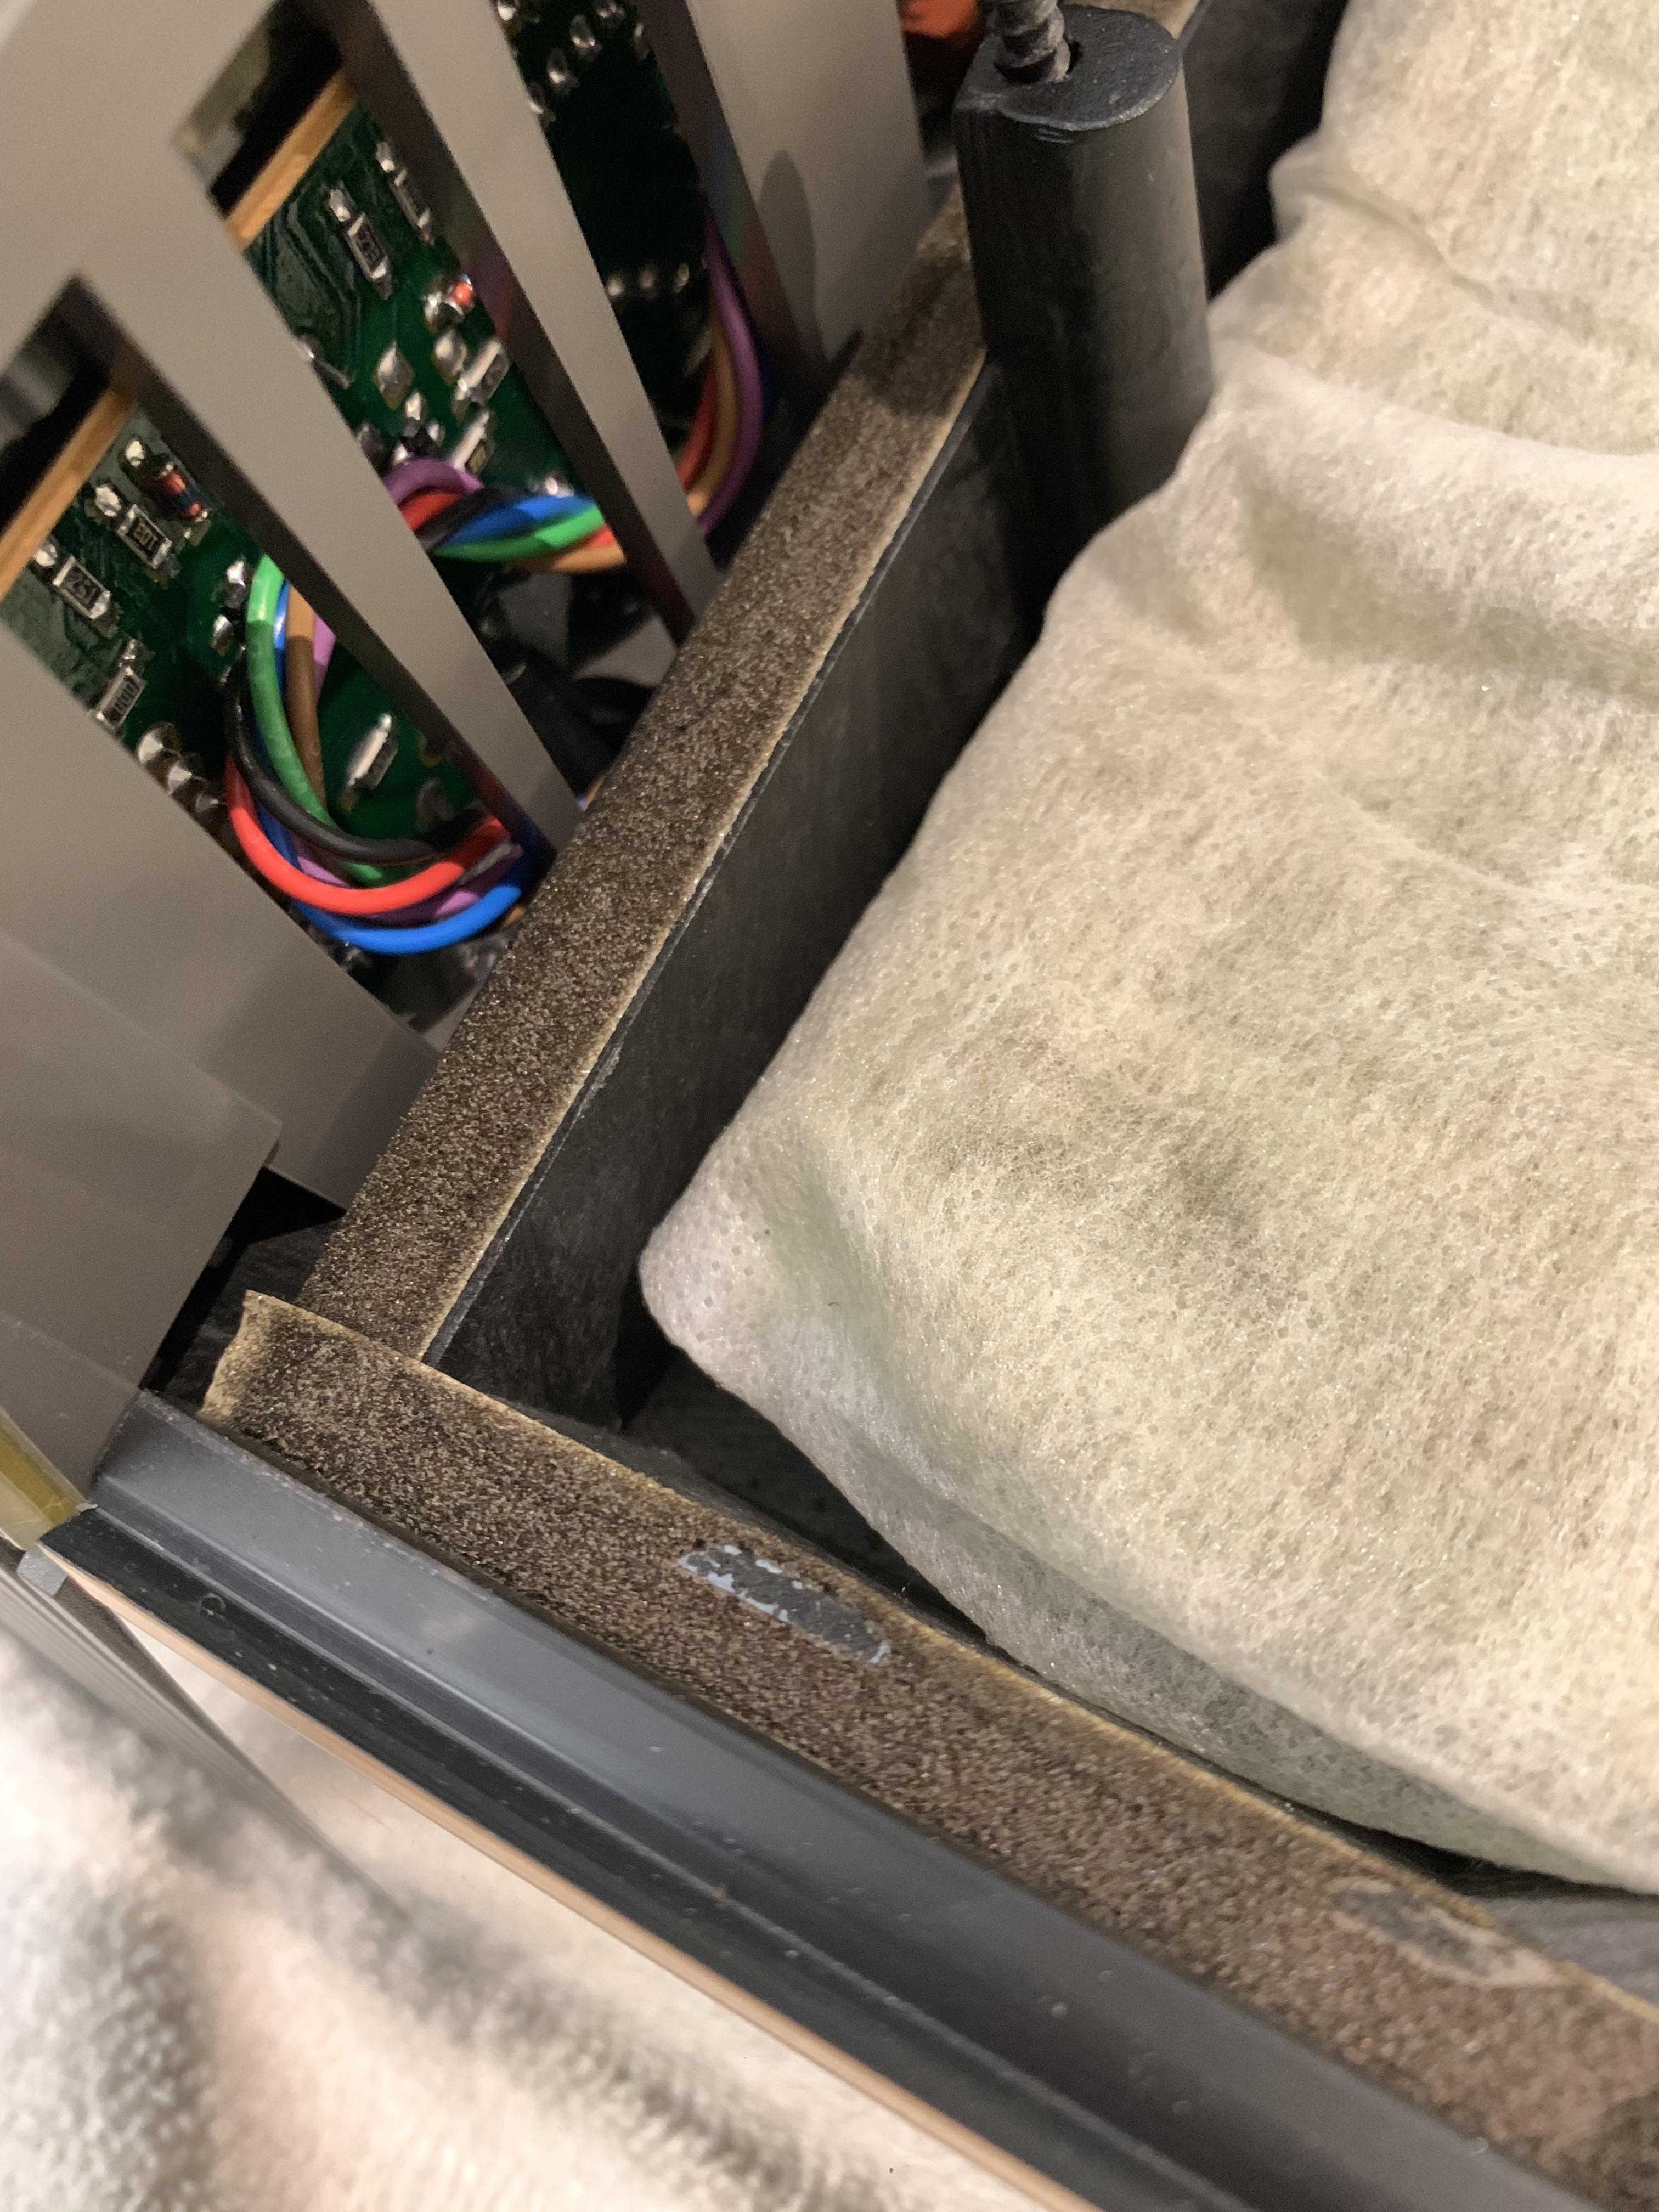
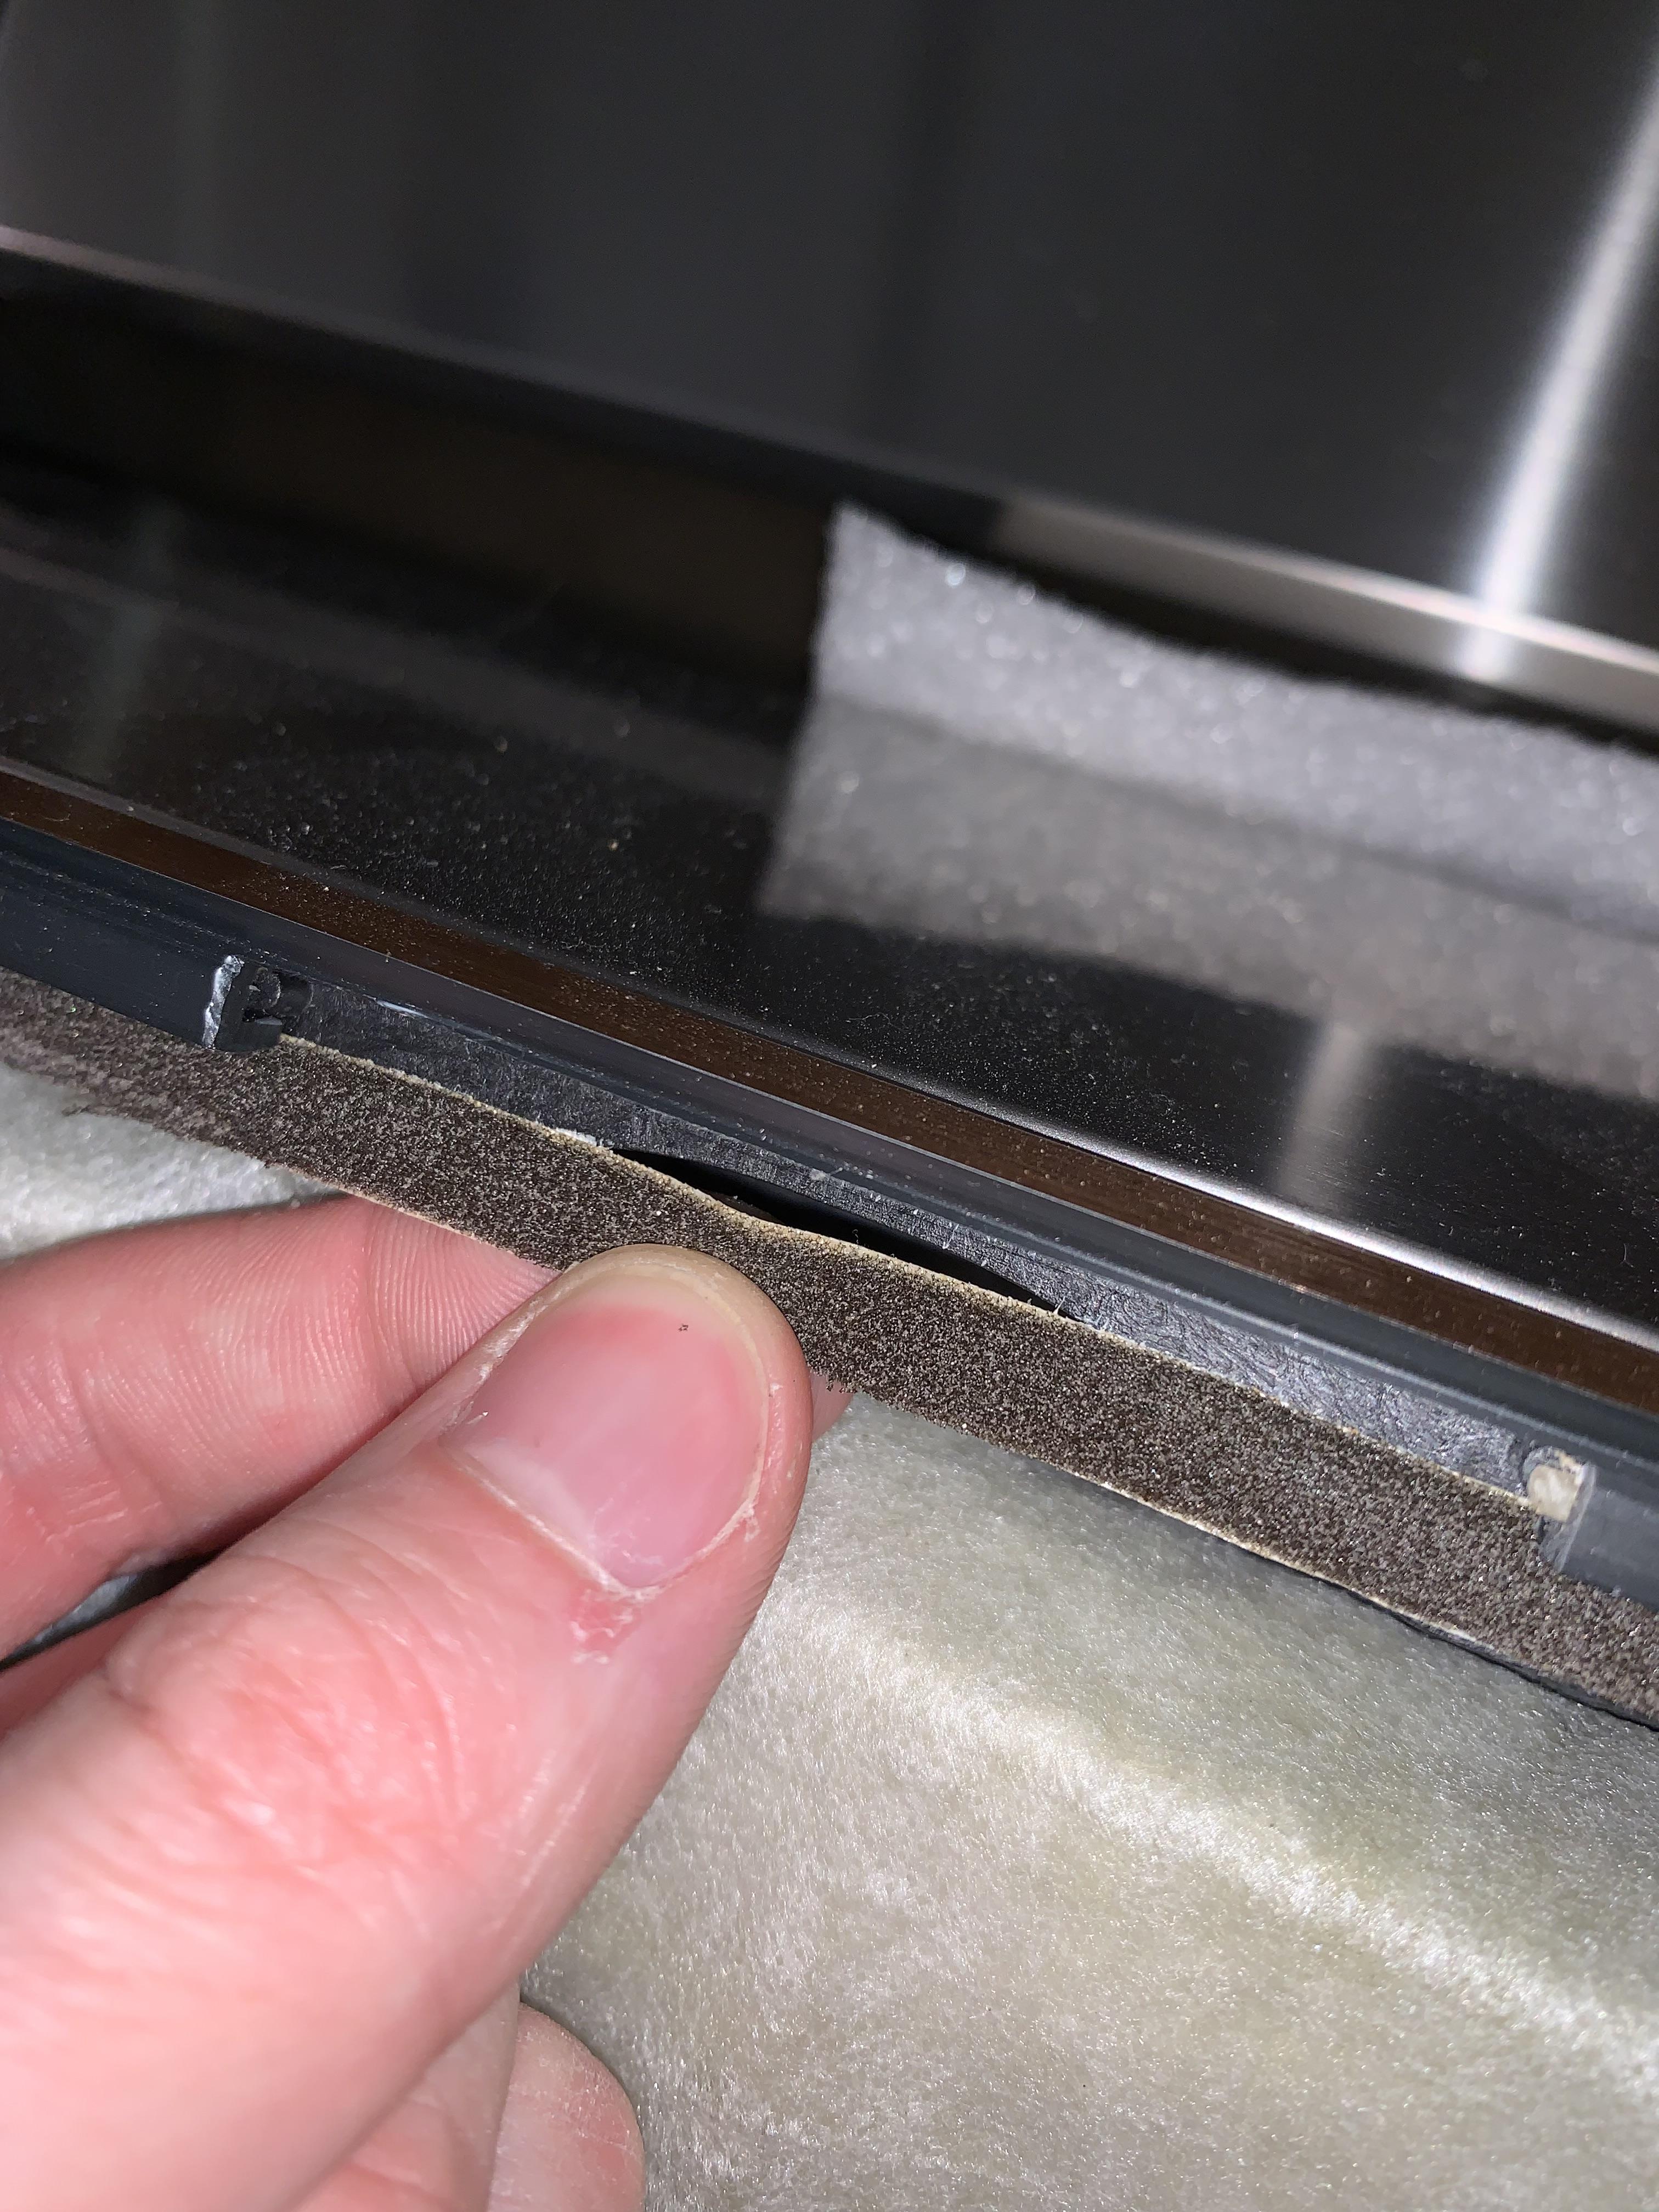
EvanGOLD MemberHere is another great example of deteriorated foam. This is the base of the lower woofer cabinet, I also replaced this on both speakers.
Location: San Francisco
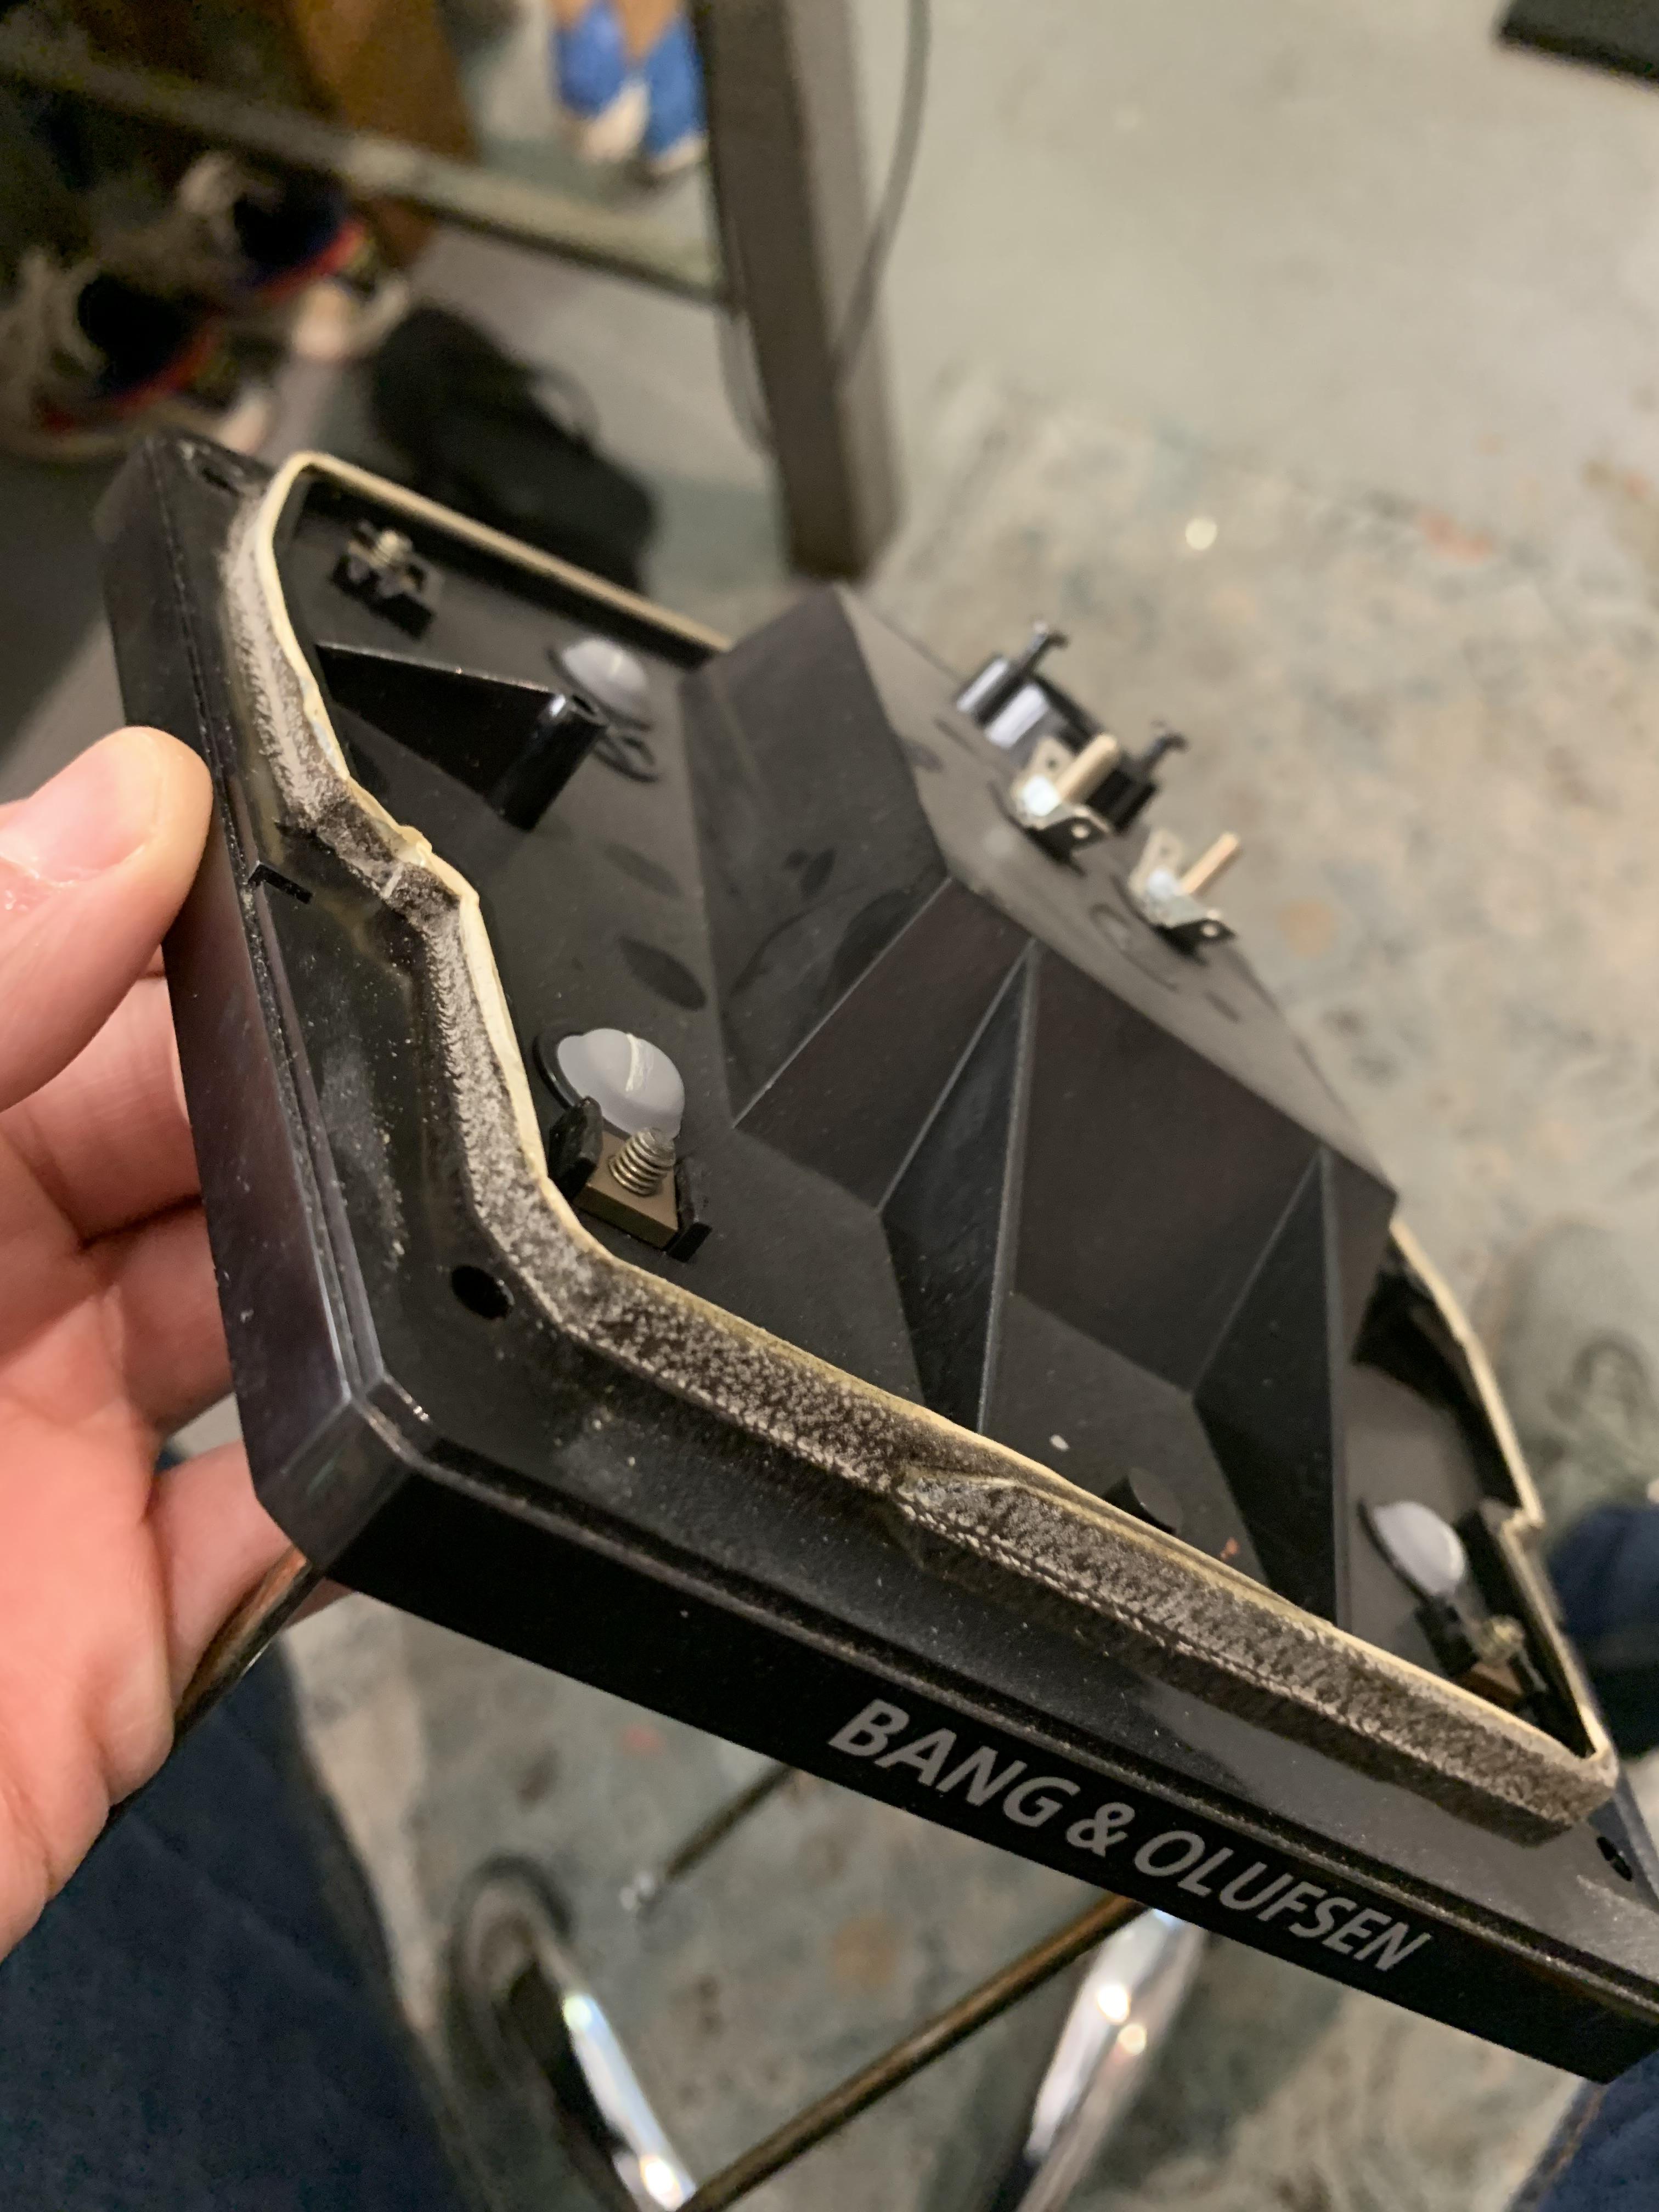
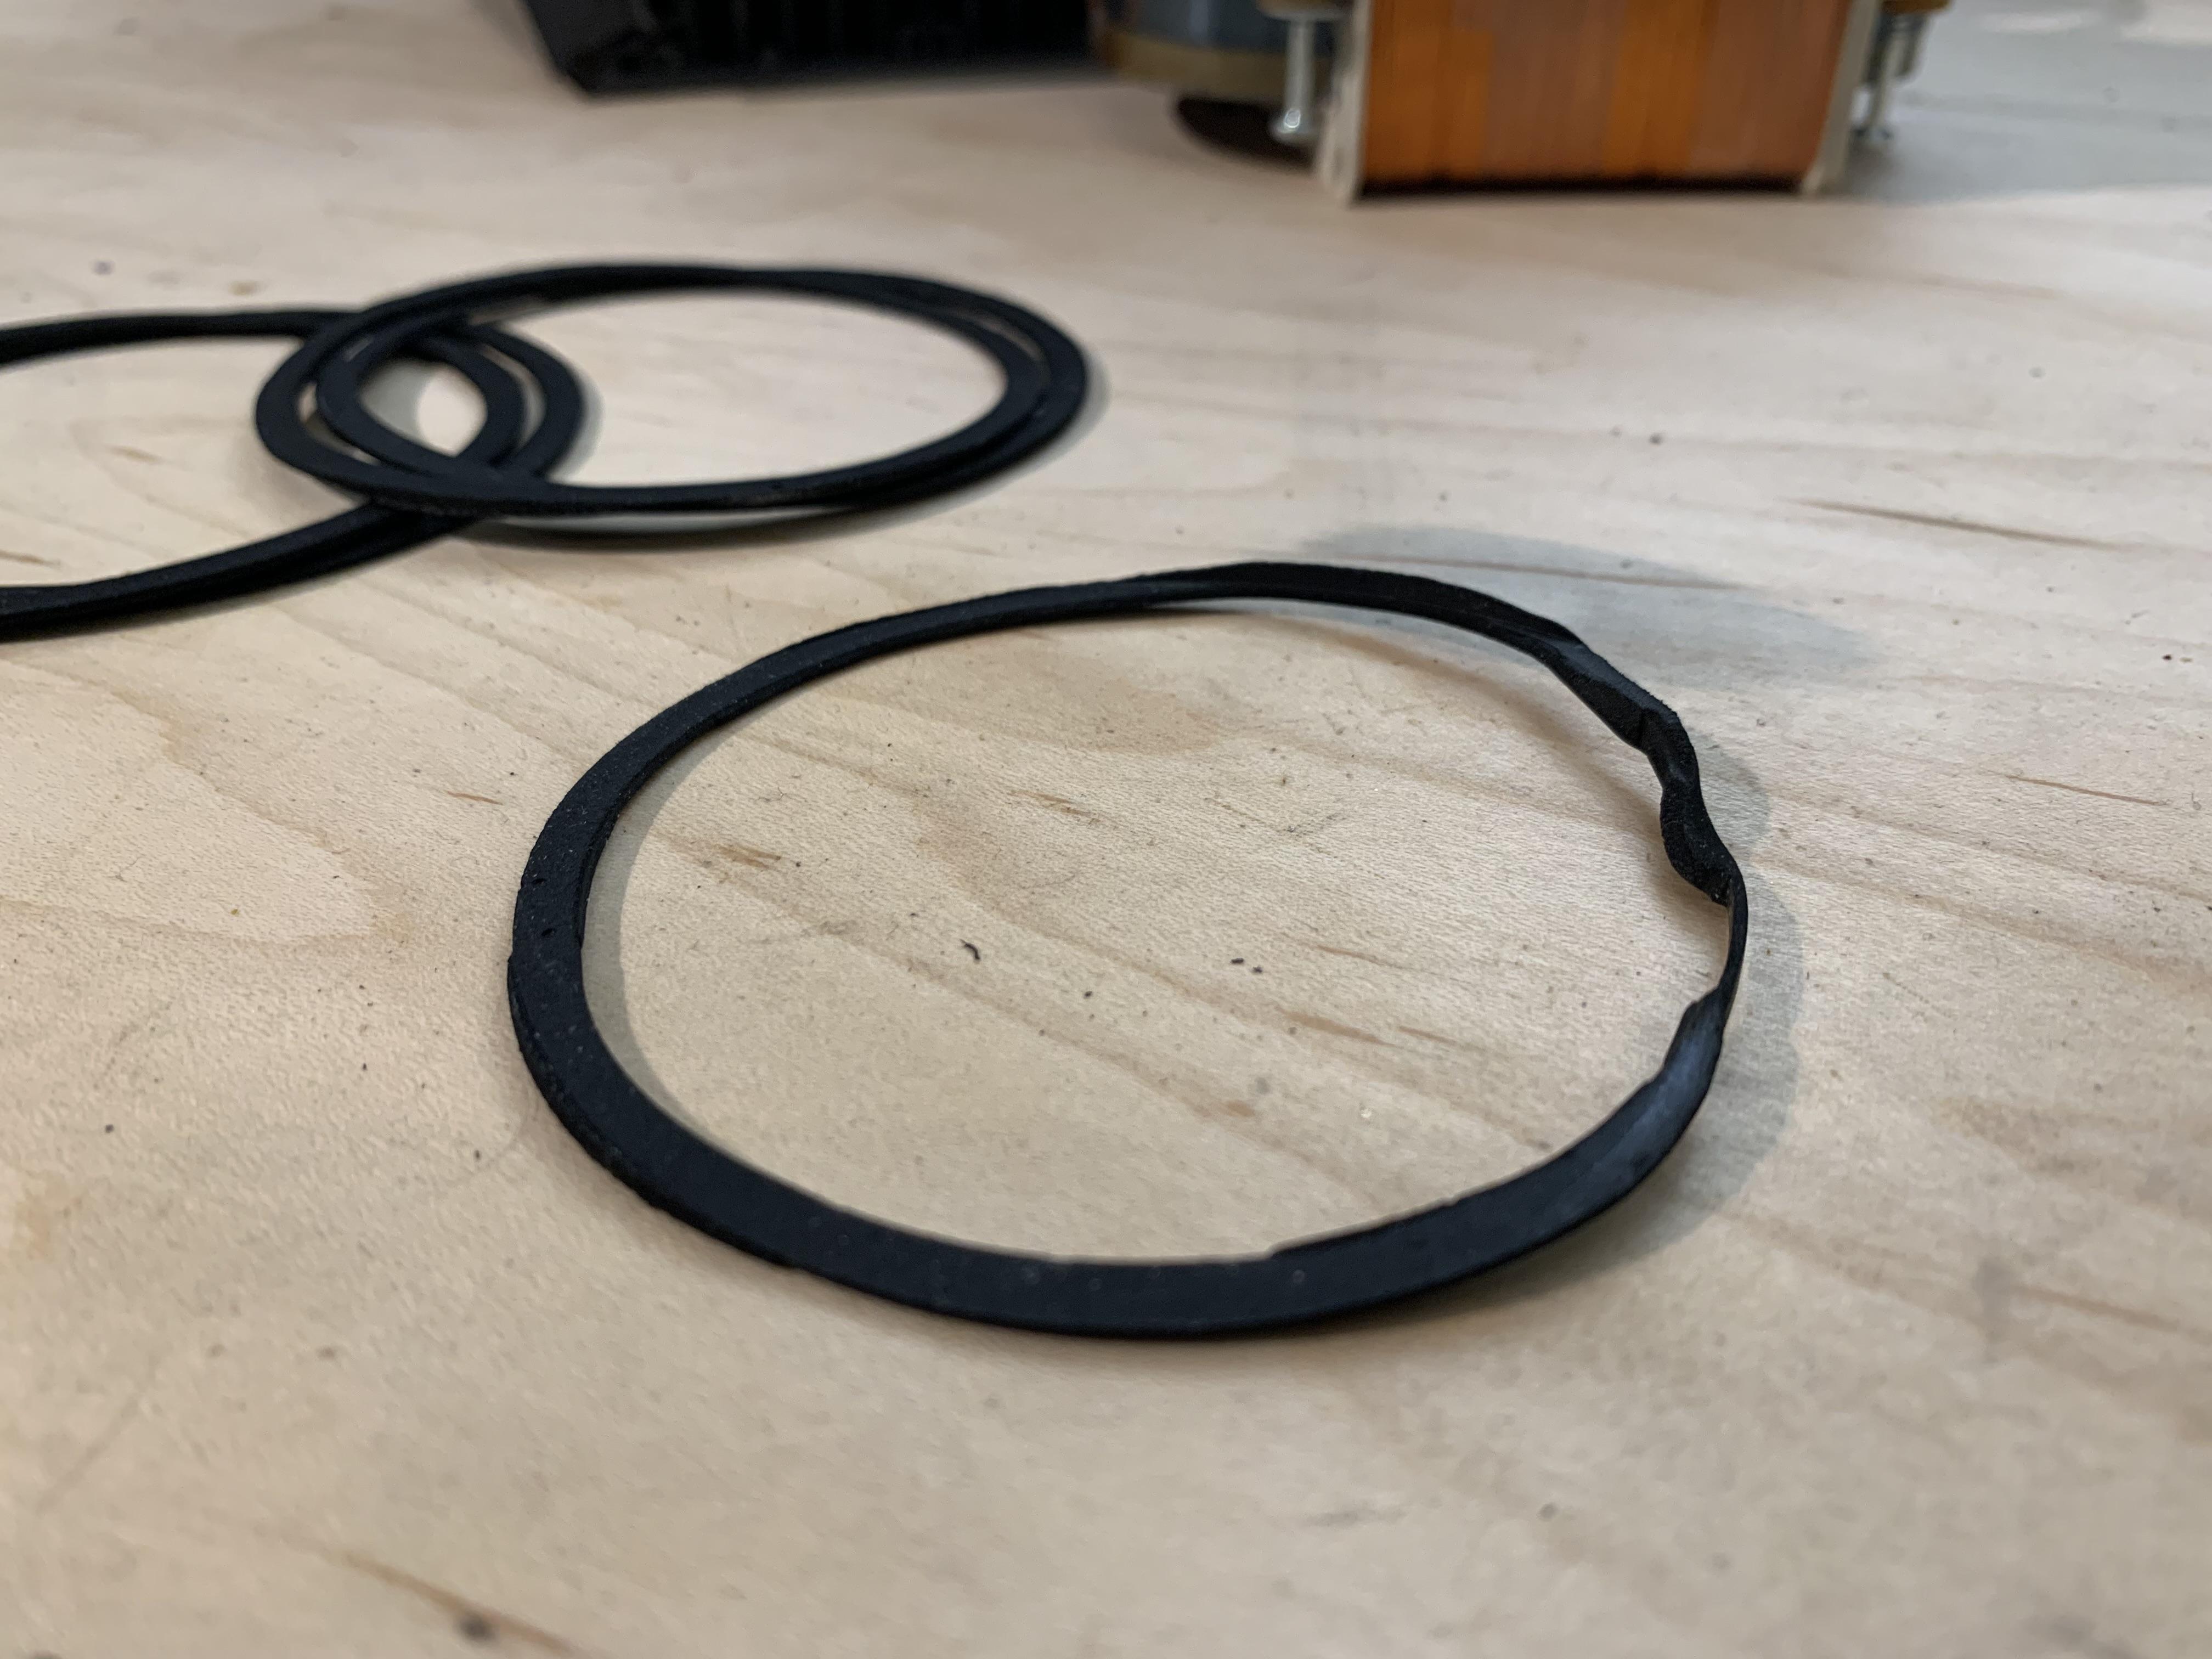
EvanGOLD MemberBefore we put those mids back in, I noticed something that needs mentioning. The gaskets for the mids looked reusable except for one. One was not properly installed in the first place and was too messed up to re-use. I ended up putting on new foam gaskets myself for all drivers. Adhesive foam strips work well for this sort of thing as they can’t move out of the way during installation.
Sealing is an important topic and I suggest those of you reading this to take a closer look at old gaskets and seals in your speakers. Leaks (even small ones) can lead to strange noises and buzzes etc. Most of all they lead to the acoustic system not working/performing as intended.
Location: San Francisco
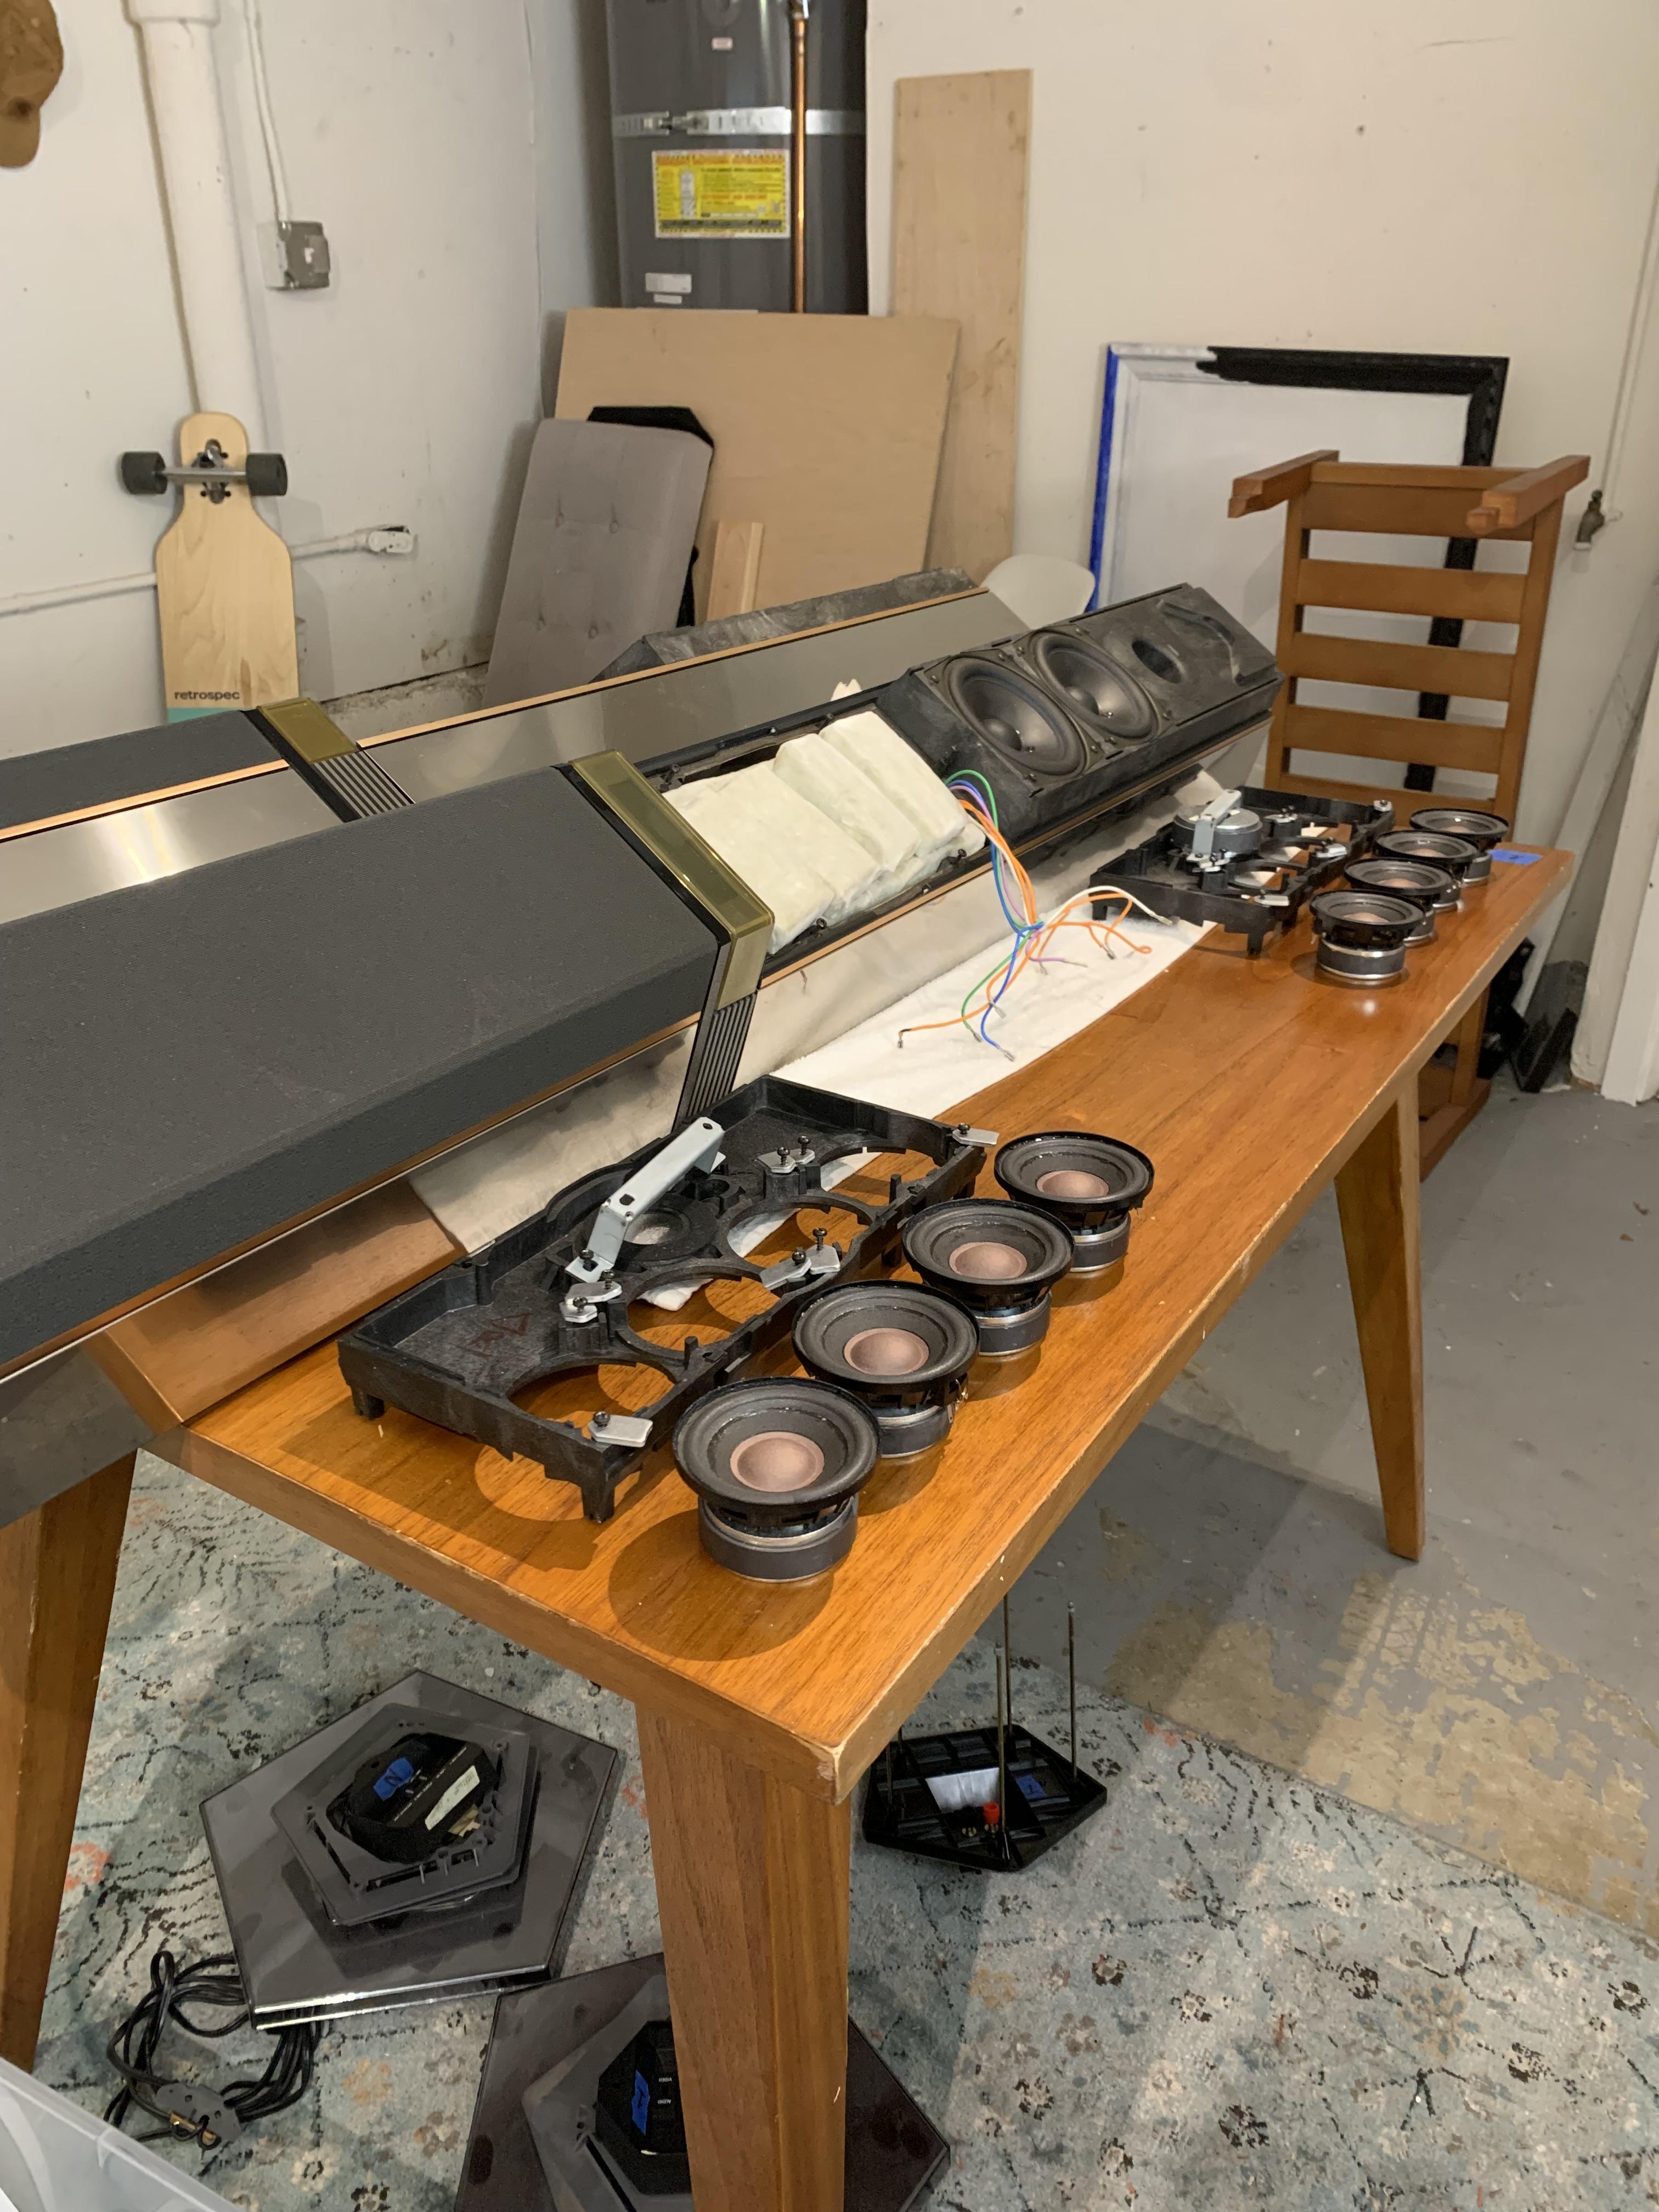
EvanGOLD MemberNow safely back at home, the mids are ready to go back in!!
Location: San Francisco
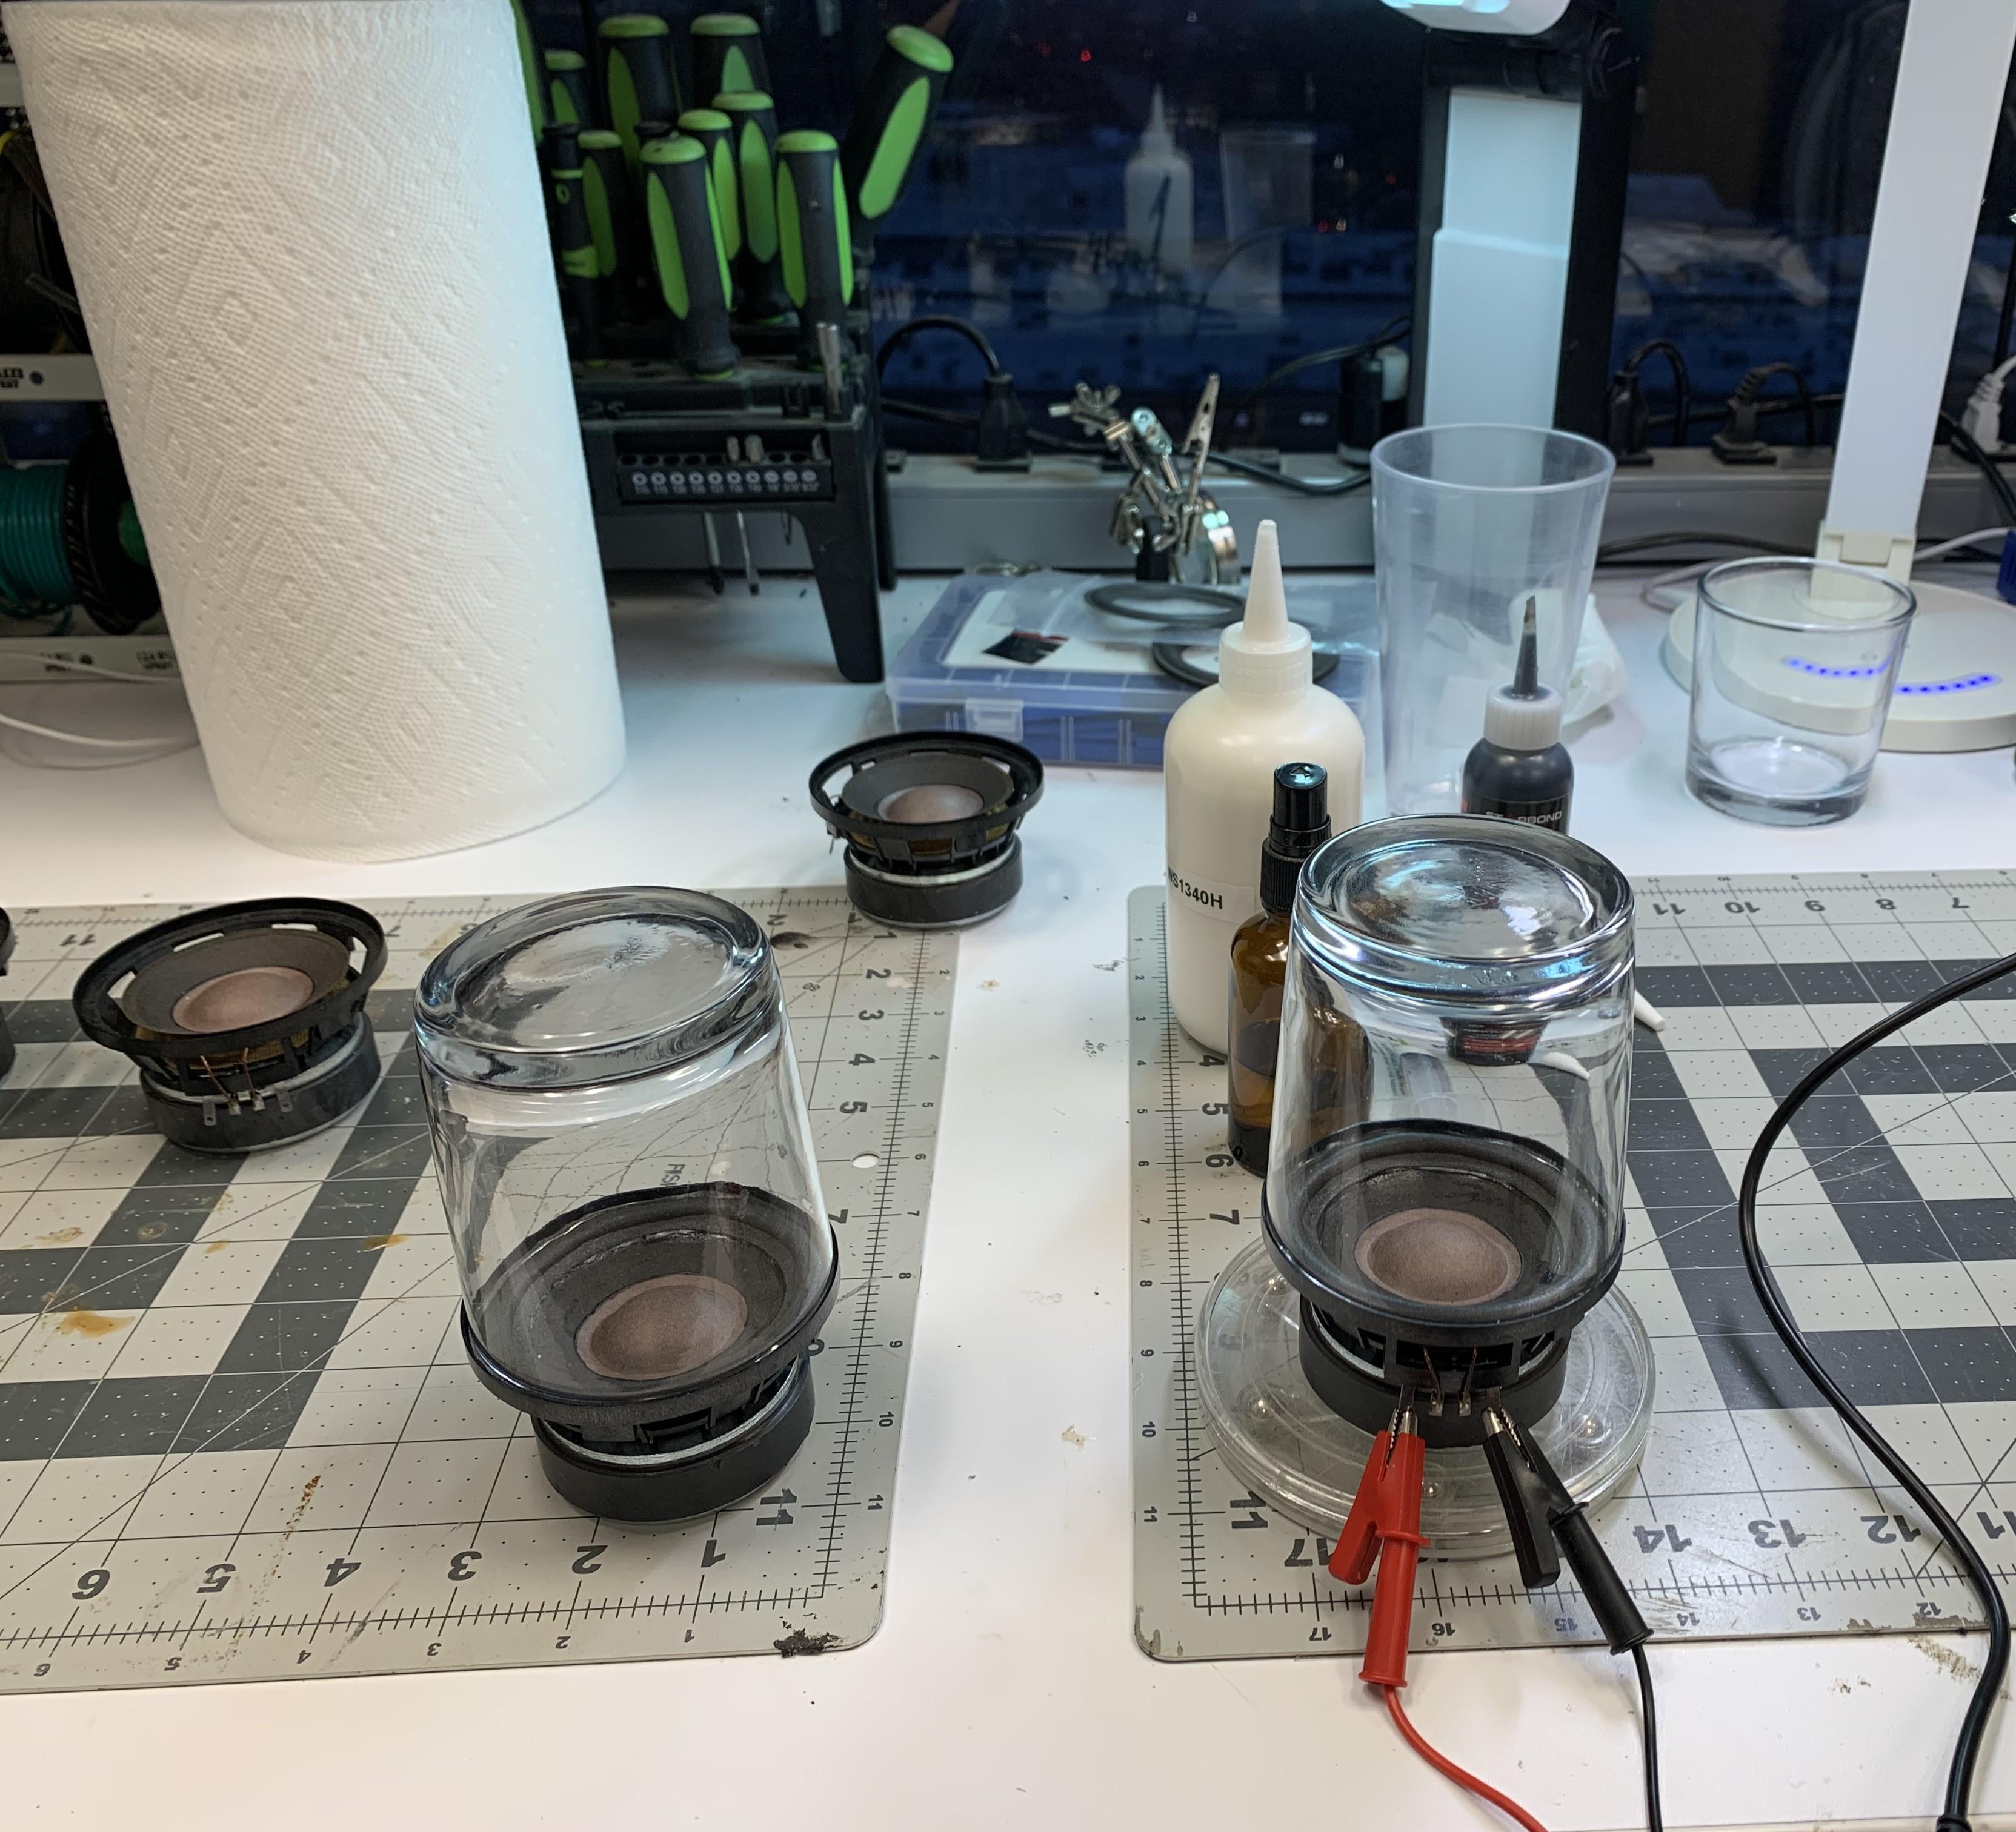
EvanGOLD MemberThings were going well. ….until they weren’t! The outer flange of the surround was starting to wrinkle and not lay flat so I frantically ran around to try and find something to hold them down while the glue set. Luckily we are a well equipped office and have drink vessels of the exact-right size for this job.

While the glueing-up was taking place, I also made sure that I ran some signal through them to ensure no nasty misalignment and coil rubs were to take place.
Location: San Francisco
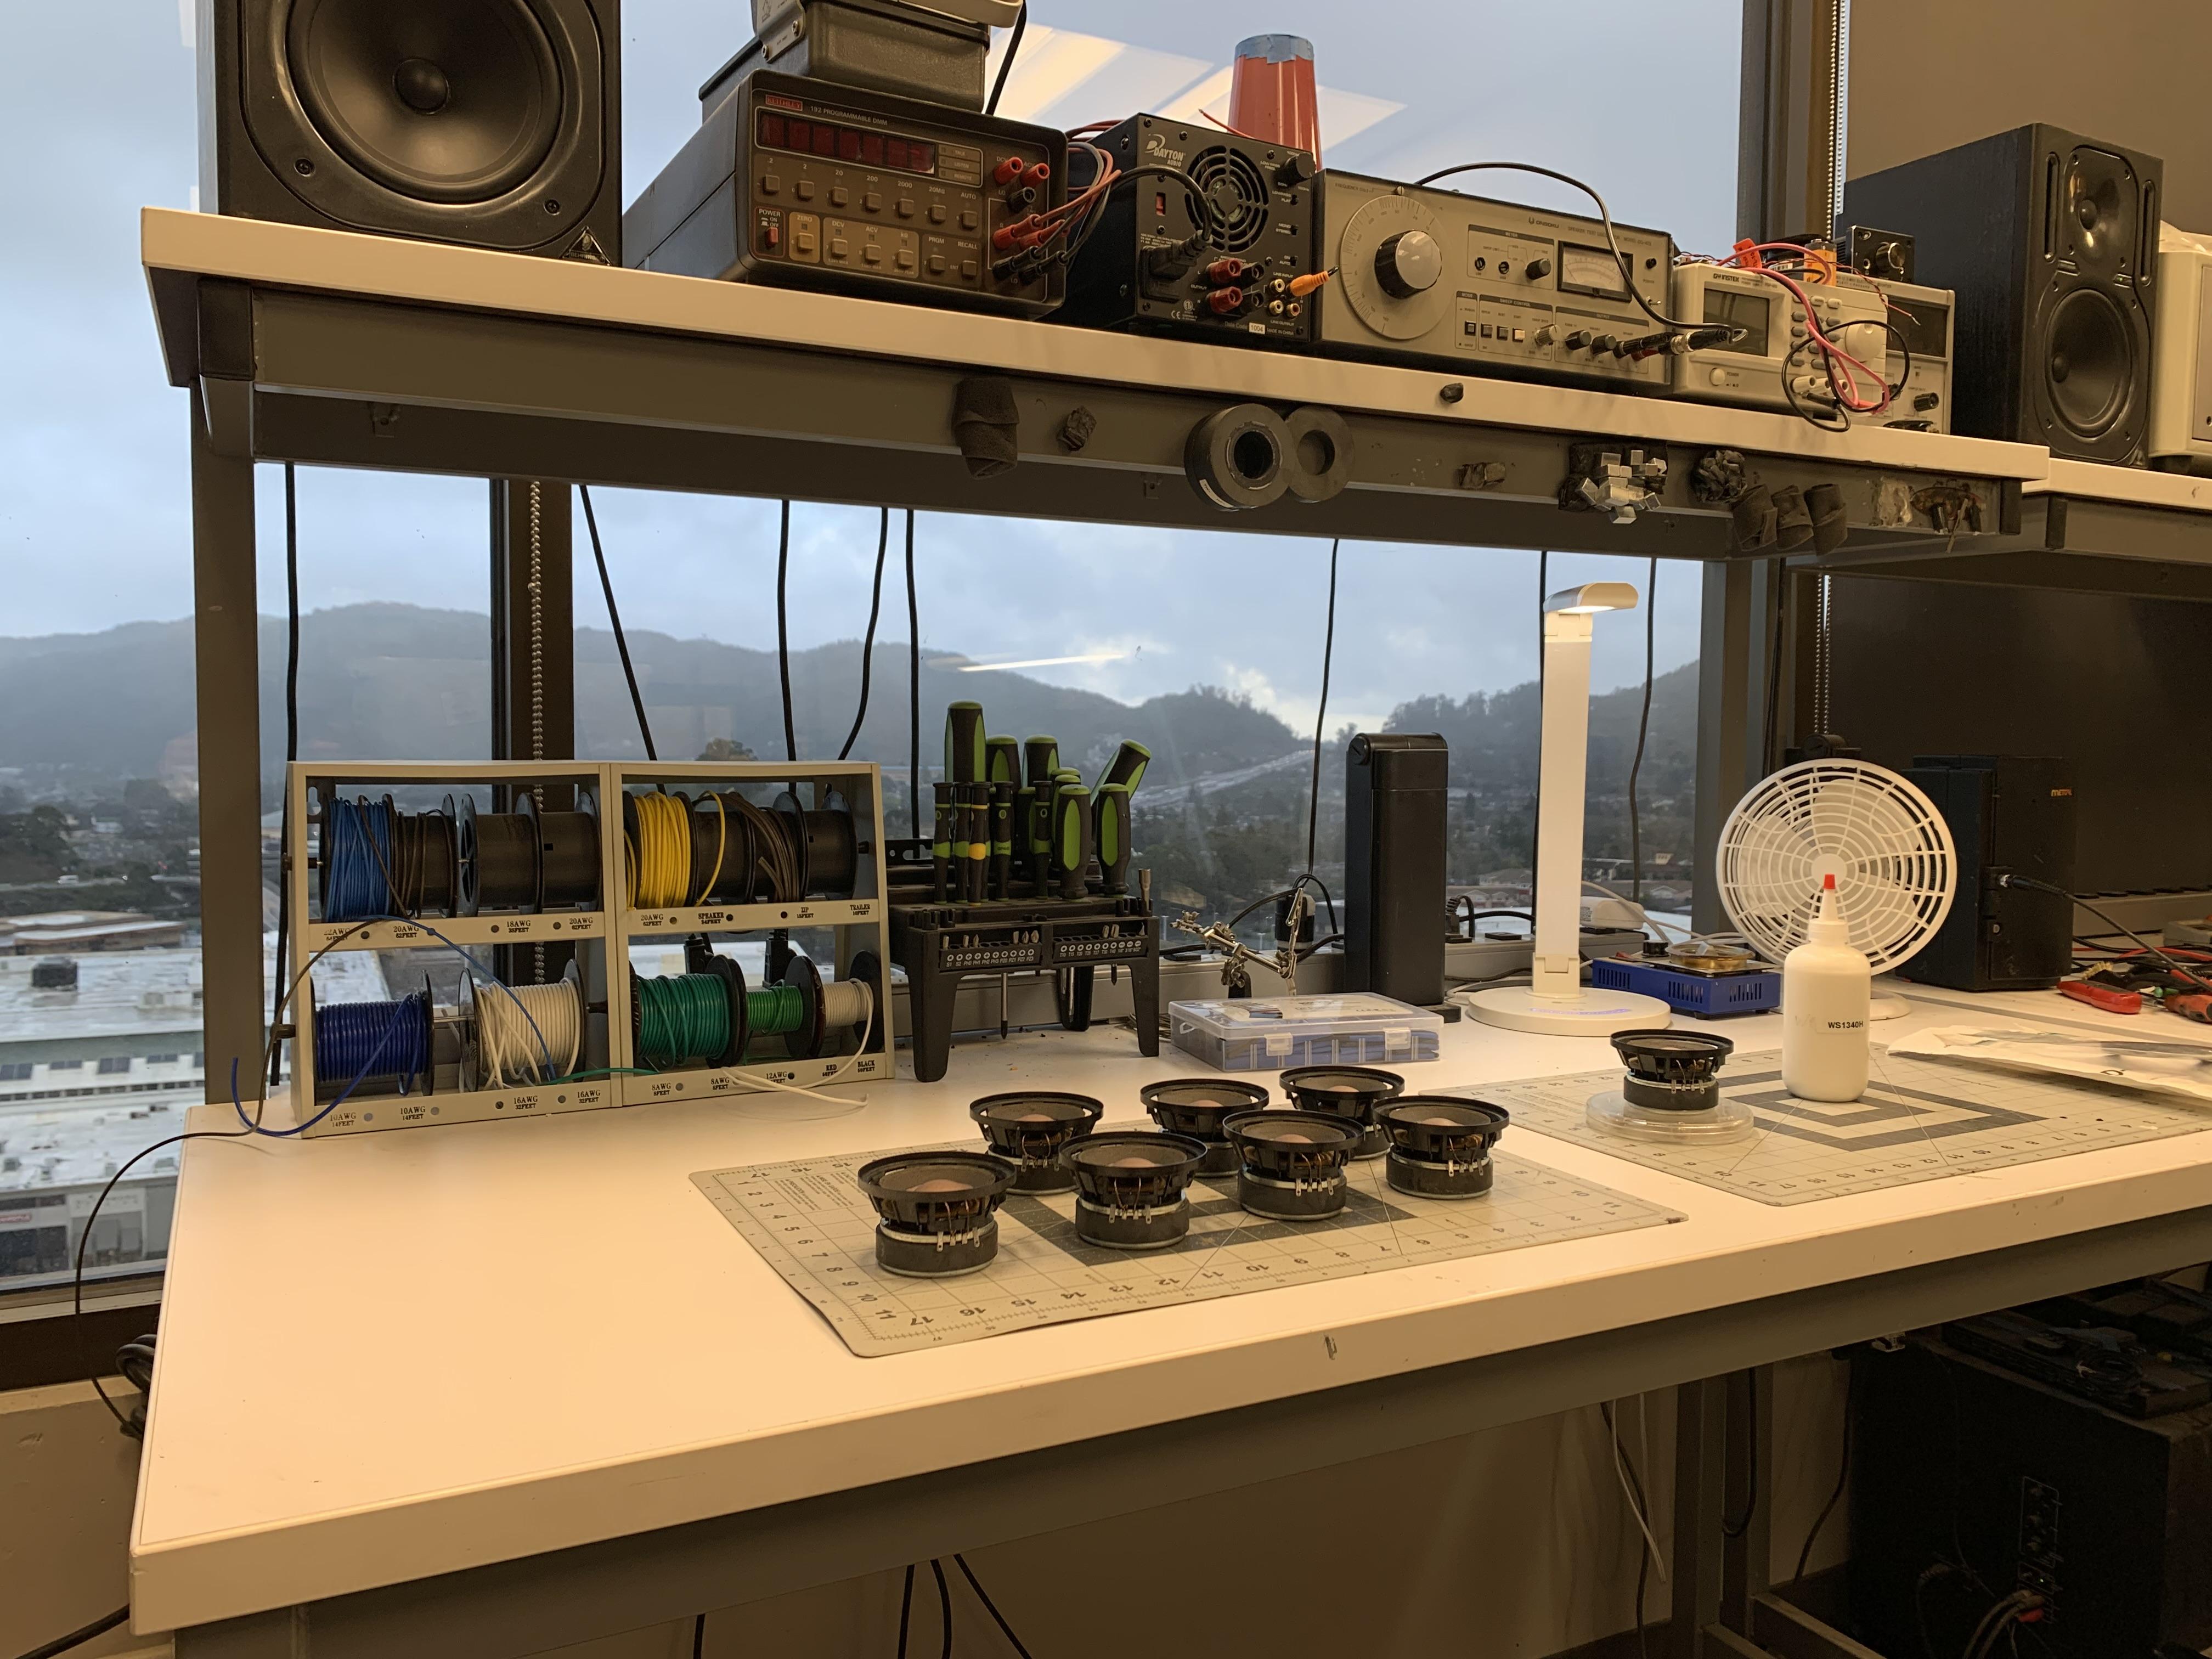
EvanGOLD MemberOne of my favorite view from the office. We are very fortunate that our company values engineers and doesn’t shove the soldering station in the basement somewhere!
This is usually just our random electronics area. Soldering, buzz-up station, general debugging typically goes on here.
Working in a speaker company means we usually have all the tools for the job haha! In this case it was nice to have a small turntable to spin the drivers on when applying the glue for the surrounds.
We had a long, three-day weekend here in the US and everyone but myself cleared out early on Friday. After everyone took off, I connected my phone to the monitors on the shelf, started jamming and getting on with the work.
Location: San Francisco
-
AuthorPosts