


Home › Forums › Product Discussion & Questions › BeoCenter › My Beocenter 9500 Restoration
- This topic has 44 replies, 7 voices, and was last updated 2 years, 6 months ago by

-
AuthorPosts
-
15 April 2023 at 18:19 #42804
 GOLD Member
I reset it to Unlisted now. Give the link a try, and let me know if it works. I just didn’t want it publicly out there since I had incorrectly counted the turns around the post.
Location: Minnesota, USA
Favourite Product: Beocenter 9500
My B&O Icons:


 15 April 2023 at 18:47 #42805
Yes that works fine now and will be a great help – many thanks indeed!
Location: Warwickshire, UK
My B&O Icons:
 15 April 2023 at 21:11 #42806
Glad to help when I can.
Also, I found it very helpful to have some painters tape around to hold things in place when working on that section. Especially the spring set up in the center of it all. Take off the metal bar holder and wrap some tape around spring assembly to hold it in place. That gives you nice access to the pulleys when you need it.
Location: Minnesota, USA
Favourite Product: Beocenter 9500
My B&O Icons:
16 April 2023 at 12:31 #42807Many thanks for the tip! I must admit that I am not looking forward to the repair – she has had the BeoCenter since new and it has about 34 years of dust and dirt inside, and that’s despite me replacing the backup battery in it about 10 years ago! (I was in a rush and didn’t have time for a fuller service.)
I will put some photos in this thread when I get around to fixing it.
Location: Warwickshire, UK
My B&O Icons:
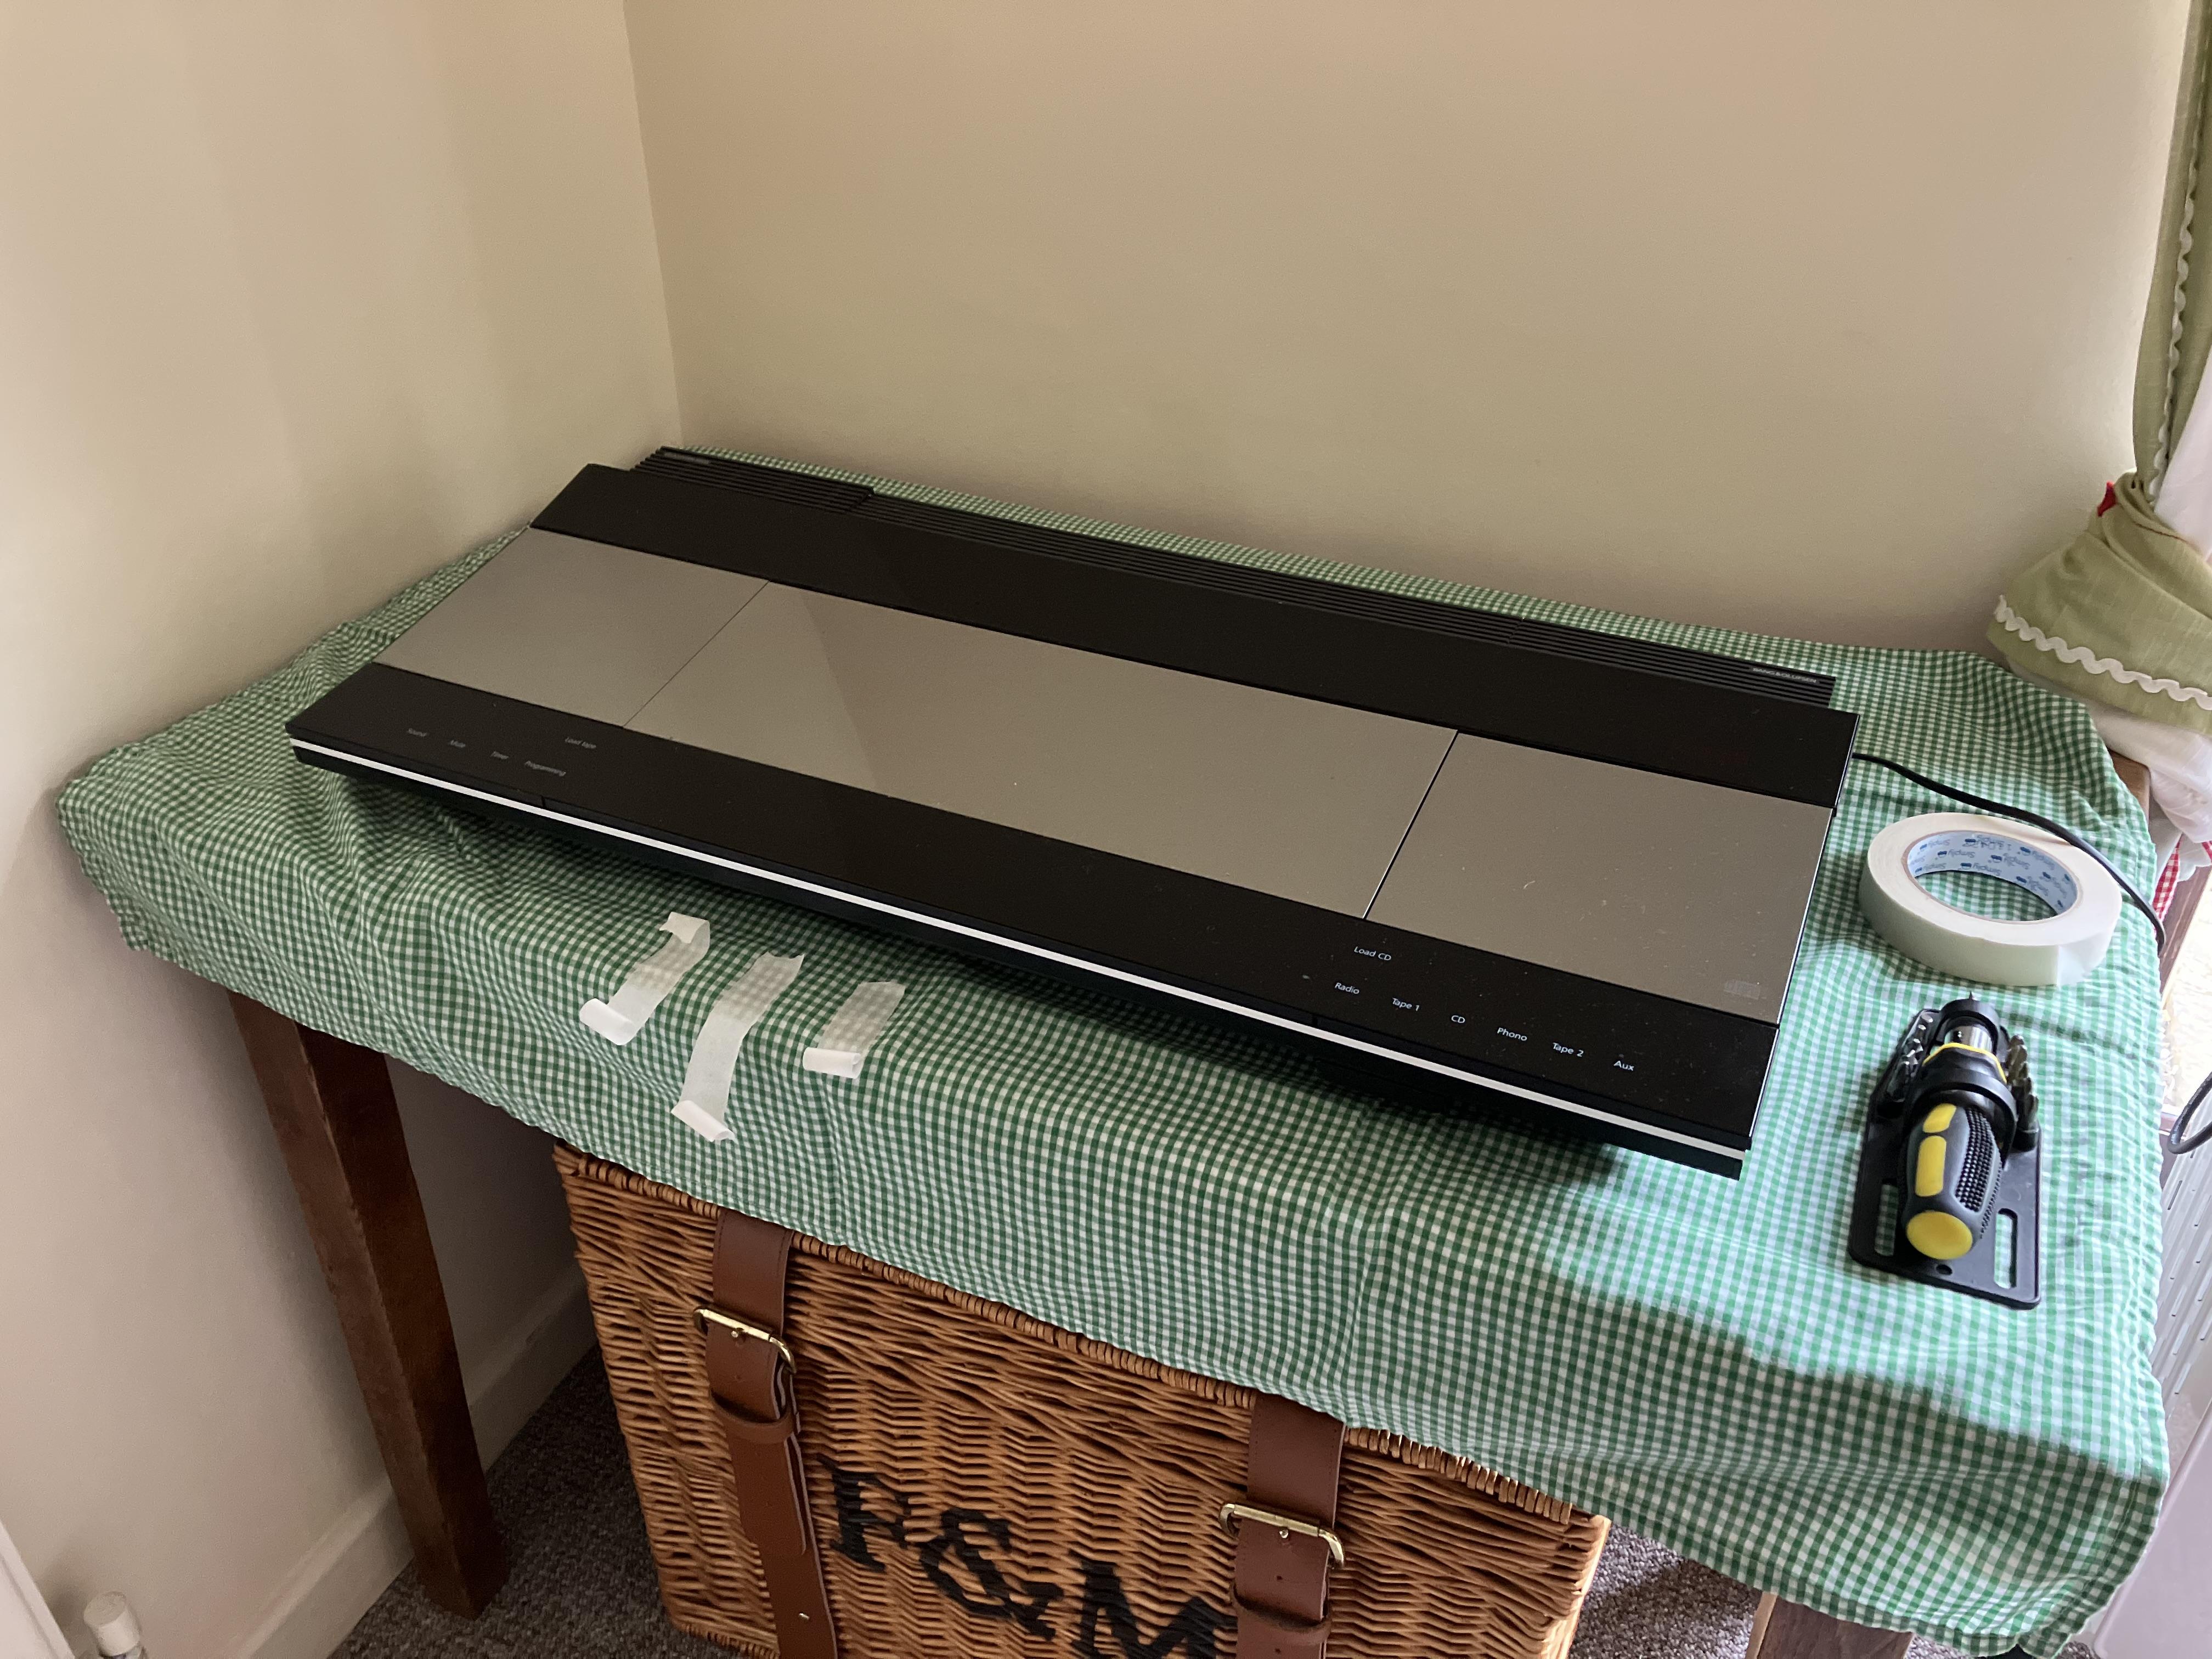
25 April 2023 at 14:31 #42808So as promised I am hijacking Beitie’s thread to described repair of my (Danish!) mother-in-law’s BC9500, collected yesterday. I merely fitted the CD transit screws, taped down the loose glass panels and placed it carefully in the boot of the car in the centre of an old cot mattress that I keep for just such purposes (unless more grandchildren arrive!)

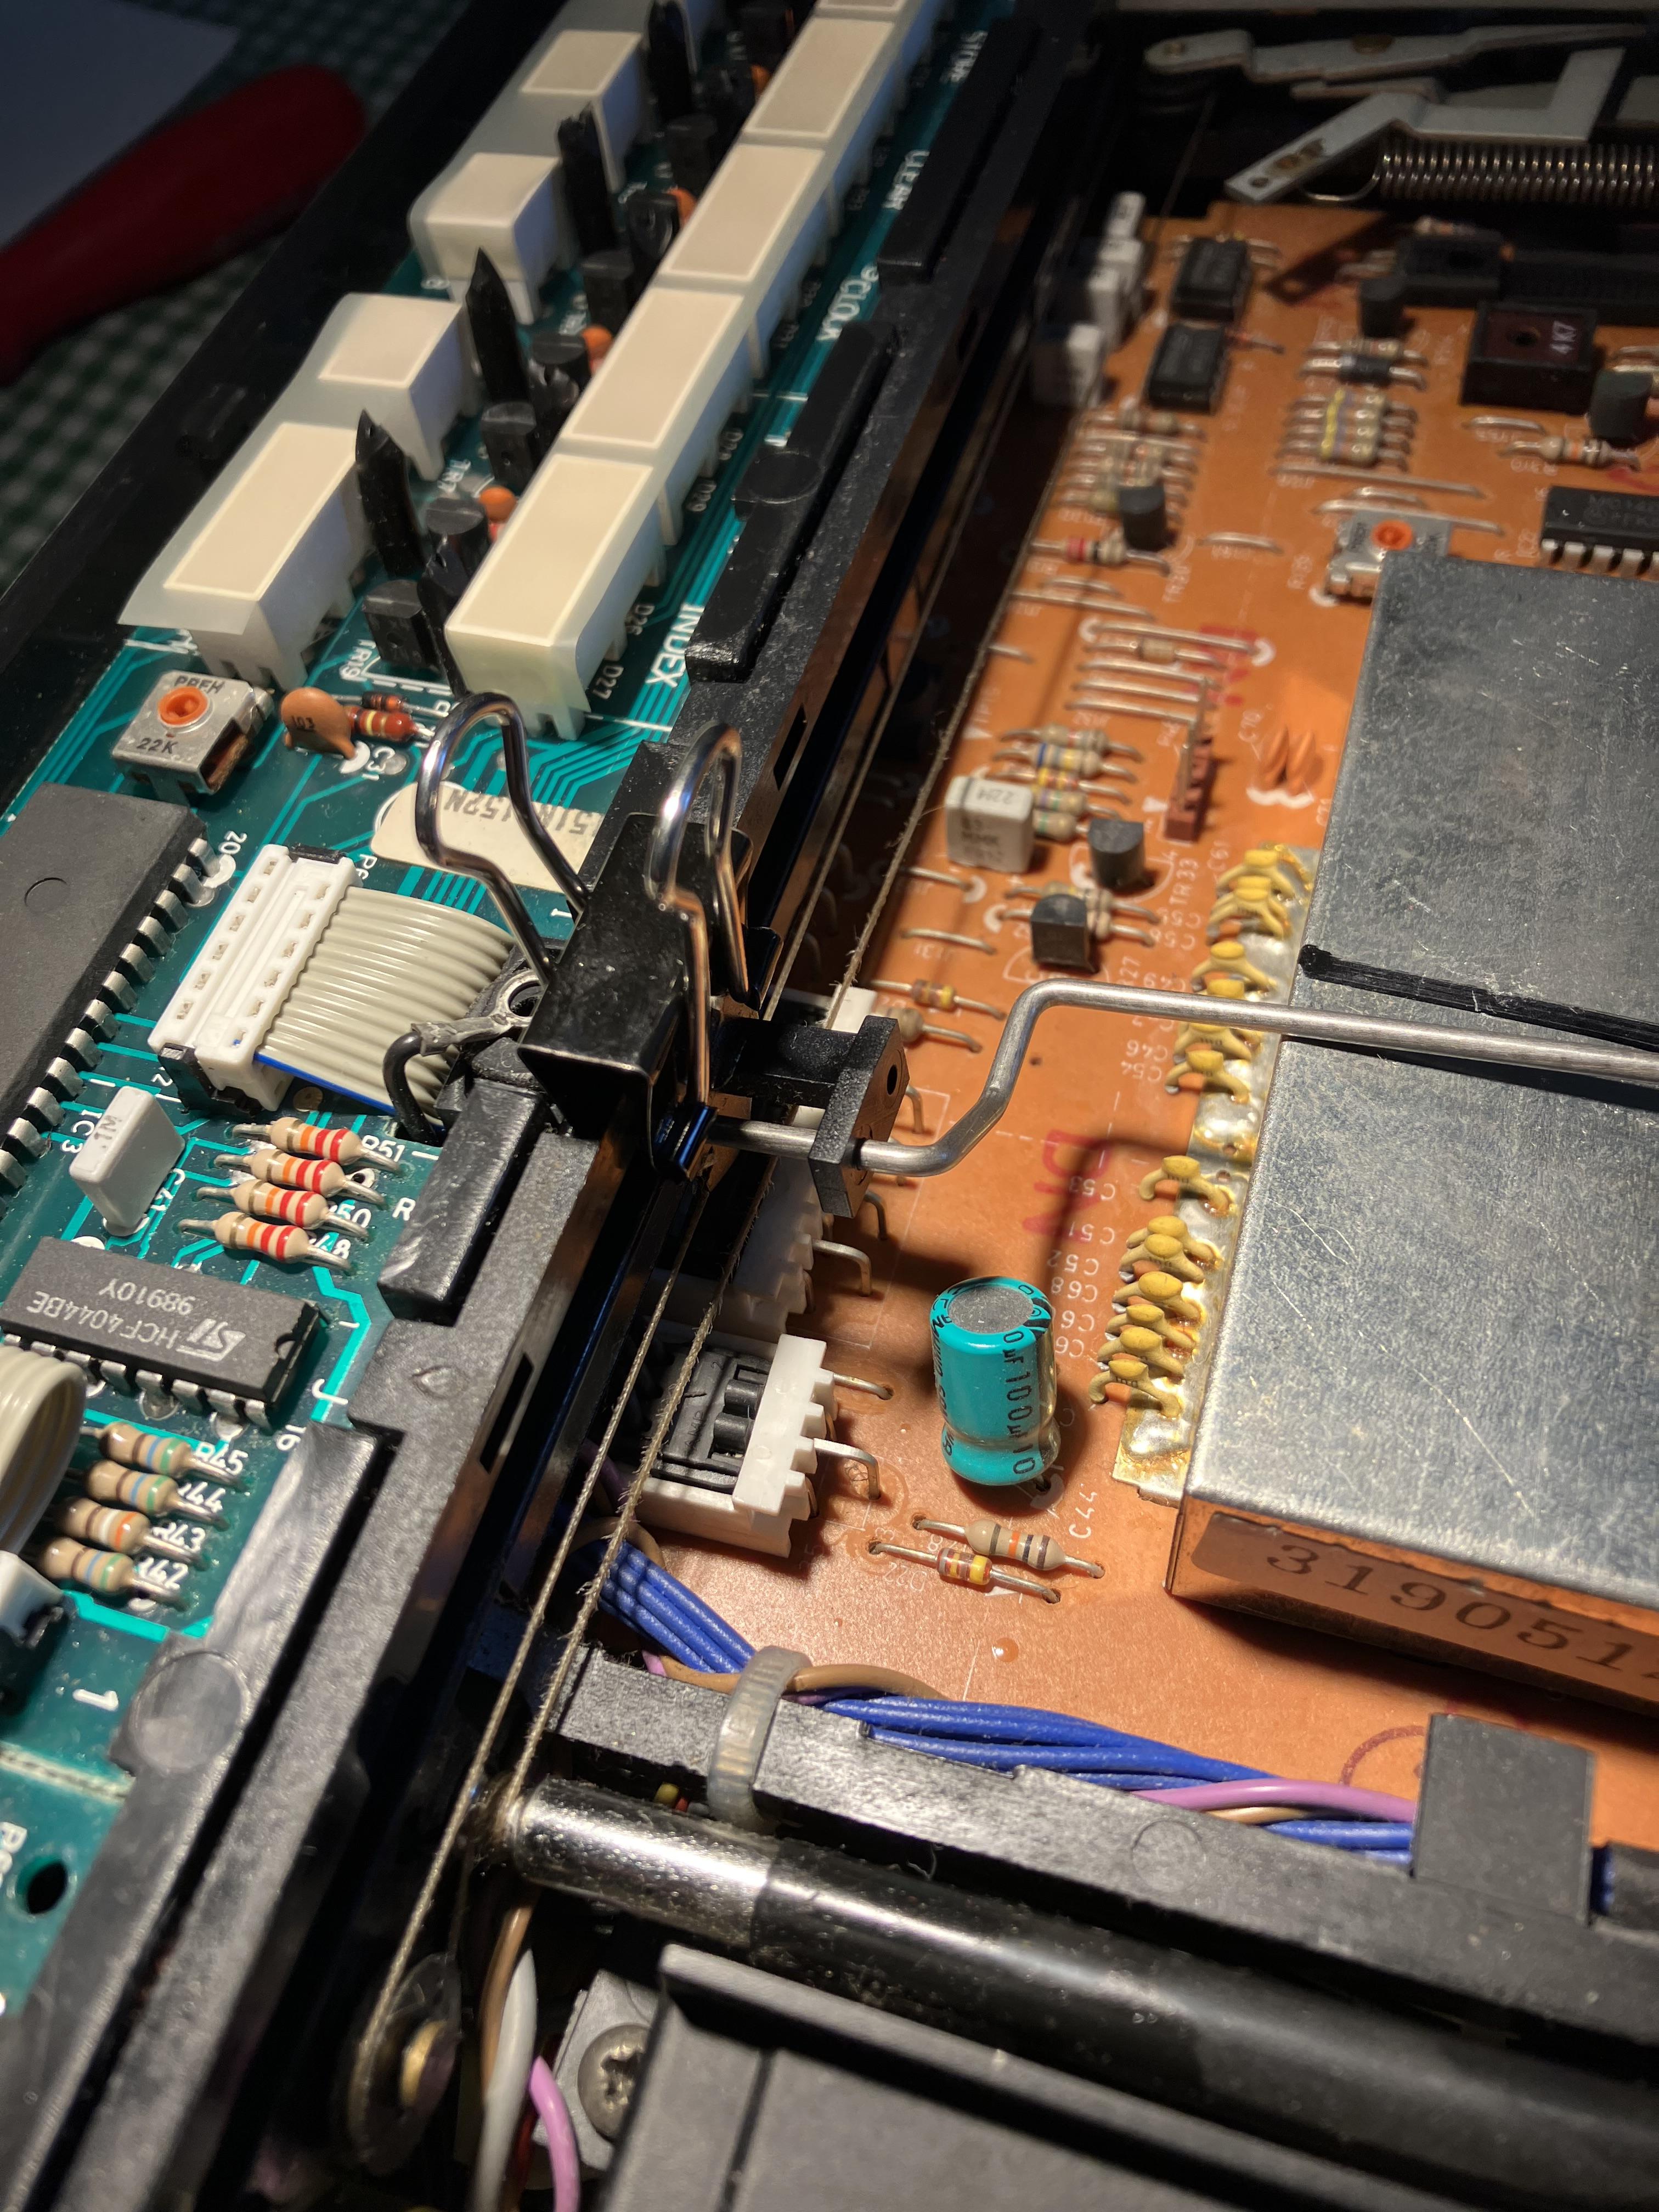
The faults are a sticking CD door and loose top panels (I re-glued the lower panel approx 10 year’s ago and it is still secure). I removed the glass panels and centre panel, then opened the unit up and realised that the service position support arm is missing, hence had to prop the lid against a box to work on it! You can see the loose CD door string hanging down:

Close up:
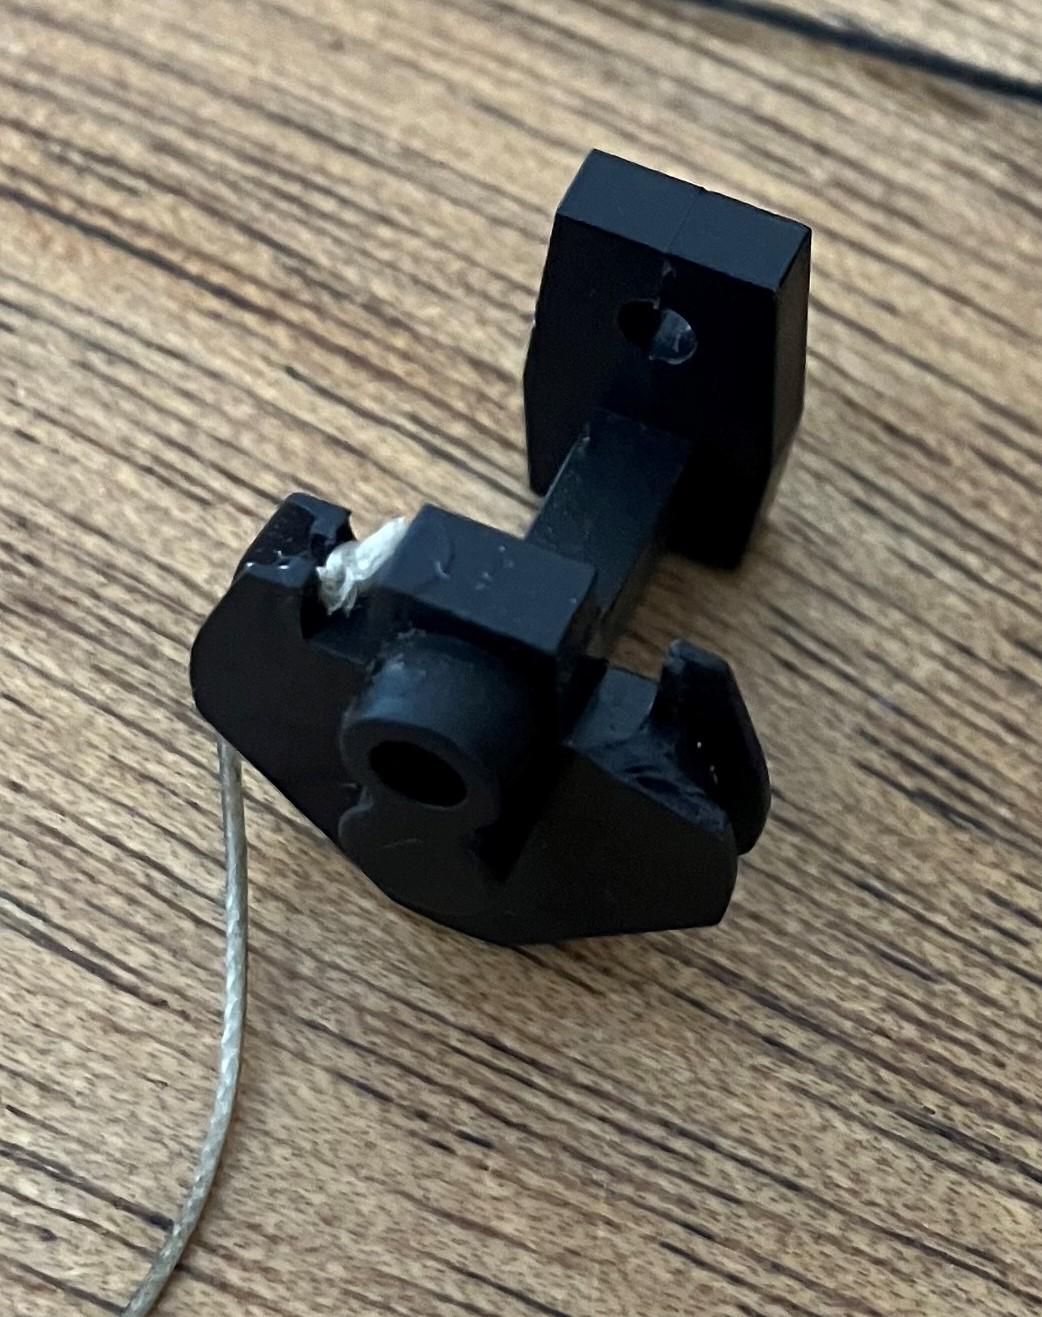
I then removed the CD door to make access easier, and realised that the little plastic sliding clip is broken where one end of the CD door string should attach! I left the other end of the string in place so you can see how it should look.

So clearly this repair is a bit trickier than I anticipated!
Two immediate thoughts:
- I wish I had kept the donor (‘Christmas tree’) BC9000 that I got rid of a few years ago – I could have transferred parts across.
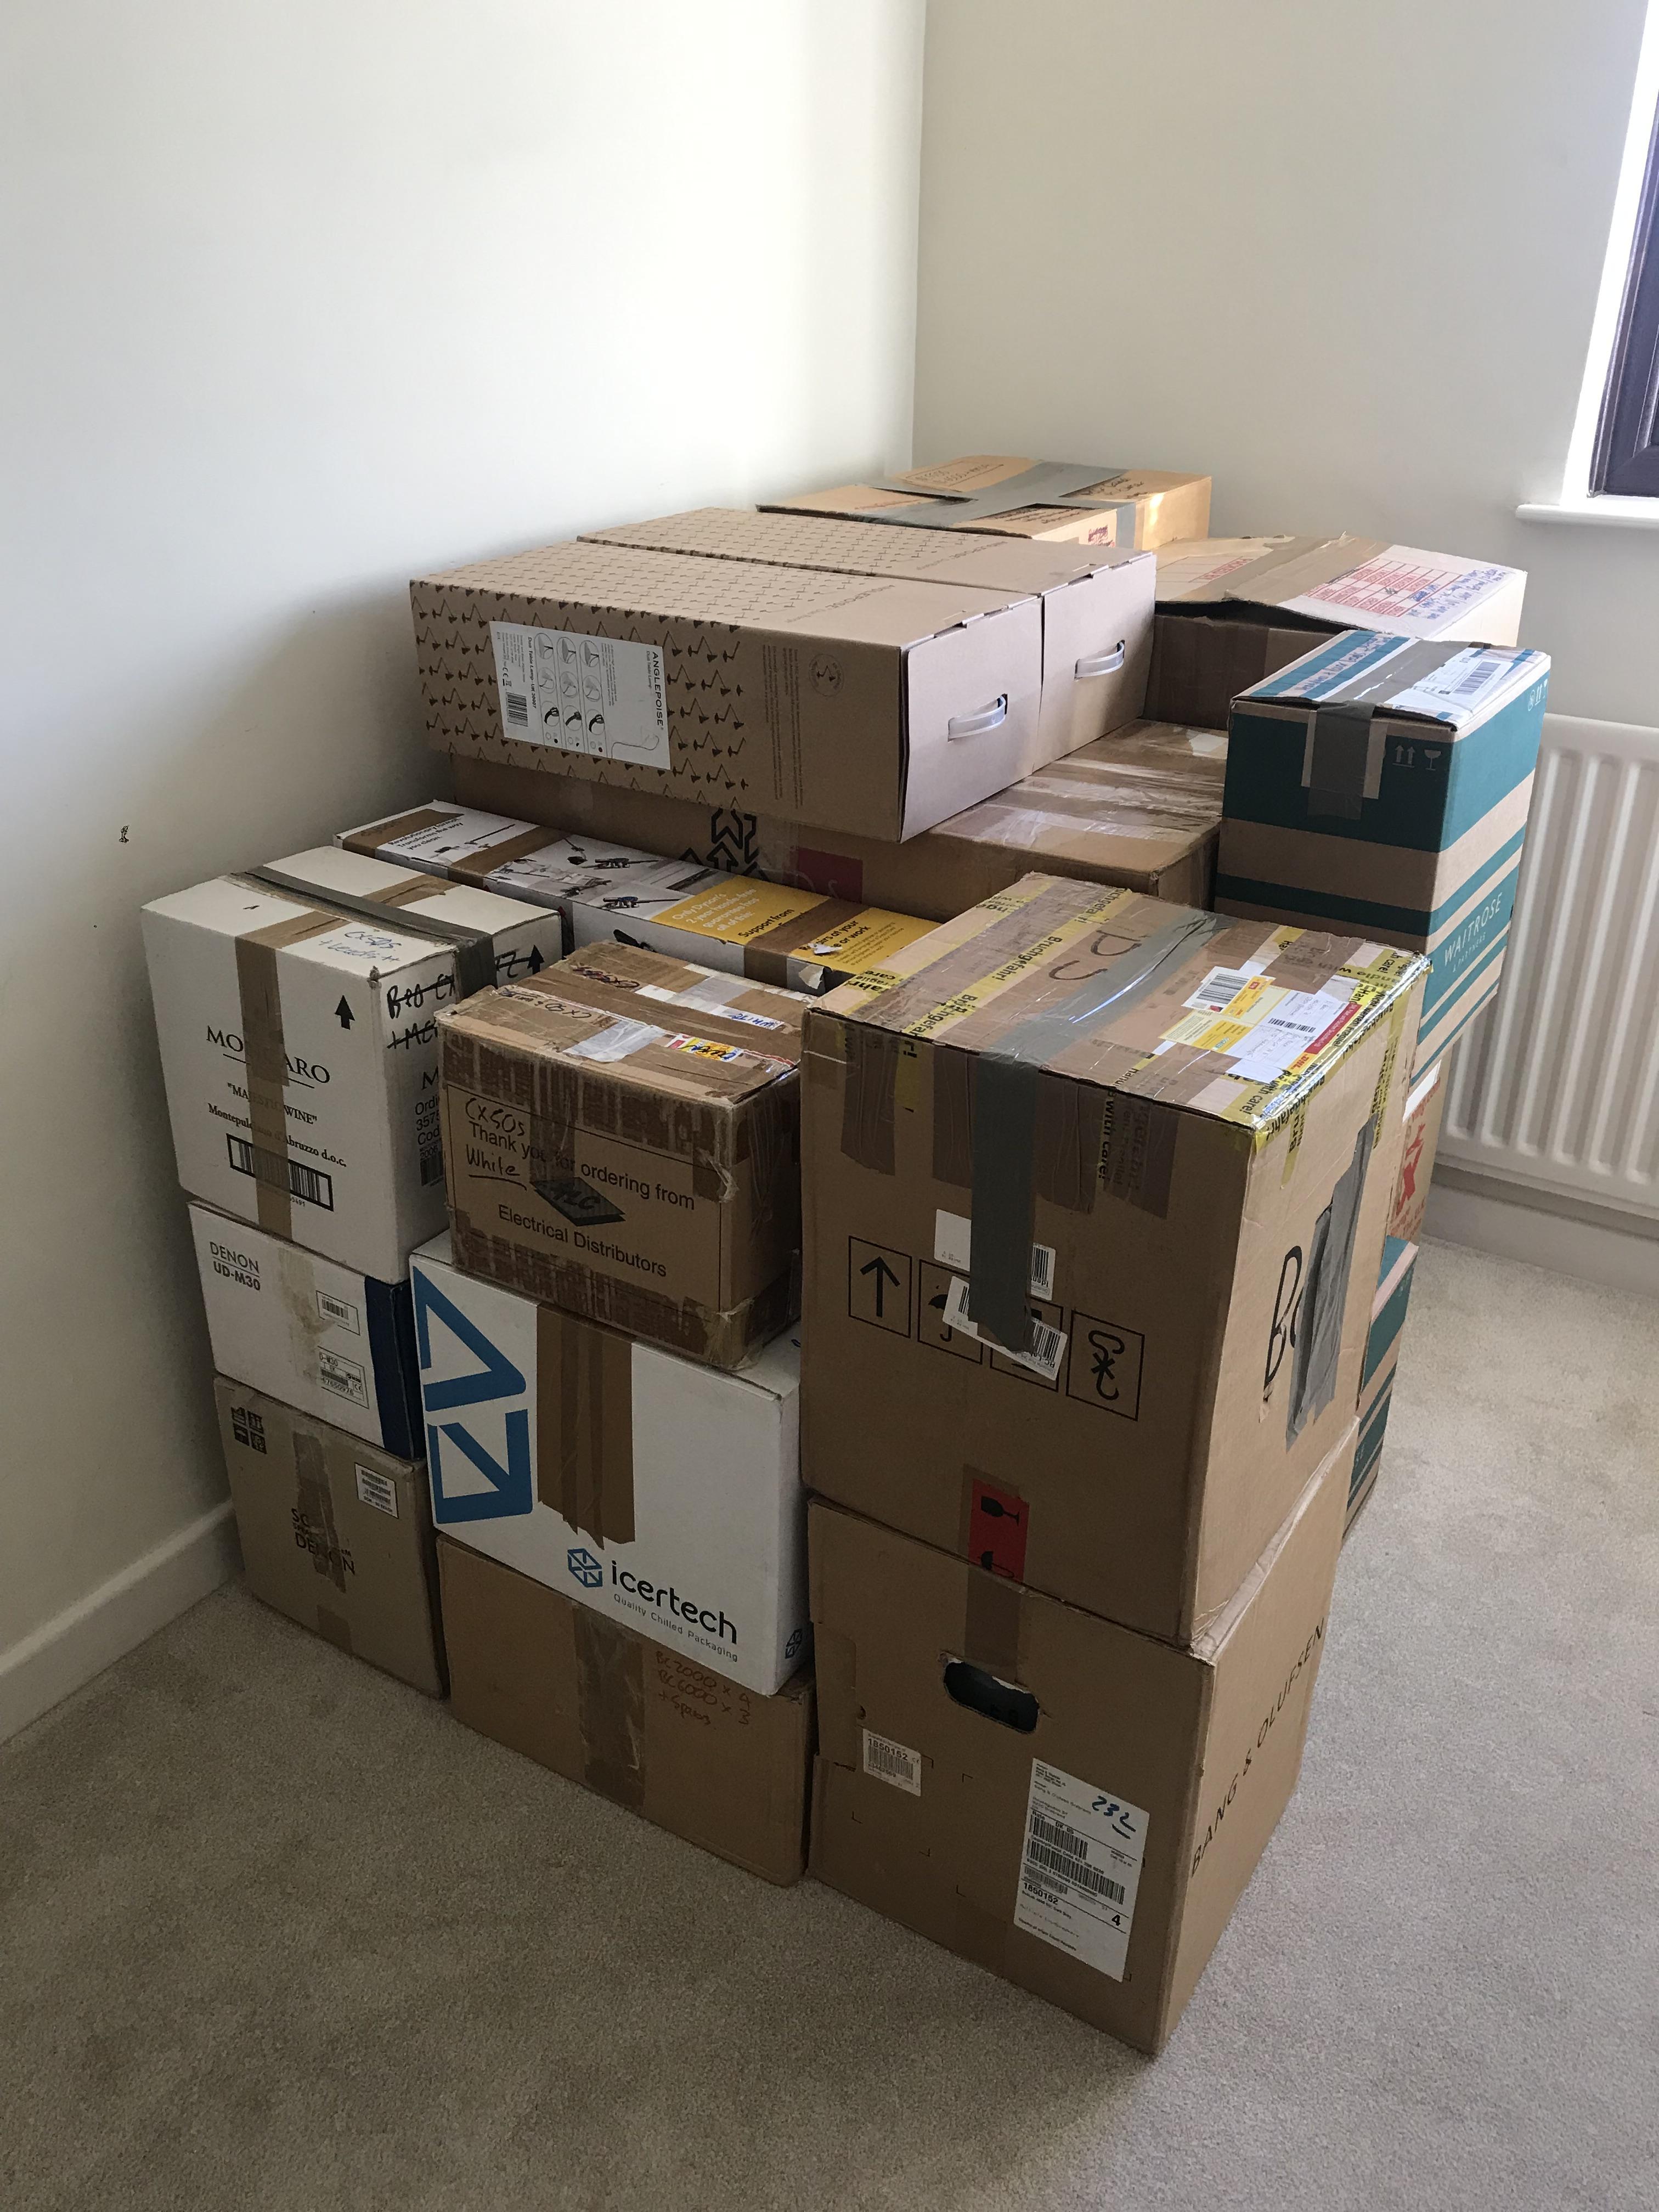
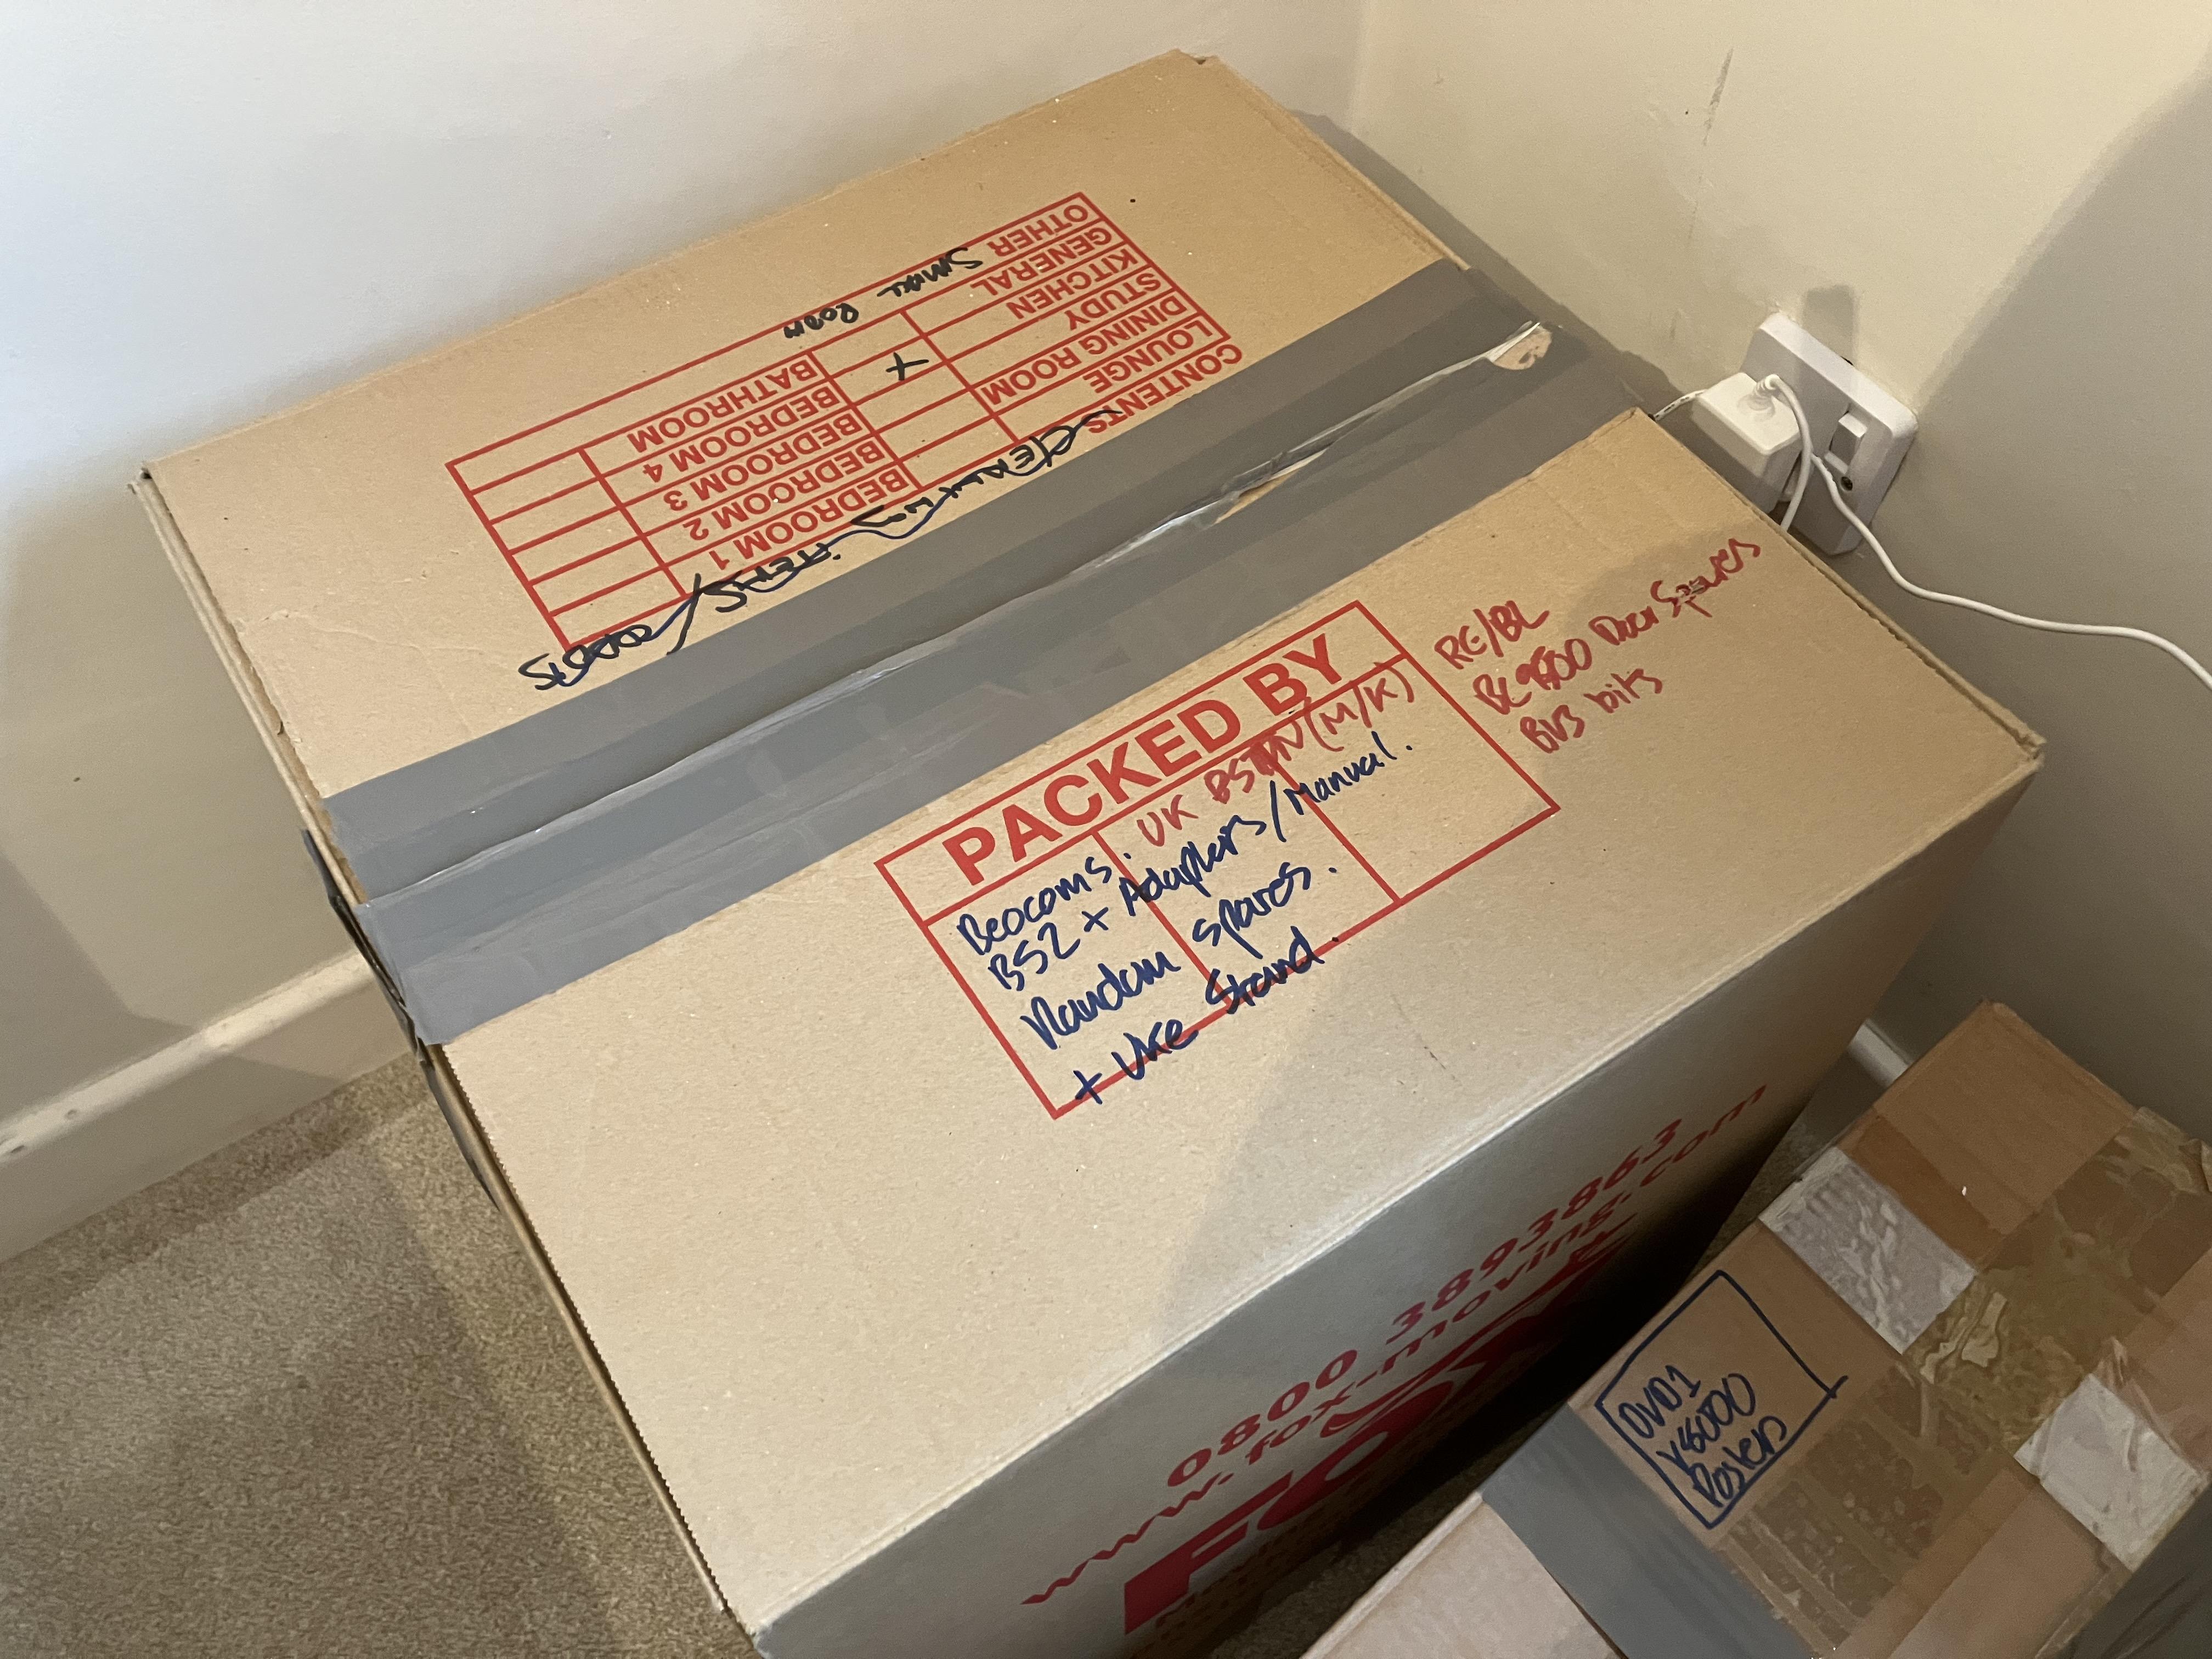
- Again several years ago, I remember purchasing (on eBay) a ‘BeoCenter 9500 door string replacement kit’, thinking that I would be sure to need it one day. I think it even included new plastic sliders. The problem is that it is in one of these boxes:
What the above photo doesn’t show is that there are now several more boxes on top and all around (not all B&O) plus a precariously balanced BL3500, BL2000 and a partially dismantled Beoplay V1-32 propped against the side. I can barely enter the room!
So I will try to muster the energy to delve into the boxes again – I really must label them in much more detail.
I am also waiting for ‘super glue gel’ to arrive to re-stick the upper glass panel, so I can’t even crack on with that task while I procrastinate about the boxes.
To be continued ……. timeframe uncertain! ?
Location: Warwickshire, UK
My B&O Icons:
26 April 2023 at 06:00 #42809 MadskpGOLD Member
Looking forward to unboxing pictures of all the B&O black boxes you have in these large boxes ?
jokes aside I hope you find the spare part somewhere in there
Location: Denmark
26 April 2023 at 09:56 #42810Thanks Madskp – I think it’s a rainy day job, hence I can put it off until tomorrow and crack on today with all the other jobs I normally avoid: lawn mowing, vacuuming etc.
Any unboxing photos will be of me sat in the middle of a pile of cardboard and wrapping with my head in my hands, wishing that I had been far more organised when I packed it all away! ?
Location: Warwickshire, UK
My B&O Icons:
26 April 2023 at 11:31 #42811MadskpGOLD MemberAny unboxing photos will be of me sat in the middle of a pile of cardboard and wrapping with my head in my hands, wishing that I had been far more organised when I packed it all away!
Haven’t we all been there 🙂
Location: Denmark
27 April 2023 at 17:20 #42812So despite hurting my back yesterday mowing the lawn I have today commenced the great box search!
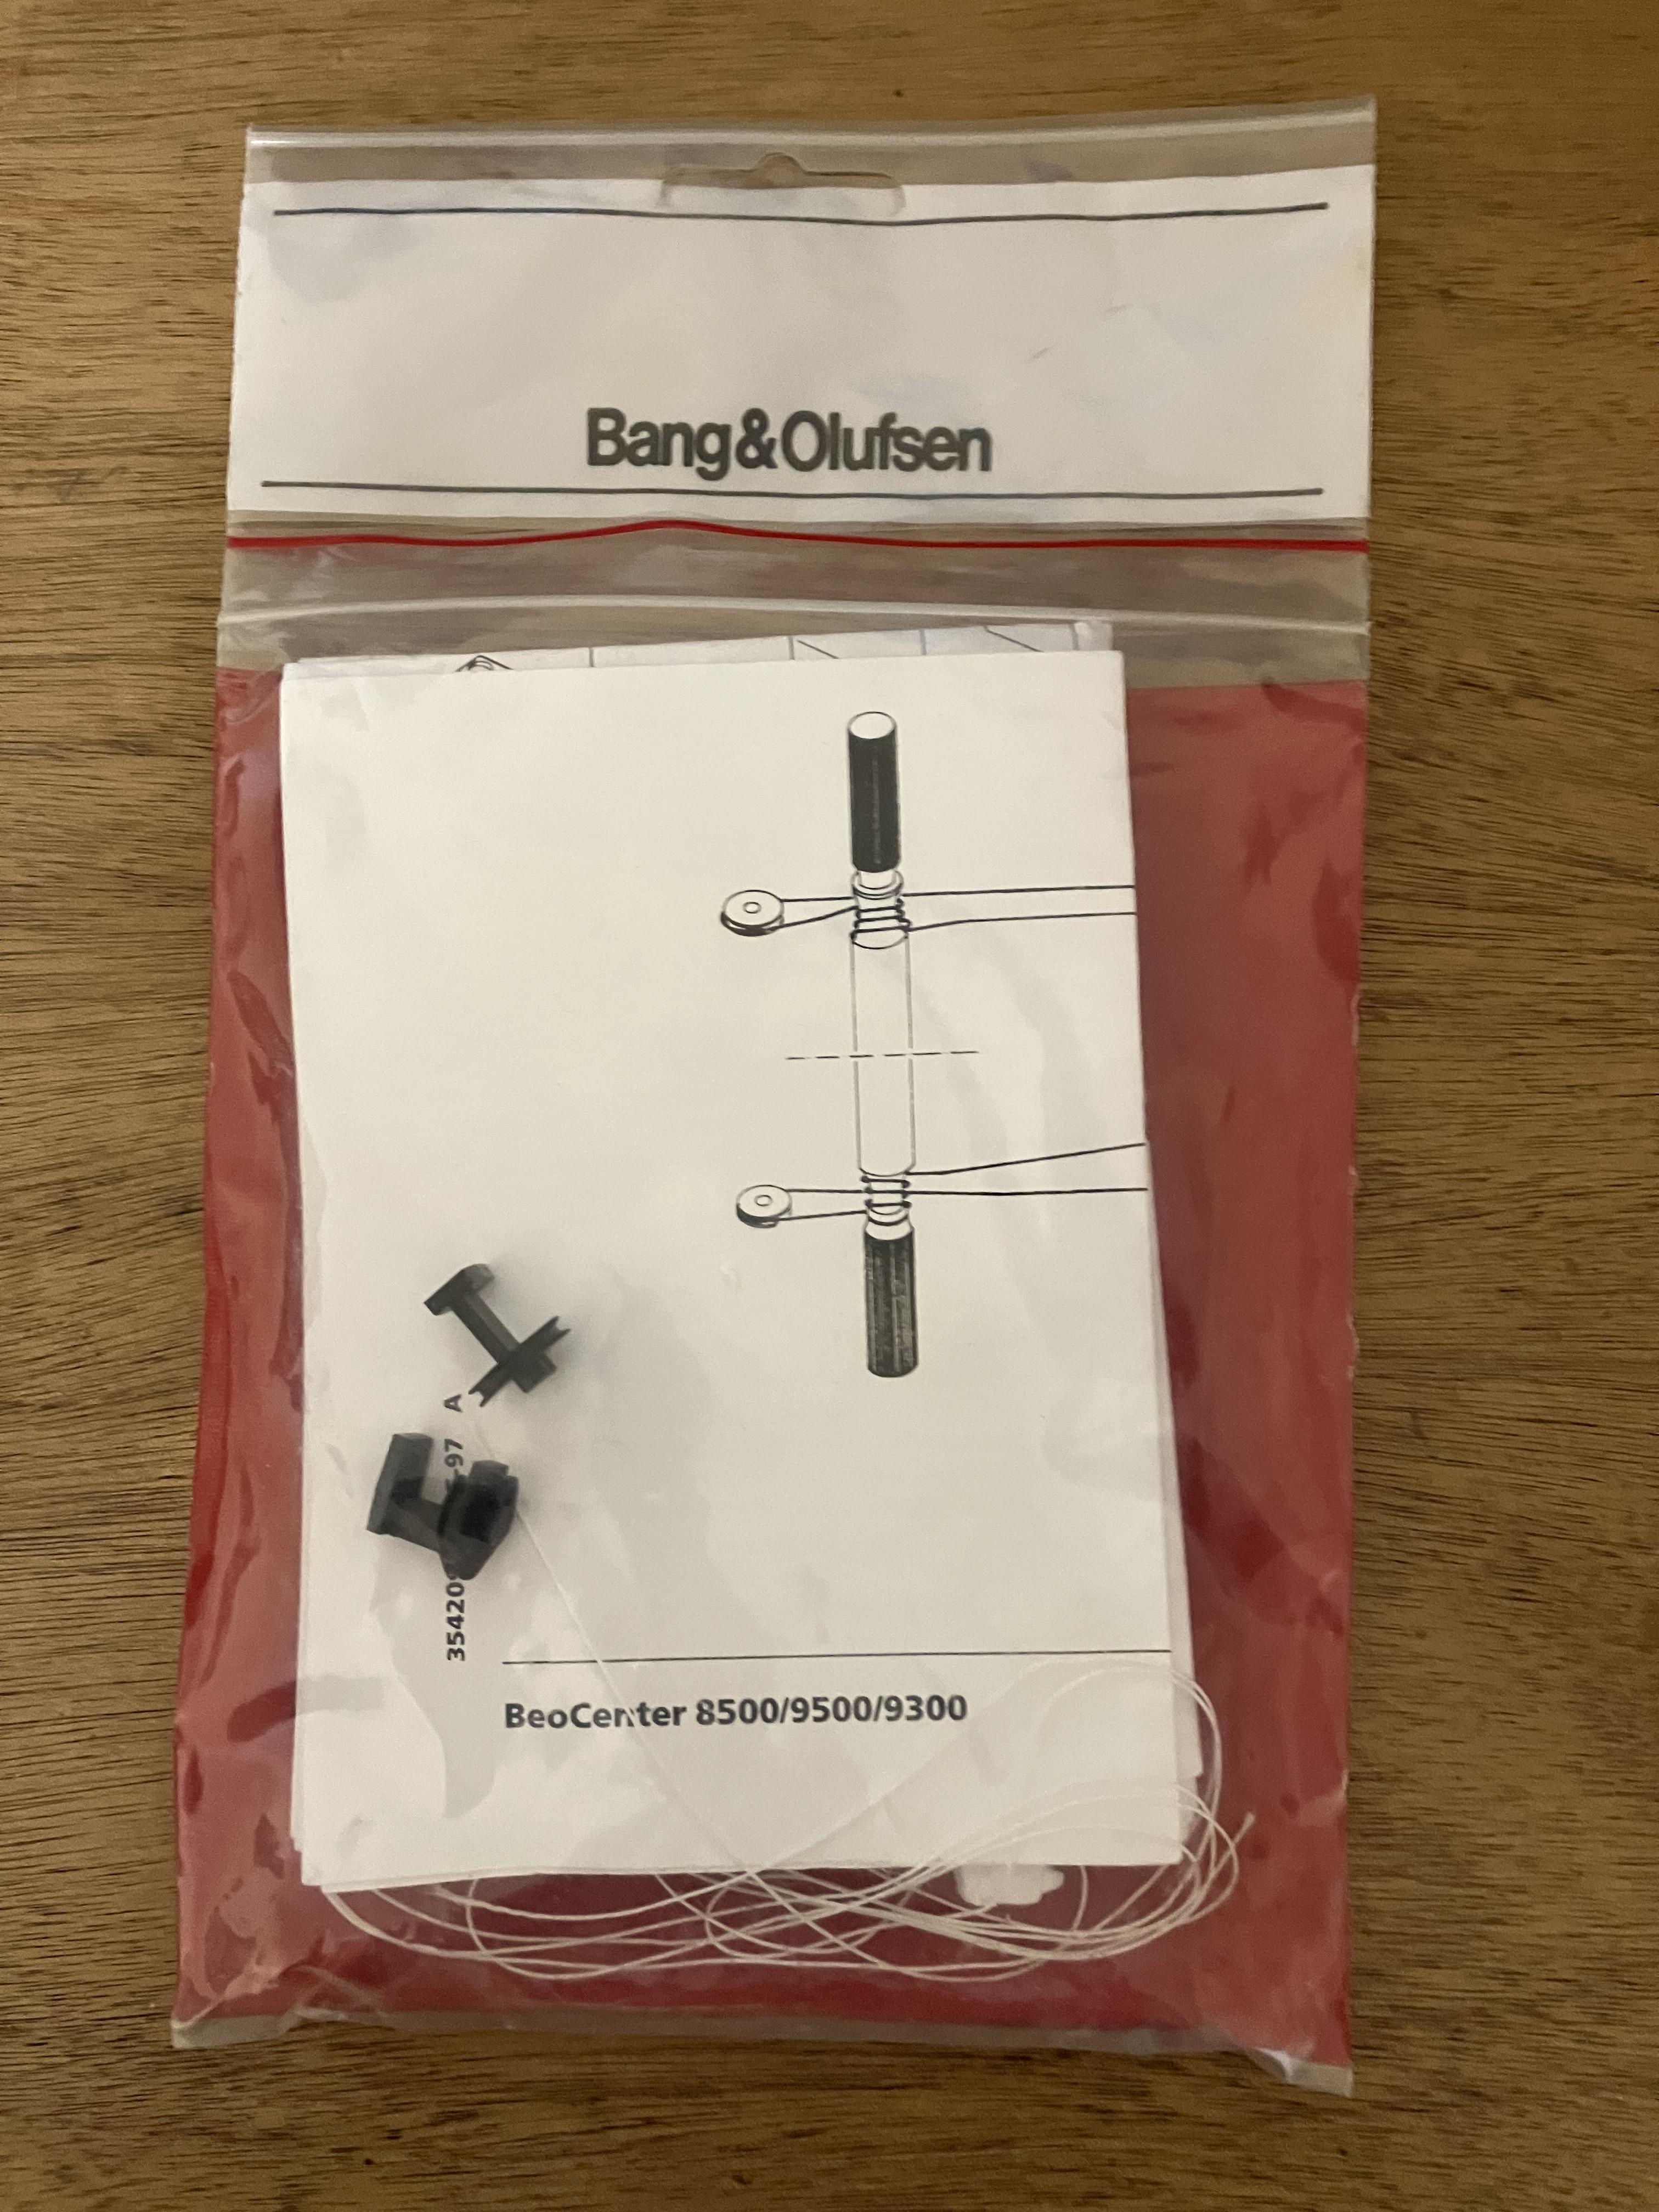
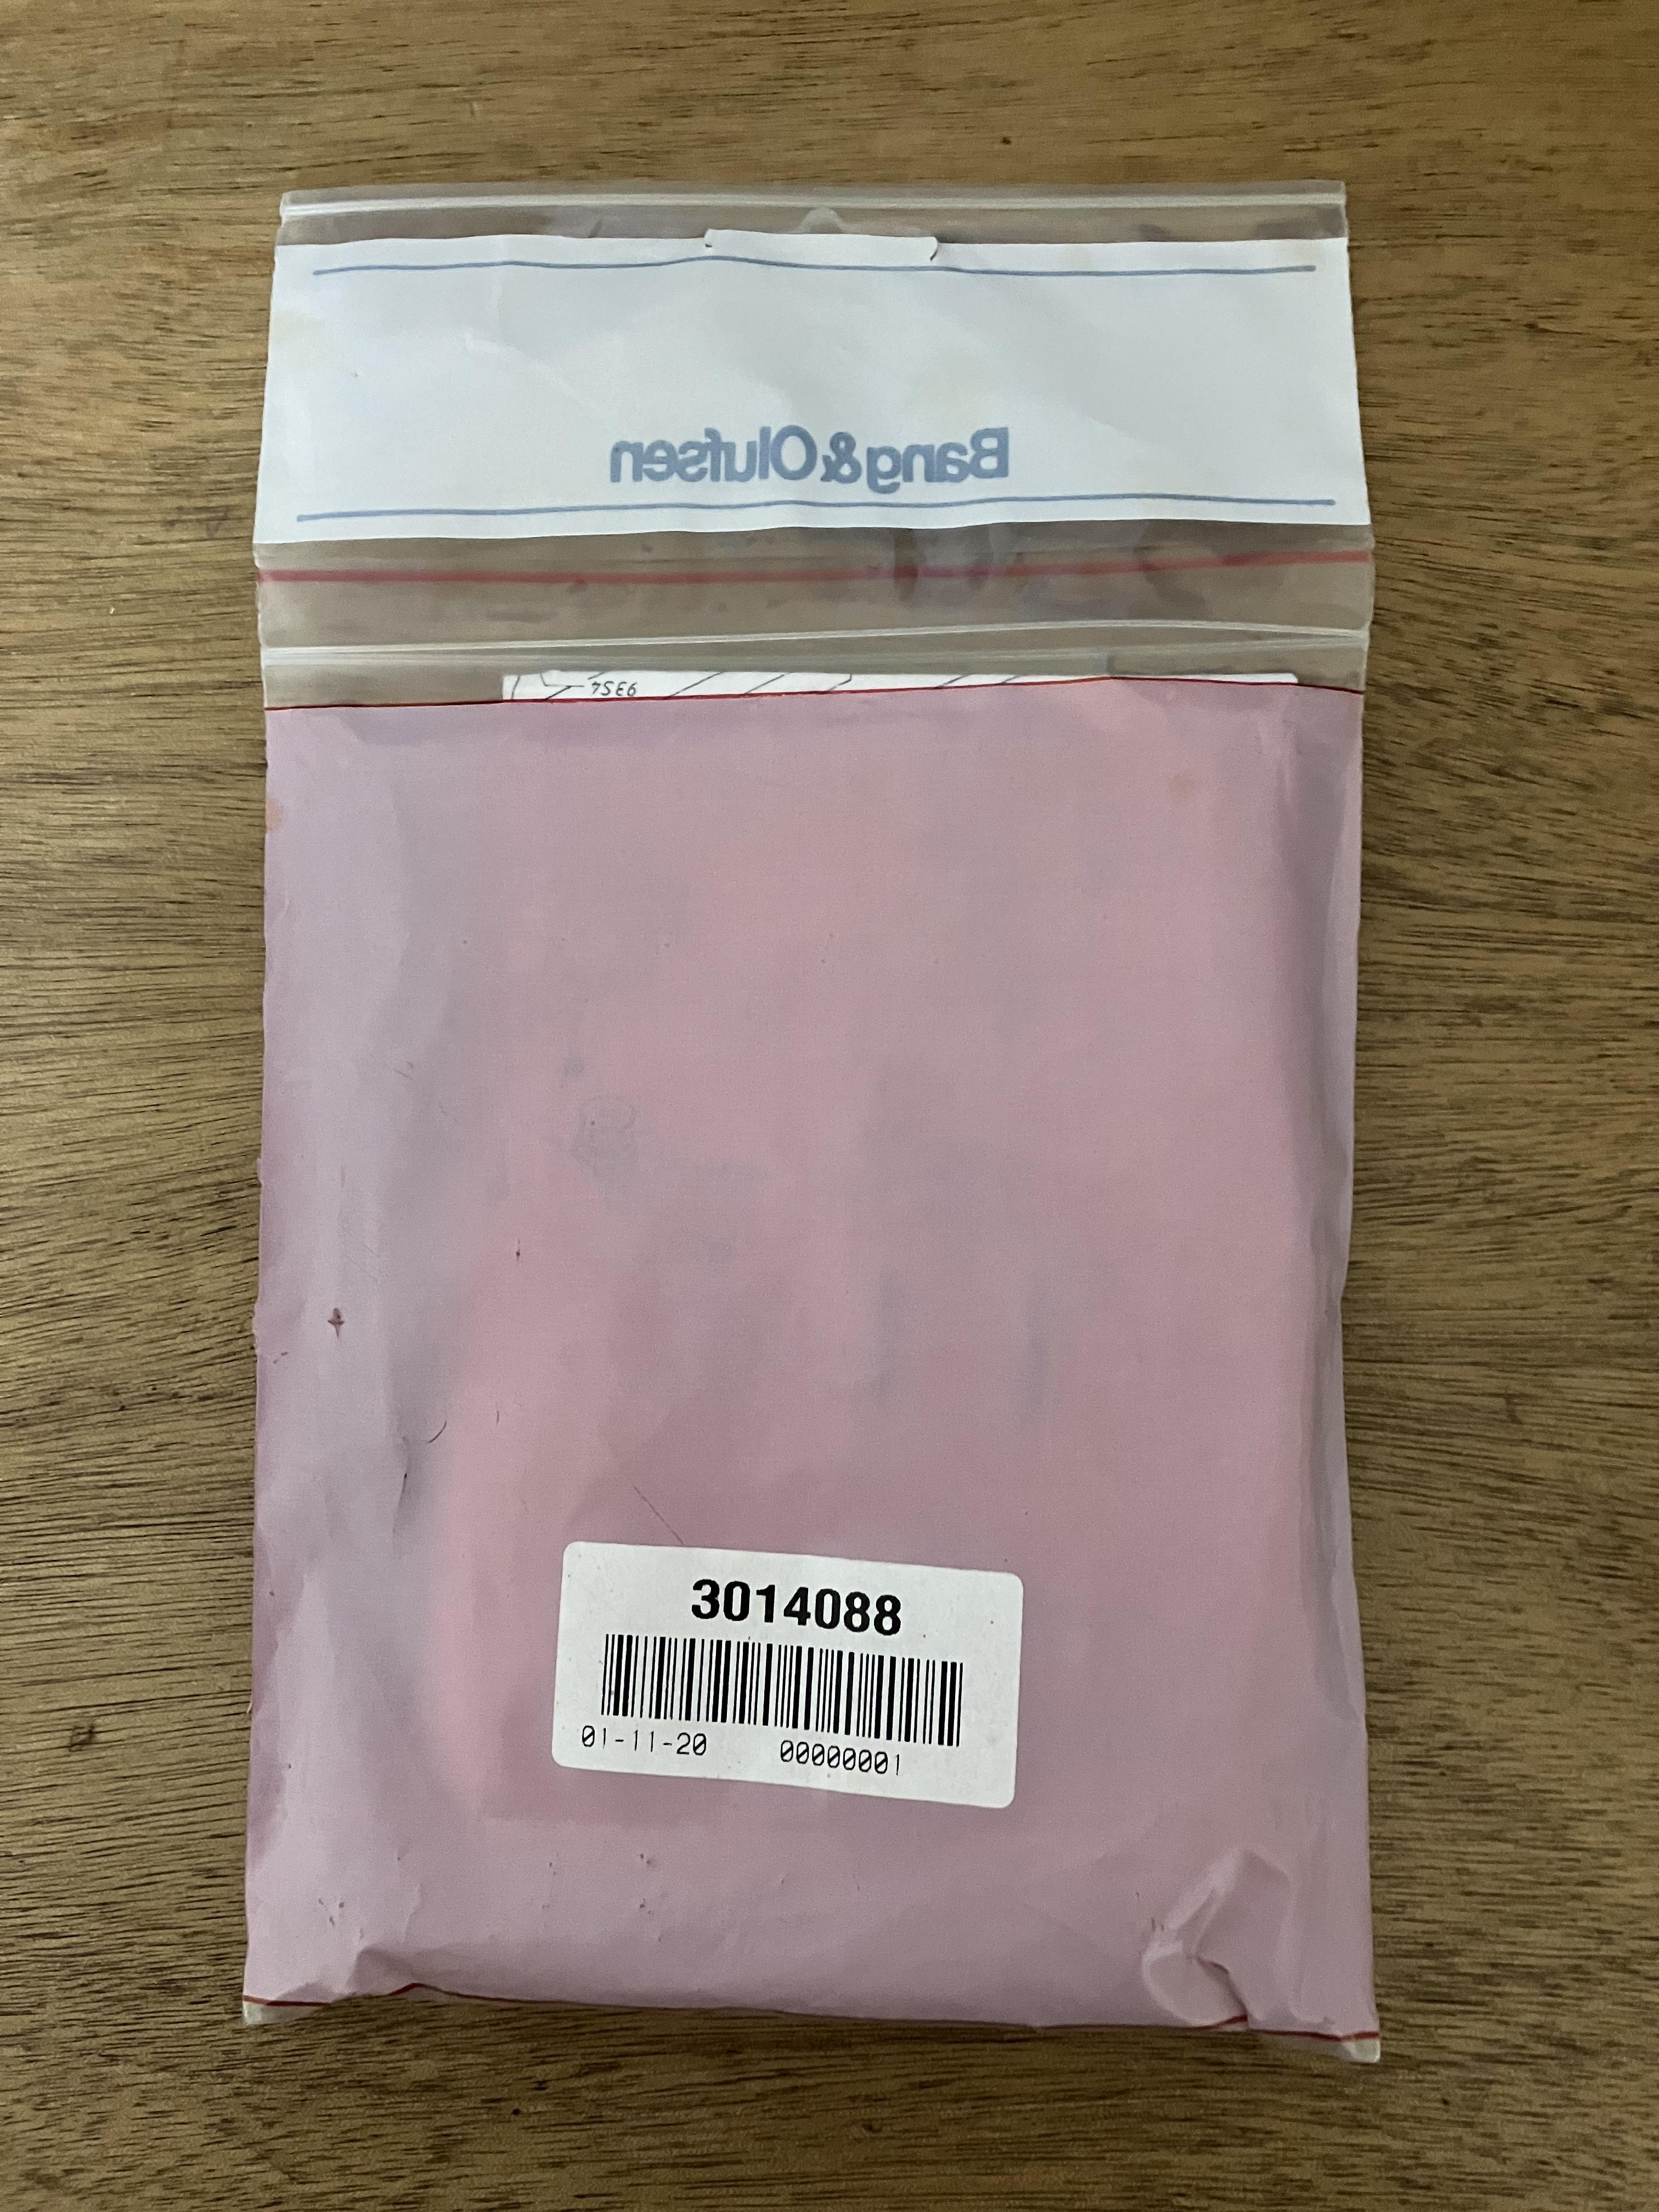
After four hours of careful extraction, unwrapping and disappointment, I have uncovered the very last box and saw this red writing on the top: (I was organised after all!)
And in a little box inside the box I found this:
Reverse view, just in case anyone else finds the part number useful!
I am so relieved – I was beginning to doubt myself and had even searched out the eBay confirmation email from when I bought it. (this confirmed that it cost me £4.10 exactly ten years ago!)
Anyway, I need to rebuild the box pile and then go out for a meal to celebrate the find. I will start the CD-door re-stringing exercise in the next few days and will let you know how it goes!
Location: Warwickshire, UK
My B&O Icons:
27 April 2023 at 18:00 #42813I have attached the door string fitting instructions that were included with the kit – basically they are an extract from the service manual.
I will also upload to the manual library.
Location: Warwickshire, UK
My B&O Icons:
27 April 2023 at 18:15 #42814MadskpGOLD MemberSo despite hurting my back yesterday mowing the lawn I have today commenced the great box search! After four hours of careful extraction, unwrapping and disappointment, I have uncovered the very last box and saw this red writing on the top: (I was organised after all!)
great that you found the part even if it was the last box. Hpefully it wasn’t all disapointment looking through the boxes? At least you find the two IR eyes we were taking about in the other thread.
Location: Denmark
27 April 2023 at 18:32 #42815Hpefully it wasn’t all disapointment looking through the boxes?
Not at all! I found lots of useful stuff that I look forward to unwrapping again when we eventually find a house to buy. I am not sure whether I have more phones or remotes …
Anyway, off to the pub! ???
Location: Warwickshire, UK
My B&O Icons:
30 April 2023 at 16:35 #42816So I have spent quite a few hours getting the BC9500 up and running.
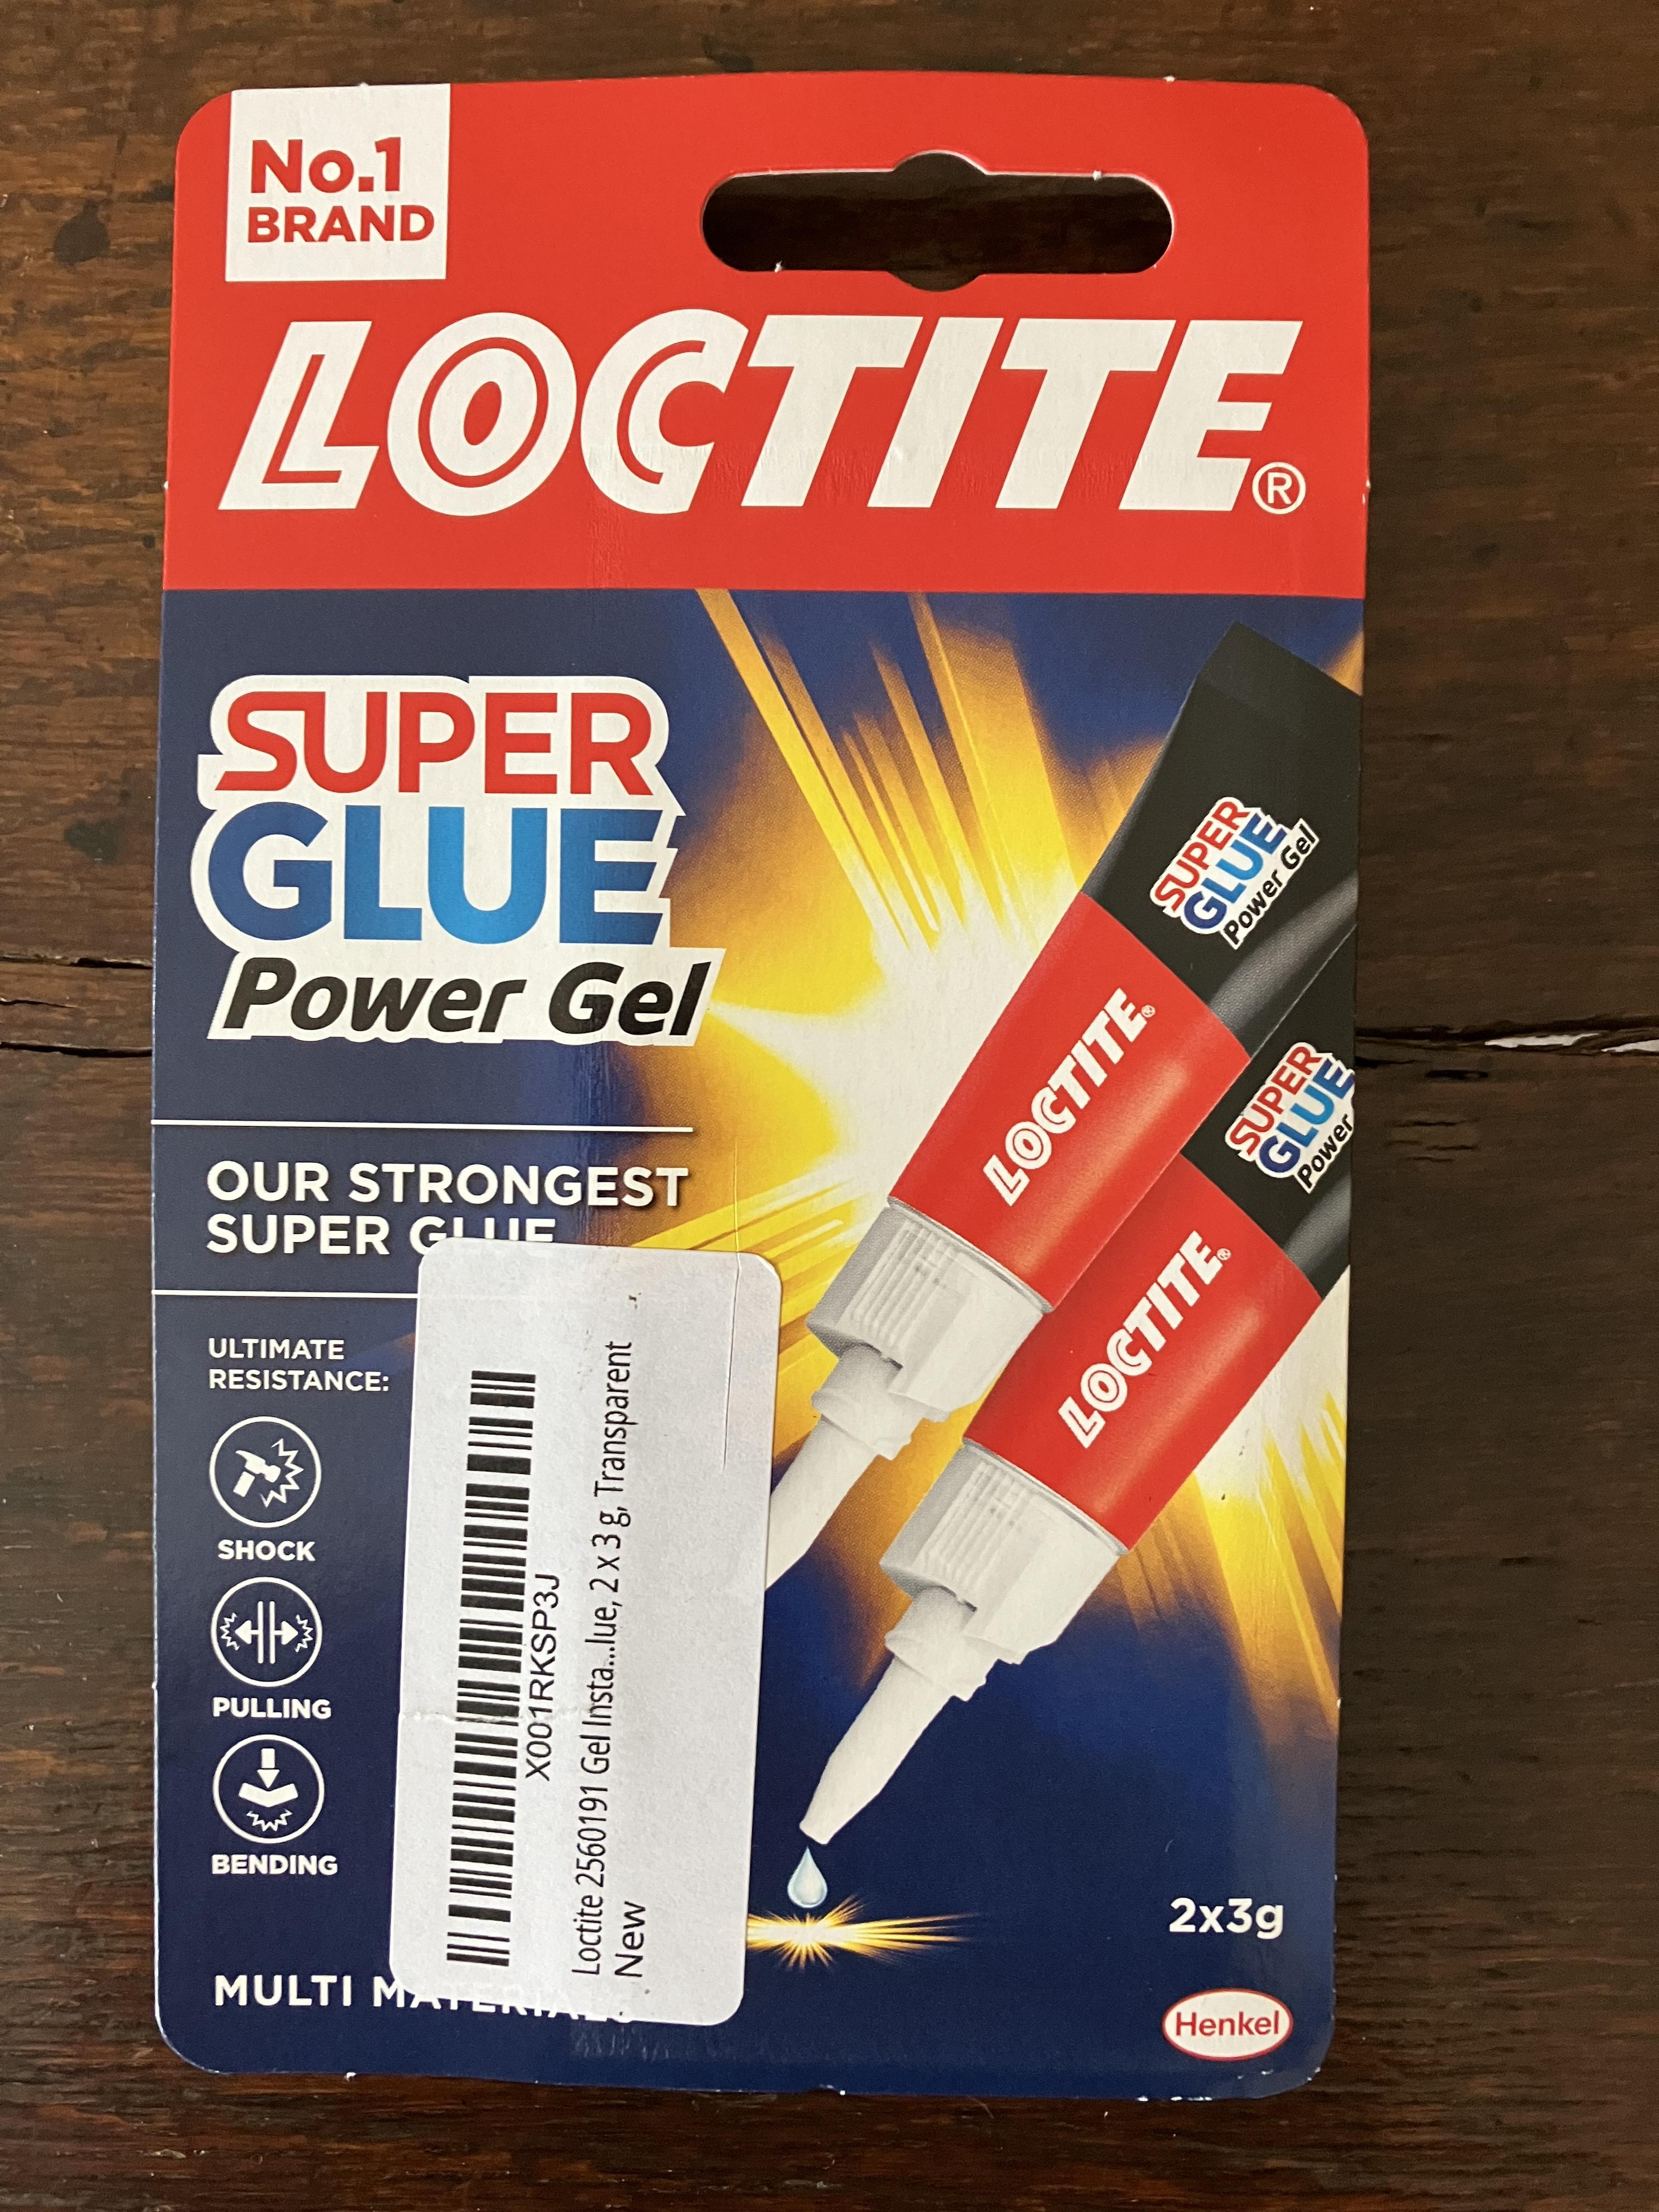
I first re-stuck the upper glass panel. I used the ‘gluing’ technique as this has worked well for me in the past. I cleaned up the panel and plastic surrounds, leaving the old 2-sided tape in-situ and merely brushing off the loose bits of perished tape. I then placed the glass panel face down on a totally flat surface. I fixed the two end (U shaped) pieces of plastic first, because this enables you to then centre the middle strips and leave an equal small gap each side. I simply spread a thin bead of Loctite Super Glue Gel along the centre of the tape on the reverse of the glass panel, and then firmly pressed the plastic strips into place, holding each for about 30 seconds. When you do the centre strips it is important to note that they are not interchangeable – the one closest to the centre panel has a chamfer along its edge.
Here’s the glue that I used – I needed both 3g tubes to glue the complete upper glass:
I then moved onto the CD door strings. First I tried simply replacing the broken plastic slider from the earlier photo. Although I managed this successfully, the door would stick when opening and closing. I then removed both strings and gave the entire system a good clean – rollers, drive shaft and sliding grooves. Upon re-assembly it still stuck!
Whilst observing the door opening and closing with the BeoCenter in the service position, I then noticed that the upper CD string was fouling on the drive shaft. I think the string was sticky/greasy (perhaps it had been ‘lubricated’?) and was sticking to the drive shaft. Basically it couldn’t slide axially, hence the three loops moved to the outer edge of the drive shaft and then started wrapping over itself and jamming.
Anyway, I decided to replace the strings and thankfully this cured the fault. The door is still slower than the tape door but this is to be expected because the door also moves the CD clamper mechanism in and out. I also cleaned and lubricated this mechanism to make the door’s task easier.
Many thanks to Beitie for the inspiration and also for his invaluable tip about painters tape which is very useful for holding ends of the string in tension whilst re-threading the rollers.
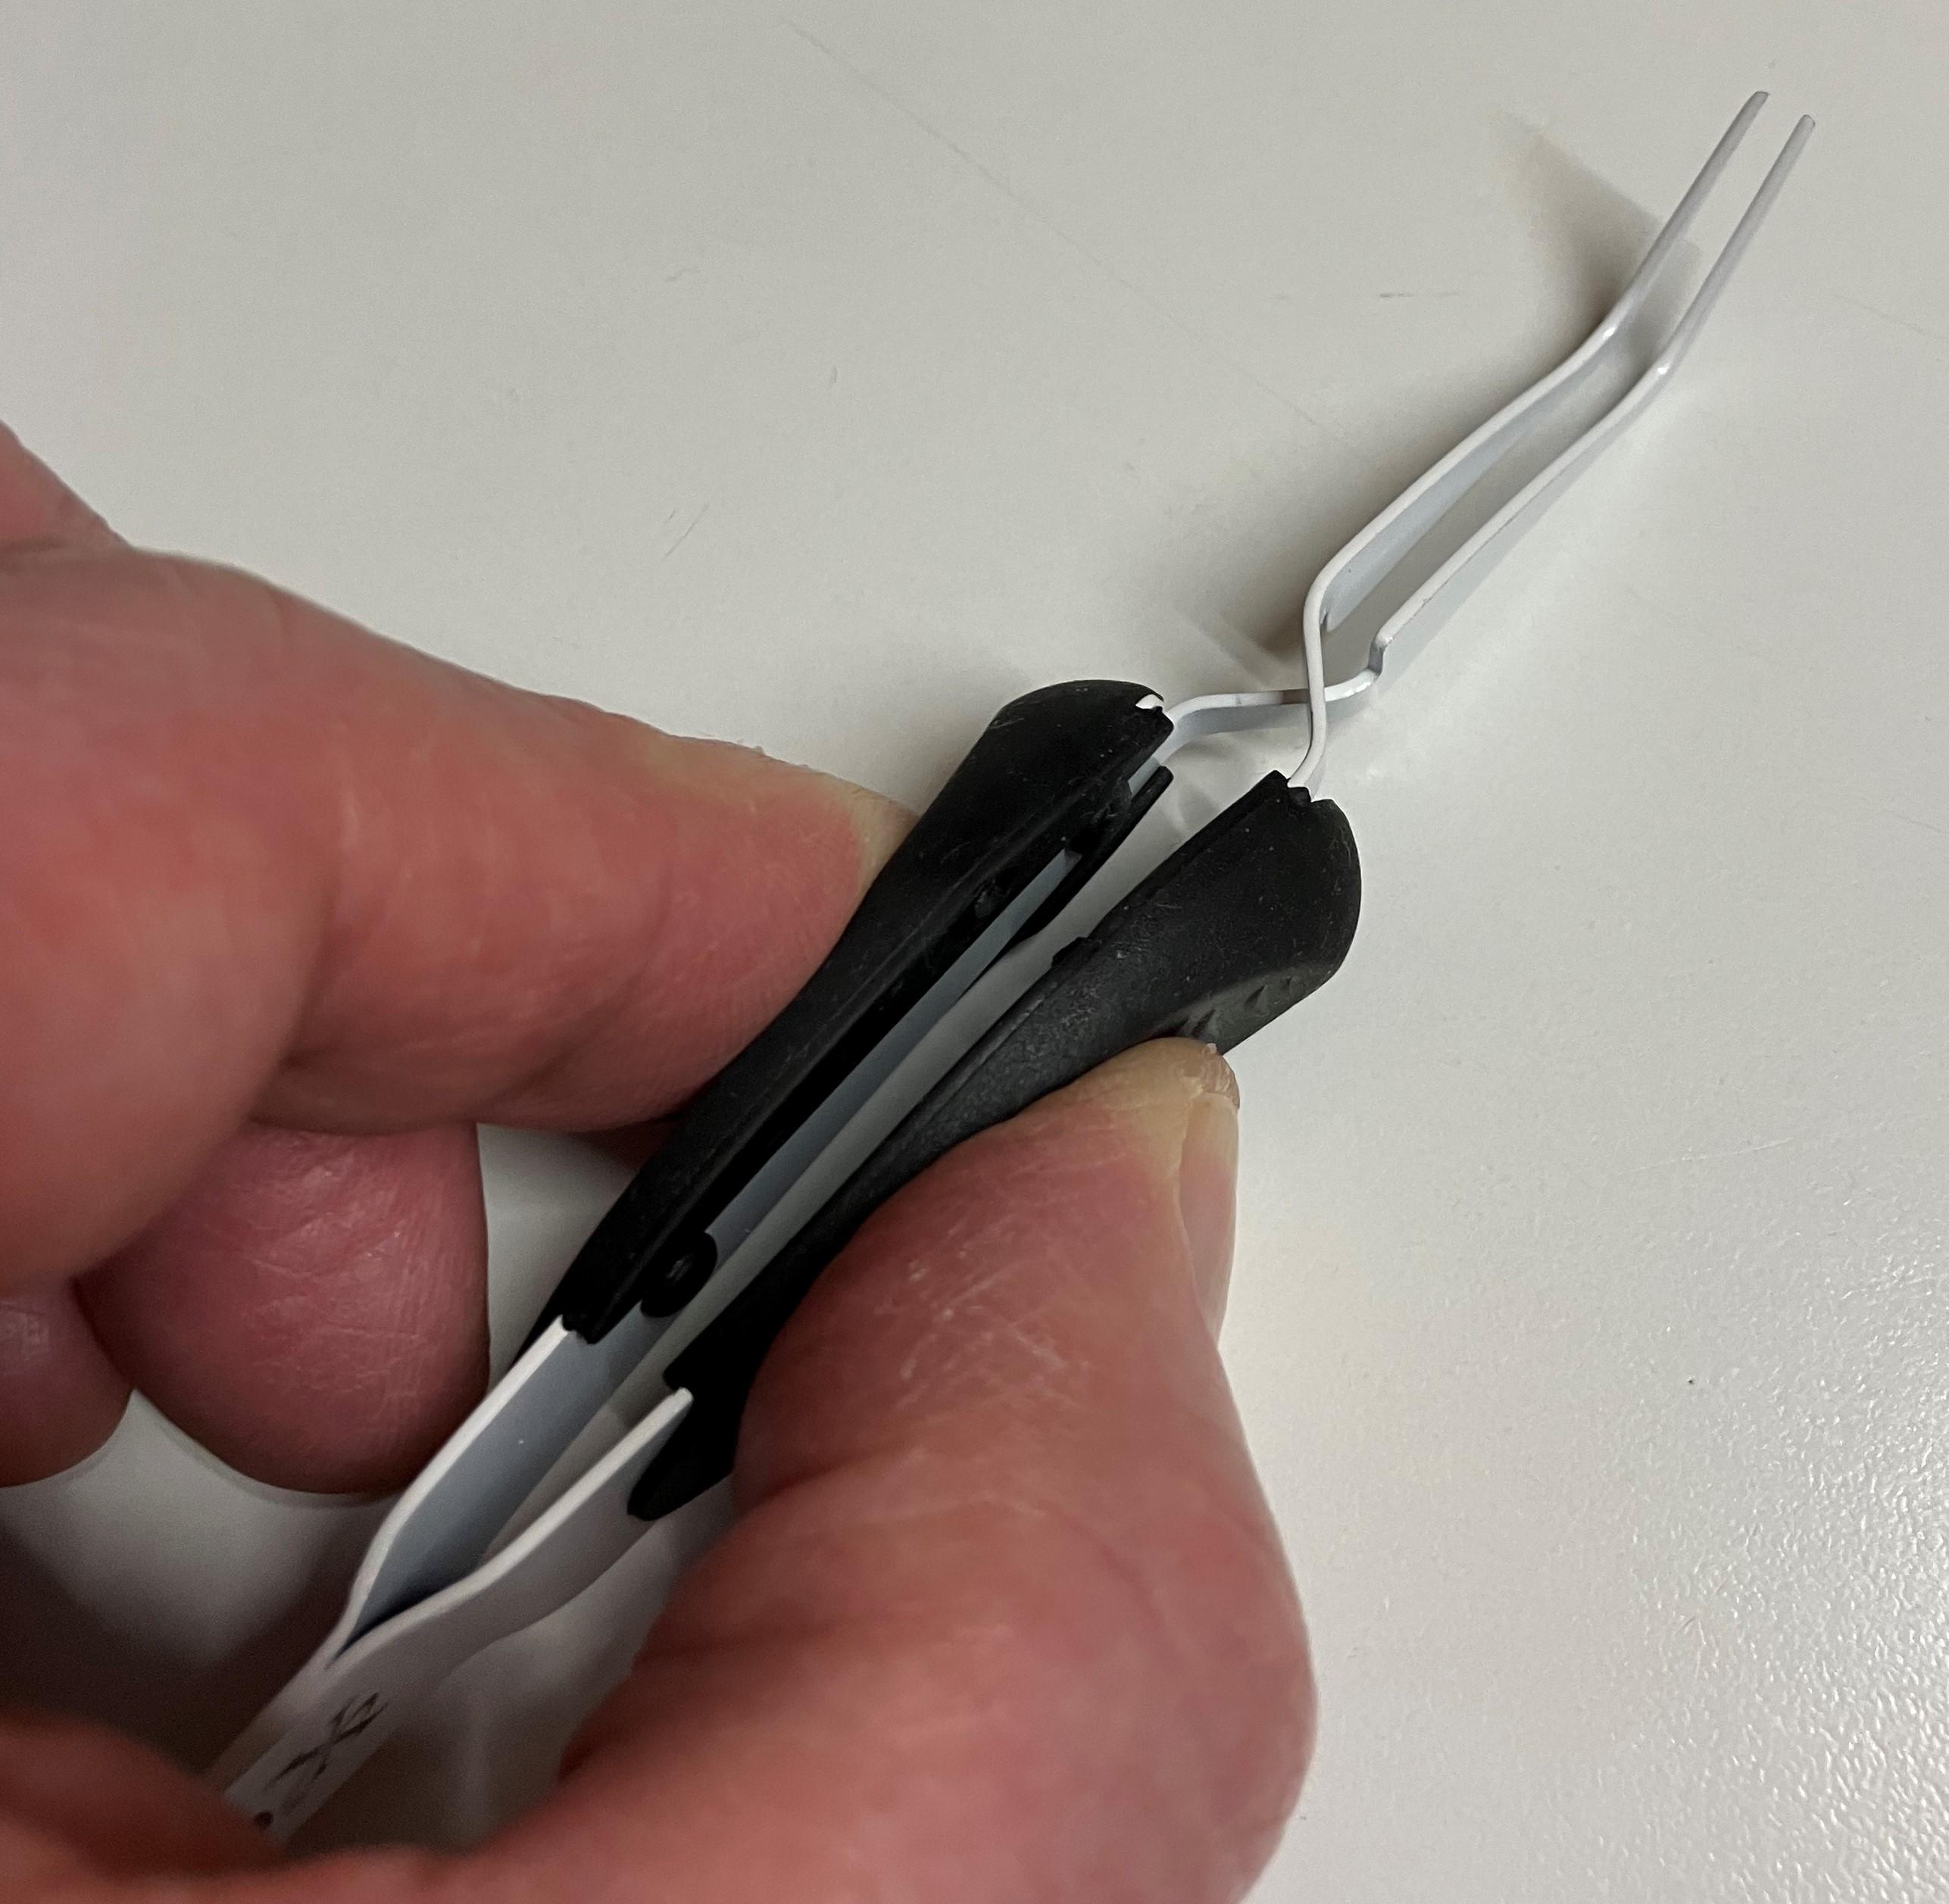
One other thing I found useful was using a small bulldog clip to hold one of the sliders in place whist re-threading the string on the other side. You can see it in this photo:
Also, just as I was finishing my wife noticed the difficulty of the task, went upstairs to her craft box and came back with these ‘crossing lock’ tweezers, which would have been very useful several hours earlier to move the tiny knotted ends of the drive cord into place! I will use these next time!

Anyway, it’s now all re-assembled and up and running, but I will test it over the next few days before taking back to my mother-in-law. I am using the A2 Active as a speaker connected to one of the Powerlink sockets.
Location: Warwickshire, UK
My B&O Icons:
21 May 2023 at 00:13 #42817Wow! Very well detailed, and so cool that you had replacement door kit parts! Thank you so much for documenting this process, and glad that you got it going!
I like the clip you used to keep the sliders in place. I had used painters tape, but neat to see other methods. The cross tweezers is nice. I found that a nice hook tool and tweezers were must haves for this job.
Location: Minnesota, USA
Favourite Product: Beocenter 9500
My B&O Icons:
2 July 2023 at 18:54 #42818I had some free time this weekend, and I wanted to spend some of that time exploring more on my Beocenter 9500. The first thing I wanted to take care of was the center mirror panel. The last time I buttoned this item up, I noticed that the upper left screw was not threading into anything.
Luckily I found the threaded part laying on the PCB below the hole. I put a few drops of super glue onto the outside of it, and put it back into it’s home. I noticed that there was some cloth tape covering the hole so that this item shouldn’t have been able to fall out, but the adhesive on the tape was dried and the tape was brittle. I re-covered the back side of the hole with some painters tape for now. Along with the super glue, this should be good for another 30 years I hope.
I was hopeful that this would somehow allow my Beocenter to power back on, but no such luck in that department.
I spent a little time with a multimeter probing the power transformer. While I understand electricity very well (I work at a generator factory, and calibrate meters for a living) I find schematics so busy and they trigger ADHD in me so that I cannot focus on one thing.
That all said, I was finding voltages on all spots that I expected. So more exploration will need to be done.
Location: Minnesota, USA
Favourite Product: Beocenter 9500
My B&O Icons:
30 October 2023 at 03:44 #42821the function of the (relais) ‘Line In/Out’-Plug
Bridges the pre-amp output to the amp input. Imagine if you inserted an equalizer in the middle, for example. There was a custom plastic plug that ran the outs to the ins, to prevent cables dangling back there. See https://archivedforum.beoworld.org/forums/t/16926.aspx for more info.
30 October 2023 at 14:29 #42819Hi Beitie and others.
Today I’m standing at the same point as you , some months earlier – at the beginning to restaurate and repare a BeoCenter 9000′ with 2 BeoVox RL60.1.
For the first check it works fine enough – Tape, Radio, Lights, … CD dont works, also IR-RemoteControl dont works. BeoLink 1000 still works (transmit), but no reaktion on the receiving side. I will see in the next time what’s necessary to do.
My question today is: what is the function and the connection for each of the 4-pin-connection-Speaker plugs; and also the different function and connection of the 3-pin-speaker plugs and at least the function of the (relais) ‘Line In/Out’-Plug ? (I dont have this plug.)
Is the plug only to switch the contacts behind, like a headphone-jack which stops the Speaker-Output ? Or is it like a bridge while connecting two sides. And what is the reason for it ? To stop the amplifier on Speaker 1 ? Why ? I have the circuit-diagram, but I cant find an answer ;-). I dont understand this little, tricky part.
Perhaps there is anyone who can explain it for me.
Thanks !
Bodo30 October 2023 at 14:31 #42820Tape, Radio/Tuner, Lights, Ampifier … works ! The other parts (CD, IR-Remote) dont works.
30 October 2023 at 16:59 #42822BeoLink 1000 still works (transmit), but no reaktion on the receiving side. I will see in the next time what’s necessary to do.
The BC9500 may be in A.OPT 0, where it doesn’t react to IR remote control commands.
To resolve this, with the system in standby, press SOUND, 2, STORE on the Beolink 1000. the Beocenter should briefly display a ‘2’ on its display top-right.
Then try remote control again.
Location: Warwickshire, UK
My B&O Icons:
30 October 2023 at 18:32 #42823Wow – quick reaction !!! Many Thanks !!!!! Like to drink a pint with me next time ?
OK, I read and understand your answers and the also the helpfull link to the additional pins on the speaker-connection. Thanks for that.
The function of the ‘Line In/Out’-plug is also understand – but … is it only a plastic pin which presses the inside contacts together, or an electrical connection – for example a jack plug whose 2 contacts be short-circuited ? –> I’m looking for alternative if I dont can get such original plug.
And the IR remote control …. I will try quickly and I will tell you. Promised !
-
AuthorPosts


- You must be logged in to reply to this topic.