


Home › Forums › Product Discussion & Questions › BeoLab › DIY Beolab 8000 Wood frets (STLs included).
- This topic has 189 replies, 90 voices, and was last updated 1 month ago by
 Bubu Bogdan.
-
AuthorPosts
-
19 February 2024 at 13:44 #36903
 BRONZE Member
Hello BramBoerema
there is no difference in the housing between BL 6000 and BL 6002. BL 6002 uses modified Bass-Mid-Drivers. There are many people around here who really do appreciate when you design the clamps and share the STL File/s with us – me too 🙂
thanks in advance
20 February 2024 at 15:04 #36904 cghBRONZE Member
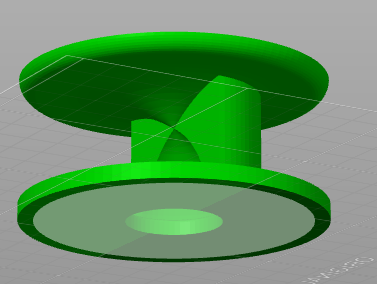
I designed an acoustic lense that will fit on top of the BL 8000, Attached is the stl file.
Thank you for the clips for the BL 8000, it is very appreciated.
I tried to upload the stl file, but it seems not to working??
Attachments:
You must be logged in to view attached files.21 February 2024 at 04:52 #36905Thanks cgh providing the stl File. I used the Extension PDF and the upload works. Caution everybody: the attachment is a stl file (and not a pdf) thanks again cgh
24 February 2024 at 16:41 #36906wol0977BRONZE MemberExcuse me for the offtopic!
For all the guys (me included) who are looking for the clamps for the 6000:
Since I couldn’t find the 3D files anywhere, I may have an alternative for you.
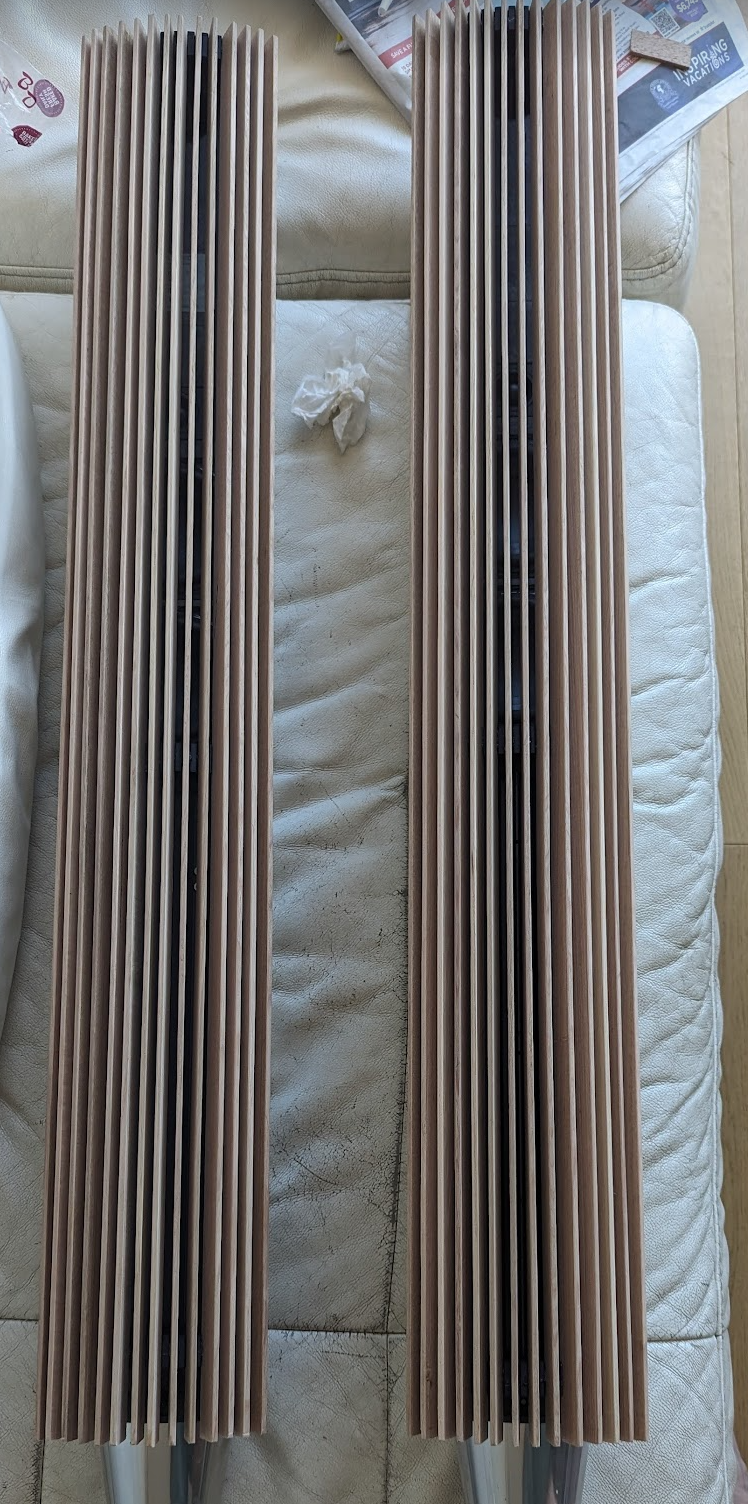
The fabric of my 6000 had tears and didn’t look good anyway, so i removed it.
As you can see in the attached pictures i simply glued wood sticks on the metal grill and it looks good to me.
the costs:
EUR 6,5 for the wood
EUR 12 for the color (light oak)
EUR 5 for the double adhesive tape (transparent)
optional: EUR 10 for the transparent matte paint spray to fix the color
25 February 2024 at 14:08 #36907Hi Matador,
Copycat? Check here:
https://www.leboncoin.fr/photo_audio_video/2509547503.htm
Location: Brittany, France
My B&O Icons:
 27 February 2024 at 08:45 #36908
Hi Matador, Copycat? Check here: https://www.leboncoin.fr/photo_audio_video/2509547503.htm
Hi YannChris,
Thank you for the heads-up.
There are a lot of copycats around including people who just sell the clamps I design with the Ikea like manual but this one is not. It may be inspired but it’s not the same, it is deeper and rounder.
Location: Paris France
29 February 2024 at 23:17 #36909ManulitoBRONZE MemberCan someone tell me if he has a file for the Beosound 9000 to equip it with the wood cover? Also I try to build a cover for my Beolab 1 but struggle to identify the best position for the clamps. Anyone has some experience for the best position?
9 March 2024 at 22:09 #36910MVeeBRONZE Memberthere is a dedicated post on the Beolab 6000 meanwhile: https://forum.beoworld.org/forums/topic/diy-beolab-6000-wood-frets-stl-included/#post-30824
9 March 2024 at 22:23 #36911MVeeBRONZE MemberI live in The Netherlands and no 5mm slats are sold here either. So I bought 4mm slats. 4x18x2100: Which I had custom made by the wood trade to 4x13x1000 (and then a total of 28 slats for one set of BeoLabs) 4x44x2100: Which I sawed myself in a length of 1000mm (a total of 2 slats needed for one set of BeoLabs)
Did you use oak wood? I live in The Netherlands as well. Which wood supplier supplied them in the rights dimension? Have a hard timing finding the right (oak) wood. Thanks for you hints!
9 March 2024 at 22:46 #36912MVeeBRONZE MemberWhen I look at your STL file, I see room for 10 wooden slats, but I see a slightly longer piece on one outside and an extra notch or something like that on the other outside? The 7.1 STL doesn’t look the same as your own photo’s in your first post:
Did you already try on a 7.1 or 7.2? Are the clamps equal? And how does the result look?
15 March 2024 at 20:52 #36913catchBRONZE MemberDo you have the file for the lens?
15 March 2024 at 20:53 #36914catchBRONZE Member I designed an acoustic lense that will fit on top of the BL 8000, Attached is the stl file. Thank you for the clips for the BL 8000, it is very appreciated. I tried to upload the stl file, but it seems not to working??Do you have the file for the lens?
18 March 2024 at 04:47 #36915Mikaeln1BRONZE MemberFor the poor Australians out there who haven’t got a beautiful selection of European wood frets available here’s what I did 🙂
- goto Bunnings and buy 14 of these : https://www.bunnings.com.au/20-x-4mm-2-4m-square-edged-board-tasmanian-oak_p0081864
- Spend X hours cutting + sanding (I just made one side a bit rounded to soften it)
- Use the 5mm STL file (deeper for the 20mm wood, worked better at holding than the 4mm model) and a drop of this on each position https://www.bunnings.com.au/selleys-80g-liquid-nails-clear-construction-adhesive_p1232438
- Then you have to hold the 14 frets in place for a bit until glue dries enough
They look amazing btw and thank you for this thread to modernise the appearance
 19 March 2024 at 10:40 #36916cghBRONZE Member
Egru123 uploaded the file for me. Please see the post from him
22 March 2024 at 23:04 #36917BwelBRONZE MemberHas anybody found a good supply for the 4mm Stripwood pieces in the U.K. ?
Many thanks,
23 March 2024 at 16:06 #36918BwelBRONZE MemberWhat lengths of Stripwood are people using ?
I see the design sheet here say 100cm, but other people have suggested 105cm.
I’m not sure what looks best ?
28 March 2024 at 13:13 #36919mohcineamraniBRONZE MemberHi all, while checking the 3d file i have doubts on measurements, see picture below (X, Y, Z)
thank you
mohcine
28 March 2024 at 20:28 #36920Please guys having “doubts”…
Read the thread carefully, there are of course scale errors; x10, x1000, x100, whatever…
Just think!
Plenty of people have sorted it out and successfully made them better than me.
This is an enthusiast forum, not an after sales hotline.
With all due respect.
Location: Paris France
28 March 2024 at 20:32 #36921[…] goto Bunnings…
Let me invite you “poor Australian” to our European “Leroy Merlin” in exchange to you inviting me to Bunnings!
Nice work and happy to have helped…
Location: Paris France
11 April 2024 at 08:12 #36922MatekiBRONZE MemberThank you matador for sharing
-
AuthorPosts


- You must be logged in to reply to this topic.