


Home › Forums › Product Discussion & Questions › BeoLab › Beolab 8000 preventive care.
- This topic has 19 replies, 10 voices, and was last updated 2 years, 6 months ago by

-
AuthorPosts
-
31 March 2022 at 03:03 #33695
 Moderator
Hi Guys,
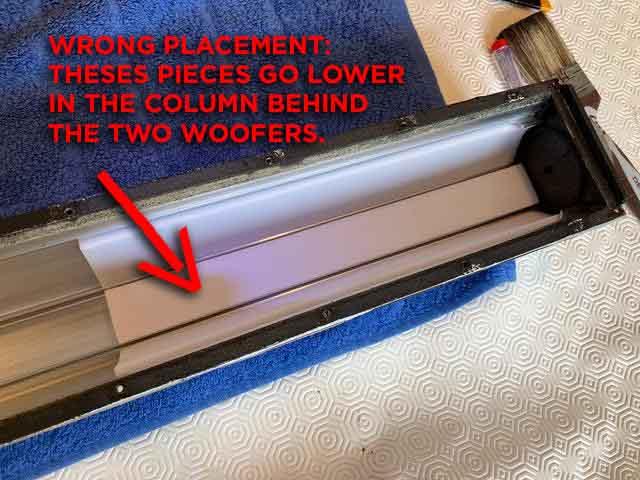
UPDATE: the foam in my pictures are not set correctly, good way to install them is as in the drawing below, in the center of the speaker, around the woofers.
Unless necessary I will not remove the pictures to keep the process documented BUT REMEMBER THE FOAMS ARE INCORRECTLY SET.
Apologies.
This Beosystem 72-22 thing did grew up into my mind to the point I got a pair of 8000 to make my own one.
The recent old forum being still unavailable I would like to know if ALL BL8000 are prone to foam rot or if like the 4000 the did change the foam for a better one that do not disintegrate at a certain point? Mine are 12xxxx so 1997 I believe.
Then is there something you can do appart from changing the foam, I was thinking to insert a fine shit of plastic or whatever cut ti the shape to avoid acid dripping on the electronics.
I know the way to go may be changing the foam but right know I dont feel like opening the speakers.
Thank you for your advices.
Location: Paris France
31 March 2022 at 17:57 #33696 BRONZE Member
Hi Matador,
Foam rot is a serious thing as it can damage the pcb and electronics, causing malfunction, etc.
I am not completely sure about which serial number has the improved foam, but I think 12xx xxxx might still have the old foam.
My advise for proper action is not to apply self cut pieces of plastic. This will not help, because when foam rot is there, it is already damaging the pcb and components. The only way is removing the old foam and thoroughly cleaning the pcb and components.
Location: The Netherlands
Favourite Product: BeoSound 9000
My B&O Icons:
 1 April 2022 at 11:29 #33697
Thank you for the comprehensive answer. Obviously note the one I was wishing the most!
I’m good to open them and what I fear is the glue the seems to hold the front panels.
I’ll do it as soon as I get or make new foam. In the meantime do you know if not using them will slow down the process (less heat) or as this nothing to do?
Location: Paris France
1 April 2022 at 12:31 #33698Don’t worry about de-attaching the front panels and the glue strips holding them.
Obviously, you will first have to remove all screws. After that, the glue strips will hold the speaker driver panel and the PSU/AMP panel in place. The glue strips function as gaskets.Nevertheless you can push a flat hand screw driver (actually & literally with a flat head), just underneath the panel, and push it up a bit. Do it slow, and as soon as it comes a Biot loose, move the flat head down a few centimeters, and so on.
“In the meantime do you know if not using them will slow down the process (less heat) or as this nothing to do?”
The heat inside the cabinet makes the foam deform. As Long as you do not use them, the process will of foam rot will not continue. Be aware though that the damage might already have been done. Some times, some of the copper tracks on the PSU PCB are eaten away. And sometimes that’s even hard to see with the eye. But this is easy to solve with some by-pass wires.
Location: The Netherlands
Favourite Product: BeoSound 9000
My B&O Icons:
1 April 2022 at 13:08 #33699Perfect, all I wanted to know.
Thank you Kolfmaker.
I Will update the forum when I’ll do it.
Location: Paris France
23 April 2022 at 17:44 #33700Bought today two set of B&O white replacement foams: 10€ each.
Even for a raddish like me it do not worth spendind time for DIY’ing an alternative solution.
I will document the replacement operation here.
PS: at least here in Paris, the most complicated step was to find a dealer selling spare parts. Most of the dealers don’t do after sales and can’t order parts references.
Location: Paris France
23 April 2022 at 23:55 #33701Matador, there is a series of YouTube videos that details the process of opening up the BL8000s. It’s a good series — I used it myself to open both of my 8000s a year or so ago.
The series was created by Pyramid Audio in Austin, Texas. Let me know if you can’t find it, and I”ll dig for it.
My B&O Icons:
25 April 2022 at 12:09 #33702Found it, Thanks BeoFrederic, it will help.
Location: Paris France
26 April 2022 at 13:03 #33703Hi Guys, It’s done, at least for one speaker.
The other one will wait a bit since this is not a really pleasant experience.
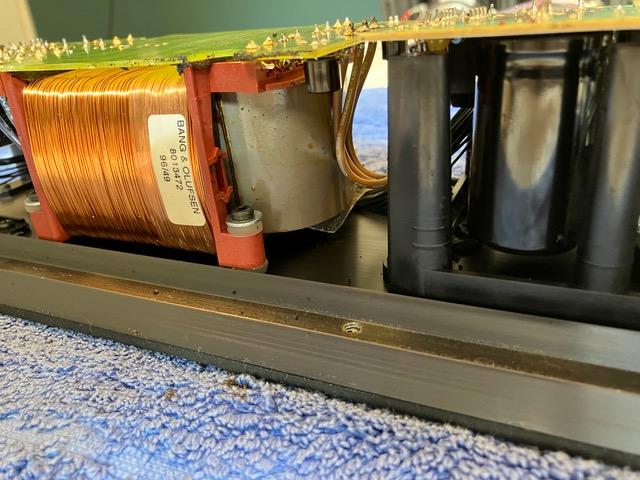
That will also allow me to compare Both speaker with new and old foam.Starting point: the Beolab with stand and fret off and obviously the new set of damping material.

Then take out the screws off: 6 for the amplifier plate, 12 for the speaker plate. All the same.
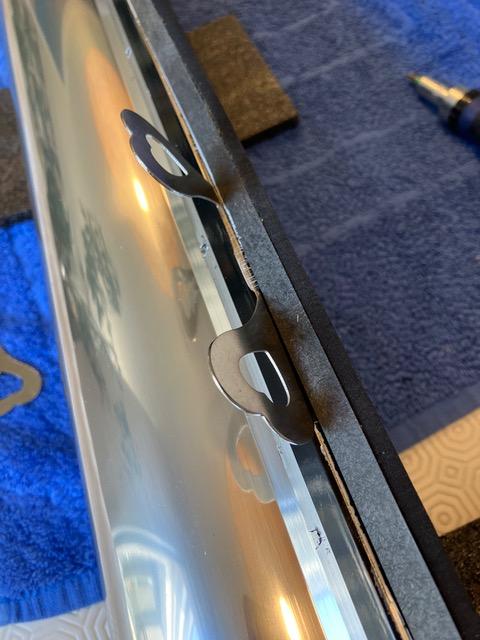
You need to cut the rubber border use to damp the fret between the two front plates. Use a sharp knife.
The plates are still firmly glued to the pipe. Insert a flat screwdriver and gently pry off the plate. Then progress to the bottom. I used two very useful little tools Thant came with a garden tinsel from a Scandinavian well known brand to open up the two plates, one side after the other.

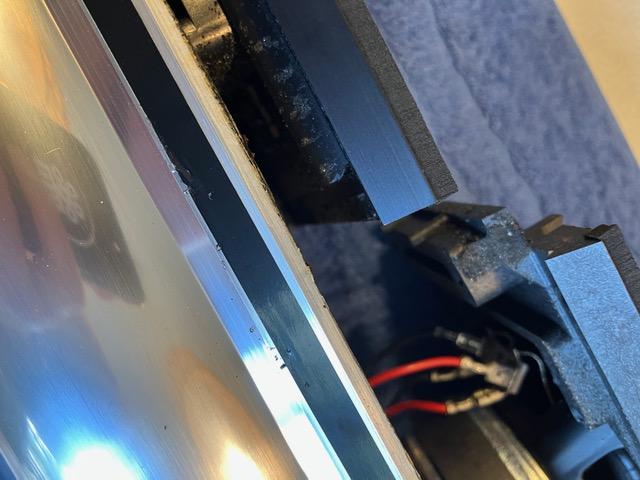
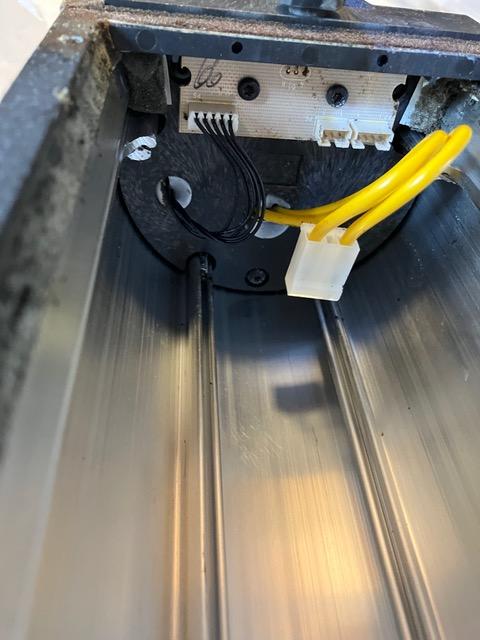
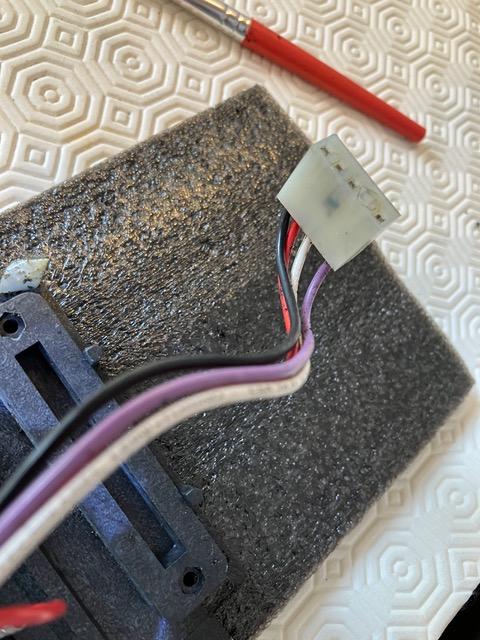
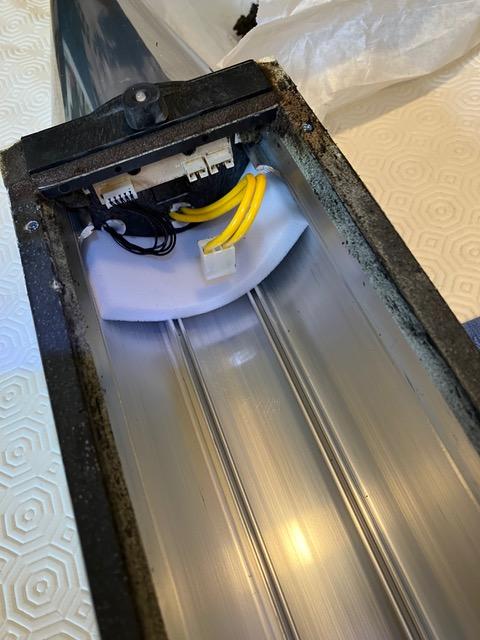
Disconnect all that should be:
- One big socket between speaker plate and amplifier plate. (white/blue/red).
- One big socket (main power/Yellow) between the amplifier board and the cone.
- Two little connectors between the amplifier board and the cone (3 and 4 wires).
Beware, there is also a third tiny connector much larger (7 or 8 wires), you can disconnect it but it loops from the cone into the cone. Don’t mistake it for the one that must be disconnected and pull the plate while it is still attached.
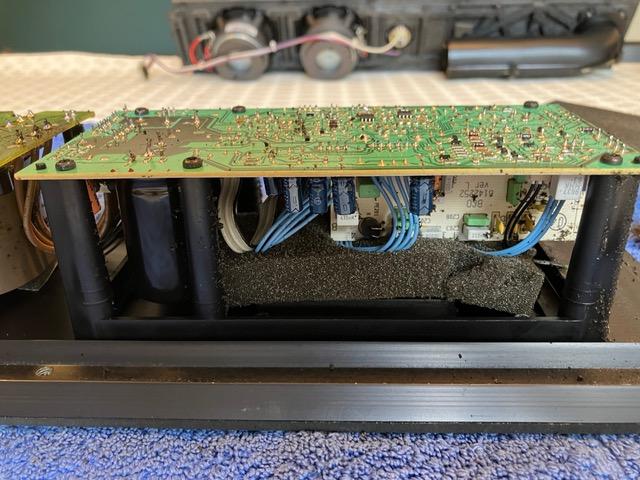
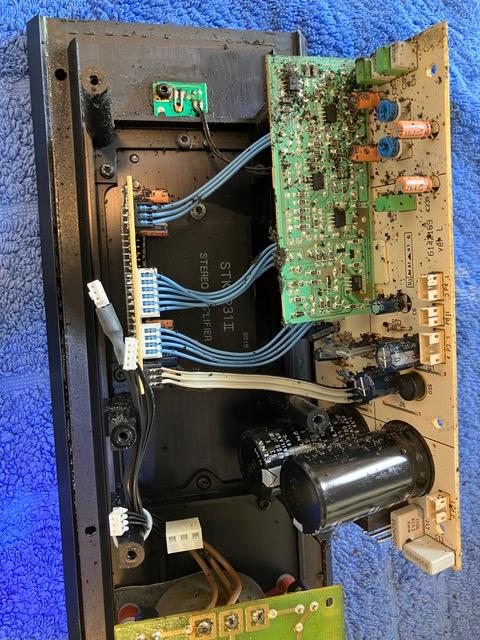
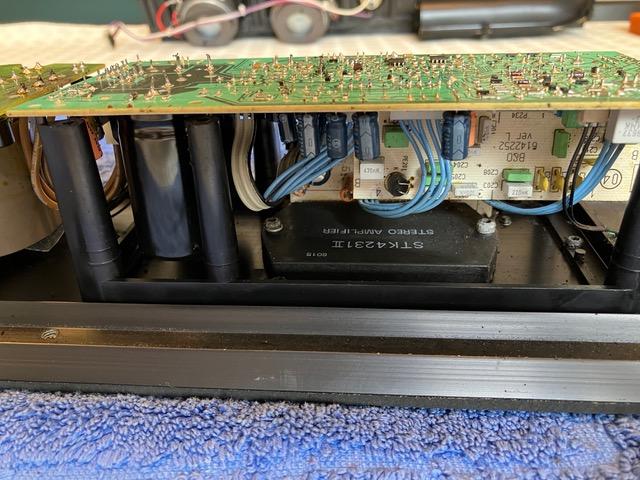
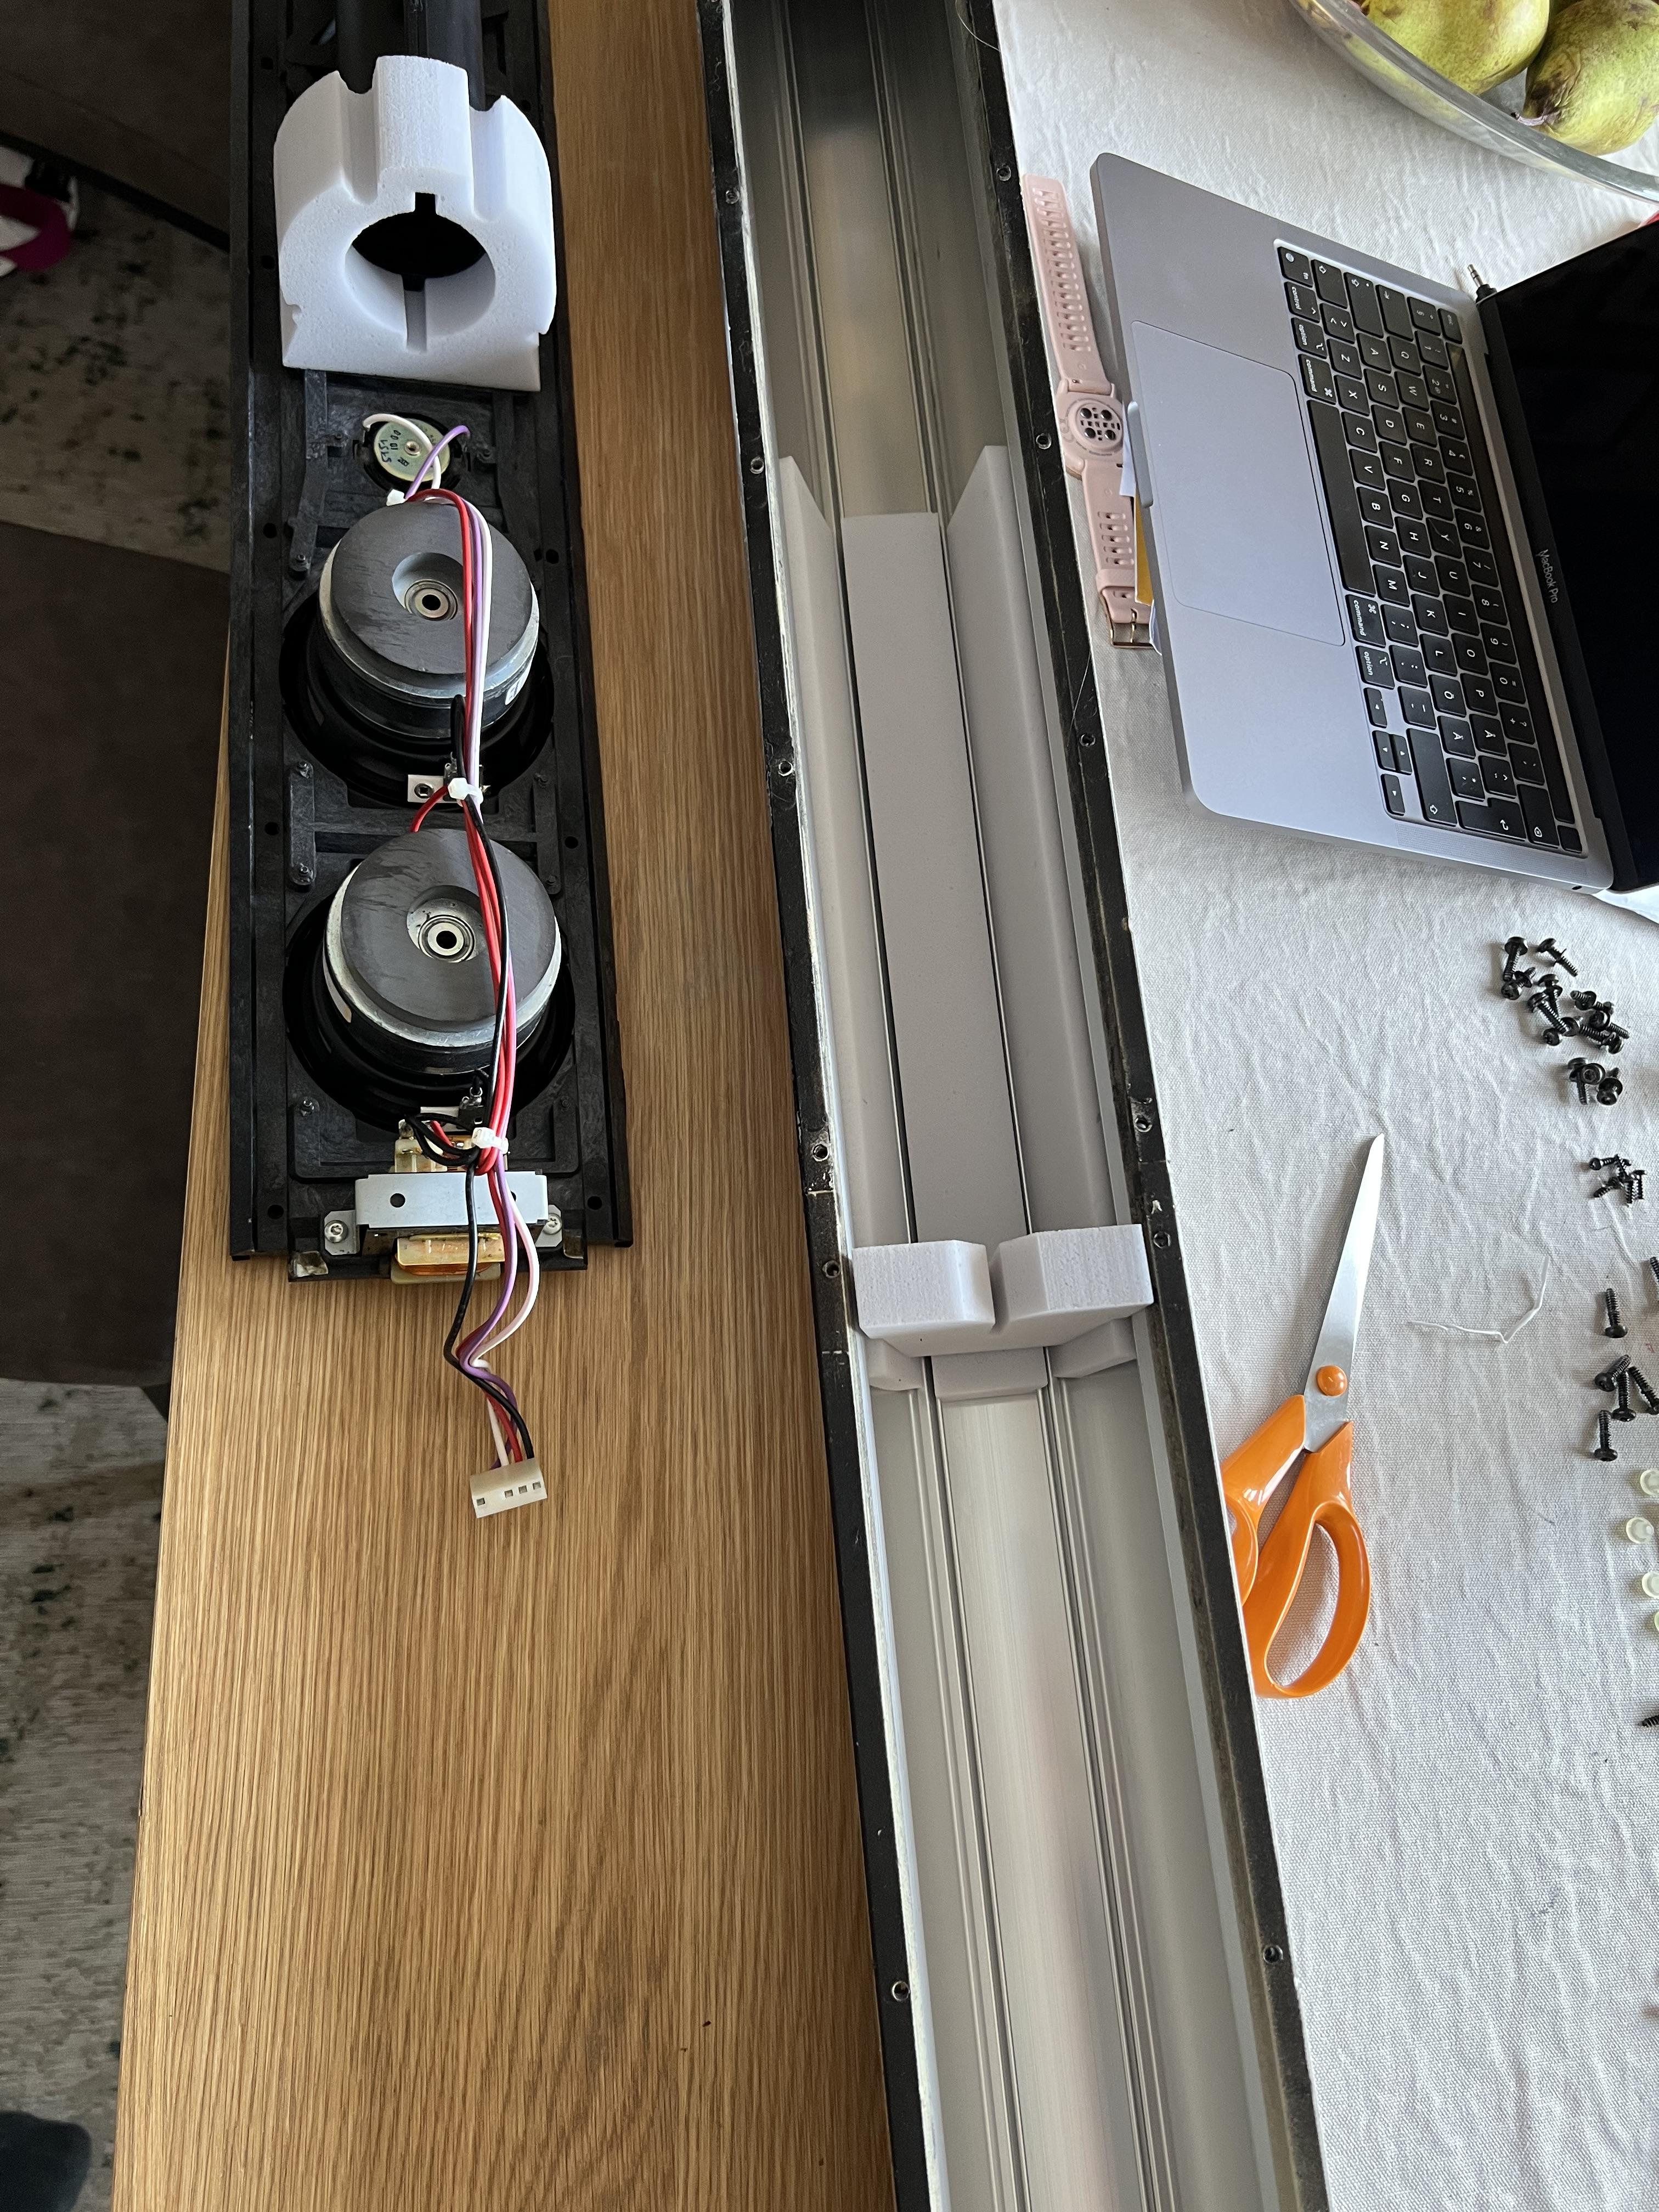
Once everything disconnected, take out the plates: amplifier first, then speaker
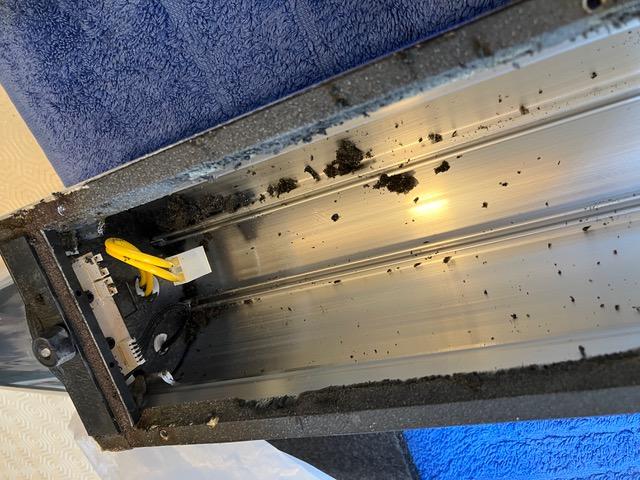
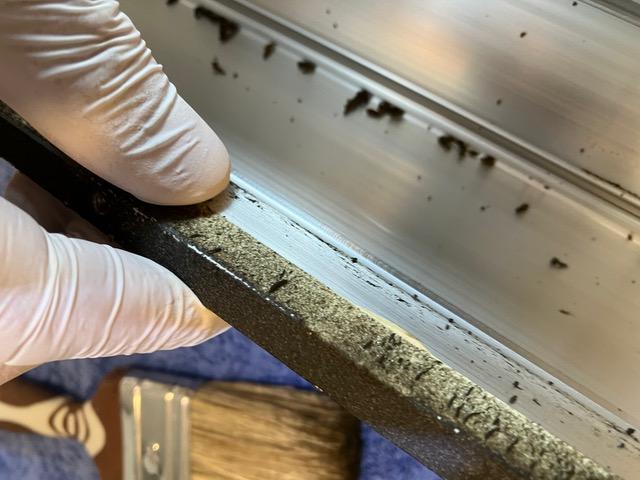
Here start the mess! Use gloves.
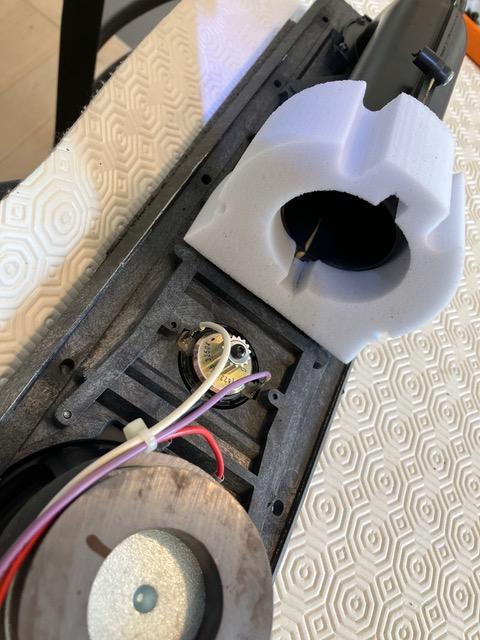
Foam to be removed is located:
- Just above the cone.
- One the amp board, between the actual amplifier chip and the main board.
- In the gap between the speaker zone and the amplifier zone.
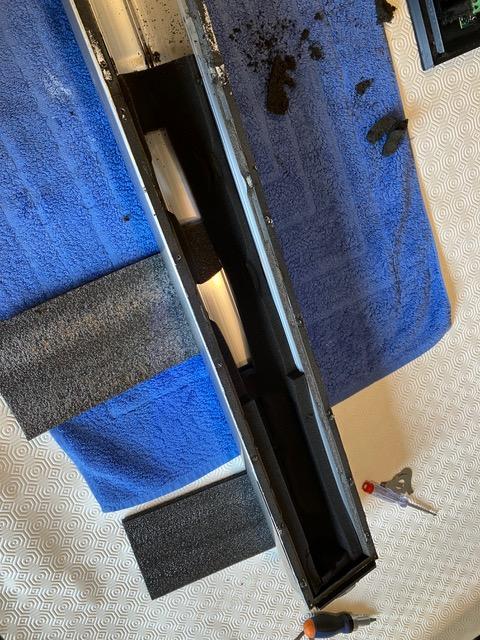
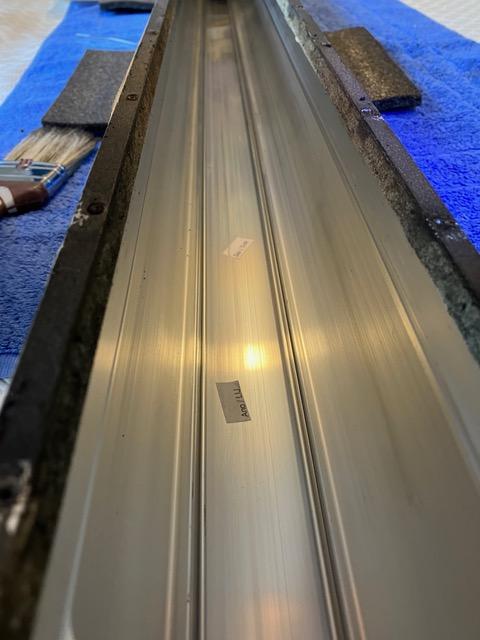
- One big piece in the speaker tube.
The big speaker piece was in my case quite well, sticky and chewy but I was able to remove it easily in one part.
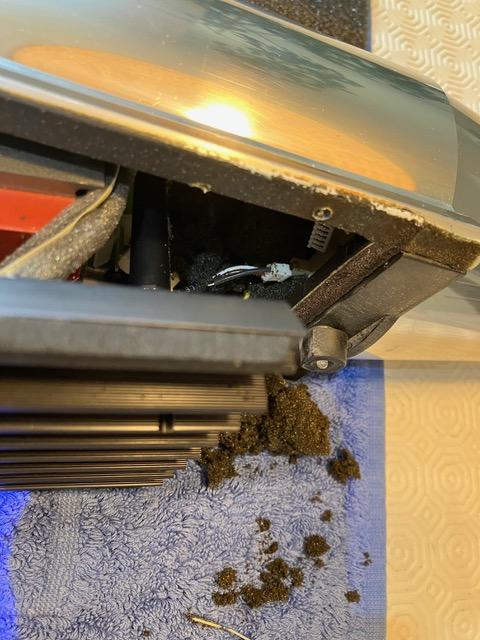
All the other parts were in an advanced state of disintegration, turned into a sticky dust spread all inside the column. You’re happy when you manage to take out a big piece!.
Even the foam sealing between the pipe and the plates is rotted. you need to rub it to clean it.
The pipe was vacuum cleaned with the help of alcohol (90°, no isopropyl here in France).
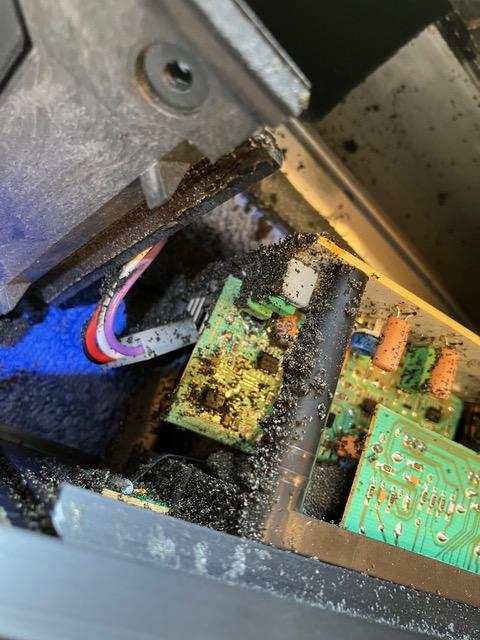
The amplifier board was opened after disconnecting the plugs and cleaned with a brush and alcohol.
To me this is the most scary part: I don’t like rub a brush on those PCB with so tiny component. I’m not confident enough to know if this is ok or not and I’l afraid of breaking something or hurting a component. SO I did this carefully with a brush and a vacuum cleaner, take out the most of it but after this, it still remain some sort of sticky touch all over the parts. I think it still better the before.
Before screwing the amplifier board to the Amplifier plate, you need to replace the foam between the chip and the board.
Then clean all the connectors, the speaker socket was particularly dirty.
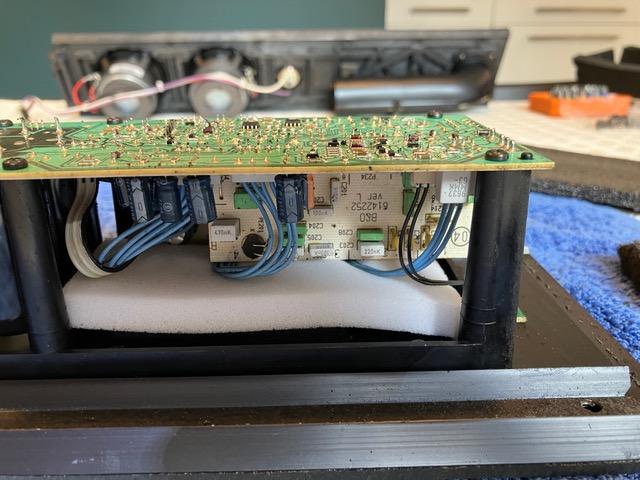
Then you can start the actual foam replacement. Note that the new set has nothing in common with the previous.
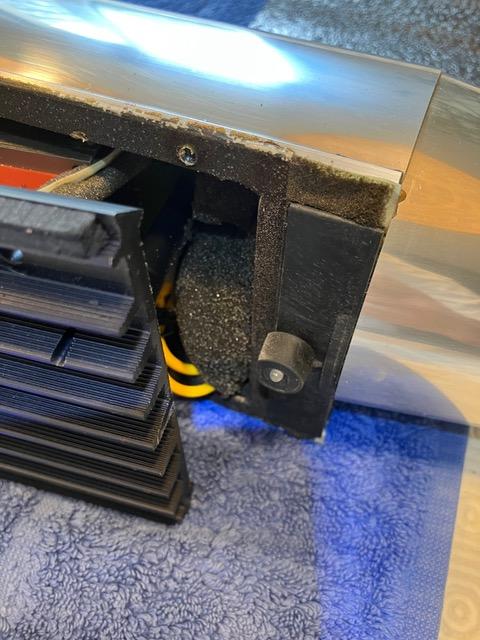
Around the bas port entry.
In the column, roughly in the middle behind were the woofers are.
At the base (rear).
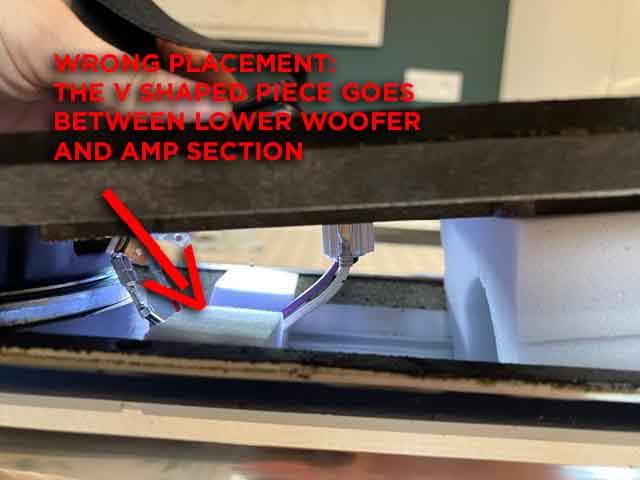
The V shaped one at the bottom of the long strips just above the amp section.
Close the speaker panel and watch out for the speakers wires to go into the foam groove of the V shaped piece.
Correct placement of the foam pieces is are illustrated below. They should make a coffin for the two woofers.

Then, place the amplifier board, plug everything that need to:
- One plug between amplifier plate and speaker plate.
- 3 or 4 plugs between amplifier plate and cone.
Before closing the amplifier plate, add the remaining front base foam piece.
Close the speaker, tight all the screws (18) and check your new foam root proof Beolab 8000!
Hope this helps.
Location: Paris France
11 May 2022 at 07:05 #33704Thank you very much for the detailed guide and photos!
27 May 2022 at 11:25 #33705Amazing documentation of the process, Matador. Great pictures ?
As you have written in other posts, the placement of the new foam in the column is incorrect.
Would it be possible to replace the pictures in this thread in order to make this writeup correct?27 May 2022 at 12:46 #33706Done, Thanks for reminding this to me.
Location: Paris France
27 May 2022 at 13:20 #33707I can`t figure out how to send you this picture in a PM. But feel free to use this picture in your writeup. (and also delete our comments after it)
 11 March 2023 at 21:17 #33708bulldog123BRONZE Member
Matador – just did the re-foam – was easy thanks to your detailed instructions- thank you.
15 May 2023 at 21:59 #33709beomediaBRONZE MemberDid B&O ever change the foam used to a better type that doesn’t rot and if so from which serial number? Is there an easy way to check which foam one has without having to open the entire speaker?
16 May 2023 at 08:07 #33710I am not sure about the exact serial number at which B&O changed the foam type.
I can tell that the highest serial number in which I have seen ‘old’ foam, was serial 154x xxxx.
Maybe someone knows this more precisely.
Location: The Netherlands
Favourite Product: BeoSound 9000
My B&O Icons:
16 May 2023 at 09:53 #33711beomediaBRONZE MemberThanks that is useful but yes a precise “as and from serial xxxxxxxx foam was upgraded” would be great intel four our community.
Slightly off topic, I have also read that the internal cabling in a BeoLab 1 was covered in wrap-around foam that also went bad and damaged circuit boards.
Same question applies: was this bad foam in all serial numbers or only some of them? Might be them all as the BeoLab 1 had a shorter production run than the BeoLab 8000. Any input on this would be very interesting and useful as well.8 June 2023 at 19:35 #33712tabulator2BRONZE MemberHello. I bought a pair of beolab 8000s which are red, this date them from 2005 at the earliest from what I gather from the post here and elsewhere. This makes it a later model and it is unlikely to have foam rot. Can anyone verify whether I am right?
I am also about to buy a pair of BeoLab 6000s. Were they immune from the foam rot?
4 January 2024 at 12:37 #33713Khaos87BRONZE MemberHello all and nice to meet you,
I’m new to this forum and I found here the solution to this problem of deteriorated foam, a very detailed explanation, thanks for the great work!
My only doubt is where to buy this foam I read here that you found them at 10€ each but nowadays seem much more expensive (60€+).
I called a local BEO supplier and he told me that is the normal foam I can buy for each speaker and cut by myself but seems not easy especially the round one.
Has someone done it?
thanks for the reply 🙂4 January 2024 at 18:50 #33714Hi Khaos87, welcome!
BL8000s are nice speakers and worth to save.
Here: https://www.beoparts-shop.com/product/damping-foam-set-pair-for-beolab-8000/ you can find good quality parts. They appear to be out of stock now, but maybe worth to keep an eye on if DIY is not the way you want to go.
Regards, Johan
Location: Netherlands
My B&O Icons:
-
AuthorPosts


- You must be logged in to reply to this topic.