Home › Forums › Product Discussion & Questions › BeoGram › Beogram 2000 motor (1983 – 1987)
- This topic has 15 replies, 6 voices, and was last updated 8 months, 4 weeks ago by
Amine Houari.
-
AuthorPosts
-
4 November 2022 at 02:26 #40489
didier
BRONZE MemberHi everyone,
I found a Beogram 2000 that fits perfetly with my Beosystem 2000 – love the look!
But functionally it is less than stellar. The motor is making a squeaking and grinding noise (and the sound is distorted, but that’s probably the cartridge that’s shot.)
Does anyone know the compatibility of the motors in that range? I see they share the same service manual as the 1800 and the 5000 – is it safe to assume they are interchangeable?
4 November 2022 at 15:10 #40490Dillen
ModeratorHave you checked the motor suspension?
There is a good chance the motor pulley is rubbing on the metal bracket due to failing suspensions.
Read here:Motor suspension rubber bushing grommet set f. several Beogram Beocenter models
Martin
5 November 2022 at 00:13 #40491didier
BRONZE MemberThanks Martin,
I will investigate this – and won’t miss to add these in my next order!
9 November 2022 at 03:13 #40492didier
BRONZE MemberYou were completely right about the rubber suspensions, on eof them was completely squished, while the others were dried up.
Although, even at no load the bad noise continues, here is a video:
https://www.youtube.com/watch?v=QYMYdzi4Bj8
It is my first Beogram, but I think this is not normal…
9 November 2022 at 09:42 #40493Dillen
ModeratorMany motors will run a bit noisy unloaded.
Have you tried with a belt fitted?Martin
9 November 2022 at 16:39 #40494didier
BRONZE MemberI did a temporary fix to get proper clearance for the belt:
Right now the belt is not touching anything but the noise is still there…
10 November 2022 at 14:29 #40495I’m afraid that’s the classic noise of a common fault!
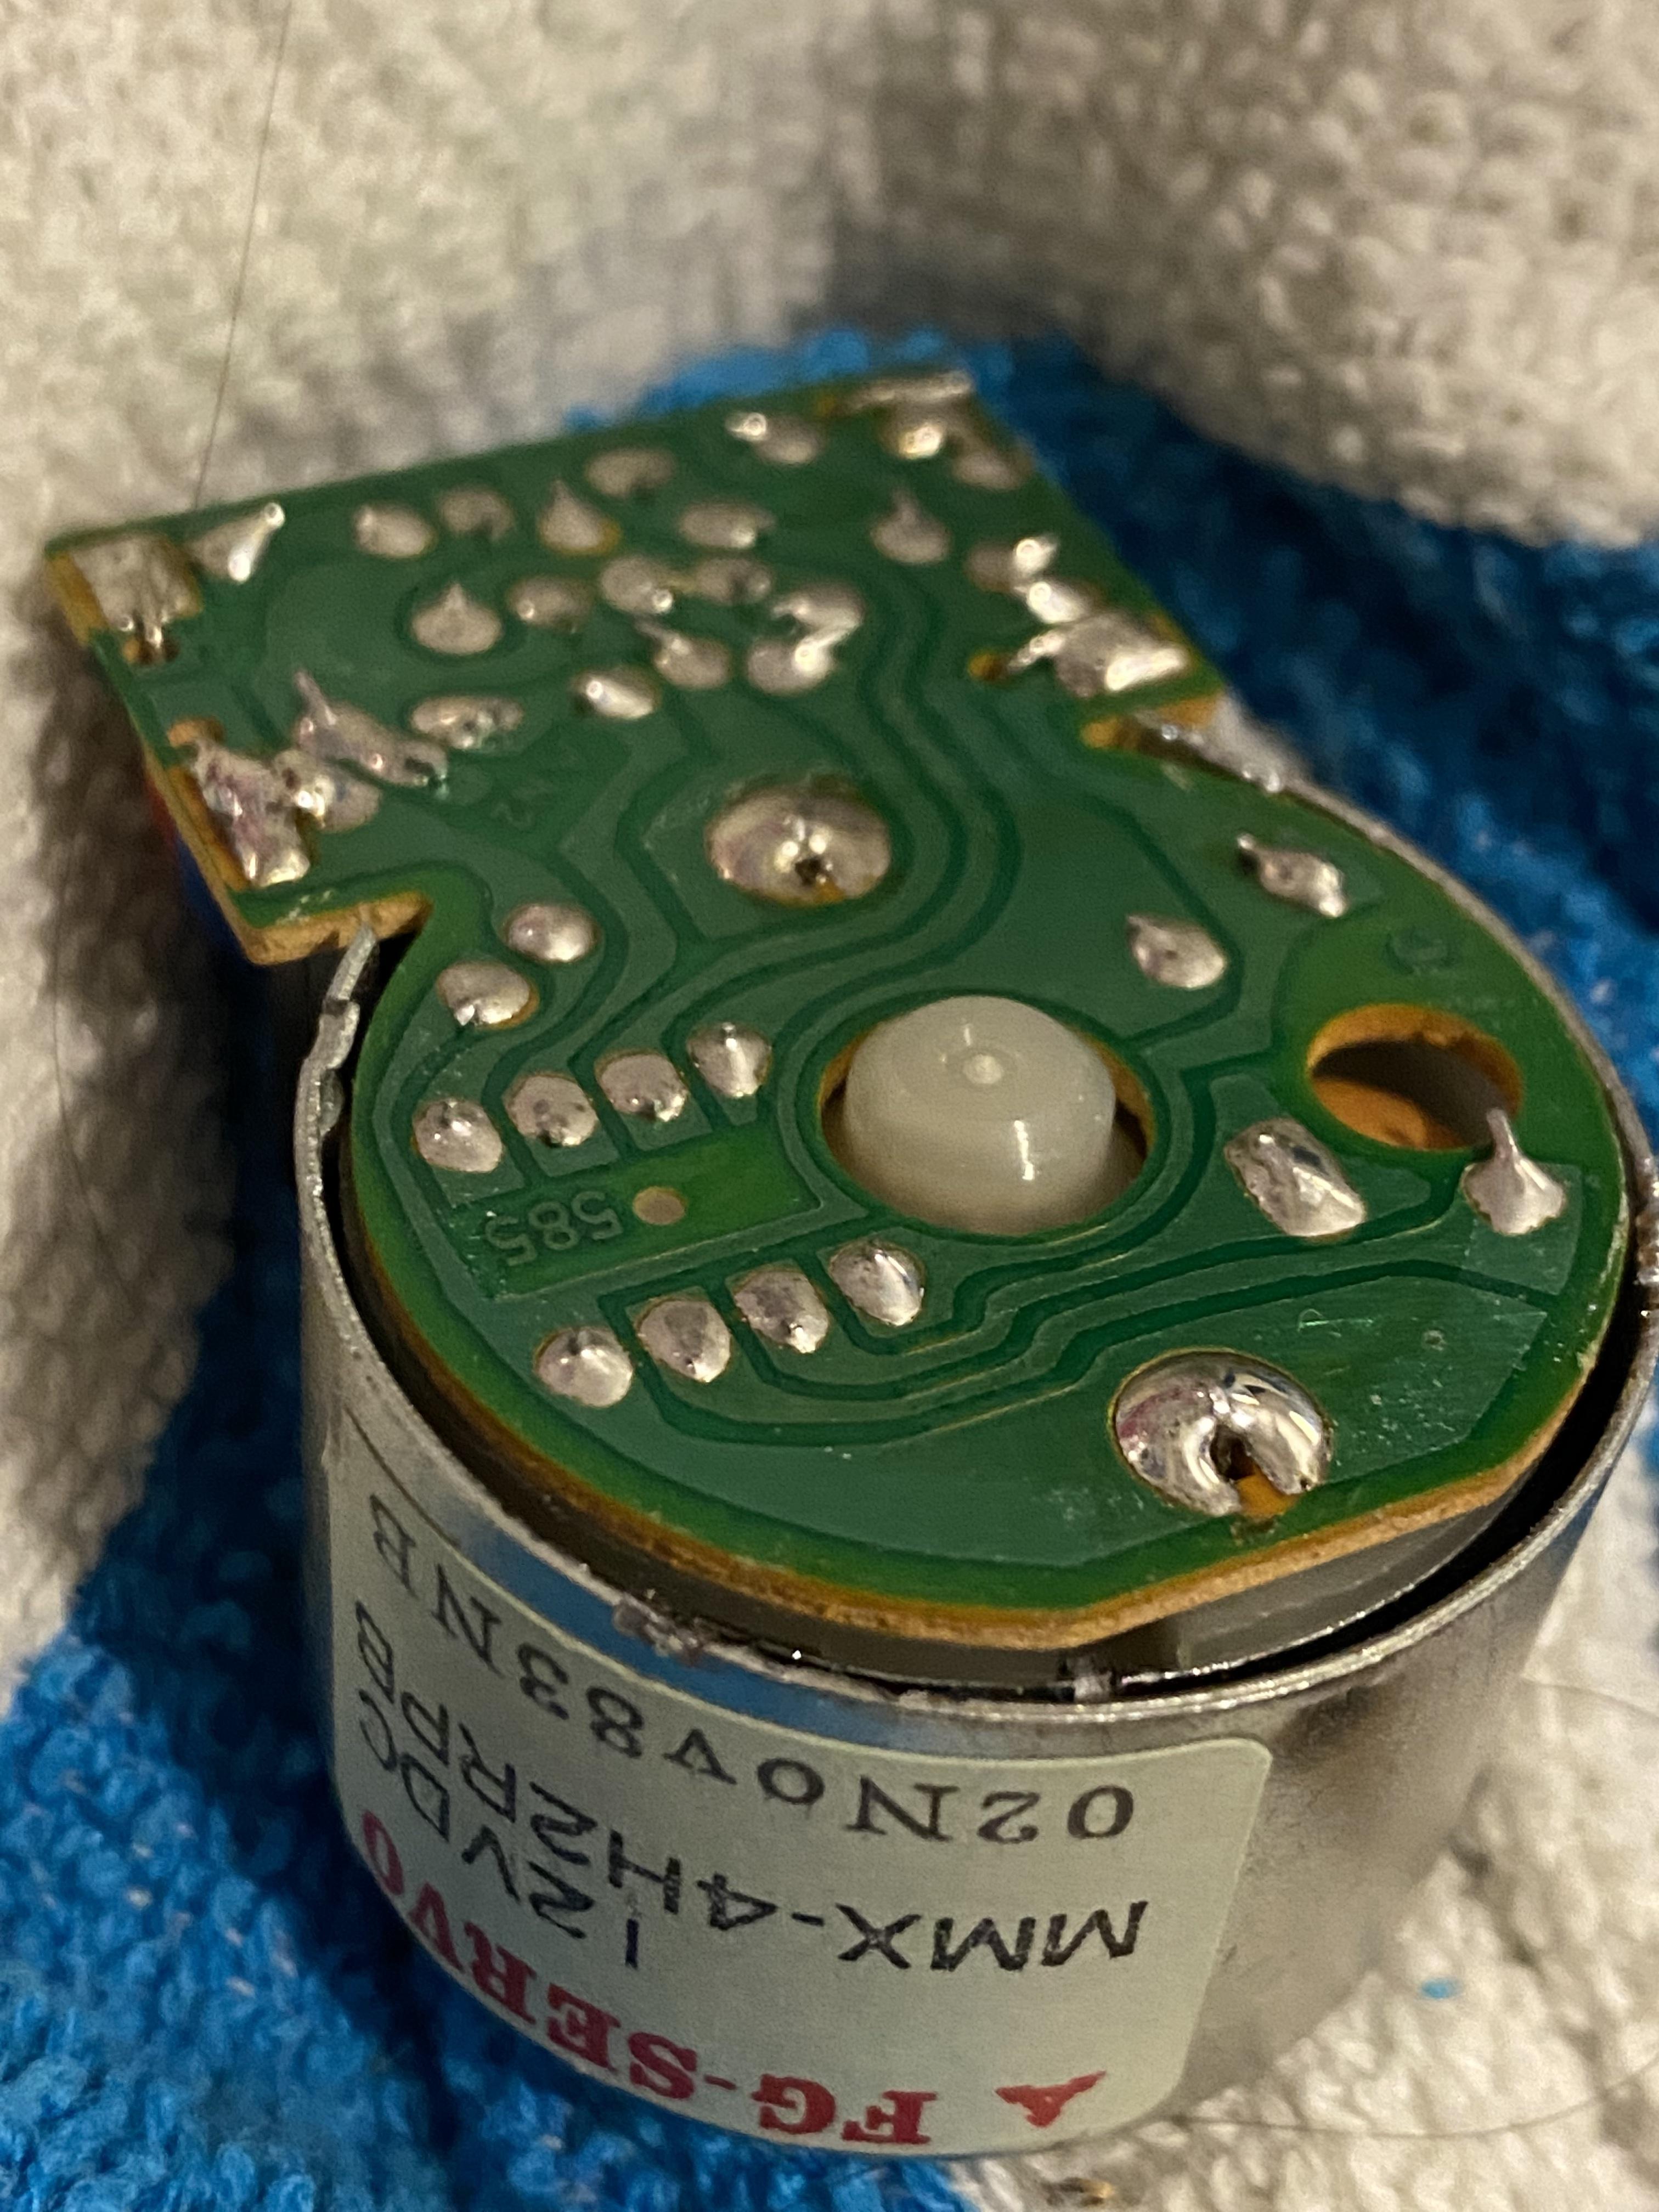
The magnetic ring for the FG servo is just above the commutator and when the plastic “tyre” that holds it in place cracks, the loose end gets mixed up with the brushes and makes a noise. Normally just removing the offending loose piece is all you have to do, the ring seems to stay in place by itself.
To do this you have to remove the bottom of the motor, unsolder the PCB and then take off the brush plate. It is much easier to put it back together if you take the pulley off first, then you can insert the rotor into the brush plate before sliding the complete assembly into the stator. Be sure not to lose any of the spacers and washers on the motor shaft, their positions are important. A tiny spot of oil on the two bearings is also a good idea while it is in pieces.
If that sounds all too scary, though, another motor from a turntable of the same range will fit and do the job. Don;t throw the old motor away, though – pass it onto someone for fixing!
10 November 2022 at 21:22 #40496didier
BRONZE MemberFor future reference, the motor in question is a Matsushita mmx-4h2rpb, it seems to have been fitted on:
- Beogram 1800
- Beogram 2000
- Beogram 5000 and 5005
- Beogram 7000
- Beogram RX2
- Probably a few others…
10 November 2022 at 22:29 #40497didier
BRONZE MemberThank you for sharing!
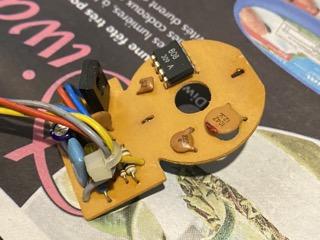
I got to the PCB in the motor… I’m guessing I can’t go deeper without unsoldering as you said. Do I need to do all the solder points?
11 November 2022 at 00:17 #40498You only need to desolder the two larger pads at 12 and 6 o’clock.
16 November 2022 at 22:38 #40499didier
BRONZE MemberI appreciate the answer Mark, I am waiting for a new solder station and will update
24 November 2022 at 05:31 #40500didier
BRONZE MemberOkayyy… I removed the broken plastic piece and it now runs smooth and quietly!
But… It runs backward ?
I disassembled again and looking at the way th parts fit into each other, I don’t see how I could have reversed the polarity by mistake.
25 November 2022 at 07:57 #40501Bonjour Didier,
The magnet polarities are reversed, not electric polarities.
Always put marks before disassembly, to avoid that kind of mistake.
Classic!
25 November 2022 at 14:04 #40502Whoops – yes, sorry I should have said that.
And don’t worry – we’ve all done it!
25 November 2022 at 18:19 #40503didier
BRONZE MemberBonjour de Montréal, chartz!
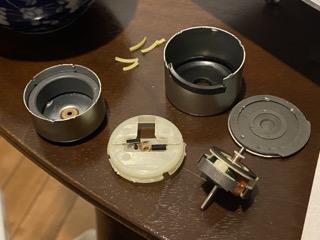
This is the insides of the motor… you can see the cracked plastic I removed at the top, they were originally on the side of the magnetic ring. I didn’t have to disassemble further
Now I don’t see how I could have reversed the magnet polarities since the shaft can only go back one side (so that the brushes can touch the commutator.)
Similarly the brush plate can only be reassembled back one way since the square hole accommodates the chip on the board…
Or maybe I misunderstood something
9 May 2025 at 13:38 #65508Amine Houari
BRONZE MemberHello Didier,
I am about to attempt the same surgery on the same motor (mine is from a Beogram 1800 I am restoring). A couple of questions please:
1) did you have to take the pulley off ?
2) Did you figure out the polarity issue after reassembly?
Thanks (to anyone who can help)
Amine
Location: Montreal, Canada
Favourite Product: Beogram 4002
Signature: Beomaster 3300, beogram 3000, beocenter 9500, beogram 4002, beovox RL-60, Beovox RL-35, Beolab 6000
-
AuthorPosts
- You must be logged in to reply to this topic.


