Home › Forums › Product Discussion & Questions › BeoGram › 1500 ( 1978) dust cover re assembly
- This topic has 3 replies, 3 voices, and was last updated 5 months ago by
Dillen.
-
AuthorPosts
-
30 August 2025 at 12:02 #69221
Pasha Manzaroli
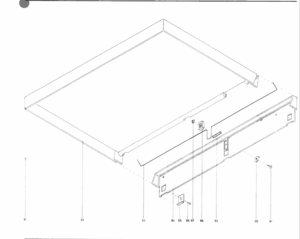
SILVER MemberHi everyone , I wondered if anyone could help , I have been fixing this B&O which I’m glad to say is working now , the problem is I can’t quite figure how to put back together the dust cover hinge and all the associated bits , any help would be greatly appreciated,
30 August 2025 at 12:05 #69222Pasha Manzaroli
SILVER MemberHere is a photo of what I have , thank you again
Attachments:
You must be logged in to view attached files.30 August 2025 at 21:07 #69235Dillen
ModeratorLay the large black hinge bracket (the rear vertical plate) flat on the table with its backside down. Put it on a thin piece of cloth or similar to prevent scratches and scuff marks.
Place the three small shiny friction plates in place in the hinge bracket, so that they sit aligned with where the three holders will be (photo).
From little marks they have left, you can usually see where they sat previously, and you can glue them in if you find them difficult to control.Put the dustcover in place in the bracket, also lying flat on the table (in what would correspond to fully open position if upright) and fit the spring to the hinge bracket at the center with a holder, a screw and a washer. Don’t mind the springs ends at this point – just let them flap around as they please until the center holder has been fitted.
The spring has small round ends, that needs to run in the grooves at the ends of the dustcover, so make sure the spring is the right way up, or it will run with the sharp pointed ends in the groove and wear the grooves out in no time.Then grab one end of the spring with pliers, twist it to upright position and set the springs length down in the groove in the hinge plate (some hinge plates have small tags it needs to go around and between) and set it into the groove in the dustcover.
Often the spring will be able to sit by itself like this.
Put a black plastic holder in place, hold it with a finger or two while you lift up the whole assy and mount the screw and washer from the other side. Alternatively, keep it flat and slide it out over the edge of a table, just enough to fit the screw and washer from below.
Same job at the other end.
Takes a little practice but it’s a 2-minute job when you know how.More here:
https://archivedforum2.beoworld.org/forums/p/4787/343642.aspxMartin
-
AuthorPosts
- You must be logged in to reply to this topic.


