


Home › Forums › Product Discussion & Questions › BeoVox › BEOVOX MS 150.2 Woofer
- This topic has 11 replies, 6 voices, and was last updated 3 years, 1 month ago by

-
AuthorPosts
-
22 May 2023 at 08:11 #46777
 BRONZE Member
Hi dear members
I’d like to ask if there is someone who has 2 lower woofers for a MS 150.2 in his workshop or basement.
The speakers must not be new or refoamed.
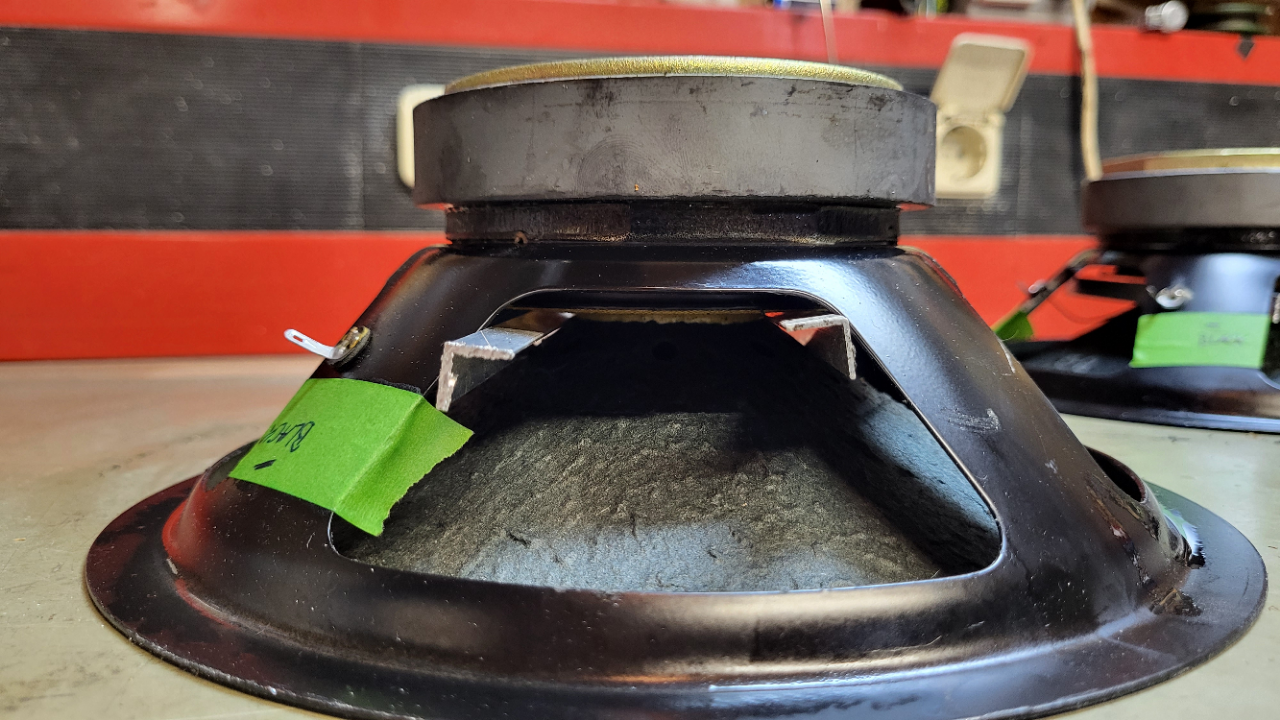
I just bought a pair MS 150..2 where the preowner had the nice idea to put a stick across the woofer after the foamsurrounds were gone and the speaker started rattlin.
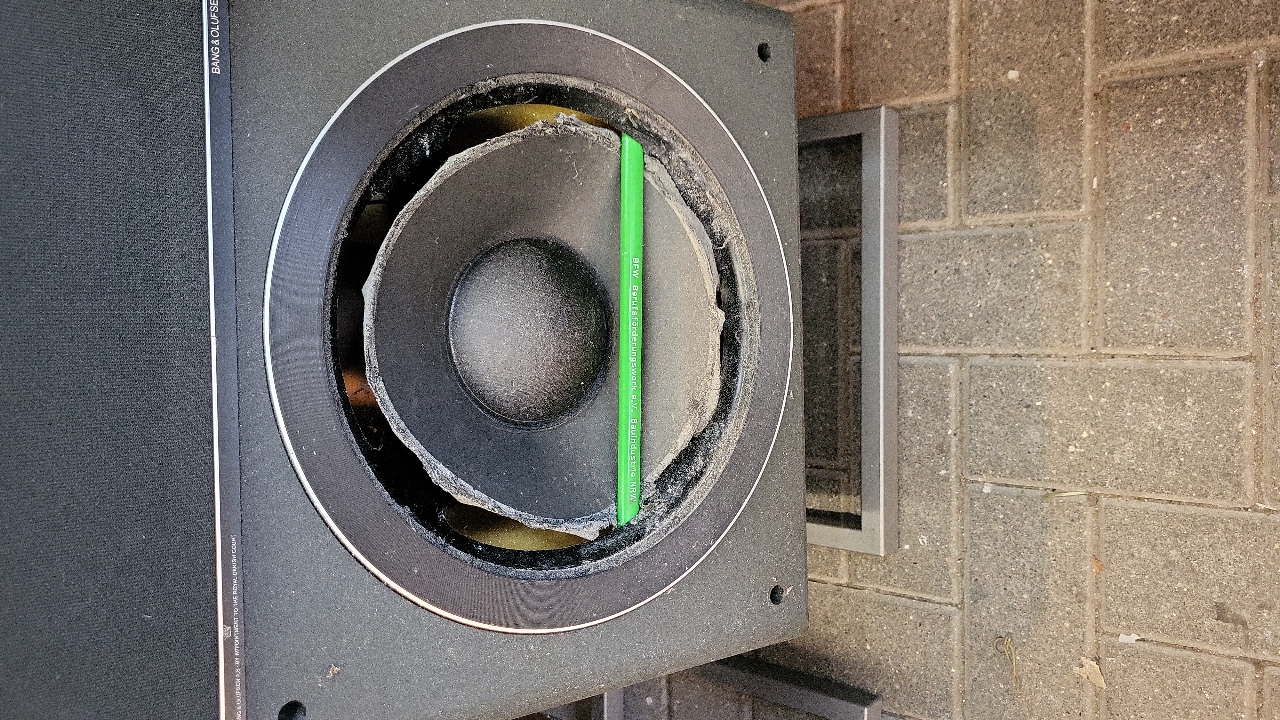
Now the papercone is hardly bent and missaligned and I just want to be shure if I could get a pair of spare speakers befor I start refoaming the ones I got.
Havn’t yet measured the coils so far.
Thank you for reply
Kind regards
Christian
22 May 2023 at 10:19 #46778 kronzillaBRONZE Member
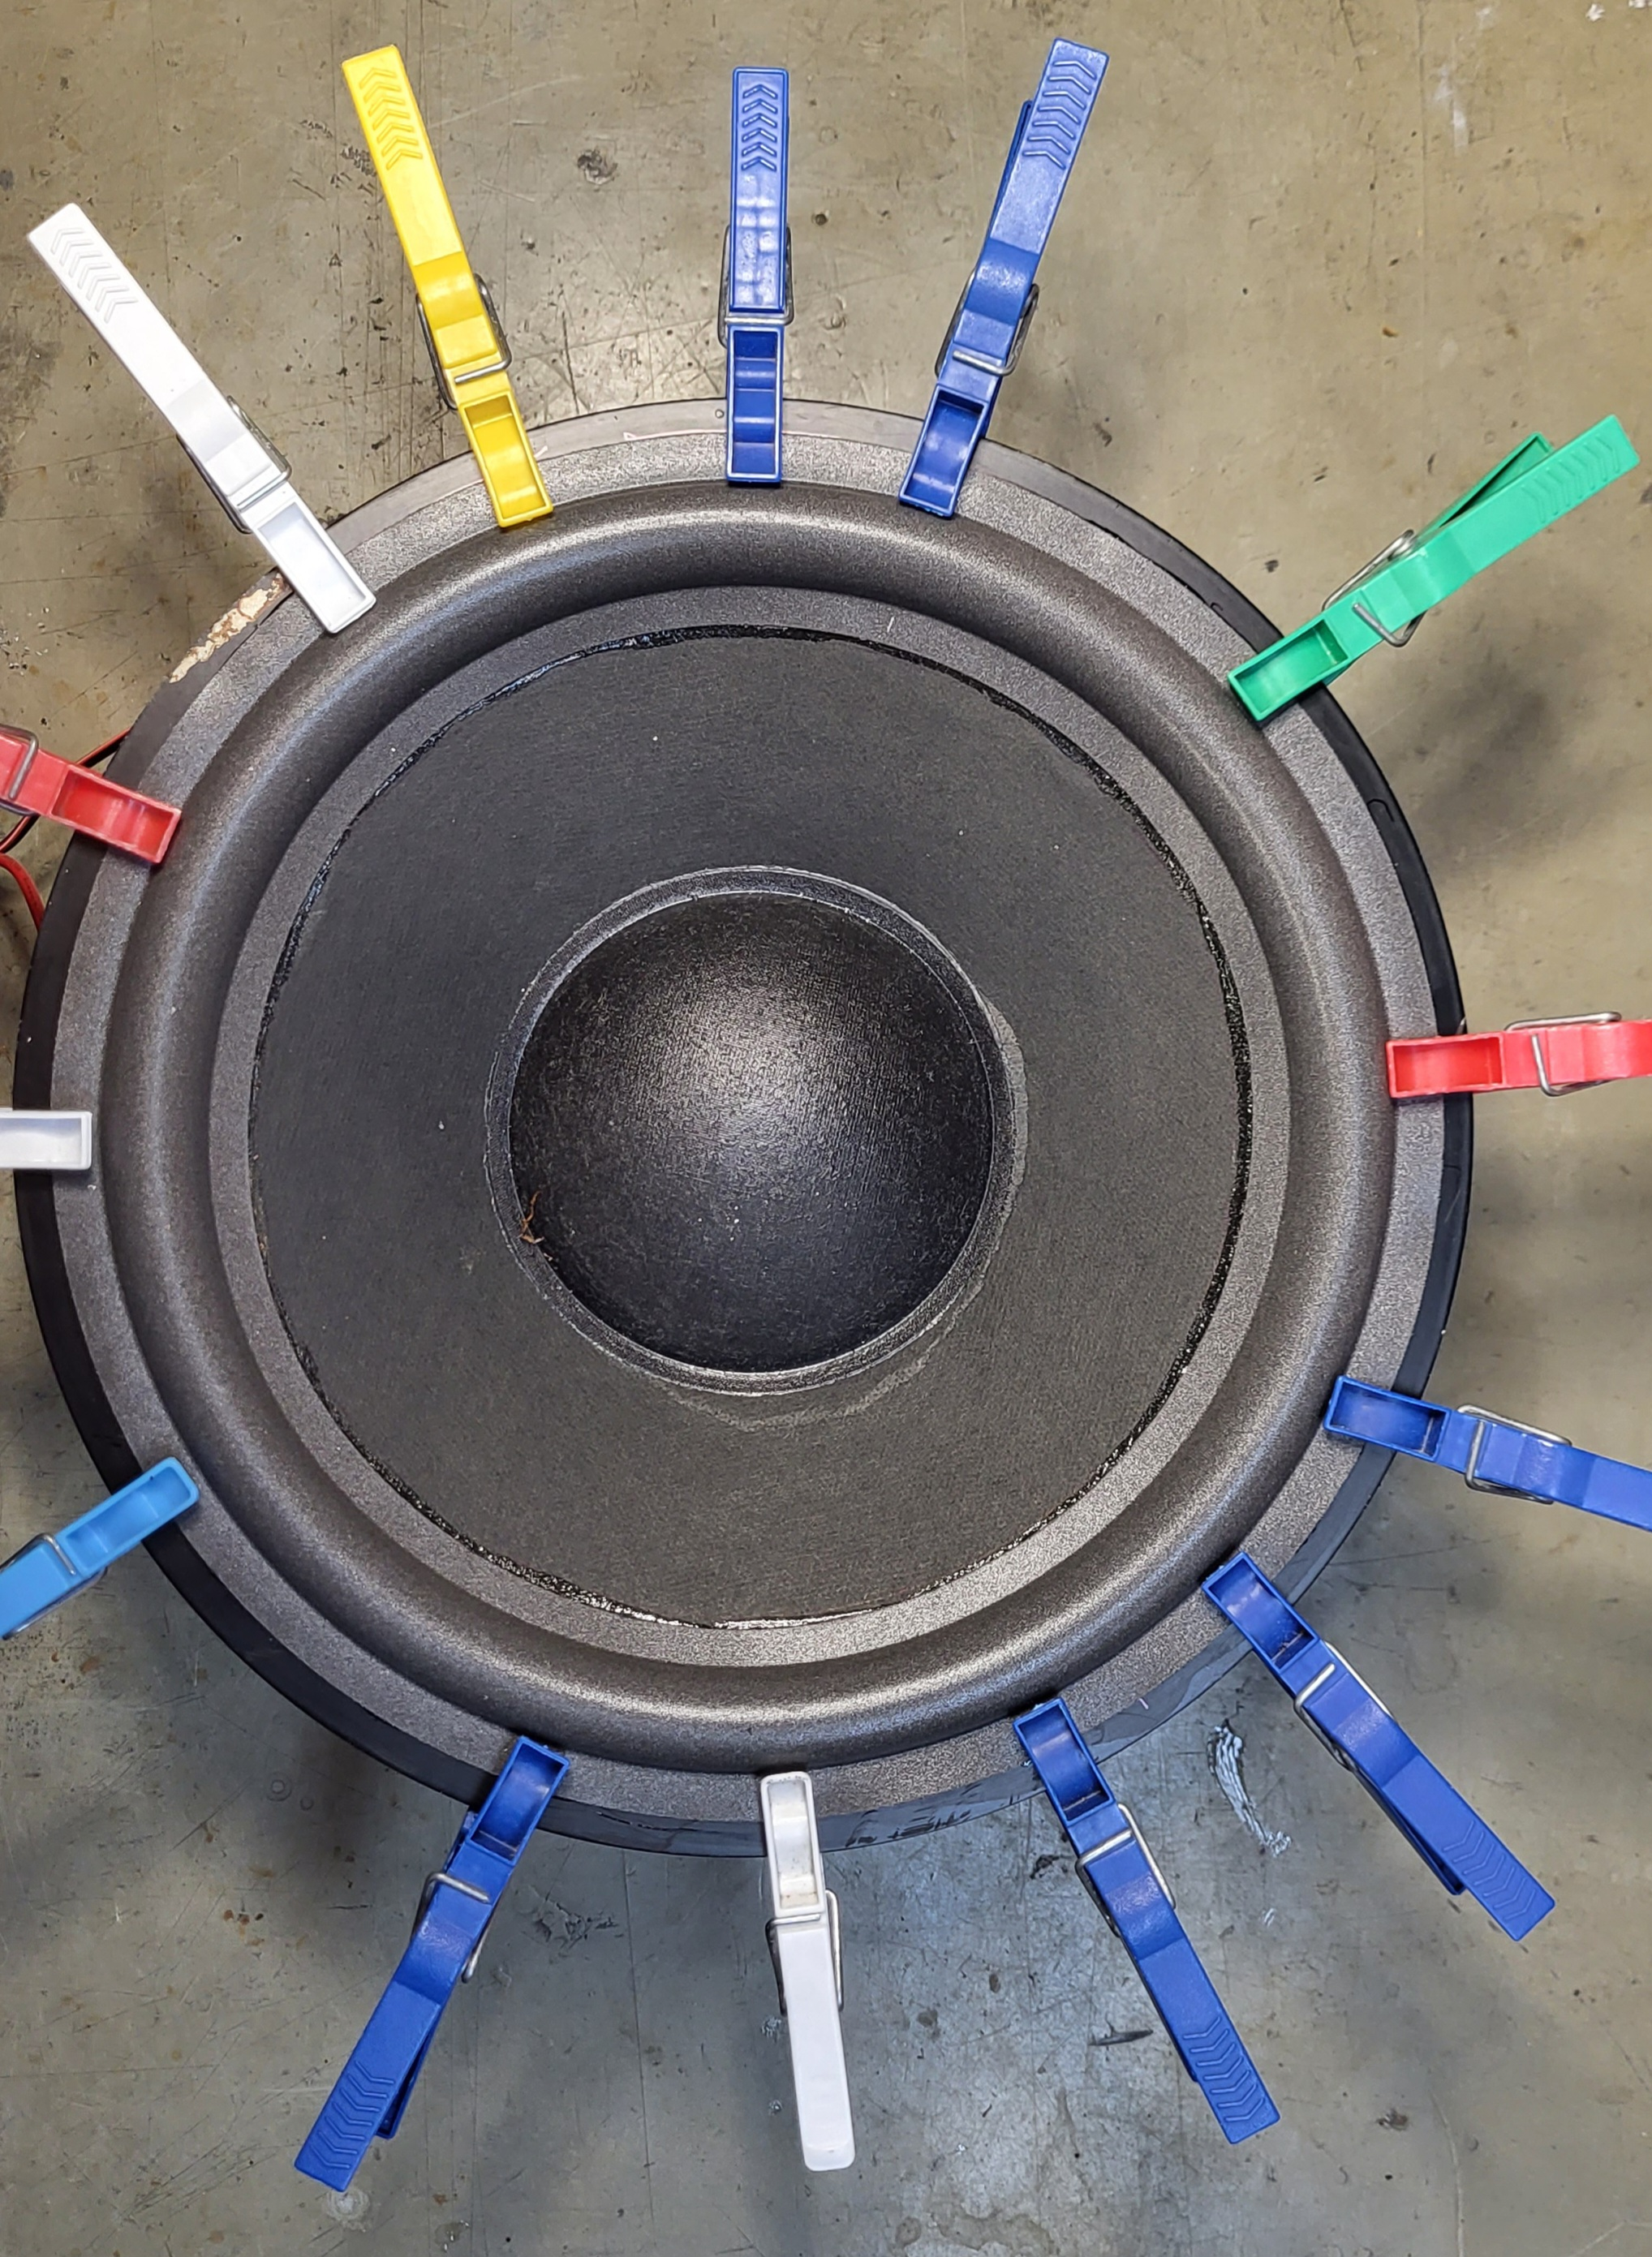
hello Christian, could you post a photo without the stick? if the paper cone is not damaged, you can cut and clean the foam around, and glue a new surround on it, let it drie upside down, you can reallign the spider when you glued the outside of the cone to the inside of the surround, and after that you can try to reallign the speaker untill you don’t hear a scraping sound anymore, but just glue diagonally, when it is drie, you do the oppisite , untill you had the whole speaker done. I think i still have pix of a glued- refoamed woofer that i did in the past (think a little bit bigger) I used clothespins and pieces of foam to press the edges against the metal chassis.
If you want the pix i can send them, but think they are too big to upload here
22 May 2023 at 13:55 #46779Hi
Thank you for the helpful hints.
For me it looks like the stick has left two dents in the paper cone while it was there for several years and I’m not sure how to bring the cone back to shape, maybe with hot steam.
I will take out the speaker next days, foam surrounds are already ordered.
I give more information after that.
Regards
Christian
25 May 2023 at 10:08 #46780Hi
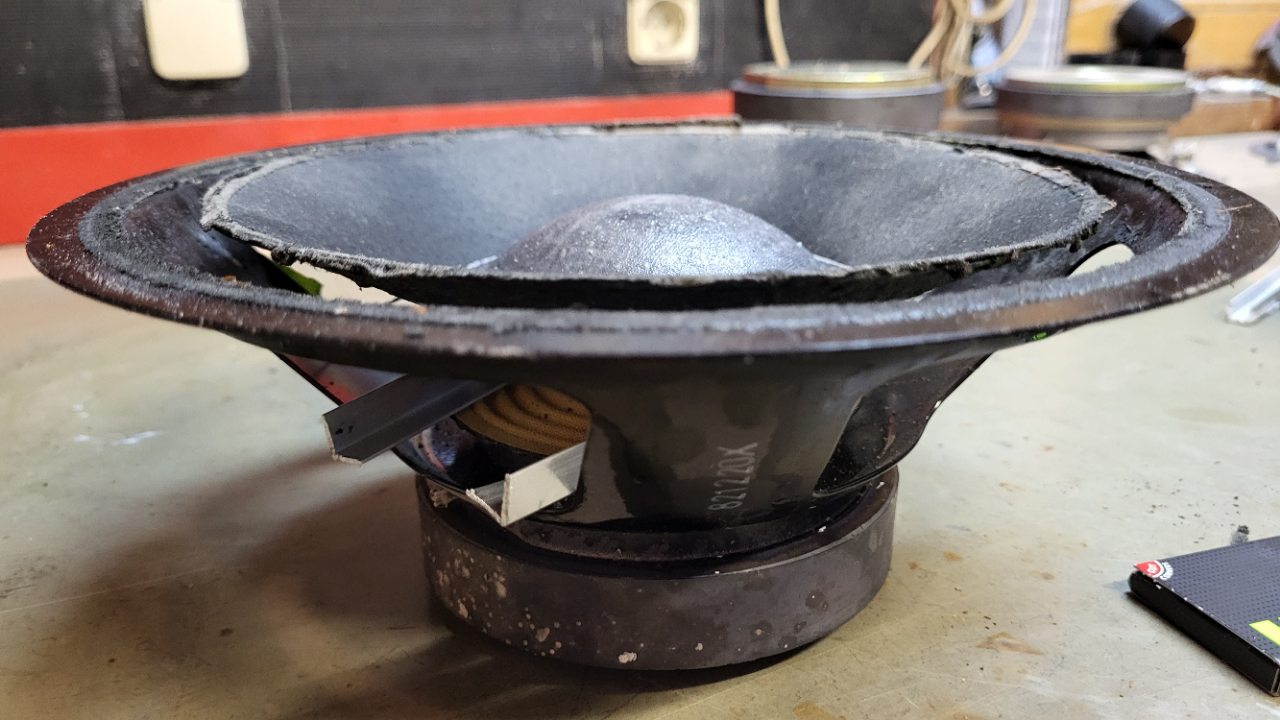
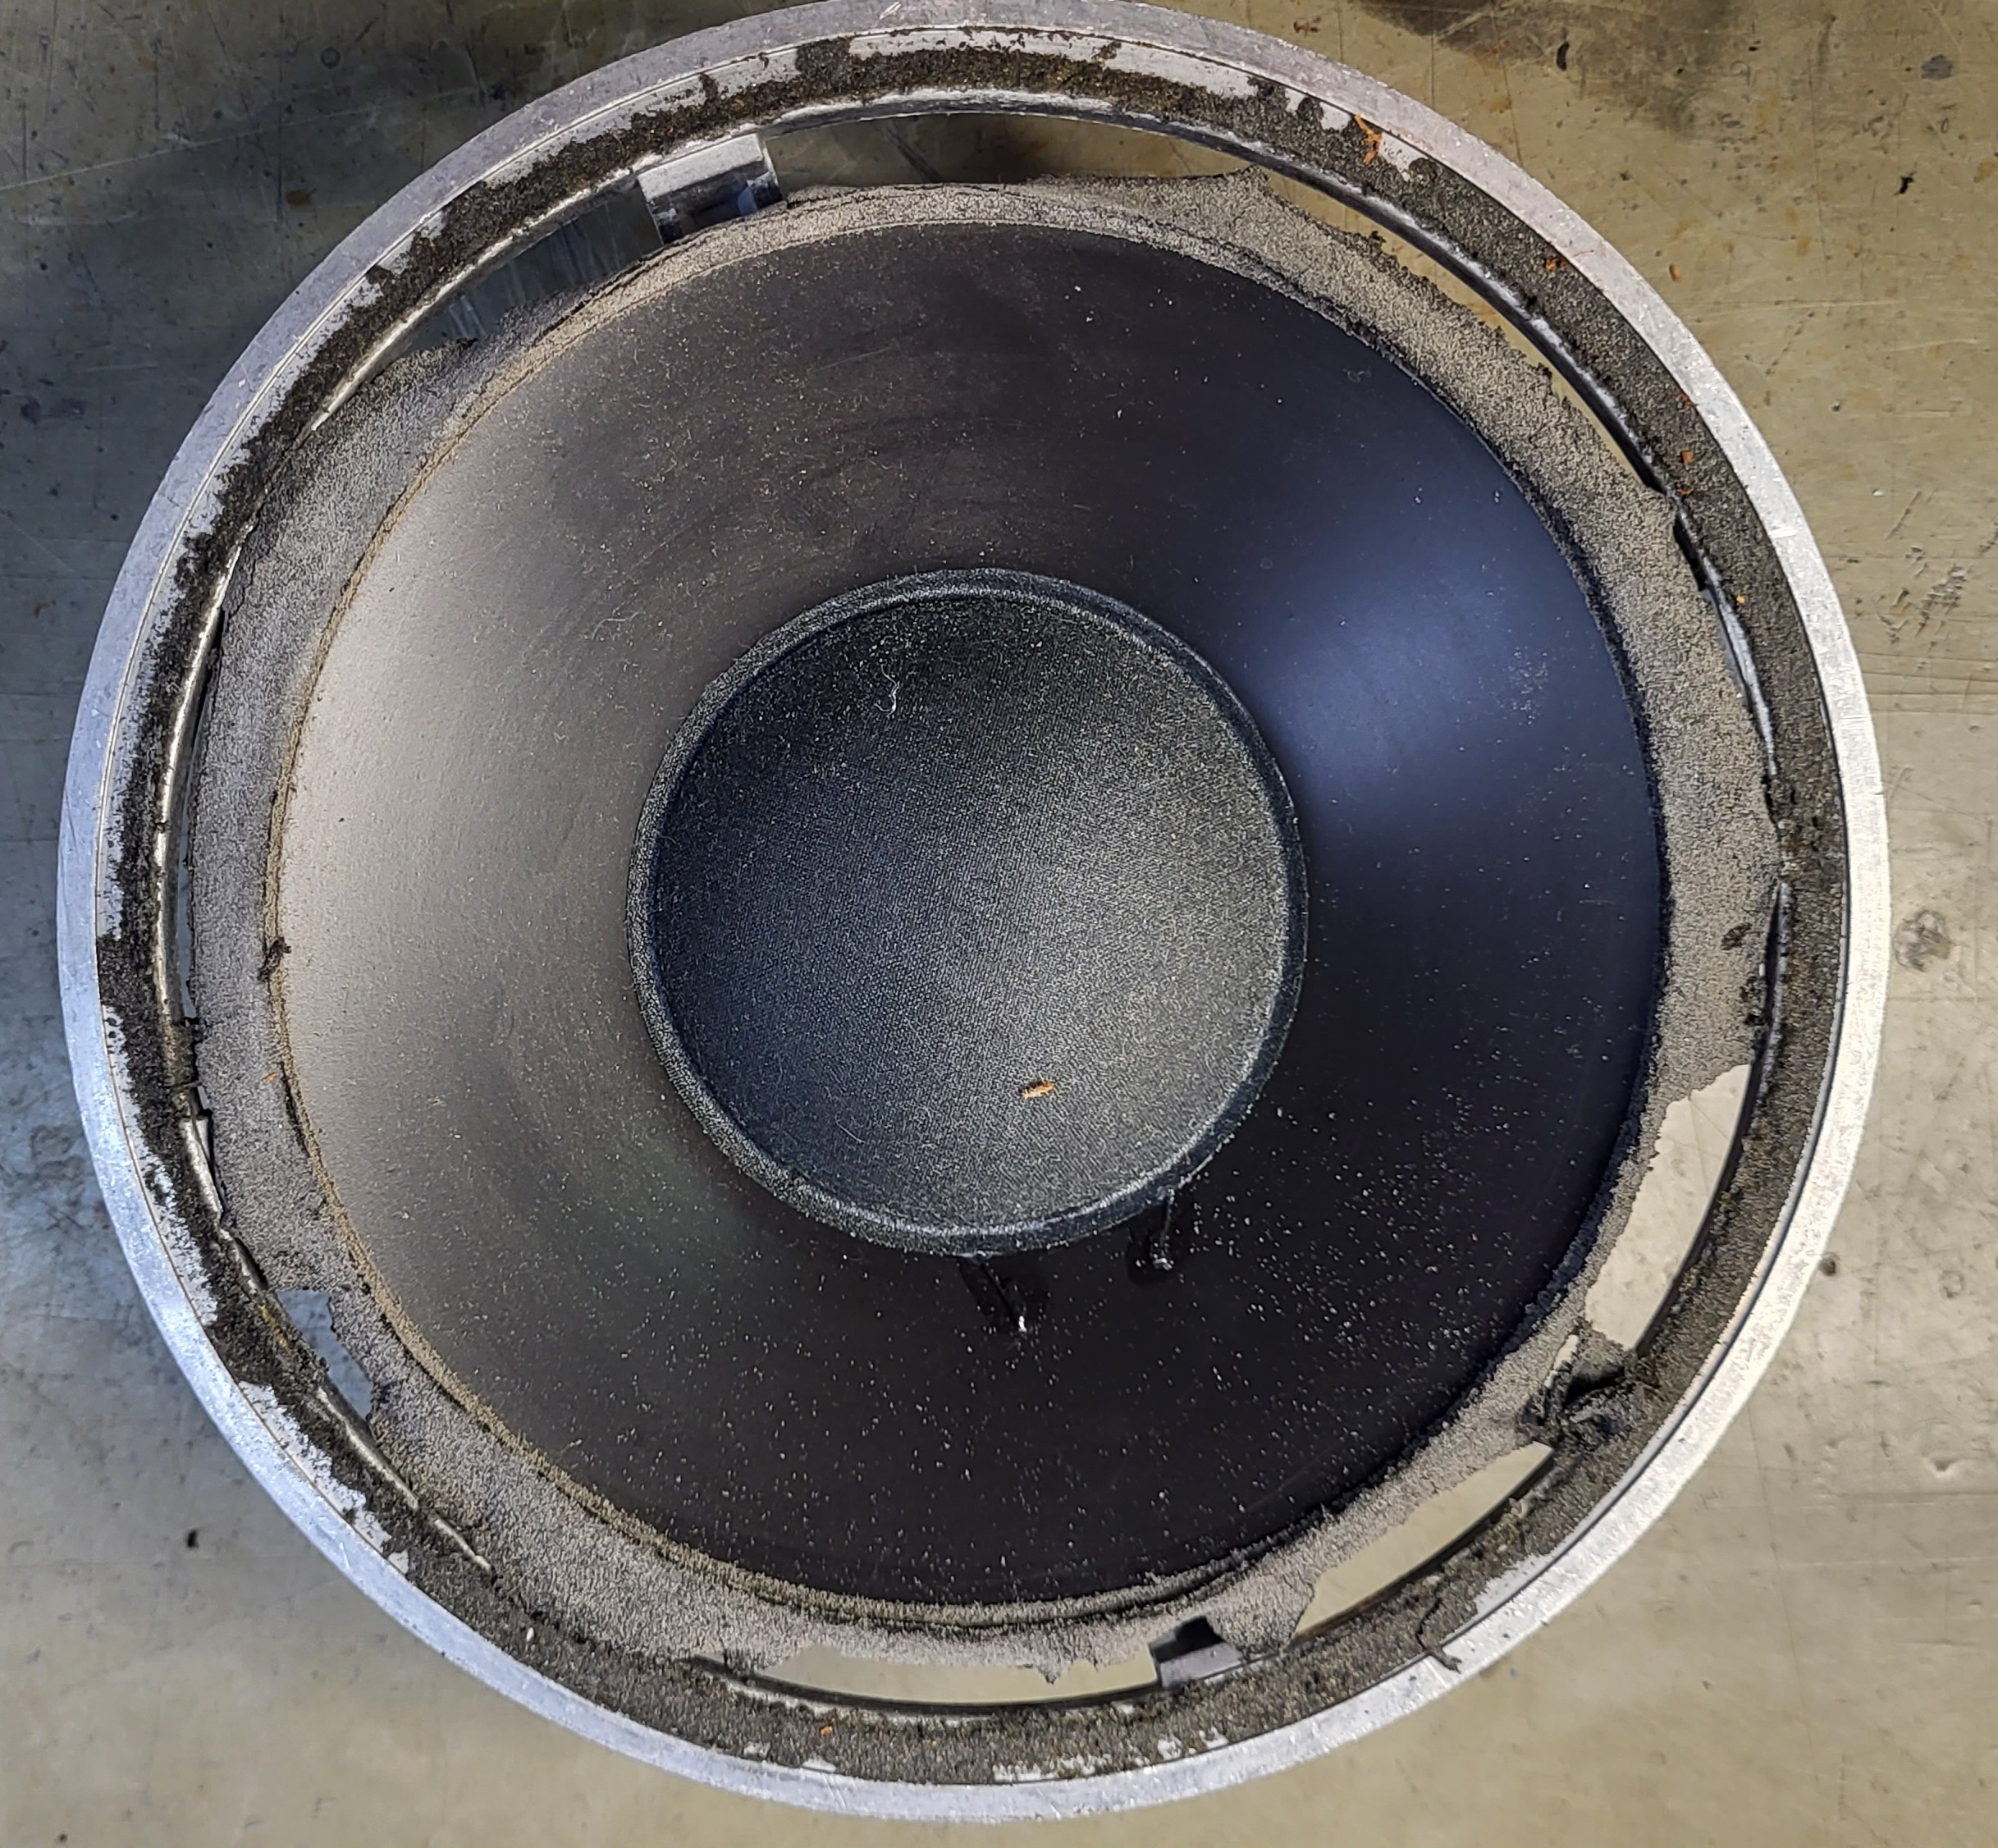
In between I dissassembled the 8″ and 10″ woofers from the cabinet.
The coils are measuring all good so far.
I decided to bring them back in shape as following:
Took some aluminium profiles 10X10 mm and put them underneath the cone to lift the cone upards about 1 cm above the metal frame.
Sprayed with a small amount of water front and back of the cone and let them laying cone downwards on the table over night.
The weight of the chassis gave the right amount of pressure to the cones and next day it looked very good for me.
on the picture you could see the result.
Does anybuddy have a good source for the front fabric? Mine have some small holes and not looking good anymore.

Still a little bit dirty but that will be no problem so far ;-))
Waiting for the foam surrounds…..
Kind regards
Christian
25 May 2023 at 11:00 #46781Hi Christian – good progress! For the fabric: I used akustikstoff.com (for my 8000s & 6000s) and liked it.
Regards, Johan
Location: Netherlands
My B&O Icons:
 26 May 2023 at 08:03 #46782
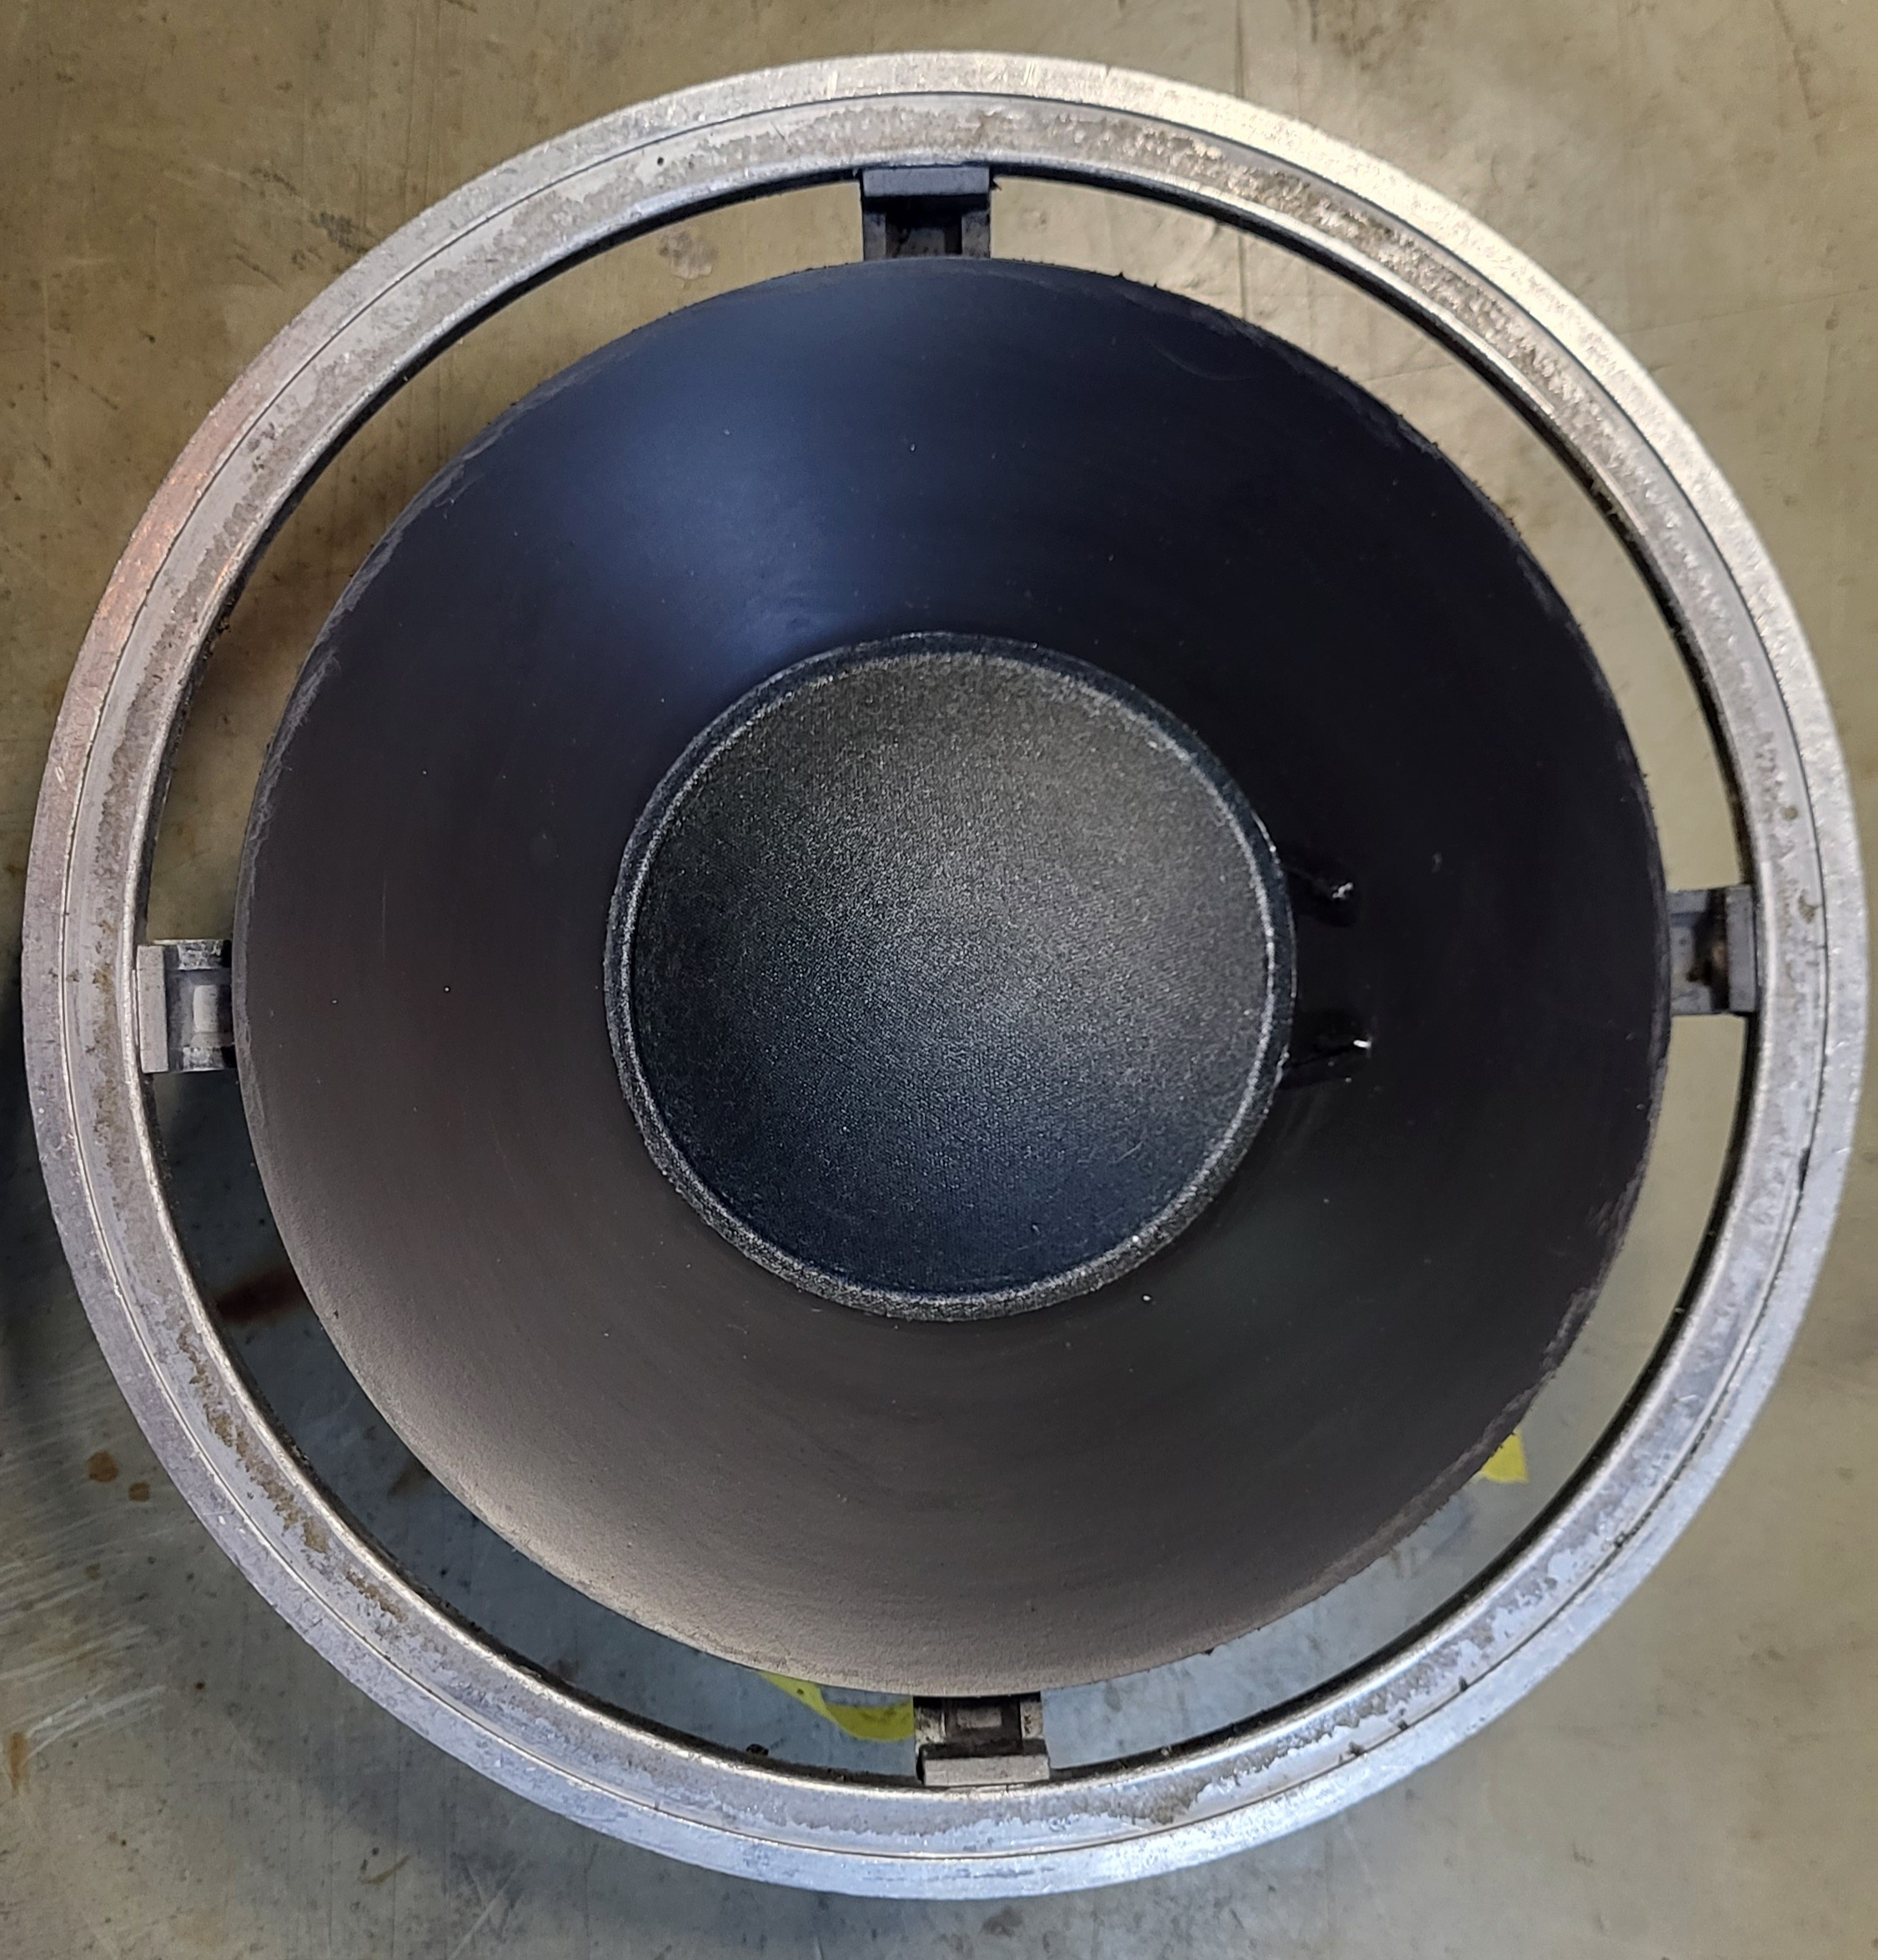
Hi
Yesterday the foam surround from “Good Old HiFi” NL arrived.
So I started to refoam the 4 woofers.
First I started with the 8″ woofer, cleaned the cast frame and carefully sraped the old glue from the plastic cone. My favorite solvent Mellerud glue remover made a good job.
Before:

After:

After cleaning I glued the foamsurround as much possible centered to the cone. I’ve made a marking arround the cone to see how far the glue should be painted. Put the glue to the backside of the inner foam let it dry for about 5 minutes and pressed it firmly to the cone.
After that I clamped the outer foamring with clothpins to the frame and made a test with a conected amp and my mobilephone and the “Tonegenerator” app at 25 up to 50 Hz to hear if the voicecoil is aligned an centered. No adjustments where requiered. The 8″ woofers need no chimming in my case and I glued the foam to the cast frame. You could see on the last picture.
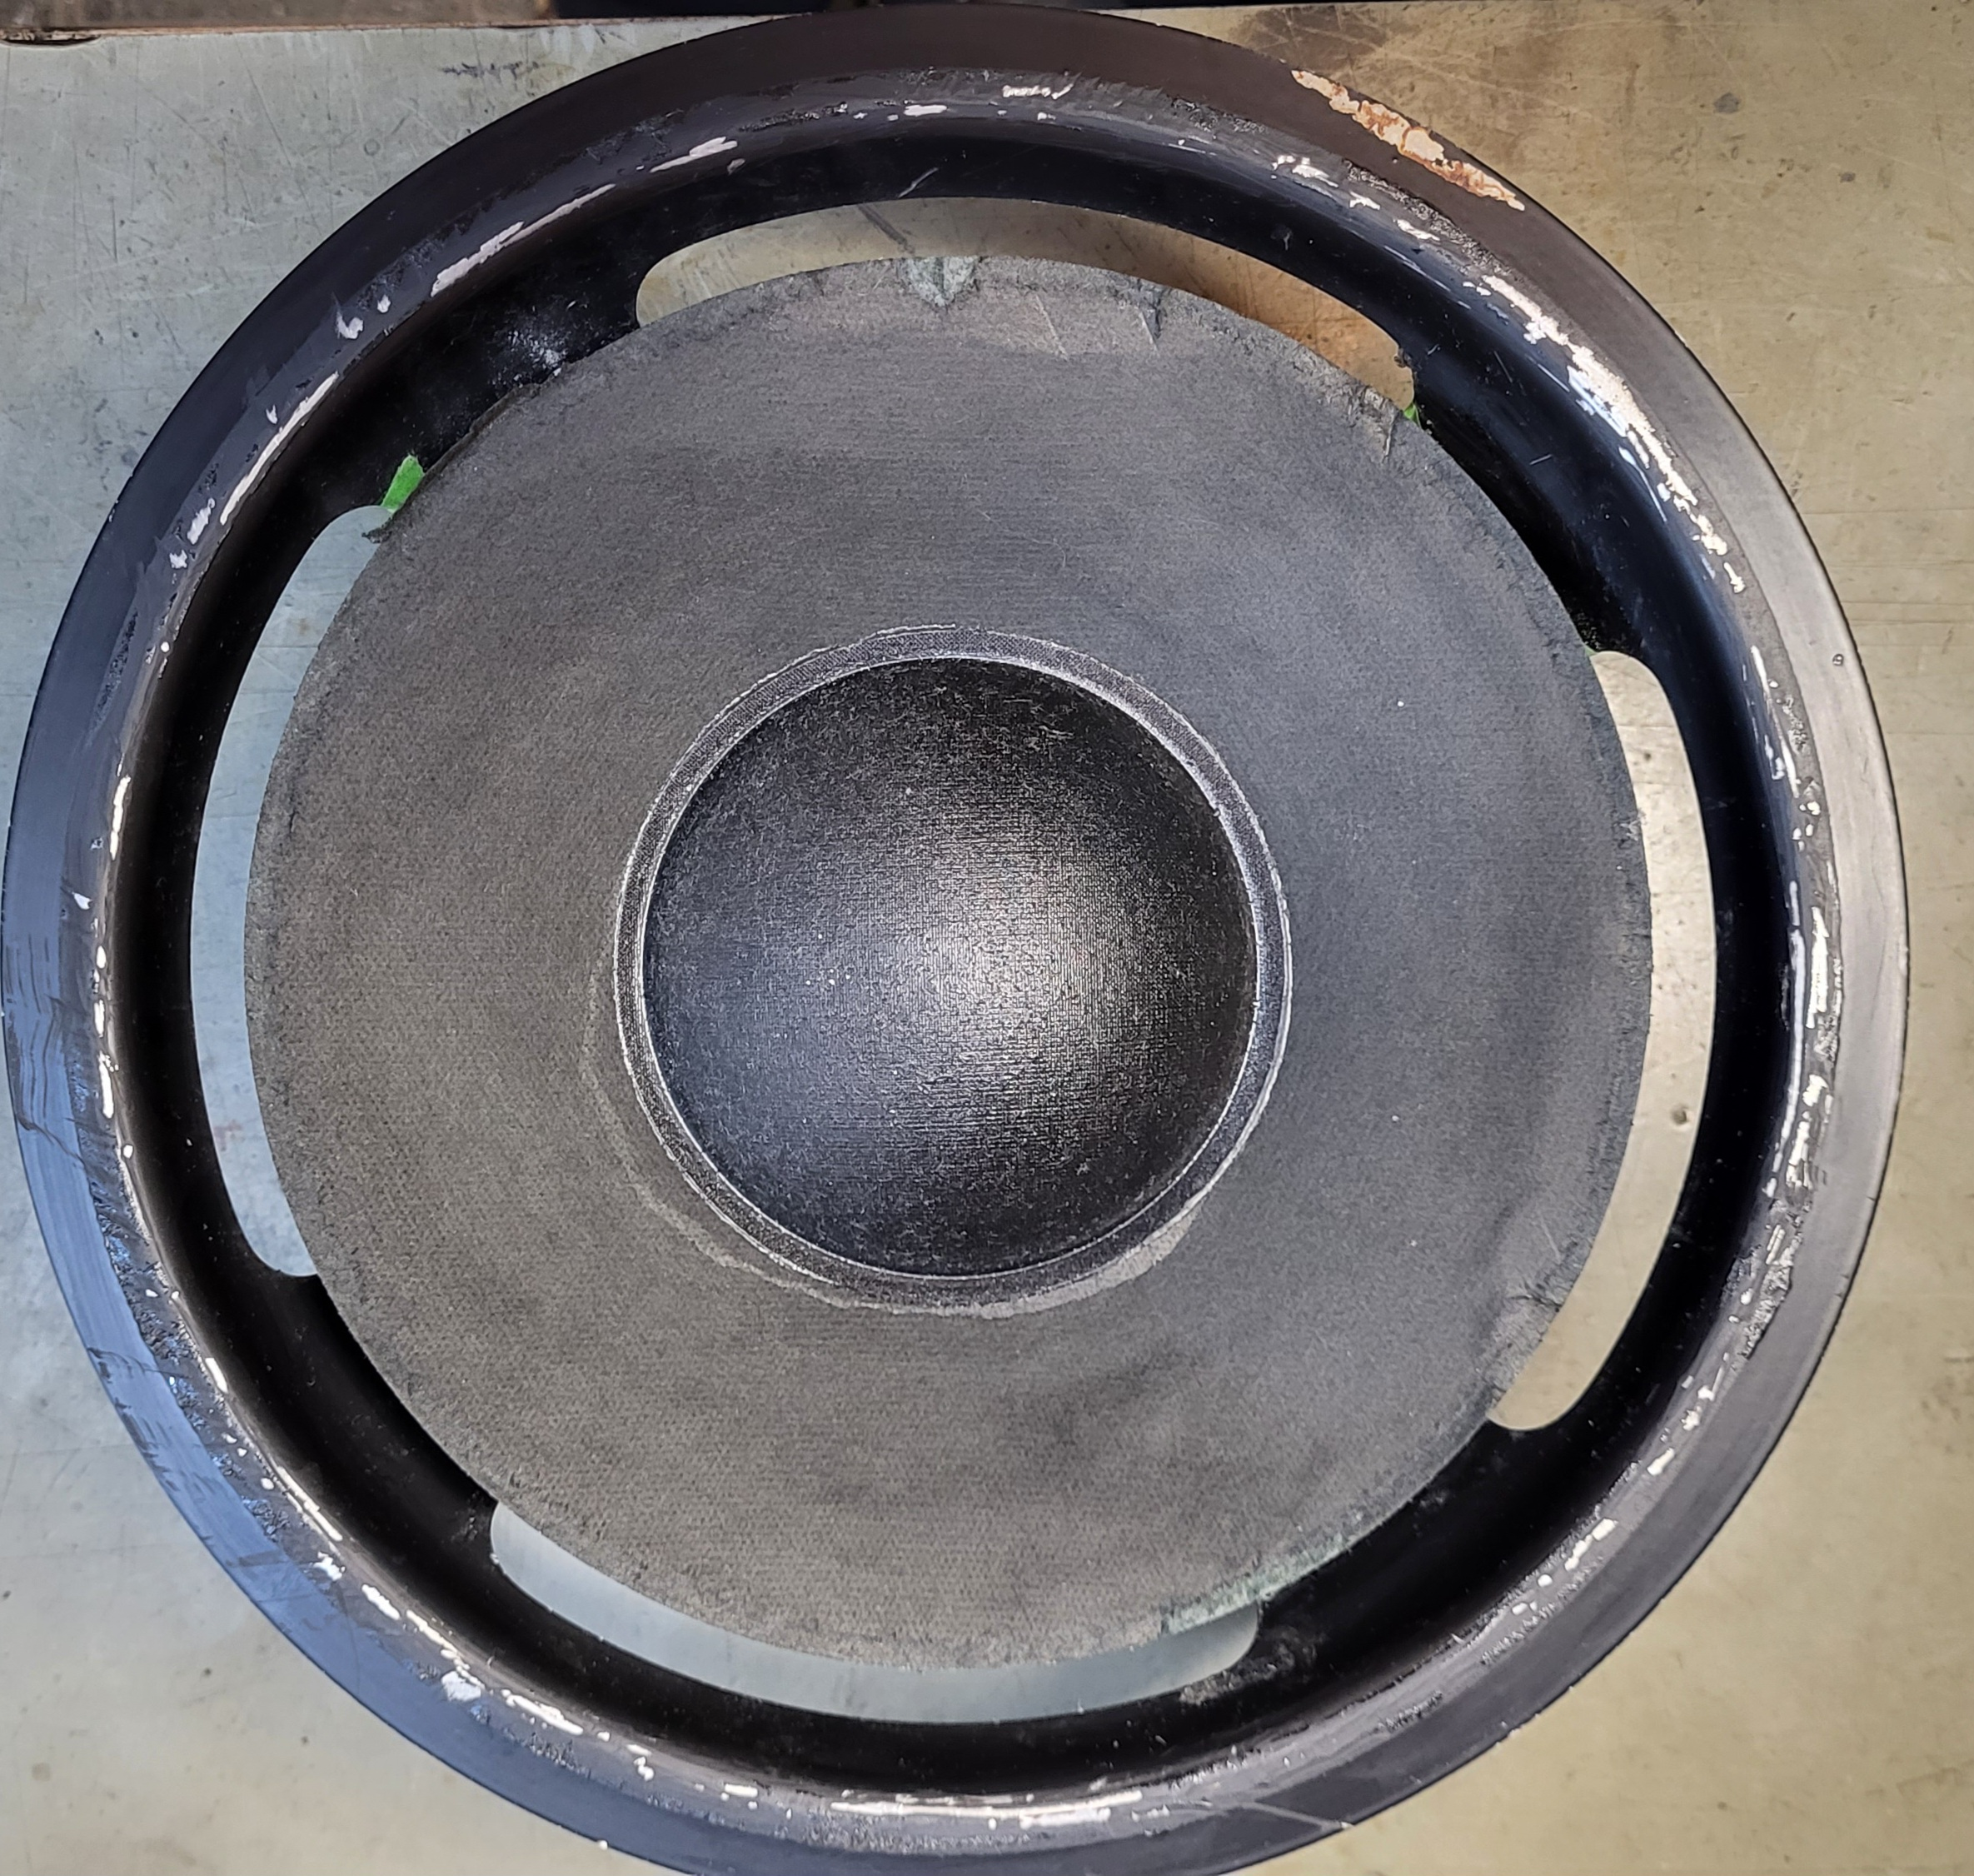
Up to the 10″ woofer.
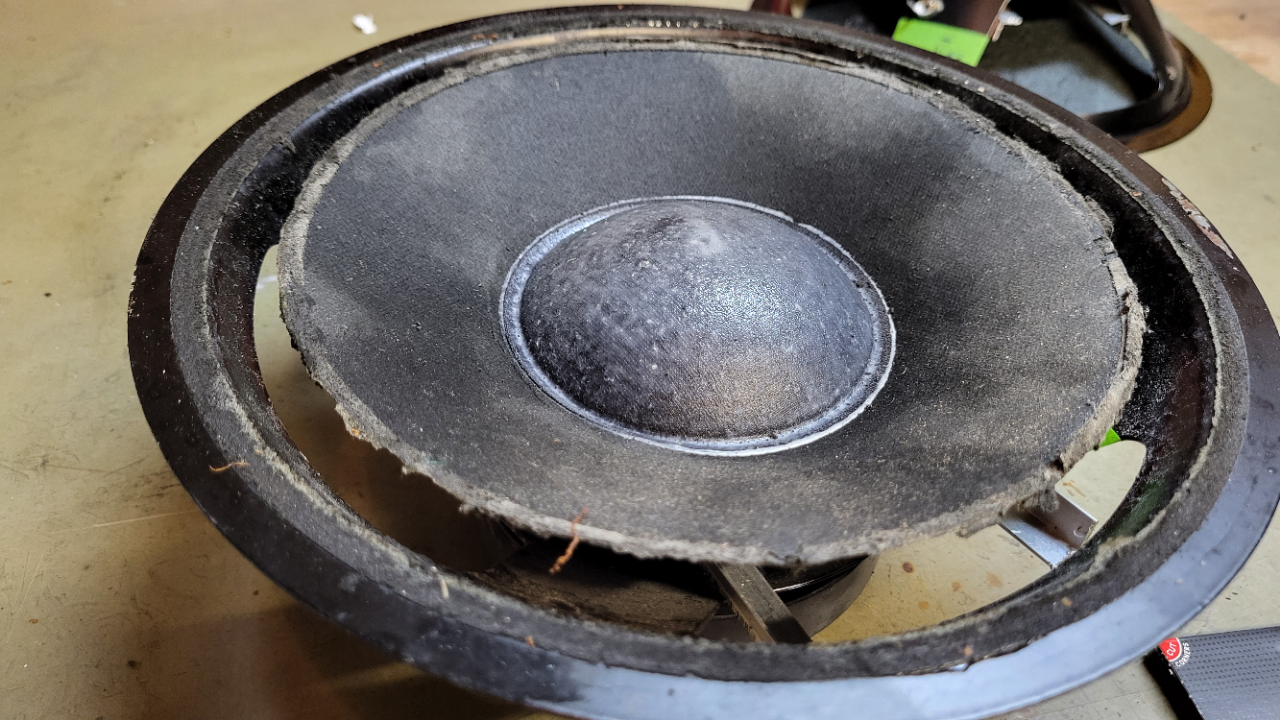
I started with glueremover very carefully only on the old rotten glue because the cone is made of paper and I would not to get to much moisture into the paper.
After about 10 minutes I could peel off the old glue with my fingernail. There is a minimal layer of paper wich comes off with the old glue but that’s no problem.
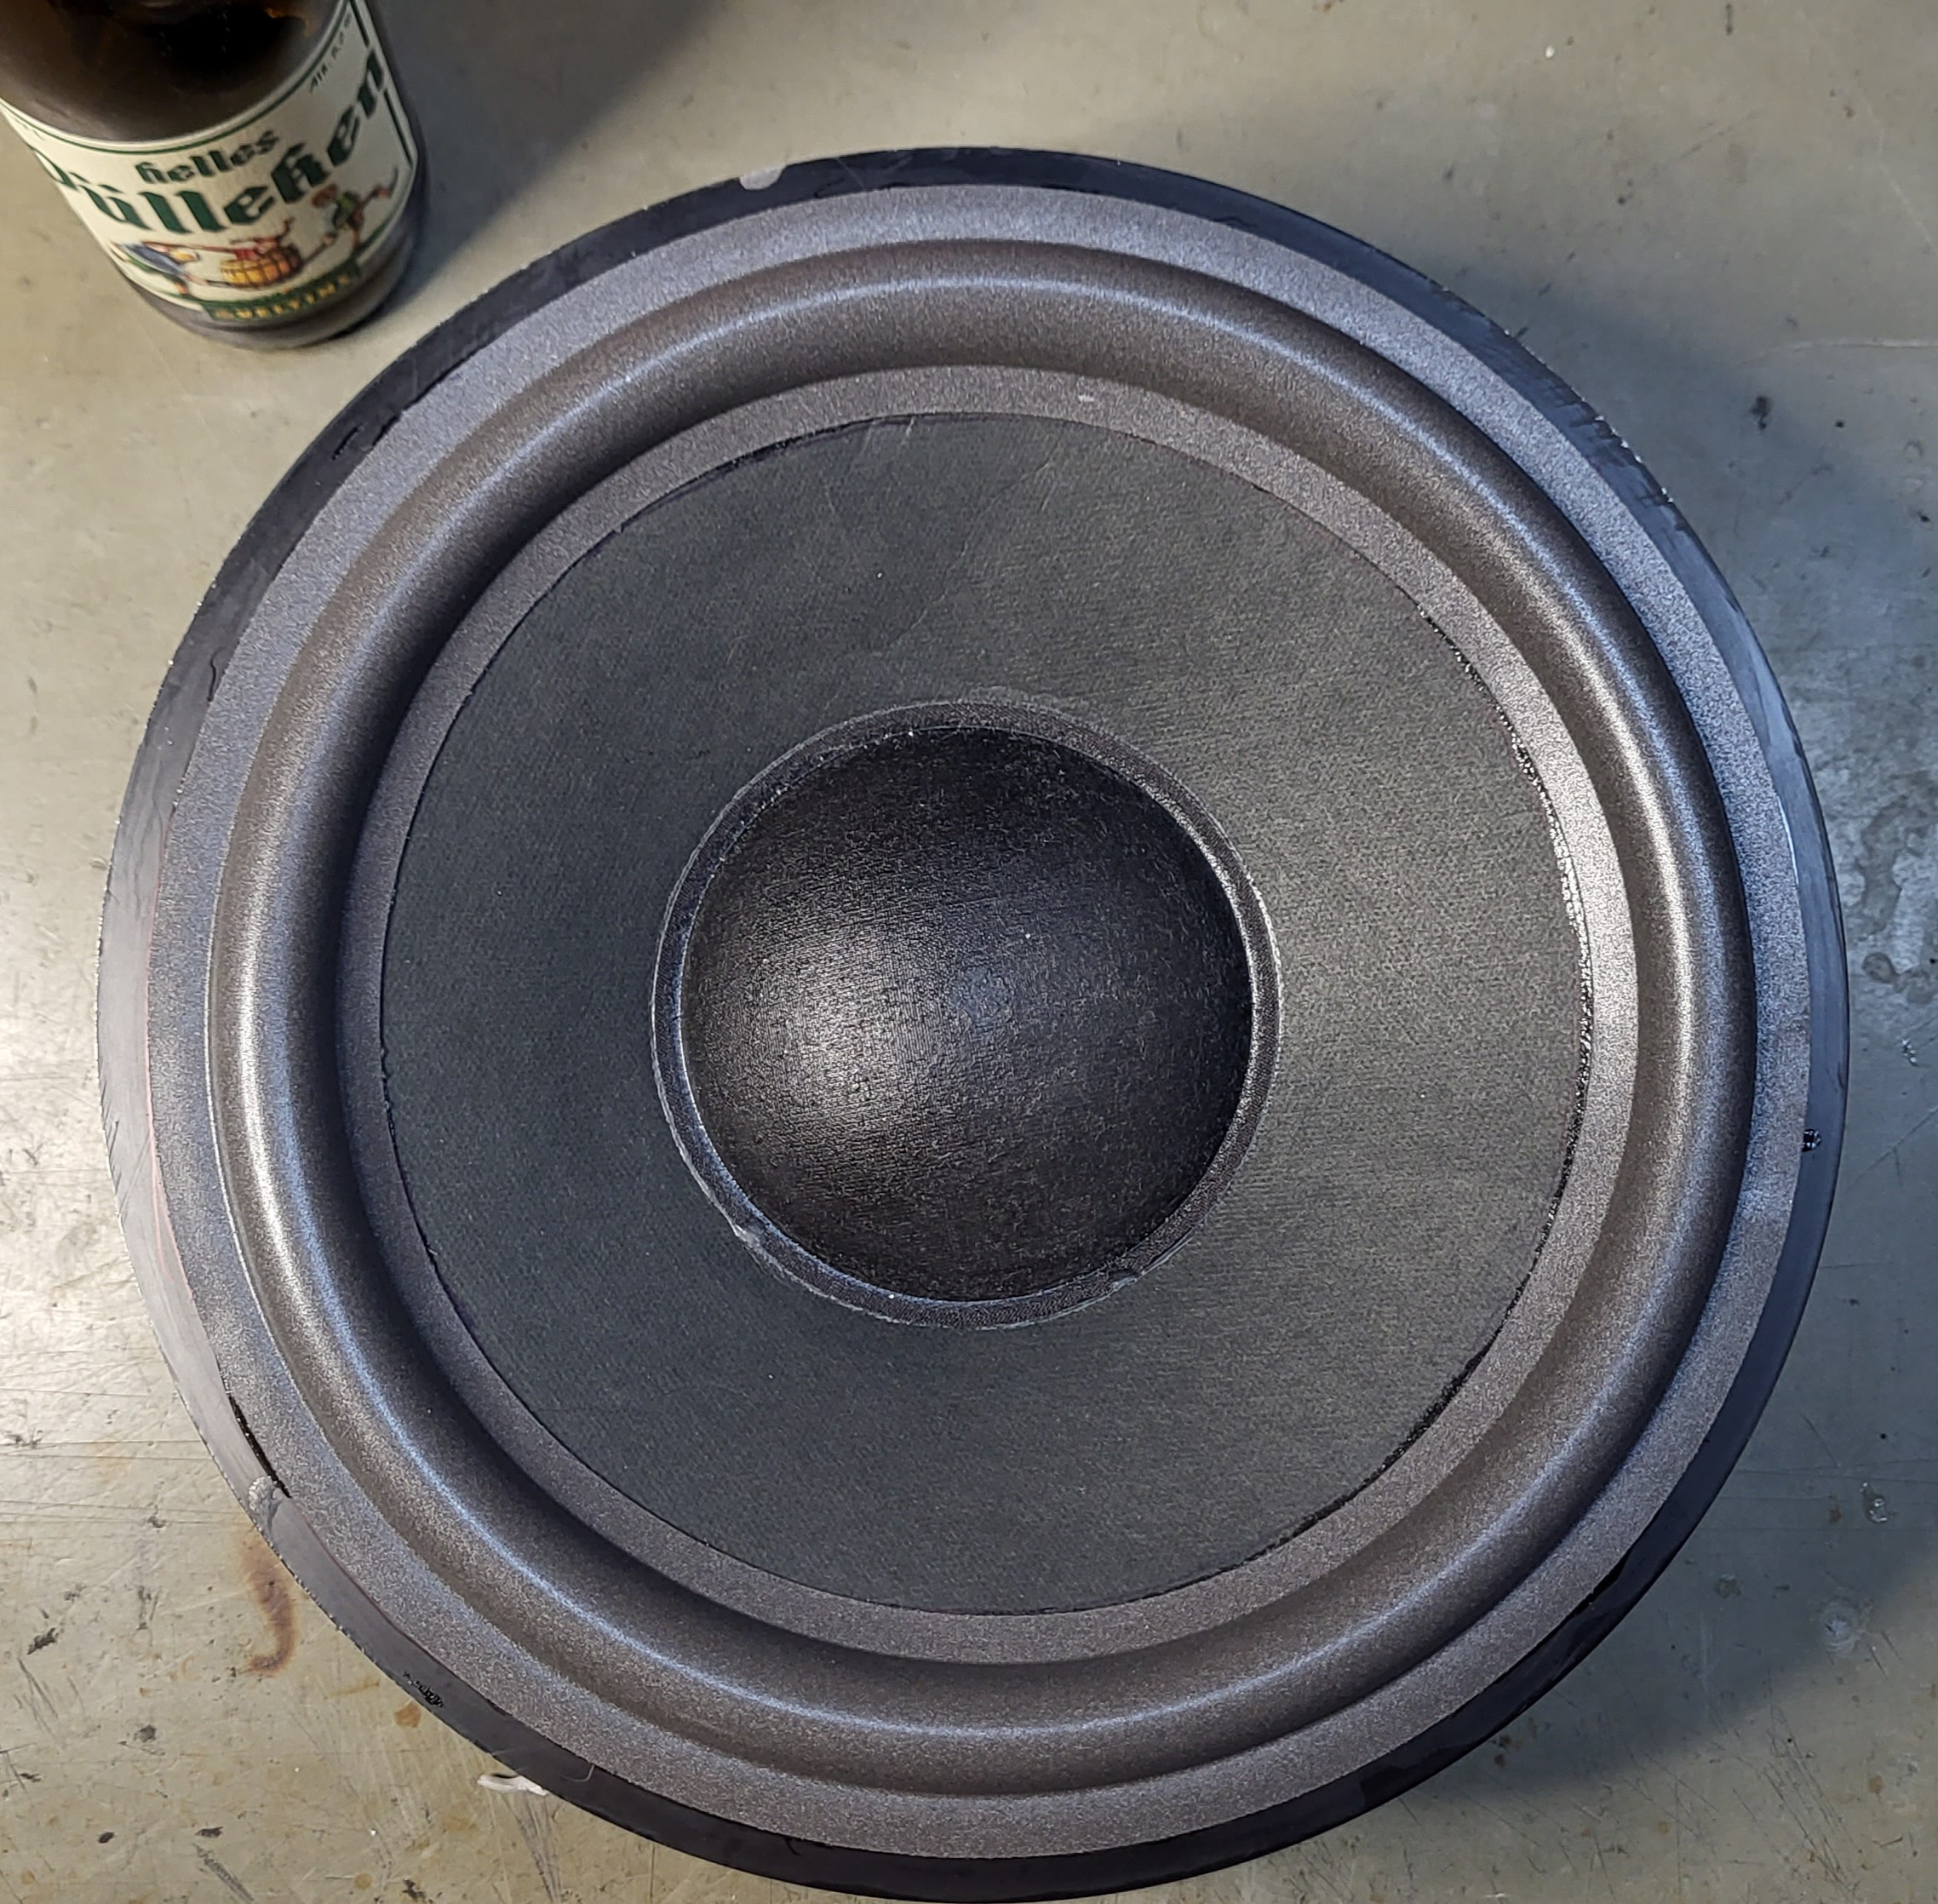
As you cn see there is a damage left from the stick wich was mentioned in the first post. The new foam surround covers exactly thes damages so I’m happy. ;-))

Next was the same steps as the 8″ woofer, I glued the foam to the cone , tested with clothpins and made a marking around the outer foam to know where the foam has to be glued on the frame.

The cone centered itself like the 8″ woofer, no alignement nessesary.
Here is the result: cheers;-))

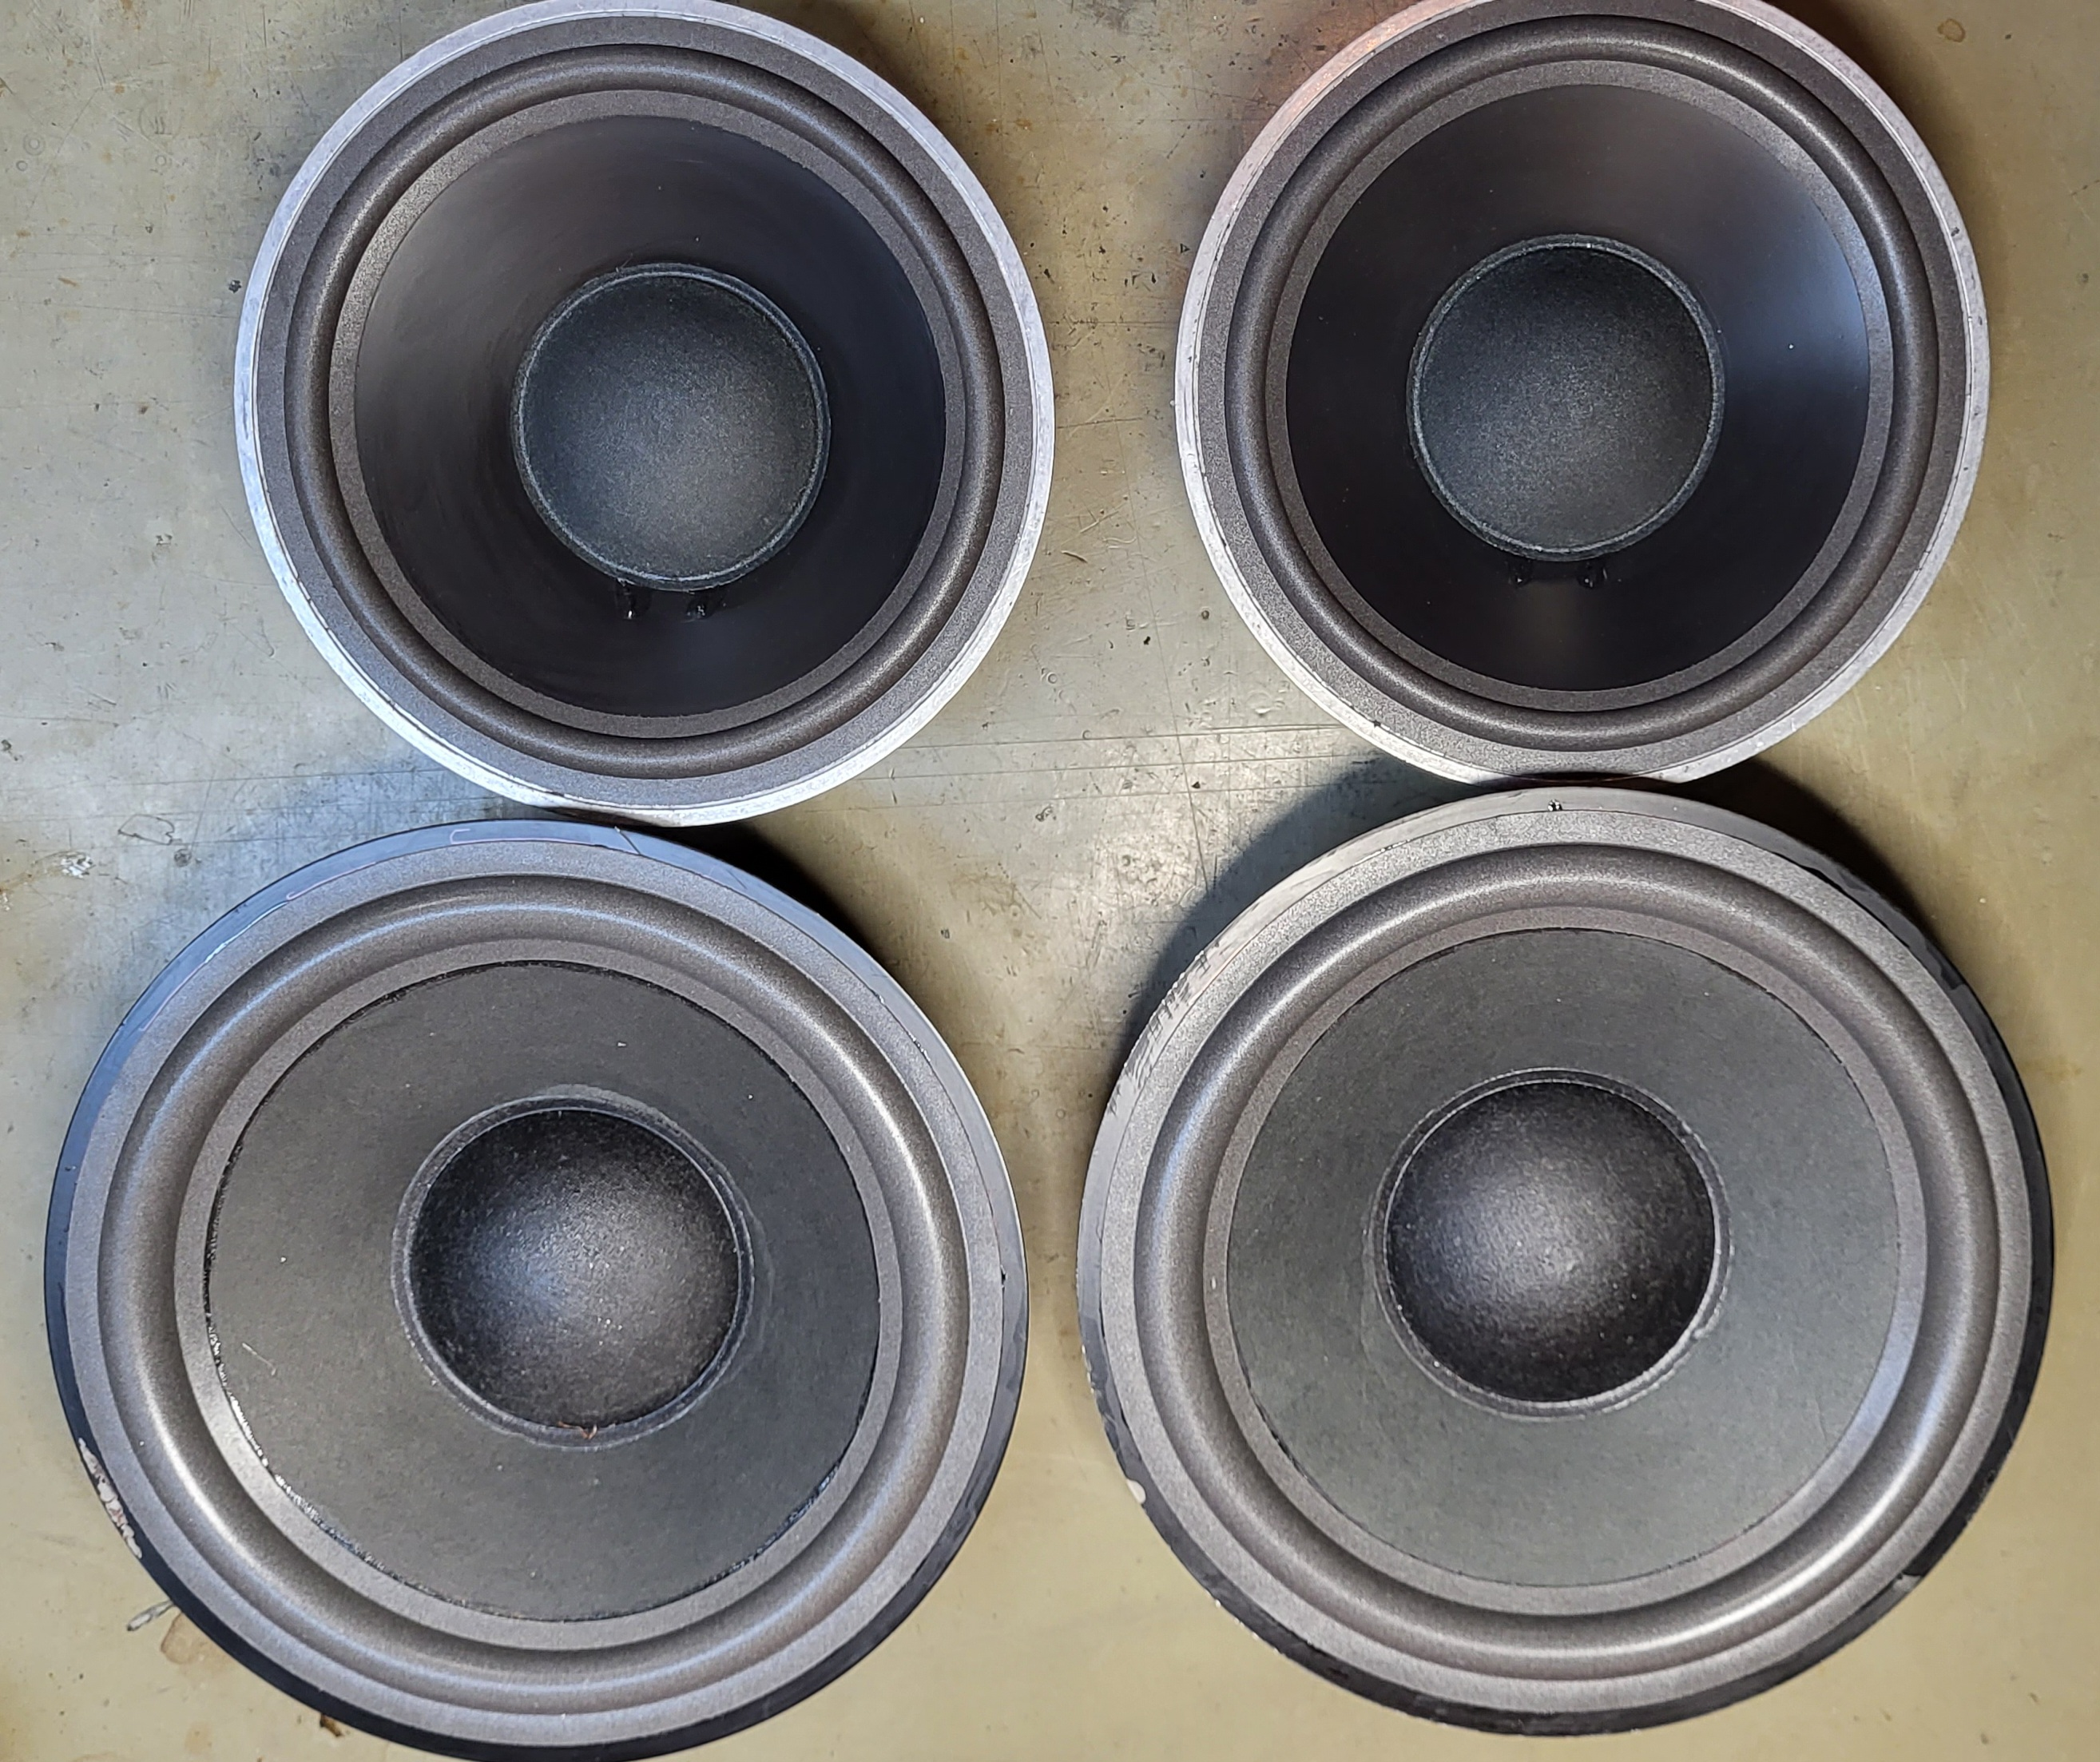
Complete set of woofers after 5 hours:

Thanks for watching!
Next is the renew of the fabric grilles, new capacitors on the filterboard and refreshing the wooden case.
Kind regards
Christian
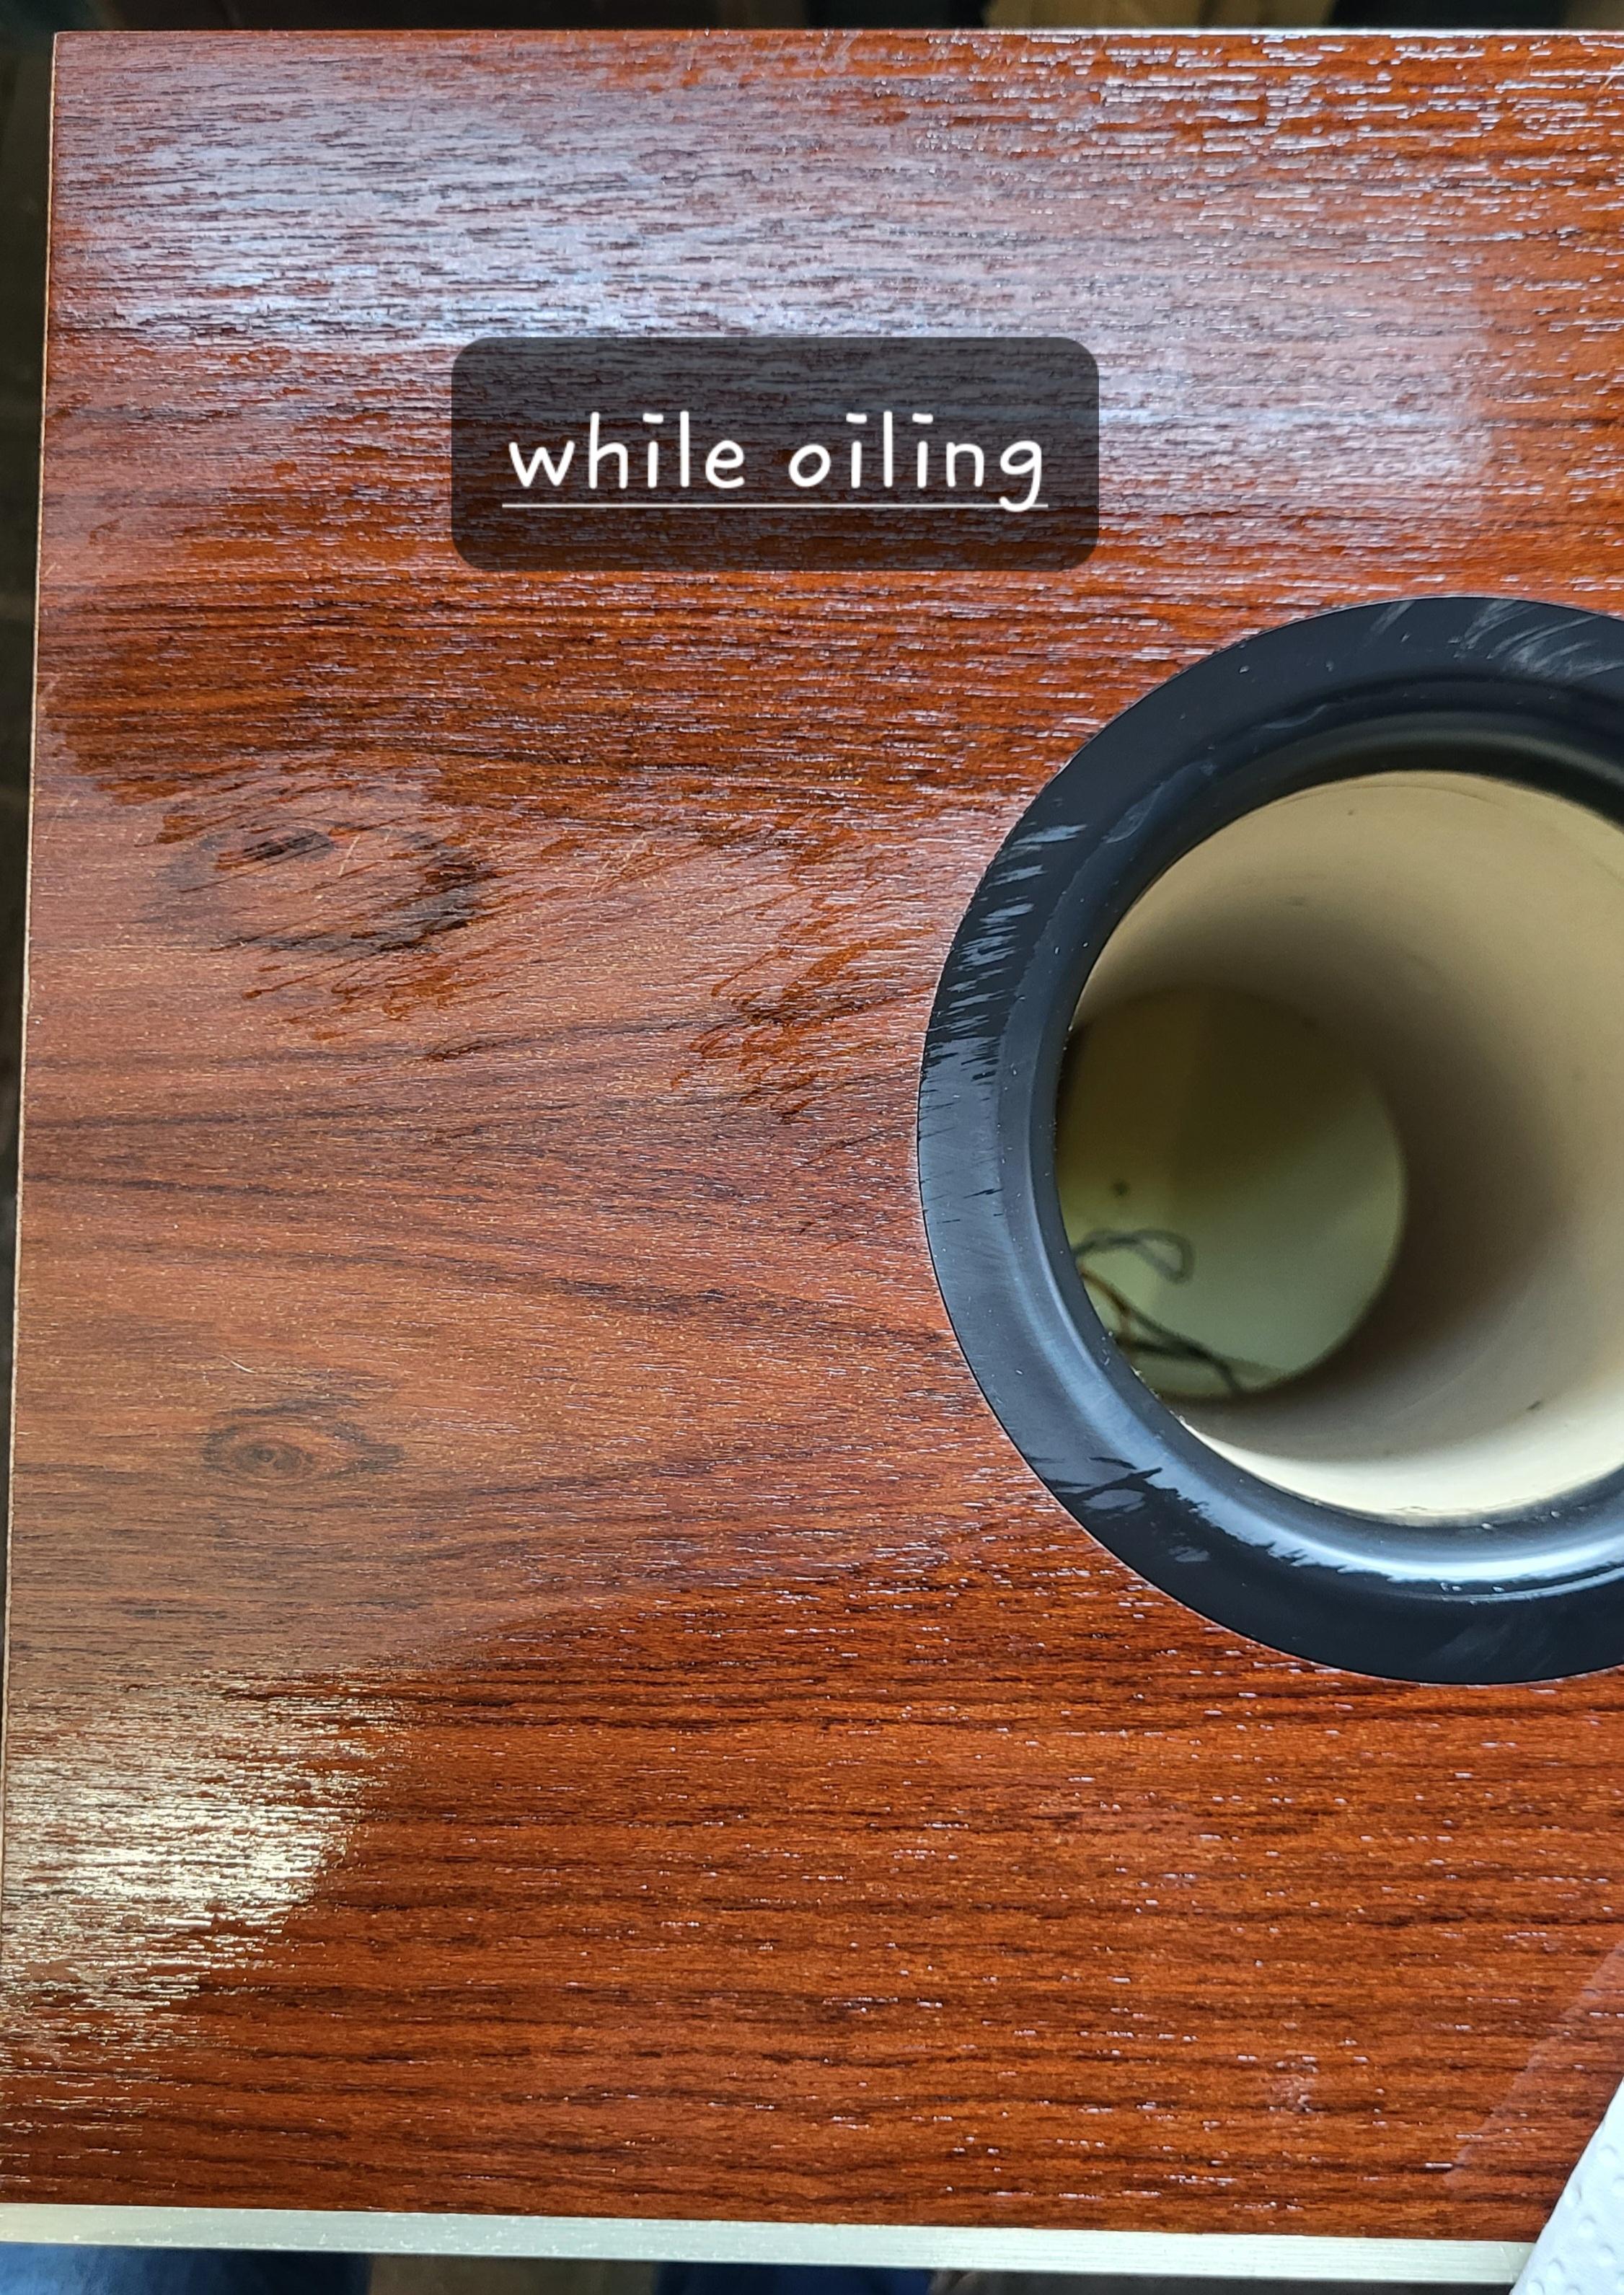
26 May 2023 at 20:34 #46783Hi, here are some news…
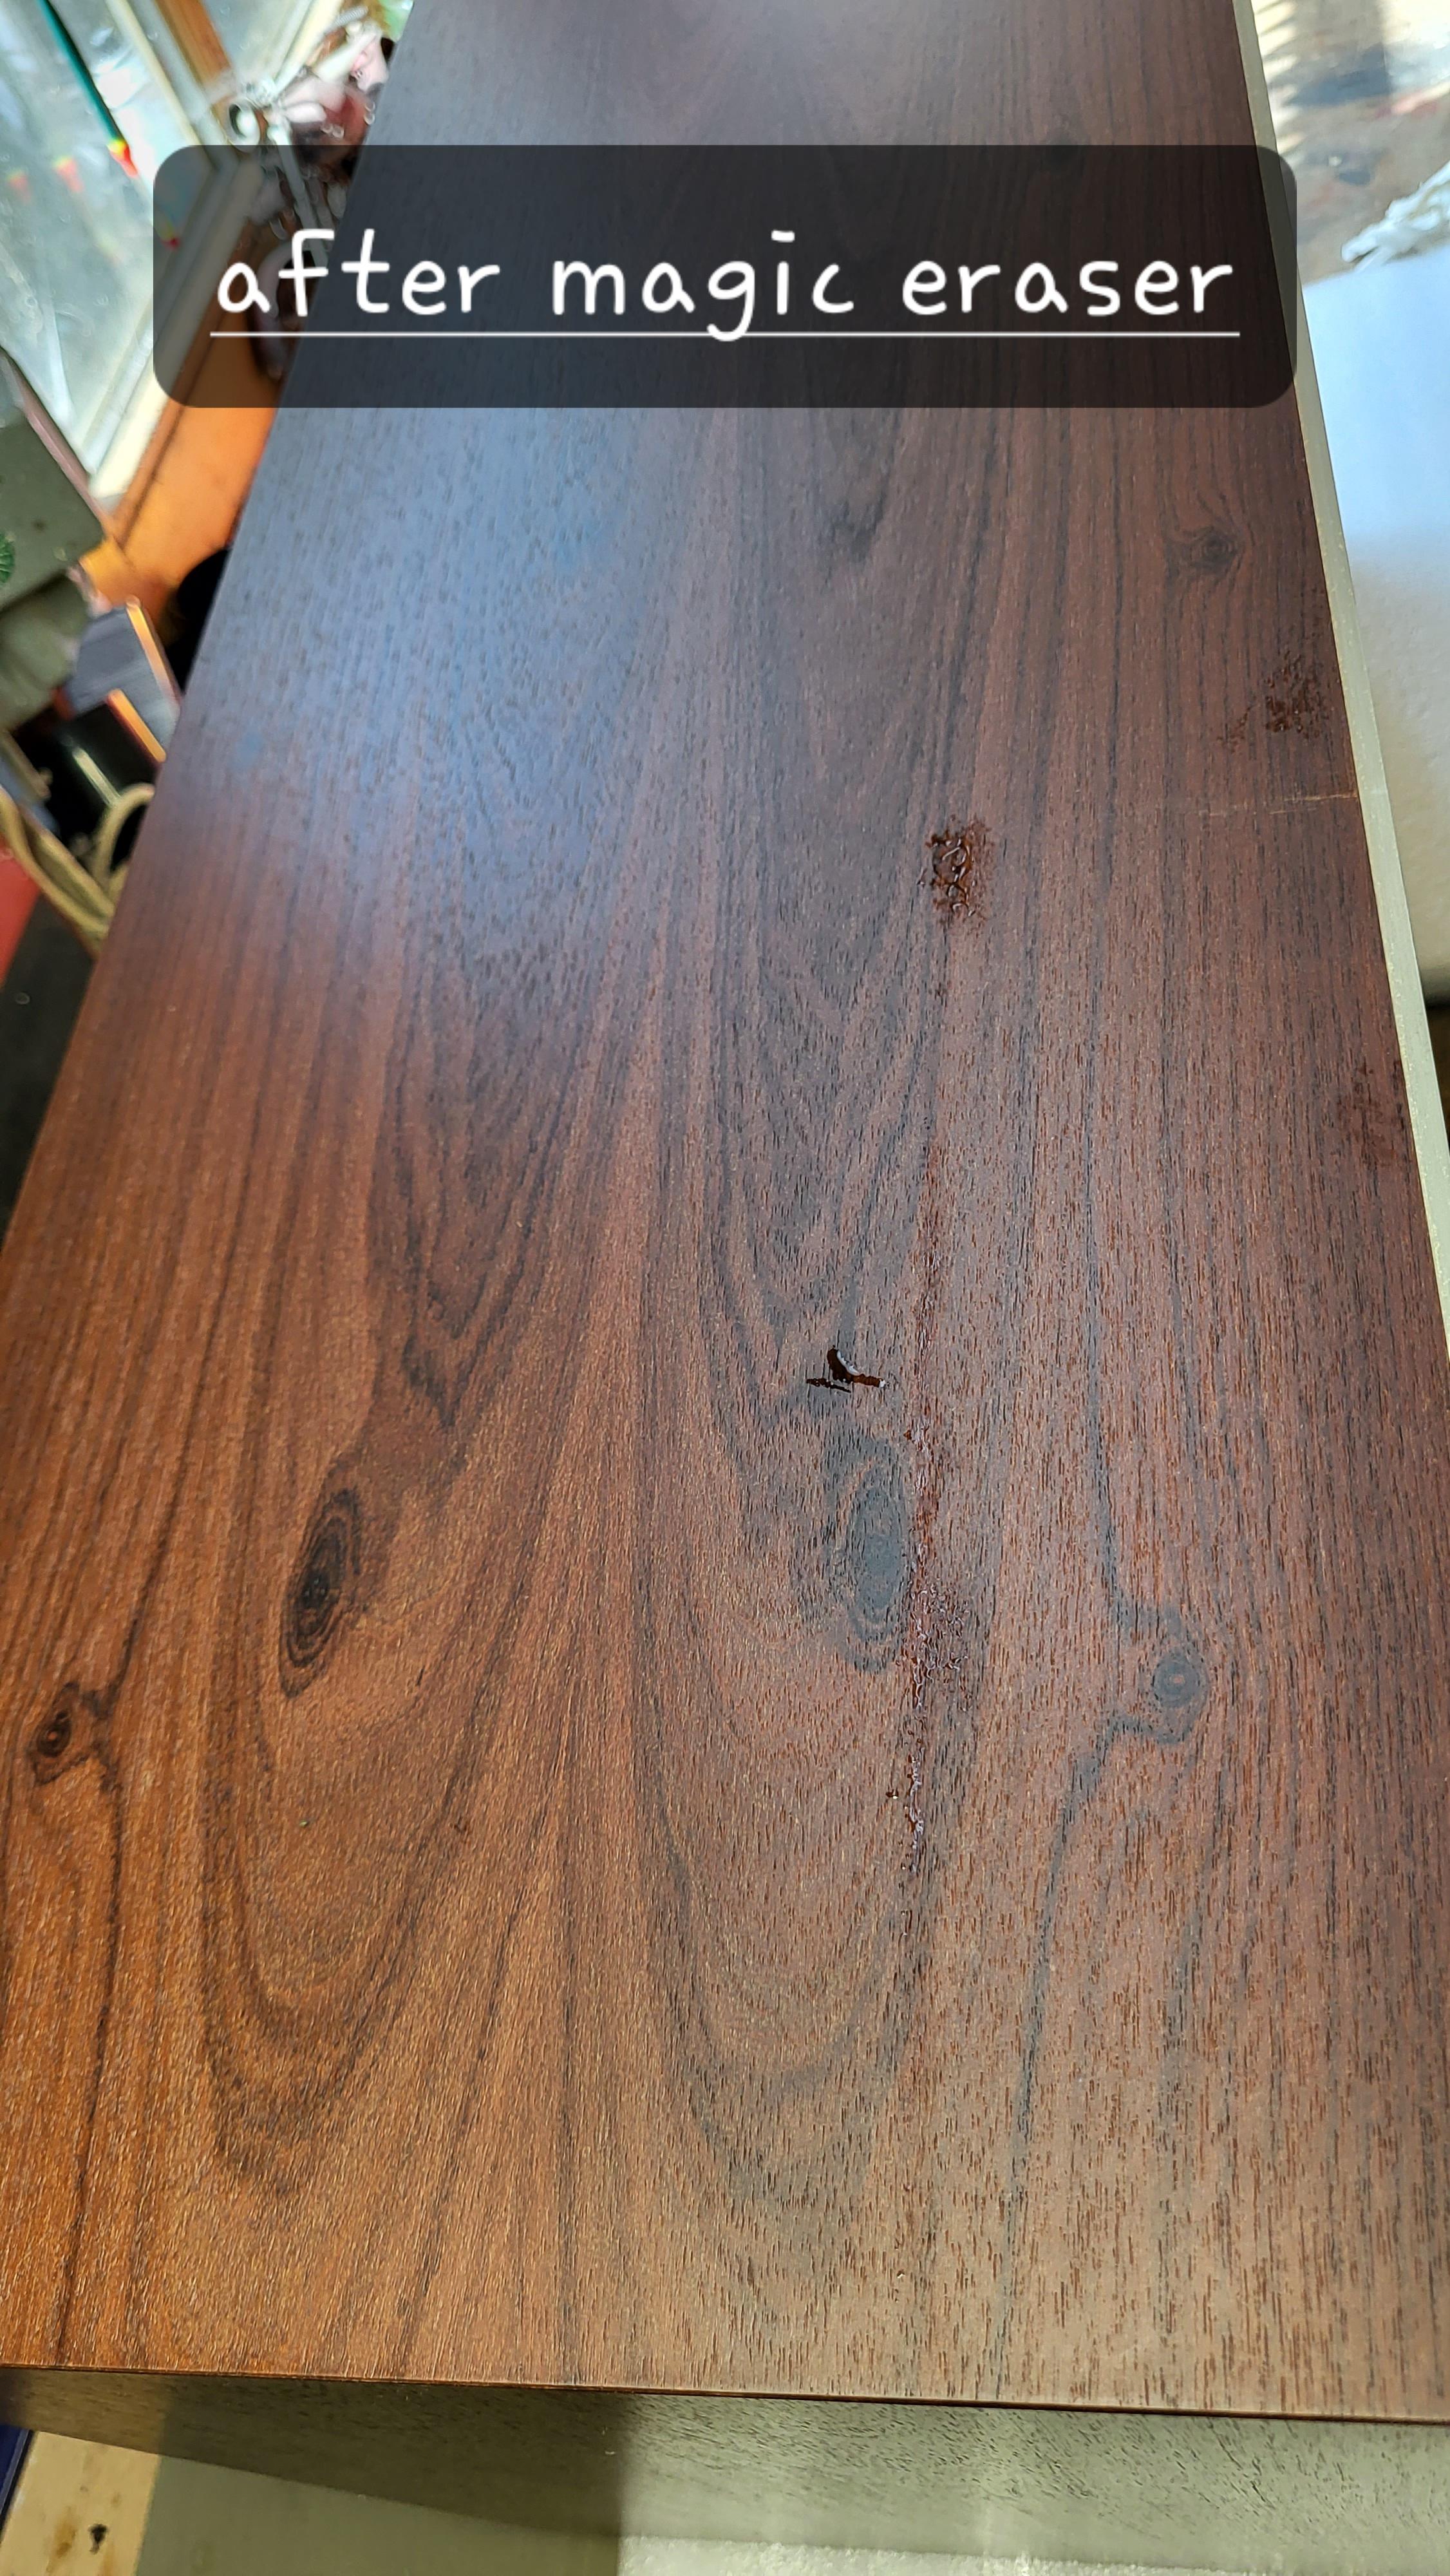
I cleaned the wood with a magic eraser and a light soaped water with a neutral soap.

After letting it dry I put some renovating oil on the wood and let it shine again.

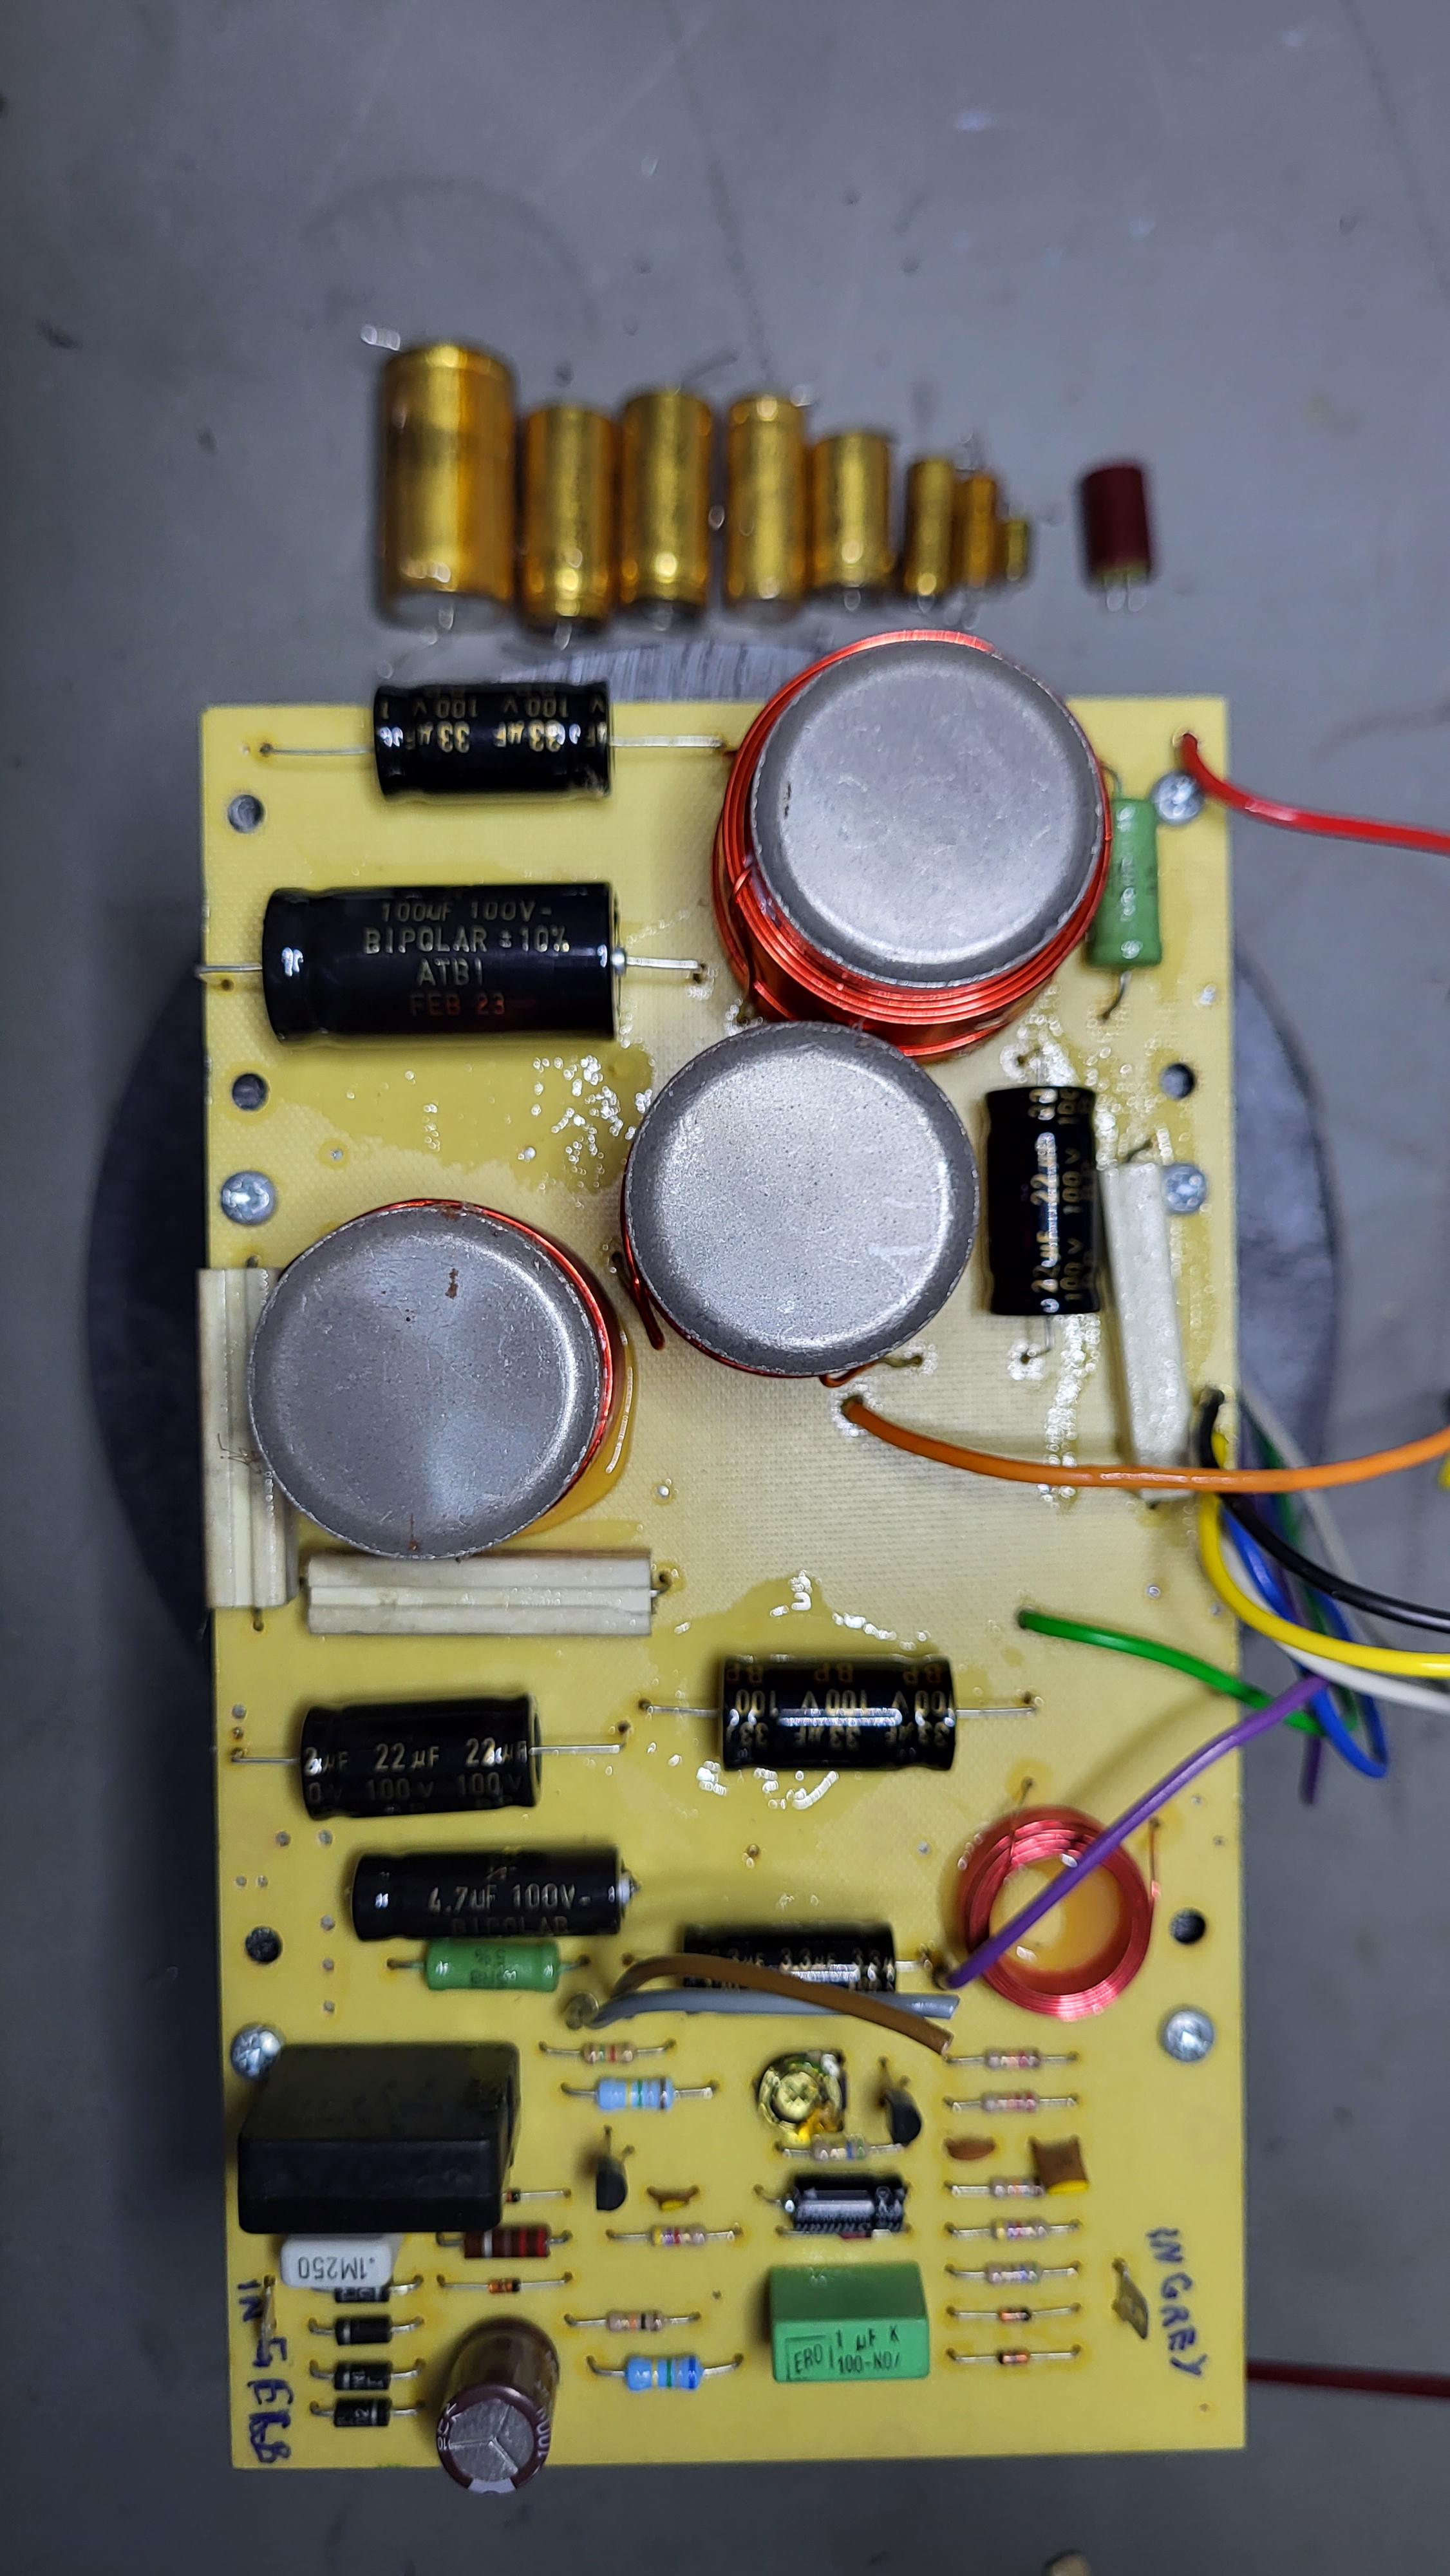
I recapped the Crossover network with new bipolar caps, just business as usual, old ones out new ones in.
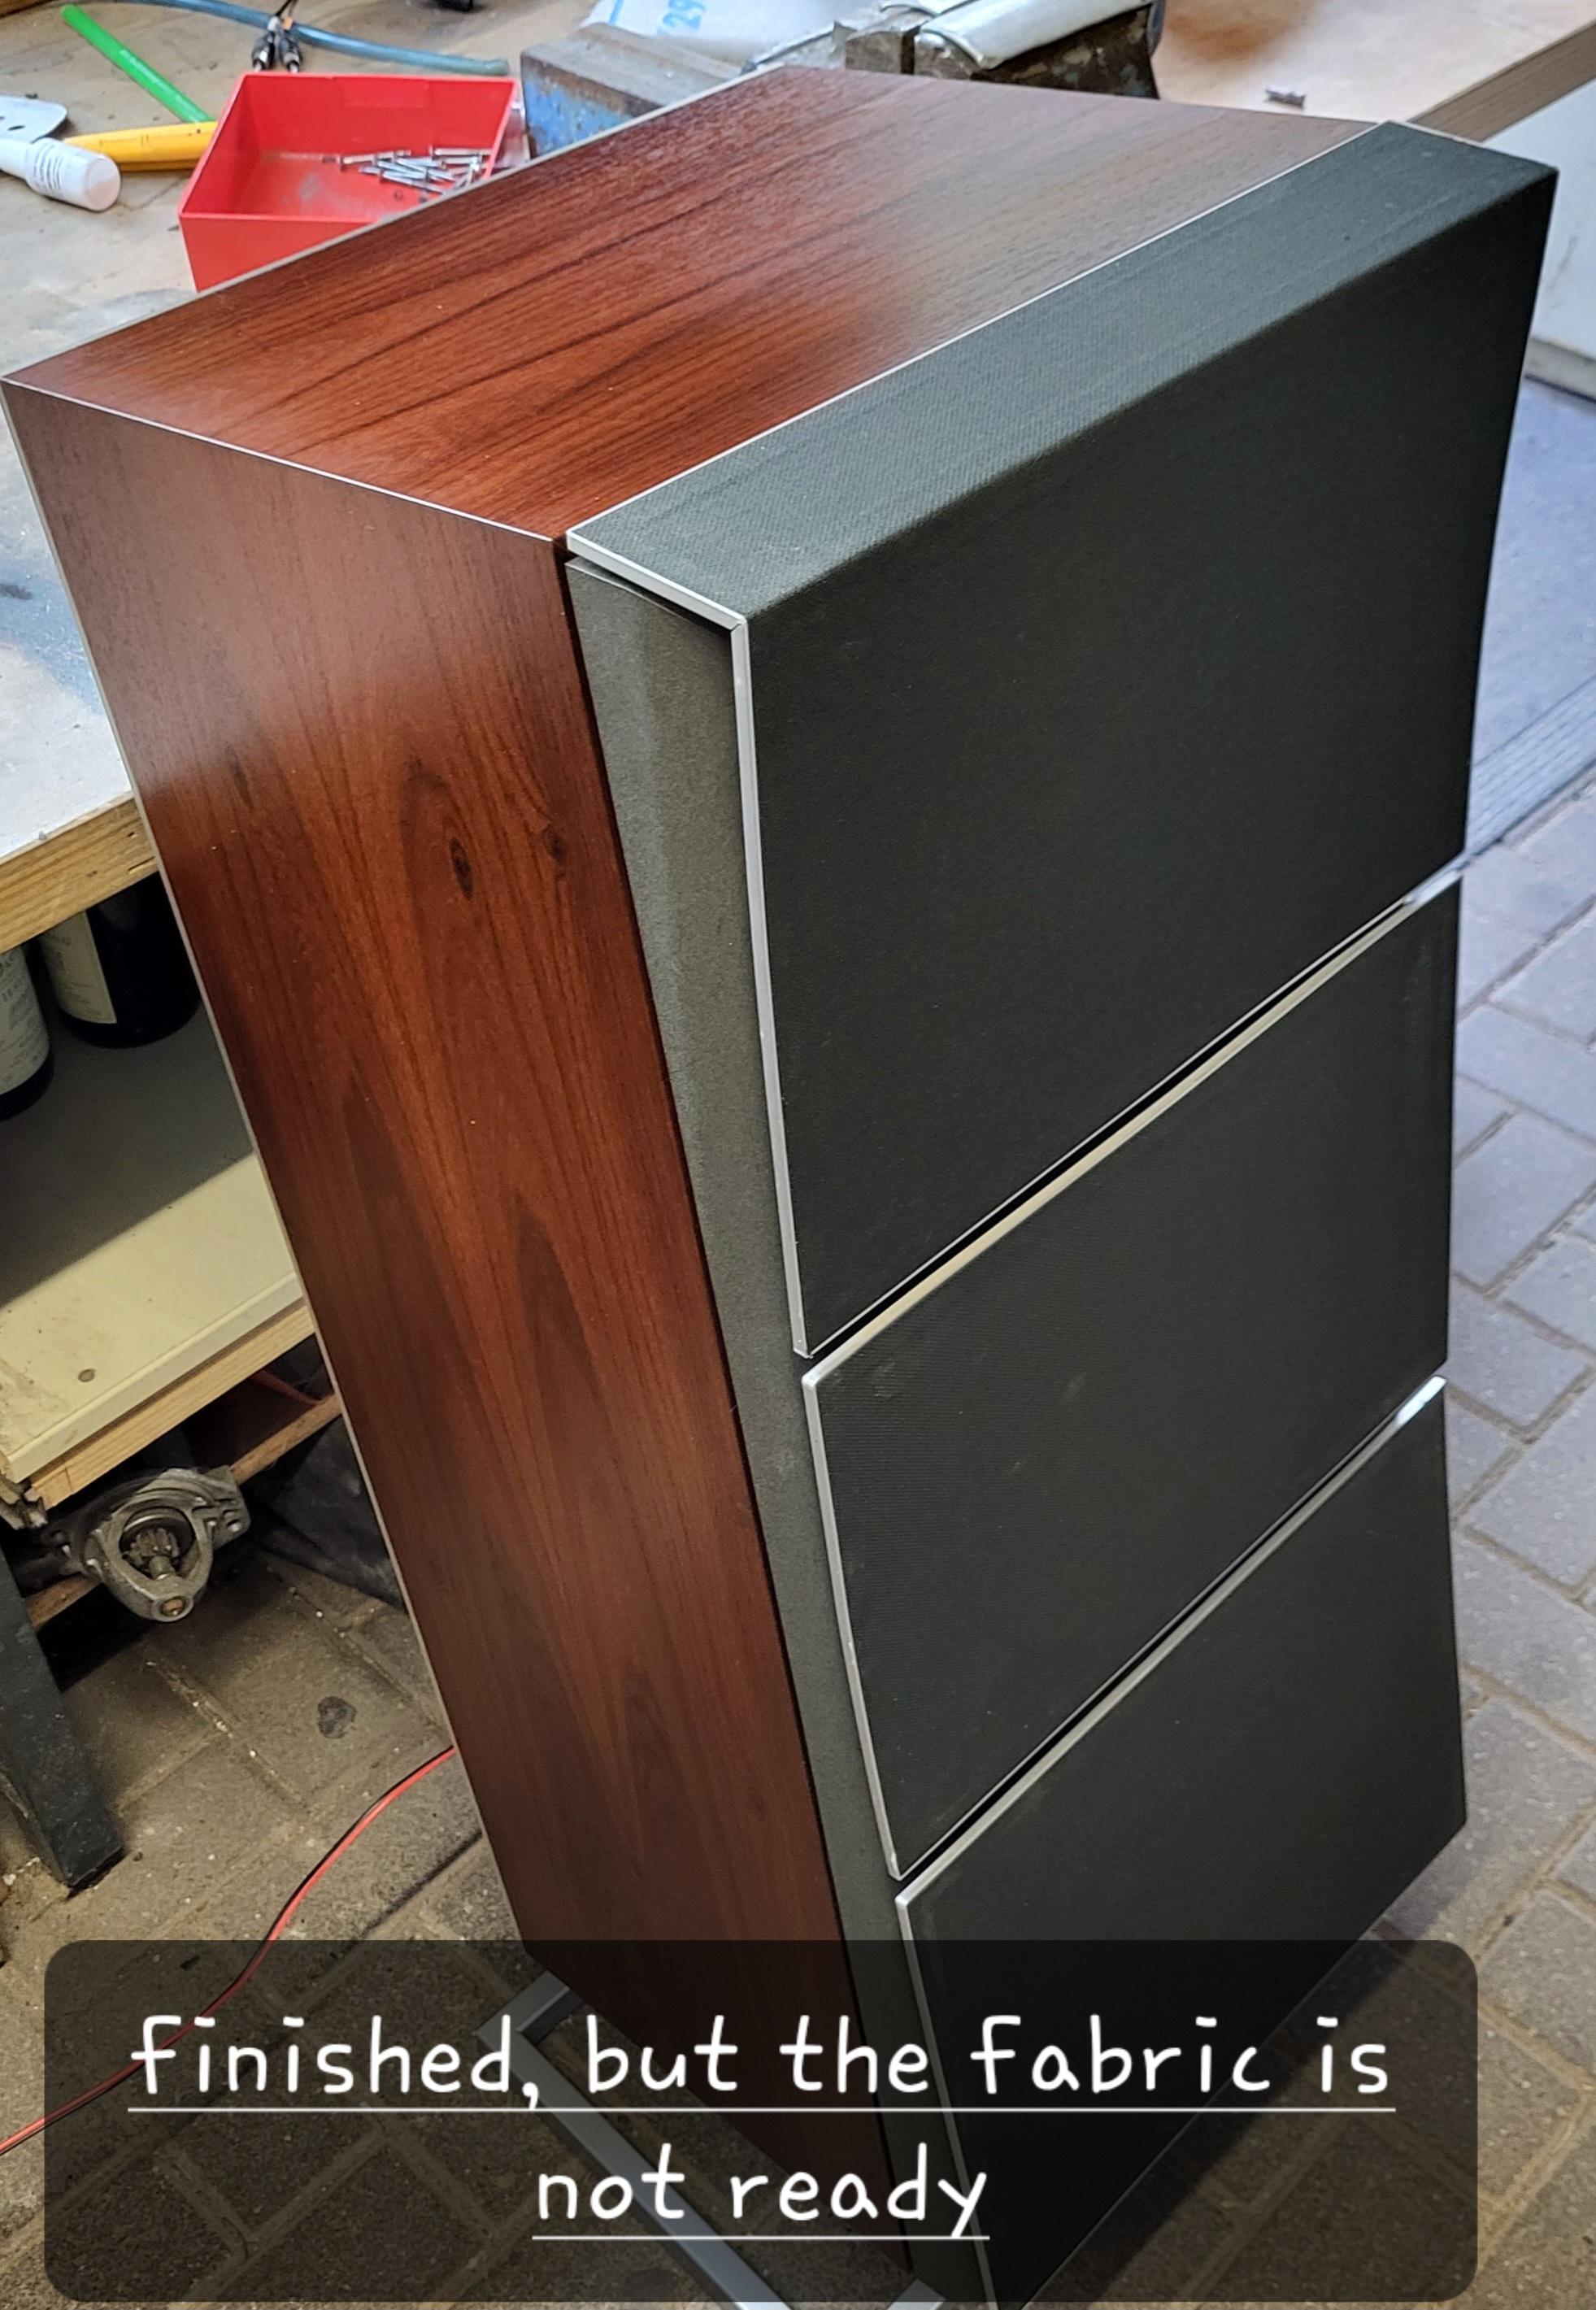
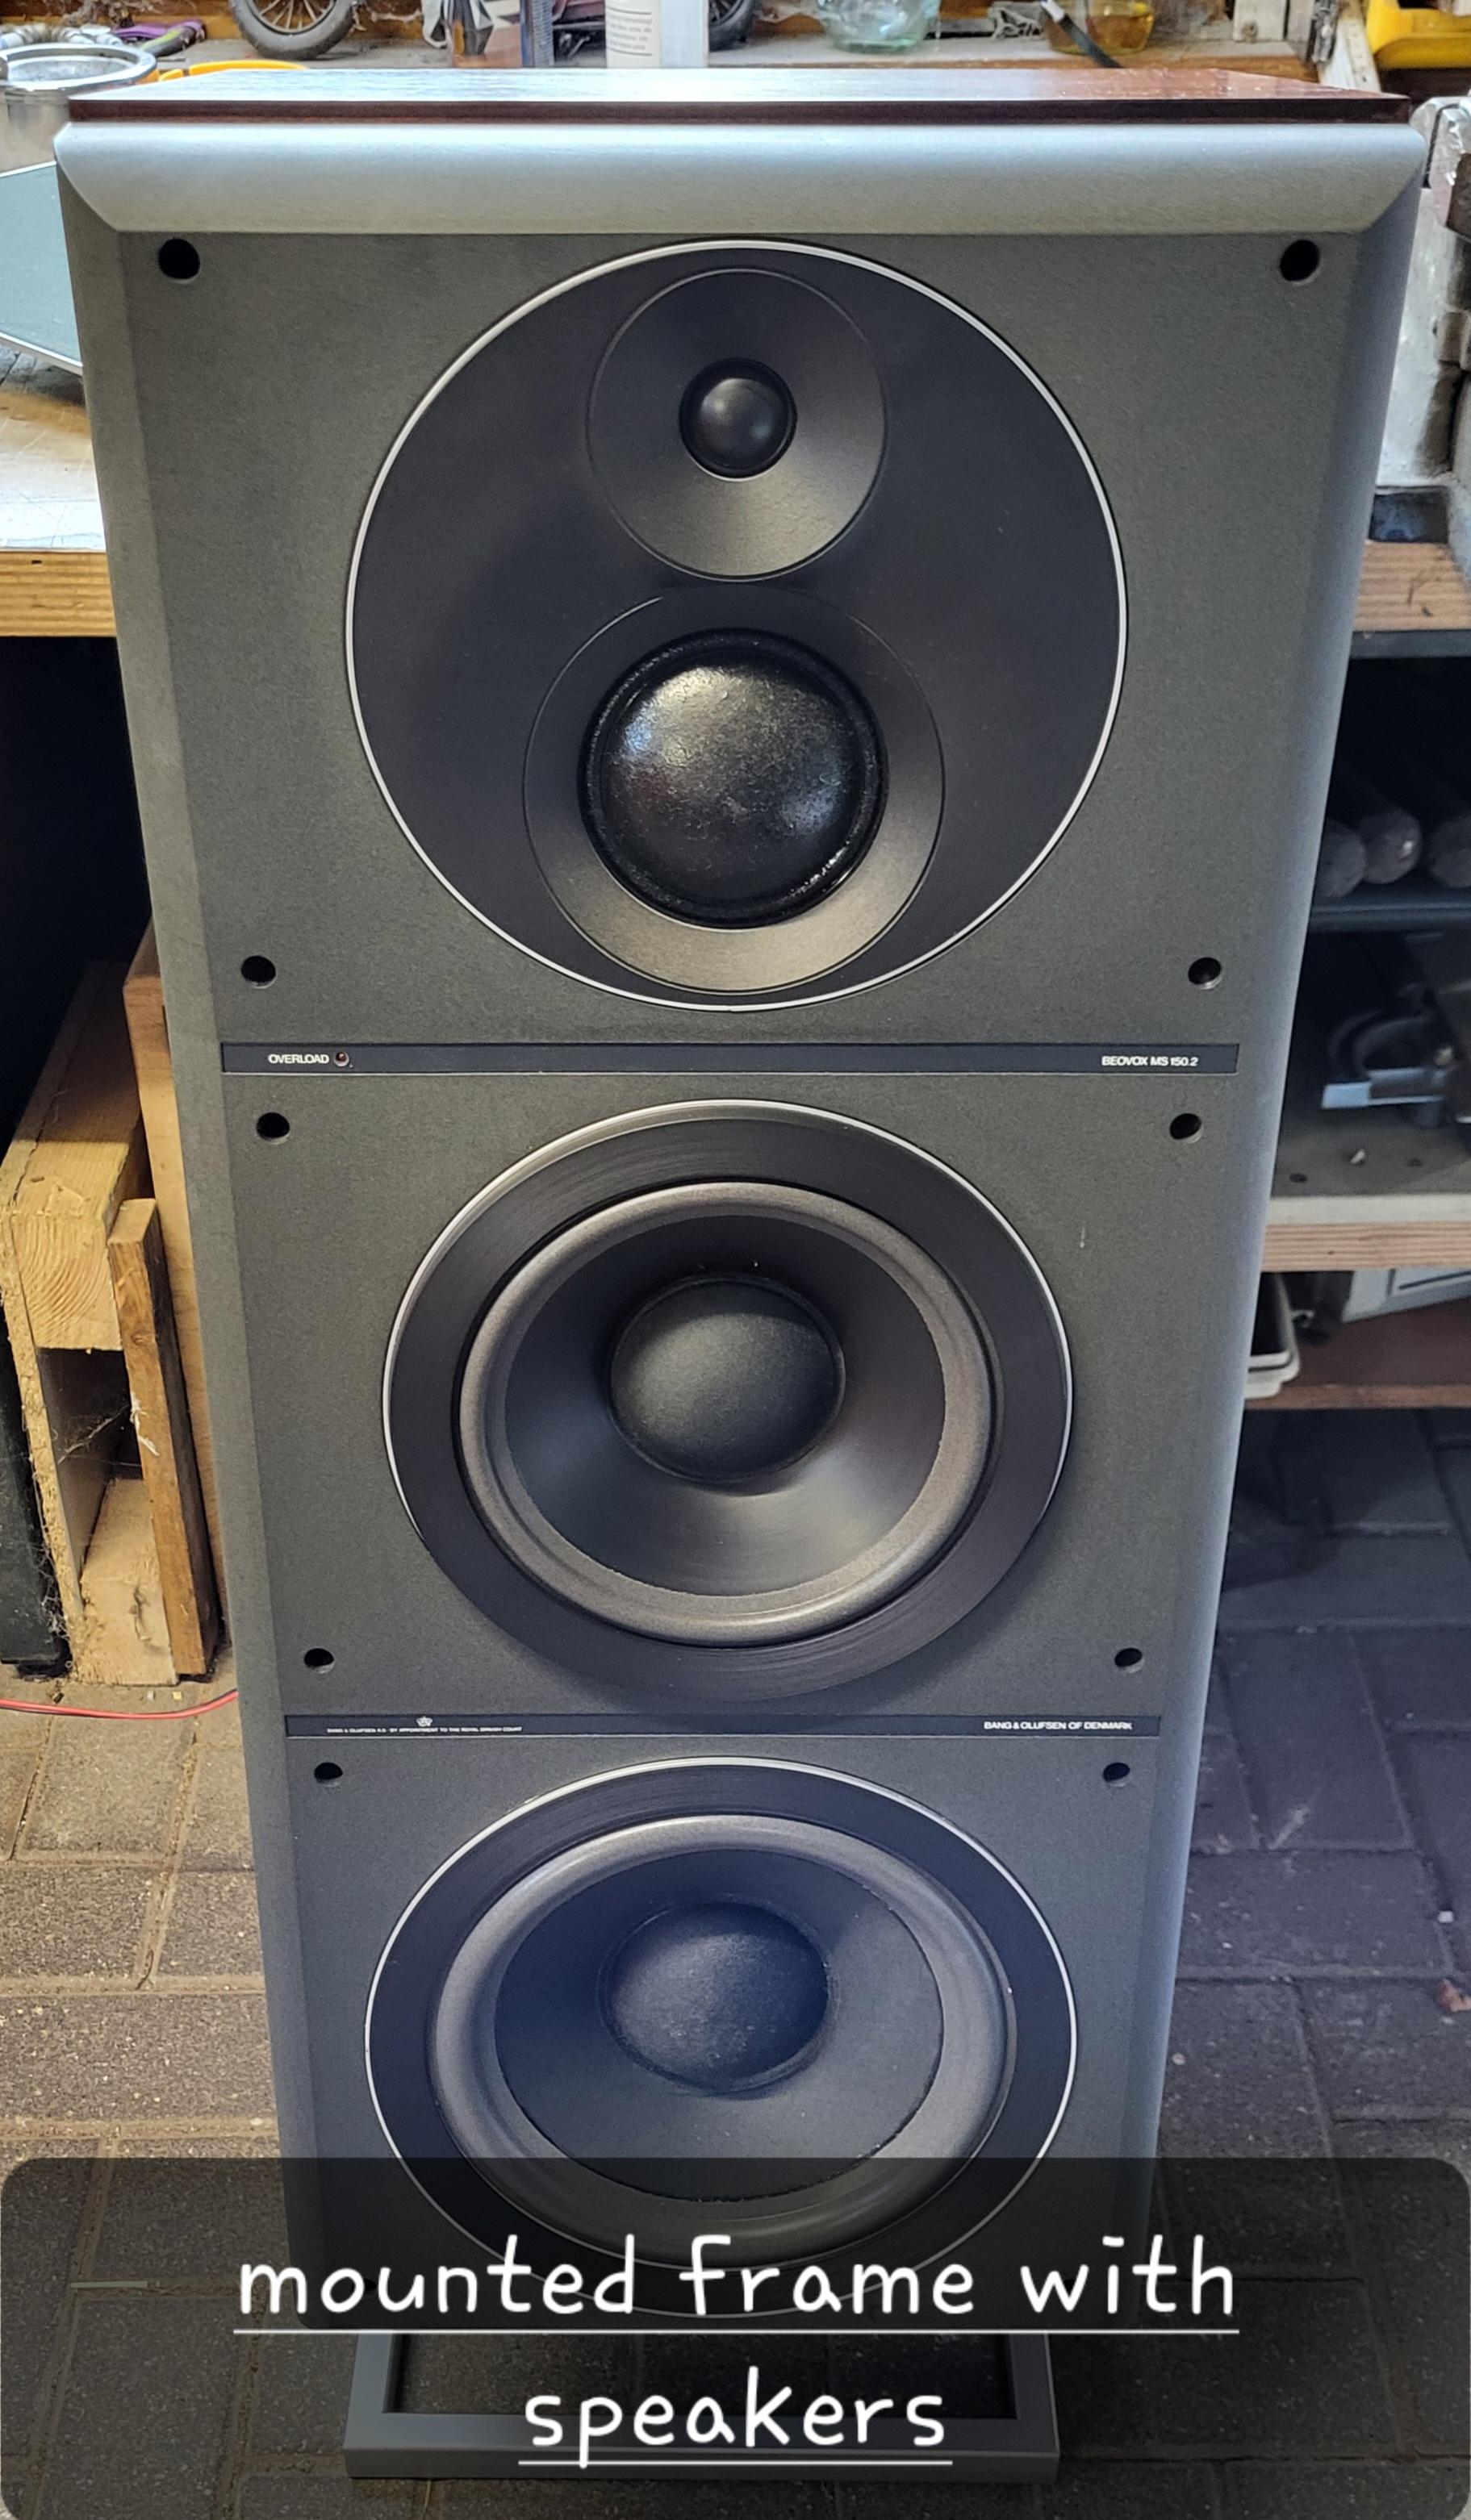
After that I assembled the chassis into the front frame and made the wireconnections to the speakers.
Mounted the frame to the speakers and made a testride.
Wow that sounds absolutly amaizing.
Here is the not really finished speaker, fabric was not delivered today 😉

 27 May 2023 at 20:20 #46784
Well done. Excellent work on these beauties. ??
Superb speakers I’ve been trying to get for ages. I had to do with the lesser MC120-2. Almost there, but not quite !
28 May 2023 at 10:34 #46785StereomenschBRONZE MemberAnd how does it sound? 😀
29 May 2023 at 19:30 #46786As I already wrote, the speakers sounding absoloutely amazing.
Far different from the M 150 of course more deep bass.
Have the MC 120.2 in another room, did never expect such a good fundamental sound, missing nothing.
Next day I hope to compare with my Nubert Nuline 102. It´s not a real comparison 😉
Now it´s time to say goodby to my 5.1 set and switch back to stereo with Beomaster 8000, Beogram 8000, Beocord 9000, Beovox MS150.2 and a MC 40 cabinet.
Maybe I connect a pair of CX 100 to the secondary speakeroutlets to have a “rear speaker”.
Have a nice week
Christian
2 June 2023 at 11:19 #46787Hi
In between the speakers moved to my livingroom and I’m sure that I don’t need a subwoofer anymore. In this moment they are connected to my Denon receiver with all tonecontrol turned off and the sound is very impresive, nothing is missing, no boomy bass just controlled but very deep.
The adjustmentscrews for tilting the speaker were too long, cut them about 25 mm and now the speakers are tilted in a for me good looking way.
The Beomaster, Beogram and Beocord will come the next week into business.
In the moment i don’t really see the MC 40 cabinet in my living room, in my taste it’s too high (about 63 cm) plus the Beomaster 8000 on top, together nearly 80 cm.
Maybe someone could make me an offer for a Cabinet SC 80-2 ;-))
Now to the fabric.
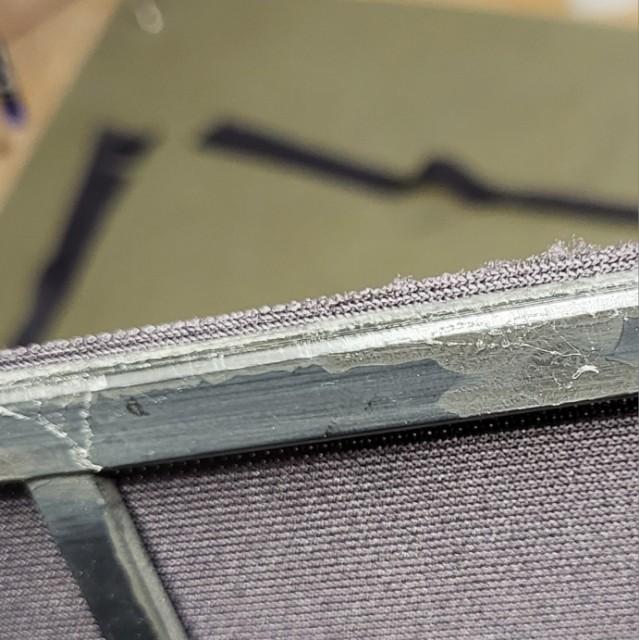
I started with gently prying out the aluminiumtrim, possibly with not bending too much because the corners are cut to 90 degrees and only a tiny part of material is left on the edge.
Two corners were broken during disassembling ;-((
I pryed off the old fabric and tried with a smal part of the new fabric to get it into the frame and push the aluminiumtrim in to clamp the fabric in place.
No chance, the fabric seems to be to thick.
I had a closer look to the original mounting of the fabric and could see that the fabric is only bent around the edge to the slot where the aluminium fits in.
The first attempt just to spray some glue on the frame and pull the fabric in place failed because you glue to the front and the fabric comes to a wavy looking on the edges.
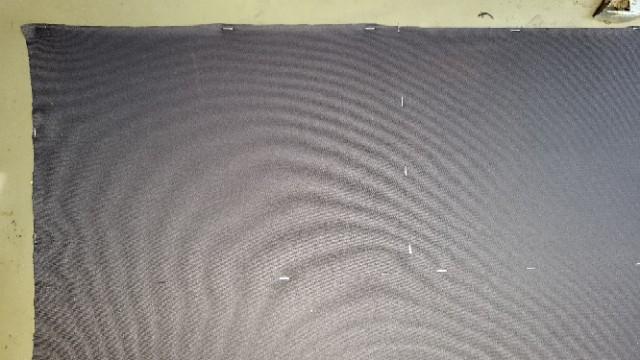
After a bit headscratching how to get this done I decided to prestretch the fabric on my table with some staples like in the picture below. (Fabric face down, staples about 35 X 30 cm)
The pattern is caused by camerasolution.

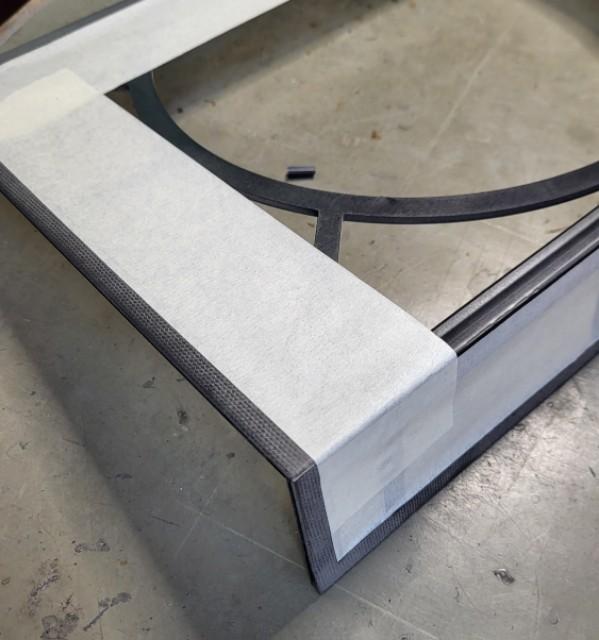
I masked the frames with painters tape to get the sprayglue only to the front and the edges:

waited about 2 minutes to let the glue getting sticky and pressed the frame to the fabric.
Than I took a square profile weling wire of 2,5 mm and cut with a razorblade a straigth 2 mm excess.

This excess cam be layed around the edges and pressed into the still sticky sprayglue.

After that the aluminium trim could be reinserted snugfif and looking good.
The broken corners of the aluminium don’t matter, hardly visible from 1 m distance.
Did not take further picture yet, comming soon.
Kind regards
Christian
2 June 2023 at 15:22 #46788Hi Christian,
Compliments on your restoration of the MS150.2’s! I’m following with interest, replacing the speaker cloth is also in the planning for mine.
I am in the process of setting up my 8000 system again after some years in storage. What a sound, what beautiful pieces. Enjoy the fruits of your work!
Location: Netherlands
-
AuthorPosts


- You must be logged in to reply to this topic.