Beogram CD 50, Mexico

206 replies
...

As I now have my pizza boxes, well and without damages, in my home, its time to start the cleaning and checkup of all the units, here starting with the BG CD50. I have done my homework and read all about the CD on the forum, Die Bogener and Mika, and Beocentral, Notebook.

If you have some good advises or stupid jokes, please reply.

I read that the CD50 is terrible to service, but taking it apart is a lot easier than BM 2400 and 4000.

Today I took it apart, so here we goes.

The CD must have been stored for some time in a dusty place, look at the dust on the CD tray and the back of the unit.

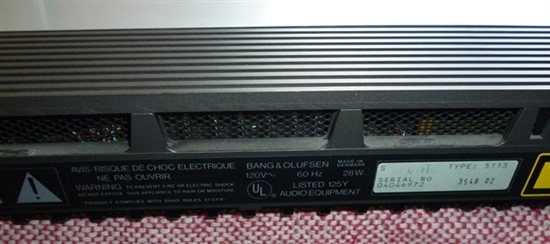
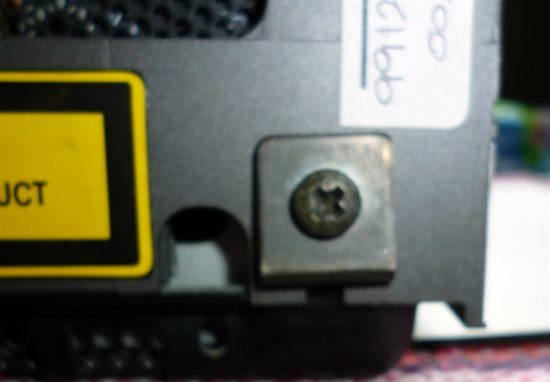
To get of the top cover, loosen the 2 screws at the back of the unit, loosen them until you can push the latch upwards, the tighten the screws lightly, pull the cover 5-10 Mm to the back and lift it straight up.
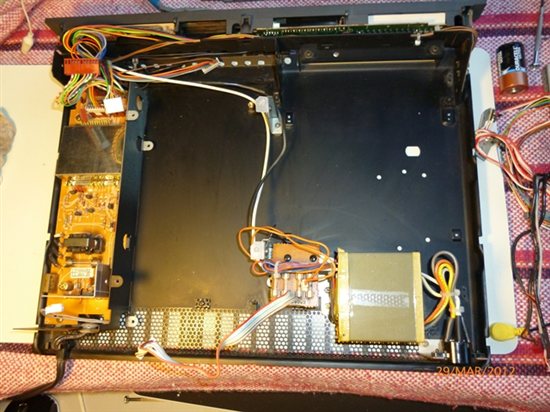
Here the CD opened, to get the top PCB out take out the screws at the red arrows.
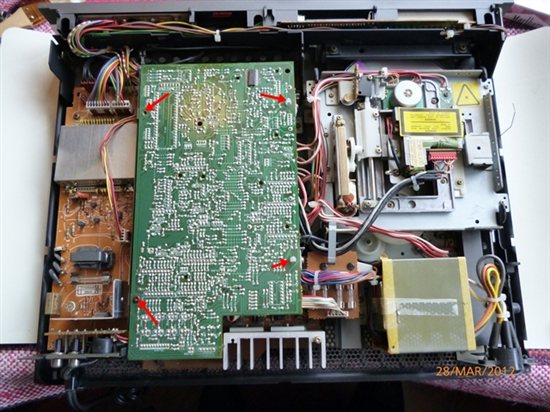
Now lift up one side of the PCB, take a pic to look at when you have to put it back again

Same from the other side
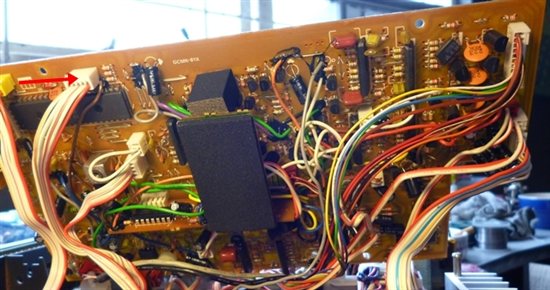
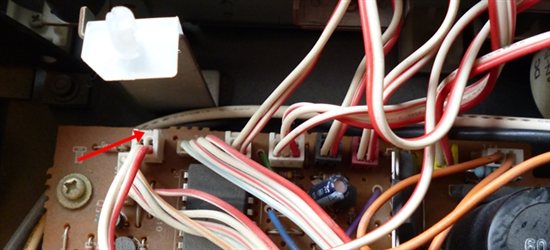
All the cable connectors in this unit are different sizes or colors, so easy enough to put back again, only one wire to desolder,  Dont forget it, its gray.The connectors have some lashes use a small screw driver to loosen them, insert the screw driver at the red arrows, pull all plugs.
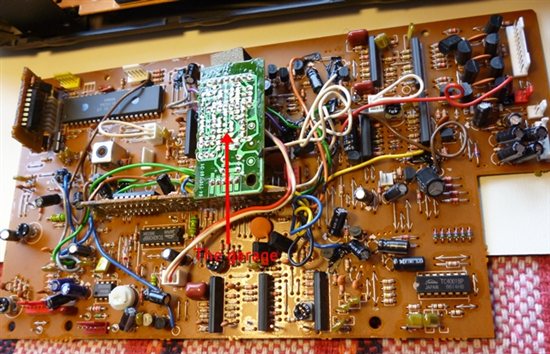
The PCB out, someone had the great idea to build a Garage in the middle of the board, inside there you will find 8 caps and some other goodies
Below the top board you will find one more, some of the cables are soldered to the board, but follow them to the other end, there you will find the plug, again take out the screws at the arrows, there are 2 black and 2 nickel screw, put them back in the same places, the nickel ones are ground screws. Now lift up the side of the board, side away from the laser unit, as high as you can, then slide and wiggle it out to the back of the unit, taking care not damage the small jacks or pull out wires.

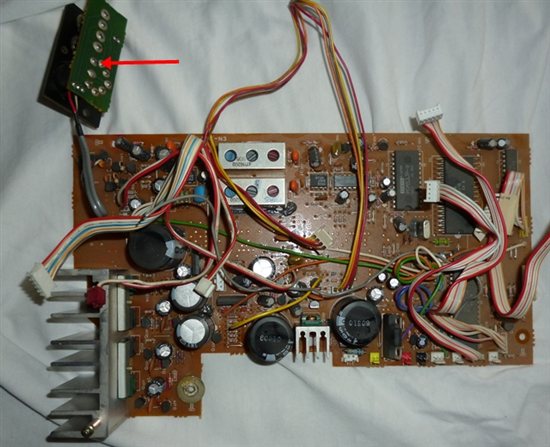
Board out, at the arrow you see the 7 pin DIN and RCA board, its fitted to the chassis with 3 small plastic expander, with a screw driver, between the board and the jacks, press out the center pin of the expander then from the chassis side, you can pull out the whole plastic piece with a screw driver and one good finger nail, be careful its plastic 30 years old.
The laser unit comes out after taking out the 4 screws that hold it to the rubber buffers, just turn it out to the side of the chassis, do not desolder the wires going to the small contacts. As this laser is "upside down", there is is no dust to speak of.

I placed a soft piece of cotton with tape over the laser for protection, as I know I will move it without thinking of what I'm doing.

The screw drive and the gearwheels looks clean and the grease is still soft
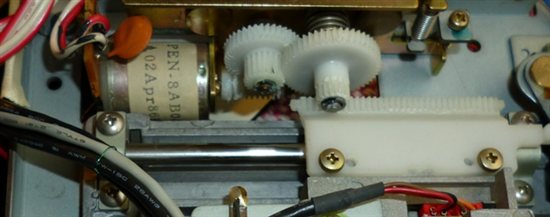
To get out the disc loader, move the gears by hand to the outer most position (check the small contacts below the gears), mark the gears, take of the arm for the front door, then take of the stop and the 4 plastic guide pieces, lift the sledge of the gear and take it out to the front. Forgot to take pics, I was so exited. The red arrows point to adjustments of open and closed position of the front door, dont touch the left one and bring the right one back to where it was, if the door was ok closed and open.

And now to the fun part, checking some of the caps with my new Blue ESR meter, I found one or 2 bad ones (over max limit) and many near the max limit, where max limit is 1 Ohm, they went 0.8-9 Ohm, and so on, I'm going to change some 70+ caps the ones below 1 uF with Wimas MKS2 and the rest with Nichicon high temp.

More to come

Location: Mexico city

Retired
Printing machine technician
Restored various 1960-70 items
Rock and Roll music
Collecting Vinyl
Restored Jukebox Wurlitzer 1050
Nice project.

I hope you remembered to mark all gears etc. as they need to get back into the same position (same tooth) ?
If you didn't, it can be very difficult to get everything right again.

Martin

Dillen wrote:

Nice project.

I hope you remembered to mark all gears etc. as they need to get back into the same position (same tooth) ?
If you didn't, it can be very difficult to get everything right again.

Martin

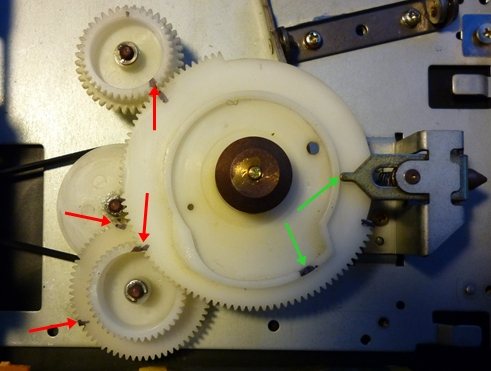
I did Martin, but forgot to take pics, marked closed pos. and open pos., pics will follow, still have to get out the motor for the disc sledge, want to clean and lubricate it. Want to change the belt too, but I have to open the Beocord to see what I need there, before I order.

Location: Mexico city

Retired
Printing machine technician
Restored various 1960-70 items
Rock and Roll music
Collecting Vinyl
Restored Jukebox Wurlitzer 1050
I can't wait - I need to fix one myself and I'm sure thus will help a lot. Thanks.

Hi soren,i changed the belt on my cd 50 a while back, but i have never been able to get the disc sledge to go all the way in without a little help from me.

It travels three parts the way in then i have to lift the flap up, and then it continues on in and plays the disc.

A ny idea what the problem might be😮.

glen.

glen fowles wrote:

Hi soren,i changed the belt on my cd 50 a while back, but i have never been able to get the disc sledge to go all the way in without a little help from me.

It travels three parts the way in then i have to lift the flap up, and then it continues on in and plays the disc.

A ny idea what the problem might be😮.

glen.

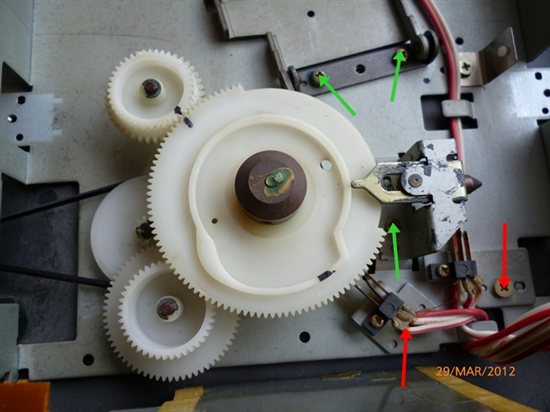
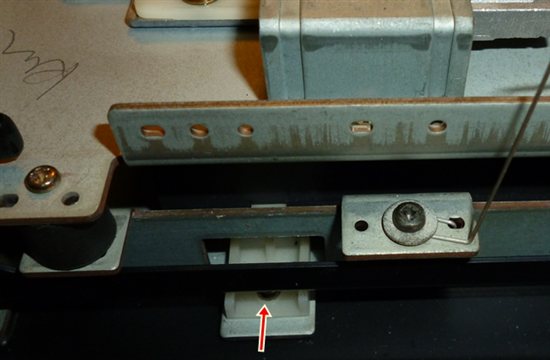
Take a look at the pic, left red arrow is pointing at a adjusting screw, this screw will be touched by the sledge by the green arrow when the sledge move in and close the flap, if the arm is not working freely this may be why you have to help it, there is a small screw at the front where its connected to the flap, check the screw is not too tight and check that the support at right red arrow has grease and is properly fitted.

The arm is , looking from the front, running along the left side of the laser chassis.


Location: Mexico city

Retired
Printing machine technician
Restored various 1960-70 items
Rock and Roll music
Collecting Vinyl
Restored Jukebox Wurlitzer 1050
Good luck Soren, these are interesting devices and can be a bit of a challenge. But a good working CD50 is a very nice sounding player. I really like mine

Here the marks I made on the gears, with the sledge in out pos. , before I took it out. But as everything was very dirty I decided to dismantle the whole laser chassis. First I took out the switches and the no disc lamp, then the disc lift, and then the whole chassis.


Main chassis clean, even took out the front display and opened it, but surprise, clean as a whistle.

As it was difficult to clean with the gears mounted, I marked all gears and took out the big top gear, to get it out you will have to take off the big brass knob on the top of it, it has some lacquer on the top, comes off with Iso alcohol, on the side of the knob there is hole with an Allen screw in it, loosen it with a 1.5 Mm. Allen key, loosen it until you see the first thread. Now place a piece of rag or thick cardboard around the knob and turn it counter clockwise with a pair of pliers, without bending the shaft. When loose you can turn it with your fingers, the top of the knob and shaft is threaded. Now pull of the gear and the cam for disc lift. Clean and lubricate, I use silicone grease, put everything back again and adjust the the knob so the gear can move up and down a little (some 3/10 Mm.) or set it as it was before, tighten the Allen screw, done.

Back in with switches and lamp, be sure to get screws right, lamp and switches has different.

Now put in the sledge and mount the front stop, (sorry no pics, camera charging), sledge against the front stop, all marks on gears, attach the plastic guides.

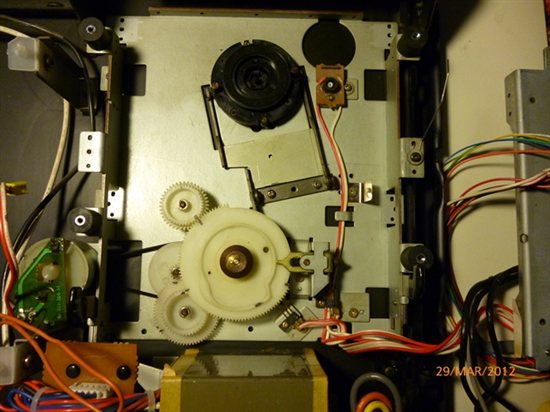
Now turn the gears by hand until the front door closes, continue turning until the disc lift goes up and a little bit down again and the switch in the lower right corner of the pic is actuated, make sure the wires are free from the sledge, if OK put back the laser unit.

Open the sledge by turning the gears by hand, put a disc in the tray, turn the sledge in again, the lift goes up and the disc gets attached to the motor spindle, the lift goes down a little, and the disc like by magic, stays up, attached to the spindle with the lift center piece, a wonderful piece of engineering.

Location: Mexico city

Retired
Printing machine technician
Restored various 1960-70 items
Rock and Roll music
Collecting Vinyl
Restored Jukebox Wurlitzer 1050
Looks good Søren du kan fandme lave det. får lyst til selv at gå i gang med at renovere noget.

keep up the good work.

/Uldall

Uldall wrote:

Looks good Søren du kan fandme lave det. får lyst til selv at gå i gang med at renovere noget.

keep up the good work.

/Uldall

Uldall you are mixing the languages 😂, in German its called Sprachverbisterung, 😁, let them Google it.


Location: Mexico city

Retired
Printing machine technician
Restored various 1960-70 items
Rock and Roll music
Collecting Vinyl
Restored Jukebox Wurlitzer 1050
...
or
BeoWorld Gold Membership card
Join BeoWorld

Register to access the forums, reference material, and exclusive member benefits — including our monthly prize draw.

Become a Member

December 2026 Prize Draw

Gold Members Only

As a Gold member you're automatically entered into our exclusive prize draw — your chance to win iconic Bang & Olufsen products. A unique benefit of BeoWorld Gold membership, every draw brings a new opportunity to win something special.